What child doesn't love rubber bath toys? The classic yellow rubber duck is probably in every home. But here’s the problem: children not only love to cuddle them, but also to put them in their mouths. But such rubber toys pose a huge danger to a child’s health: they often become moldy inside. So will we now have to throw away all the bath toys, depriving the kids of pleasure? There is an exit! Find out how to keep your water baths safe by easily cleaning your favorite toys from annoying fungus.
Mold and how to deal with it
Yes, mold inside such toys is a ubiquitous phenomenon, so you shouldn’t blame yourself for having it at home. The problem is in the very design and construction of these toys, which seem to be designed to favor the development of mold spores! Warmth and moisture are an excellent environment for their reproduction. But don’t rush to throw away your child’s precious sources of joy. Removing mold from them is a simple matter and is done manually. So, let's look at several options that will help you cope with this trouble.
How to Clean the Inside of Rubber Bath Toys
Rubber bath toys are the only way to entertain a child while bathing. They help keep your attention. If the baby is at the age when teeth are just cutting through, then you should be more careful about the cleanliness of toys, since he will certainly chew them.
Despite being in the water, they need additional care. A constant damp environment creates conditions for the development of all kinds of bacteria and mold. Fungus also develops. Therefore, clean the inside of rubber bath toys once a week.
Cleaning toys with vinegar
Let's look at the benefits of vinegar. This is an effective and harmless natural cleaner. What makes it popular is the absence of unwanted additives. Therefore, in the ranking of suitable means for cleaning children's items, it comes first.
Application:
Combine two parts warm water and one part white vinegar. The acid will dissolve dirt, so you don't have to use soap. Apple cider vinegar is also considered effective. However, regular is preferable because it is colorless and less likely to leave marks.
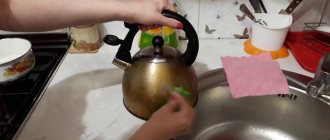
Excess water from inside the item is removed as far as possible. These special bath products have a hole in the bottom that makes a sound when they are squeezed.
This hole allows water to penetrate inside. This is how bacteria develop and mold appears. Therefore, it is important to squeeze out excess water and dry the items.
Toys are soaked in a vinegar solution for 10-15 minutes. To wash away dirt, it is important to ensure that the substance penetrates into the product, since dirt accumulates there.
To clean items with vinegar, it is best to use a small brush. If there are narrow areas or small holes, they are cleaned using the tip of the brush.
After manipulation, the toys are washed in water and dried. Rinse thoroughly and dry in the sun or on a dry towel before allowing your child to use them.
Cleaning in the dishwasher
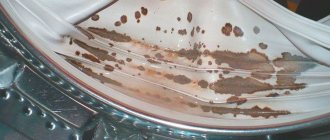
Make sure the toy is dishwasher safe. It works at high temperatures, which destroys bacteria. Therefore, the label on the toy is checked to ensure that it is dishwasher safe.
Application:
Before immersion in the equipment, excess water is removed from inside the toys and dried. It is important to dry them as thoroughly as possible before placing them in the dishwasher.
Items for safety are placed in an underwear bag or in a plastic basket, if smaller, on the top shelf of the car. Soap is added as desired. Dishwasher safe detergent or capsules are acceptable.
As a natural cleaner, use a solution of one part white vinegar and three parts warm water.
All that remains is to configure and turn on the machine. You can also enable the drying option. Some models are equipped with an additional high-temperature cycle for sterilization. However, you need to be careful with this because bath toys are usually made of plastic or rubber. When heated, they melt or are damaged by temperature.
The toys should then be dried on a dry towel or in the air before being used again.
Cleaning toys with chlorine
If testing toys for mold reveals visible traces, chlorine bleach is the best way to remove harmful microorganisms and disinfect. Pay close attention to the amount of bleach in the cleaning solution. Excessive maintenance can harm the child. Due to the existing risk, the method is less preferable.
The cleaning solution is prepared from a tablespoon of chlorine bleach with a liter of water.
Toys need to be soaked in the solution. You need to press on them so that they absorb it. It should remain inside the product for several minutes.
After this, it is necessary to rinse thoroughly and rinse in a compressed state. Toys can be considered well washed and free of mold if the smell of bleach is no longer noticeable. They must be completely dry before reuse.
vsepodomu.ru
Methods for removing fungus
You can remove mold using either bleach or vinegar. Both of these approaches rely on allowing the toys to sit in solution for some time. Ideally, they need to be boiled in it.
Vasilisa Volodina named dates of birth that threaten excess weight in 2022
Honor is going to release a flagship smartphone with maximum specifications
Would you fall in love if he was a security guard? Dibrova answered this question
So, you can sterilize toys in a solution of water and vinegar in a 1:1 ratio. If the option of soaking the toy is more suitable for you, then ½-1 glass of white vinegar or chlorine bleach should be diluted with three liters of water. As for how long to soak toys in a vinegar or bleach solution, it can take anywhere from an hour to an entire night, depending on how soon you need the toy.
However, it should be noted that some toys cannot be cleaned using these methods, as the manufacturer's instructions prohibit it. Otherwise, vinegar or bleach may cause minor or significant damage to the integrity of the toy. Be careful!
Camphor balls
- Borax. One glass of powder is dissolved in 2.5 liters of water, a brush is dipped into the resulting solution, with which mold is removed. There is no need to rinse the surfaces after treatment; after drying, the borax solution will serve as protection.
- Hydrogen peroxide. A 3% peroxide solution can be poured into a spray bottle and treated with mold. After 10 minutes, wash the surface with soapy water.
- Anthracene oil will help get rid of fungus for a long time, but has a persistent unpleasant odor.
Add 1 cup of borax to 2.5 liters of water. After cleaning the surface of the bathroom, apply the resulting composition; it does not need to be rinsed, but you need to wipe the surface with dry paper.
Removing cleaning agent residues
So now you have rubber duckies with no mold inside, but another problem arises: the entire toy is now covered in bleach or vinegar, which definitely won't do your child any good if they pick it up. Everything is quite simple here. Place the duck in the dishwasher on the top rack and wash it as you would normally wash dishes. In fact, you should not neglect to wash the toy at least once a week - this will help keep it clean and protect the child from all sorts of nasty things that are on its surface and definitely should not be in the baby’s mouth and hands or in the bath water.
Yogurt, fruit and other popular foods that you shouldn't eat for breakfast
Emphasizes the figure: 4 myths about black clothing that are imposed on women
How to style medium-length hair without looking boring: a selection of ideas
If mold appears again
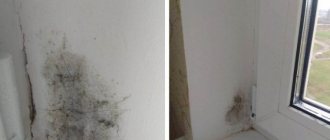
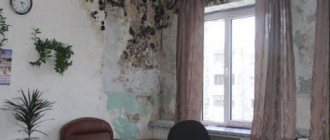
If you have removed all the mold from the surface of the finish and taken all measures to prevent its reappearance, but after some time the fungus in the bathroom makes itself felt again, most likely the spores have penetrated under the finish and the fungus is growing there. This happens when the necessary antiseptic treatment was not carried out at the repair stage. To eliminate all pockets of mold, you will have to carry out cosmetic repairs in the bathroom with a complete replacement of the old finish.
- The old covering (tiles, panels, paint) on the affected area is dismantled.
- If necessary, the plaster must also be removed.
- The area must be cleaned with detergent and treated with an antiseptic.
- After drying, the antiseptic is reapplied.
- The surface is thoroughly washed with water and dried with a hair dryer.
- A primer with an antiseptic additive and a waterproofing mixture are applied to the wall.
- Now you can begin finishing, not forgetting to treat all seams and joints with water-repellent sealant.
Tip: You should throw away all items that have come into contact with mold (gloves, brushes, sponges).
Mold Prevention
If you notice that mold appears in toys or on any other surfaces in the bathroom and home, then you should do not just cosmetic removal of the fungus, but its complete removal. After all, mold poses an incredible danger to human life. Mold toxins can activate the formation of cancer cells; they also increase the risk of developing cardiovascular diseases. In addition to allergies, mold can cause stomatitis, mycosis of the nasal cavity and a number of respiratory diseases.
How to get rid of mold in the bathroom at home
- Ozonation. The method allows you to remove not only visible mold colonies, but also deep-seated spores, including in hard-to-reach places. Ozonation is carried out using professional equipment, so for such processing you will have to call specialists to your home. The procedure lasts 30-60 minutes and will require 2-3 treatments per week (depending on the depth and area of mold damage). Additionally, ozone eliminates odors, disinfects surfaces, and kills insects.
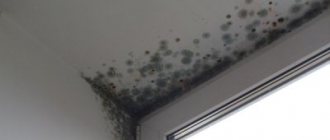
If mold appears on the surface of the tile, it is enough to treat its surface with one of the above products. But getting rid of the fungus that has settled in the seams between the tiles can be very difficult.
Making toys safe
When it comes to toys, there are two ways to solve this problem. The basis of these two methods is to prevent moisture from getting inside the toy. So, if you don't want to go through the hassle of sterilizing or soaking your ducks in a solution too often, try sealing the holes where the water gets in with hot glue. This way you can obviously stop moisture from getting into the inside of the toy. It is worth noting that before sealing the hole, it is important to make sure that there is absolutely no water left inside - to do this, you should dry the toy. You will also still need to check the toy from time to time to make sure the glue is tight enough to make sure it doesn't leak water! Be careful when choosing glue: it definitely needs to be non-toxic, as your child might start chewing on the toy!
As another - absolutely opposite to the first - option, you can try, on the contrary, to enlarge the hole in the rubber toy, thereby improving the air circulation inside it. The water will drain easily, reducing the moisture inside that mold loves so much. In addition, this will make it possible to access the inside of the toy: you can easily clean it with a cotton swab or paper towel. Try it!
It is important to approach the issue as responsibly as possible, because the health and safety of the baby directly depends on it. But under no circumstances should you rush to spoil your child and throw away his favorite rubber bath toys. Bathing toys make bathing more fun, so don't deprive your baby of this joy. Let's work together to make bath time safe for our children!
Found a violation? Report content
Folk remedies
- On silicone/acrylic sealant, remove the affected layer with a scraper, knife, tweezers and sponge. Next, the seams and base are washed with non-metallic brushes + fungicidal agents, rinsed with water, and dried with a hairdryer. Treat with anti-mold preparations and allow to dry. A new layer of silicone is applied.
- On a suspended ceiling in a bathroom, the ceiling material is not susceptible to damage by mold. The contaminated surface is washed with soapy water and a rag (for glossy ones) or a soft brush (for satin, matte ones). Wipe dry with microfiber cloths.
- On bathroom plaster, surface deposits on the walls or ceiling are washed with anti-fungal solutions, stains are bleached with bleaching disinfectants. If mold has penetrated deep into the plaster, the lining is removed down to the base. Then they irrigate with fungicide, dry, and re-plaster.
- From tiles in the bathroom - deposits on mosaics, stone plates, ceramic, glossy or unglazed tiles are removed with washing solutions and soft sponges or brushes.
- Between tiles and mosaic fragments - clean superficially with soft brushes and detergent. Blackened seams are decolorized with chlorine solutions. In advanced cases, the grout is removed, disinfected with a fungicide, dried, and a new layer is applied.
- On curtains in the bathroom - moldy fabric is soaked in a bleach solution (with hydrogen peroxide, chlorine, soda + citric acid). Then wash with powder. A curtain made of PVC, polyester or film is wiped with a rag and warm soapy water, rinsed with water, and the moisture is blotted with a napkin.
In general, all work to combat mold in the house comes down to the following list of measures:
Folk remedies Recipes for masks At home Hair loss in women How to stimulate growth Causes of hair loss Hair loss in men Review of vitamins Helpful tips
Where to look for fungus?
Even if visually you cannot immediately detect traces of the presence of mold, you should look for it in places hidden from view.
- corners of walls in contact with the bathroom;
- gaps between tiles;
- places where plumbing fixtures connect to the walls;
- under the baseboards in the area of the sink and bathtub;
- on the ceiling;
- under the rug on the floor;
- in wood paneling;
- in cups for hygiene items.
Having penetrated into other rooms, the spores, if they do not germinate, retain their ability to reproduce for a long time and are just waiting for favorable conditions.
It is impossible to completely get rid of them, but creating unsuitable conditions for their development is quite possible.
How to wash soft toys with foam?
- Complete removal of cladding on the ceiling, walls, floor.
- Elimination of pipe leaks.
- Installation of forced exhaust.
- Cleaning the base + treatment with preparations to kill mold and spores.
- Drying floor coverings in the bathroom.
- Preventive impregnation of surfaces with anti-mold agents. Drying coatings.
- Facing and other repair work.
Afterwards, it is recommended to run the wash at the highest temperature setting, without detergents.
Some tips for using the products
When planning to use one or another remedy for black mold, you need to take into account a number of features. Firstly, it is impossible to remove this scourge by washing off with warm soapy water with manganese. Even if it is possible to eliminate the black plaque, disputes will remain. Having received a new nutrient medium in the form of warm moisture and the components that make up the soap, their colonies will begin to multiply even faster.
Secondly, it is impossible to avoid the re-invasion of mold after removing it mechanically. The spores will remain and continue to reproduce.
Thirdly, high positive temperatures, as well as very low ones, are not able to destroy mold spores. Their presence will only stunt growth. Once favorable conditions return, the mold will continue to grow.
Fourthly, the smallest cracks in the bathroom wall need to be repaired, and the walls that are in contact with the street should be insulated. The rugs on the floor in this room should be dry, or even better, have a warm floor here.
Fifthly, it is advisable not to dry wet laundry in the bathroom. It will become an additional source of moisture. When zonal surface treatment does not help, you will have to make repairs throughout the entire room. For this purpose, purchase products intended for use during repairs. They are added to putty, paint or whitewash.
Pay attention to primers that are based on acids and other components that have a detrimental effect on mold.
Using commercial mold control products:
Using commercial mold sprays is often the easiest solution to the problem, as these sprays require no pre-cooking and usually contain bleach, which effectively kills mold spores, preventing mold from reoccurring. Thus, a commercial spray is the best choice for combating particularly serious infestations and a convenient solution for those who do not want to spend a lot of time and effort on removing mold.
When using such sprays, remember to take some precautions:
Always follow label directions and use product as directed.
Wear old clothing and rubber gloves when working with chlorine-containing products, as they may stain fabrics and cause a skin reaction.
Do you believe in the benefits of visiting cosmetologists?
Not really
If you accidentally get the spray on your skin, rinse it off immediately with running water and, if necessary, seek help from a doctor.
Test the products you use on a small, inconspicuous area of the surface to avoid stains and other damage.
Learn how to get rid of mold on any surface in your home with our step-by-step video instructions:
After taking all precautions, you can start cleaning! Follow these simple instructions, and soon there will be no trace of mold left:
Place a discarded rag or towel on the floor under the area you plan to clean to prevent spray drips from damaging the flooring.
Apply the spray to the mold affected areas and leave for a few minutes.
After allowing the spray to absorb into the surface, remove any remaining residue with a cloth soaked in warm water and wrung out thoroughly.
You can also use wet wipes to remove spray residue. This is a practical solution, as they can simply be thrown into the bin, while the rag will have to be rinsed and dried.
By repeating these steps several times, you will be able to say goodbye to mold for a long time. After finishing the work, allow the damaged area to dry, thoroughly ventilating the room.