In the field of construction and repair, new, more reliable types of fastening elements, which include anchor bolts, have been quite actively used for a long time. In this regard, the question of how to quickly remove an anchor bolt from a floor, ceiling or wall is quite relevant. The difficulty of removing a bolt of this type is due to the fact that it has a complex design.
Operating principle of the anchor
Loosening the clip
Loosening the clip is an option for getting rid of the anchor. This happens when the screw is turned. Freshly screwed fasteners cannot be removed (if installation was carried out correctly).
Hold the fastener with pliers and loosen the screw. Do this until the mounting frame becomes visible. You will have to scratch the bolt a little with pliers for better grip.
If the fastening is made of metal, it is lubricated with oil to loosen it.
Weakening occurs by hammering the bolt into the cage - the thrust becomes larger and weaker.
Types of fasteners
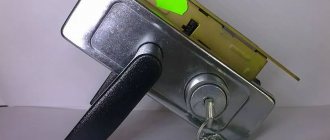
Pull out a broken bolt using an extractor
There are different types of concrete anchor bolts, each of which has its own purpose.
Photos and features of fasteners are presented in the table:
| Anchor type | Peculiarities |
| This bolt is used for fastening fairly heavy structures to concrete. Before installing it, a hole is drilled for its installation. The main difference between the screw is that the fastening is carried out without a jacket. There is a small wedge in the center of the bushing that expands when screwed in. After driving the anchor, be sure to tighten the nut securing the anchor after enlarging the plug. This is a durable and reliable element for fastening objects. |
| Spacer | This is the most popular type of concrete anchor. The length of the bolt ranges from 20 mm to 120 mm, and the diameter from 4 mm to 20 mm. The design includes a sleeve with an internal thread running along the length of the rod. The head on it pushes the sleeve apart. Such a simple device securely fixes the fasteners. When installing, you need to pre-drill a hole in the concrete, just like for a wedge bolt. |
| Inside the expansion anchor there is a petal sleeve and a nut. These are practical bolts that can be easily removed if necessary. This may be necessary when you need to cut a reinforced concrete structure with diamond wheels. Before using the bolt on surfaces with metal particles, they must be pulled out to prevent damage to the tool. |
| Drive-in anchors secure structures to a concrete surface most reliably. They consist of a bushing, a wedge, and there are cutouts on the surface that allow the bolts to expand when struck. In this case, you need to hit the anchor itself, so that the wedge can rest against the bottom of the hole. Bolts can be: metal, polymer, nylon. The main difference between the latter is the presence of a thread in the form of a shark tooth. But it is not recommended to use it on old, crumbling surfaces. |
| Typically these anchor bolts are used to bond the material to the concrete. In this case, the package with glue is placed in a pre-prepared hole. The composition contained in the bolt is pressed outward when pressed, and this ensures reliable fixation. But the price of the product is quite high, which does not make it popular. |
| This is a more reliable anchorage. The bolt has two or even three split bushings, which, when installed, open all their fastening edges. They are made with standard pins or with ends with loops or hooks of various shapes. |
| Hairpin anchor | This is a fastening device that is made of high-strength steel with various anti-corrosion coatings. Produced according to European standards - HAS and HST. Unlike other anchor structures, the product has a shorter sleeve length, and can withstand shock loads along and across the axis. |
In addition to the listed types, there are such products as:
Concrete anchor with ring
Eyebolt for concrete
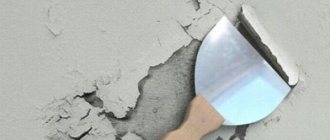
Drilling out the anchor completely
A slightly less radical method in relation to the wall, but destructive for both parts of the work. Both the wall surface and the fastening element itself will suffer.
Using a drill, drill out the bolt. To do this, drill holes nearby or guide the drill through the anchor.
Even with the utmost care, destruction cannot be avoided, so they turn to this method in case of emergency.
Removing an anchor is more difficult than driving it in. Therefore, it is better to avoid situations where the fastener is accidentally clogged.
Basic Techniques
Anchor bolts, which provide the highest reliability of fastening, are used in cases where it is necessary to fix heavy structures on the surface of a wall, ceiling or floor - massive chandeliers, door and window frames, suspended ceiling modules. The main structural element of the anchor bolt is a thin-walled metal sleeve, on the side surface of which longitudinal cuts are made. The bolt itself is screwed into the sleeve, thereby drawing a cone-shaped nut into its inner part, which opens its walls and ensures reliable fixation of the entire structure inside the previously prepared hole. Anchor bolts, due to the peculiarities of their design, allow you to securely fasten elements weighing more than 100 kg to the surface of the wall, floor and ceiling.
First of all, you need to try to loosen the anchor in a circular motion, if you can get caught on the protruding parts
To use an anchor, you must first drill a hole of the appropriate diameter into which the fastener shell will be inserted, and a bolt or threaded rod is screwed into it. If problems with how to use such a fastening element most often do not arise, then the question of how to remove the anchor is quite relevant. The high reliability of fixation of such a bolt often leads to the fact that it has to be literally broken out of the wall, floor or ceiling, and the hole formed as a result of such manipulations must be sealed with cement mortar or putty.
The conical part can move deeper if there is a hole to spare along the length
Meanwhile, there are several simple ways to remove such a bolt from the wall with minimal damage to the condition of the surface.
- First of all, you should unscrew the nut on the stud and try to drive it deeper so that it stops pushing the cage apart. If you managed to do this, then you can easily pull out the clip, and then the stud bolt itself.
- The threaded connection of the nut with the stud can be drilled out, and then, if the distance at which the stud protrudes above the nut allows, it can be driven deeper so that it stops pushing the cage apart. After this, as in the previous case, it is necessary to remove the clip from the wall, and after it the anchor bolt itself.
- You can also drill a hole in the central part of the stud bolt, in which a thread is cut using a tap. A bolt is screwed into the resulting threaded hole, which must be locked. While holding the screwed-in bolt, you must try to twist the nut on the main stud so that it turns together with the cage. When the additional bolt is fixed, you need to remove the lock nut from it and unscrew it. Then you can cut the main nut off the stud using a grinder and drive the stud into the hole. Once you have freed the clip, you can remove it using pliers or other clamping devices, and then pull out the pin itself.
- Without doing anything, you can try to hammer the stud into the cage as much as possible along with the nut screwed onto it. After performing this manipulation, you need to break the concrete surface around the head of the anchor bolt, going 1 cm deeper. After this, you can try to pull the fastener out of the wall using ordinary pliers.
- If the anchor bolt is made of metal that is not too hard, you can simply drill it out of the wall. However, even with such a careful approach to removing the anchor bolt, you should be prepared for the fact that the section of the wall, ceiling or floor on which such a fastening element was located will have to be restored to its original form using putty or cement mortar.
There are many videos on the Internet that give a detailed idea of how to remove an anchor bolt from any surface with minimal difficulty. When performing this procedure, you can follow the instructions offered in a particular video.
How to remove a whole, broken or rusty anchor bolt from a thread
Anchor fastening is considered the most reliable and is usually designed to last for many years. For example, this is how water tanks and even parts of walls are hung during construction.
But what if the element needs to be completely removed? Removing an anchor bolt from a concrete wall is quite easy if it is in good condition and has been installed correctly.
If the installation was carried out with errors or the bolt was damaged during operation, you will have to work hard.
How to remove a working anchor
Installation rules:
- the hole for the anchor must be equal in length to it;
- the sleeve should protrude from the wall so much that it can be picked up with pliers (for further dismantling);
- hammering an anchor by hitting a nut, bolt, hook is highly not recommended - it is better to lay a wooden block or the like. shock absorber to avoid damaging the thread;
- In order not to tear off the bolt slot, you need to use a high-quality and clearly suitable screwdriver, as well as medium speed screwdriver.
Important When placed outdoors or in damp areas, the anchor fasteners require anti-corrosion protection. https://www.youtube.com/embed/i5WAzE9O1nU
Removing a working nut anchor:
- Remove the nut.
- Hit the bolt with a hammer through the gasket so that the expanding element comes out of the sleeve.
- Push the pin deep into the wall so as to free a small edge of the cartridge.
- Grab the sleeve with a suitable tool and pull it out.
Removing a working frame anchor:
- Completely unscrew the anchor screw.
- Pick up and pull out the sleeve.
- Insert a screw into the hole in the wall so that it connects to the removable anchoring part.
- Screw the screw into the expansion element.
- Pull out the entire structure.
Advice It is not necessary to remove anchor sleeves from the walls: they can be driven deeper so that they do not protrude beyond the wall, and covered with a plastic or wooden sleeve or cement.
The sleeve is completely driven into the wall
This is the most common case. If you need to remove an anchor from a concrete wall, we are usually talking about an indoor space. The best recipe is to break the plaster around so that the pliers catch on the edge of the sleeve.
If you need to remove the anchor without damaging the adjacent surface (primarily tiles or plastic window slope):
- Remove the nut, knock out the bolt or loosen it (for a frame structure).
- Screw a thin self-tapping screw between the bolt and the sleeve until it jams.
- Place something for support (for example, a hammer).
- Grasp both studs and pull out the structure.
If the first option doesn't help:
- Remove the nut and knock out the stud or unscrew the bolt.
- Use a thin nail or self-tapping screw as a wedge to tear and bend the edge of the sleeve.
- Grab the cartridge by the bent edge (it’s convenient to first pull it with narrow- or round-nose pliers; when the edge is released enough, take pliers) and pull it out.
- For a frame anchor, insert it into the concrete passage and screw the bolt into the spacer and remove everything together.
The anchor is rusty
A slightly rusted anchor bolt can be restored with automotive rust converter, machine lubricant, or WD-40 remover.
Procedure:
- Remove the top layer of dirt and, if possible, rust.
- Treat the head and nut, if possible, spray deep into the converter.
- Maintain the time specified in the instructions for the product.
- If necessary, repeat the procedure.
- Try to carefully unscrew the bolt.
Advice On the forums they suggest treating oxidized parts with kerosene or VD-40 and leaving for half a day for the product to take effect.
The slot on the bolt is torn off
Broken splines are a fairly rare occurrence on anchor fasteners. However, if this happens, it is not necessary to dismantle the wall.
Try drilling out the head, or the rod if there is no head, to remove the bolt from the threads. An “extractor” for screws and screws copes well with this task.
This is an inexpensive device with attachments that are suitable for both a screwdriver and a drill. You can buy it on AliExpress for little money.
How to use the extractor:
- Attach and secure the bit with the drill (curved cross) facing down.
- Drill a hole in the stud or bolt head.
- Turn the extractor over with the wedge-shaped end facing down and screw it into the stud.
- Engage reverse and release the broken bolt using the extractor.
With proper installation and operation, the anchor bolts are removed with force, but quite simply.
In rare cases, when it is impossible to hook the sleeve (for example, bad steel, the edge breaks) or the fastener is “stuck” tightly, the only option remains is to cut off the head or cut the anchor itself with a Bulgarian saw. If the anchor held a Swedish corner or etc.
heaviness on the wall, perhaps the best option is to drive in a stud and cover everything with a wooden bobbin or cement and just put finishing plaster on top.
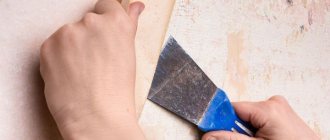
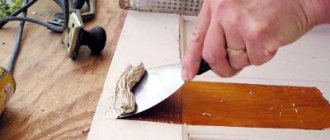
Let's work with wood
Anchor bolt with hook: application and installation features
Today, most people use plastic dowels, but some prefer wooden dowels. The difference in their extraction is not particularly large. The cap can also be pulled out using a self-tapping screw, which is screwed into a wooden product, then the removal process is carried out using pliers. If you don't have them at hand, a nail puller or other construction tool will do.
Another method that is especially popular is pulling it out in parts. To do this, you will need a chisel and a hammer, with the help of which the dowel is divided along the fiber. Then the resulting fragments are removed with a knife or screwdriver. You can also use a drill. This option is provided for dowels made of soft wood. The drill can be replaced with a hammer drill
It is necessary to carry out the procedure carefully to avoid large-diameter holes in the wall
In most cases, wooden dowels are used for installing wooden windows. To do this, take 3-4 fasteners with which to fix the window sill, and several pieces for installing the window frame.
Metal dowels are not as widespread as plastic ones, because their use implies the presence of special equipment. There are two options for removing such fasteners.
One way is twisting. The second is loosening with a hammer. If you can’t carefully unscrew the dowel, you can try to loosen it with a hammer. When the fastener is flush with the wall, it can be removed; to do this, you will need to make several small holes located around it. Then the actual extraction occurs.
Removing a dowel from a concrete surface is not an easy task, but using the right method, you can quickly remove the fastener with minimal loss to the surface. To complete the procedure in the shortest possible time, you only need to prepare the necessary tools and choose the right extraction method.
How to quickly remove a dowel from a concrete wall? updated: November 11, 2016 by: Artyom
Few people know how to properly remove an old dowel from a wall. The main thing is to try to choose a simple, reliable and economical method. Skills in installing and dismantling fasteners will help you achieve results; experience in using electric and hand tools will come in handy.
Several types are available specifically for concrete; they always use a nail as a rod. Reliable operation can be guaranteed if you are able to choose the right version based on the dimensions of the plane and the massiveness of the suspended structures, and perform high-quality installation.
Before starting work, you need to evaluate the quality and thickness of the surface. The presence of hidden electrical wiring and metal fittings is the basis for changing the location. Sometimes it is not easy to hammer in a dowel carefully without damaging the adjacent part of the wall.
The most commonly used options are:
- Expandable, suitable for solid walls. It will establish itself inside it due to the expansion of the plastic casing. The plastic bushing is made with a cone-shaped metal core or with a threaded thread.
- Universal. The built-in nail fits tightly to the walls of the hole. Suitable for loose, hollow partitions.
You can insert the dowel using a drill with a hammer or hammer function, a concrete drill, or a hammer. Correctly perform the work in the following sequence:
- using a hammer drill, punch a hole with a diameter similar to the bushing and a depth exceeding the length of the fastening element by 0.5 cm;
- clean the resulting recess from dirt and dust;
- fix the dowel body with a hammer until its edge aligns with the wall surface;
- hammer the nail into the body until it stops.
If you follow all the installation rules, it will be difficult to get it.