How to sew a denim skirt - simple and beautiful
Denim never goes out of fashion - despite its practicality, it looks elegant. So any fashionista will definitely have a few denim items in her wardrobe that she doesn’t want to part with.
You bought a skirt that you liked, but it fits a little loosely, or you lost a little weight, in any case, you will have to sew the thing up. After all, the main guarantee of elegance is “that the suit fits.” And a woman will feel more confident if the things she wears fit her figure.
Clothes hanging loosely on the hips will ruin the charm of your appearance. Even the presence of a fashionable belt will not save the situation, emphasizing even more the inconsistency of the outfit with the figure. This is where it’s time to think about how to sew a denim skirt if you want to look elegant.
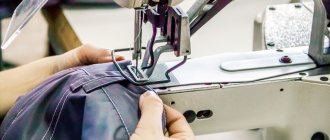
The specificity of some denim seams implies the presence of tailoring skills in alterations. Poor quality repairs on this product will be immediately noticeable. Therefore, when starting such repair work, it is necessary to study the technology of the process.
Moreover, you should also determine where the product requires adjustment - in the belt or on the hips.
We sew in the waist
Most often, adjustments to denim skirts are required in the waist area. At home, such an alteration can be done without problems, provided that the back seam on the product is overlocked and not replaced with a double stitch.
In the second option, you will need not just the hand of a master - you need a professional sewing machine, since not every home machine is capable of taking such a line. Manual repair, especially of denim products, is not carried out.
A seam finished with overlock is easy to adjust and includes the following algorithms:
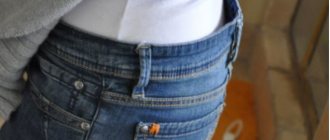
First you need to remove the belt loop located in the middle of the belt on the back side (this is the part through which the belt is threaded).
Then the belt is trimmed to the left and right of the seam by 8-10 centimeters and cut in the center.
Rip the seam from below and up to the yoke (or to the hip line), freeing this area from the overlock.
The middle seam is adjusted to the desired fit length using a basting stitch.
If the fitting went satisfactorily, you can stitch the seam on a machine.
Having trimmed off the excess, the edges are overlocked together (or processed with a zigzag stitch), folded and the front stitching is restored.
The belt is shortened to the required length (on both sides of the incision) and stitched. Having placed it on the skirt, attach it with a front seam.
Now you can put the belt loop back in place.
That’s all the “passion” on the topic of how to sew a denim skirt at the waist. And if you are wondering what to wear with blue women's trousers, then follow the link and get detailed information.
How to sew a denim skirt at the hips?
The principle of performing work to reduce the volume of the hip line is not much different from adjusting the waist line, except that the side seams need to be sutured.
The procedure is as follows:
- To begin with, you should turn the skirt inside out, put it on and mark how much you should reduce the volume along the hips.
- When the basting is ready, the adjacent belt loops are removed and the belt is ripped off.
- The side seams are ripped out and new ones are formed using a basting stitch.
- Having stitched the sides on a machine, the excess fabric is cut off, the edges are overlocked, ironed and, if there is a front stitch, it is restored.
- With the belt you need to follow the previous example.
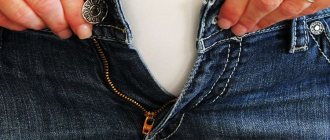
- If there was a zipper in the side seam, it is first evaporated and transferred to a new seam before the belt is returned to its place.
Having a sewing machine and basic needlework skills at hand, the problem of how to sew a denim skirt will be solved by itself.
Increase in waist circumference
If the waist line needs to be increased by no more than 2 cm, add 1/4 of the required size to the side sections of the back and front panels and connect the new lines with the original ones at hip level. To increase the waist by a larger amount, reduce the bevel of the side seams and the width of the darts.
Lateral enlargement
Place a piece of paper under the edge of the pattern and secure it. In order to increase the waist circumference, measure the desired value from the edge of the pattern and mark it. From this mark, draw a new line, gradually bringing it to the starting line at the level of the hips (for a skirt) or chest (if it is a bodice). The same changes need to be made on both the front and rear.
Increase by darts
To increase the waist circumference of the darts, you need to reduce their width. Inside the dart, mark new lines and connect them to the starting point. Fold the dart and cut it from the top cut line. The distance between the new and original lines on both sides of the dart is the amount of increase in the waistline on this pattern piece.
Skirt on the hips
When increasing the waist by 2 cm, add 1/4 of the required size to the side sections of the back and front panels. With a larger increase, move the side seams and reduce the width of the darts.
Skirt with wedges
When the waist increases by up to 2 cm, additions are made only to the side sections. For a larger increase, divide the required amount equally between all seams except the middle seams of the back and front wedges.
Skirt sun"
To increase the waist circumference, lower the waistline so that the seam line (not the cut) drops 1/4 of the amount you need to change to increase the waist, not including seam allowances. The length of the skirt is added by allowing for the bottom hem line.
Trousers
Additions to the waist circumference of up to 2 cm are made only along the side seams. With a higher magnification, the required amount is distributed between the side seams, the middle seam and the darts. The side seams are changed symmetrically.
Dress
To increase the waist by more than 2 cm, reduce the width of all darts at the waist before adding seams.
Side dress
When increasing up to 2 cm, add 0.5 cm to the side sections at waist level. The new line merges with the original one in the chest and hips. At higher increases, 1/12 of the increase in waist circumference should be added to the side and curved seams.
The procedure for sewing a denim skirt yourself
Jeans is a material that has long been included in the category of undying classics. Denim has always looked stylish and elegant. In the wardrobe of many women you can find skirts made of this material. But the figure changes, and it is often very difficult to part with a favorite thing that no longer fits. In such a situation, information on how to sew a denim skirt will be useful.
Necessary to sew in a skirt at the waist
When you manage to lose a couple of extra pounds, the question arises of what to do with the things that have become large. Knowing how to sew a skirt at the waist, you can continue to enjoy not only a beautiful figure, but also your favorite wardrobe accessory.
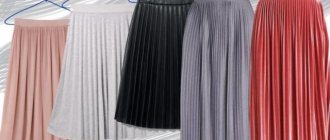
Denim skirts are an everlasting fashion classic
You can do the alteration at home yourself. But it is important to pay attention that the back seam is overlocked. If double stitching was used instead, it is recommended to take the product to a workshop, as a professional sewing machine will be required.
Important! Repairing and hemming denim clothing by hand is impossible.
To sew a product at the waist, if the seam is finished with an overlock, you need to do the following:
- First of all, the belt loop, which is located in the middle of the belt on the back, is removed. A belt is threaded through it.
- The belt is cut 10 centimeters to the left and right of the seam.
- The seam must be ripped from the bottom to the yoke; the overlock must be removed from this area.
- Basting stitches are made along the middle seam to adjust the desired length of the product.
How much will it cost to sew pants?
TROUSERS
| TYPE OF WORK | Price, rub.) |
| Sew side seams with waistband (excluding pockets) | from 650 |
| Sew side seams with topstitching | from 600 |
| Sew along the crotch seam | from 400 |
| Sew step by step seam with topstitching | from 500 |
Interesting materials:
How long does it take for aloe vera to grow? How long does it take for a nail to grow after removal? How long do sparrow chicks take to grow? How long does it take for a magnet to demagnetize? How long does the ice last on Lake Baikal? How long to cook soup chicken? How long does it take for lobelia seeds to germinate? Where should the fan be located in the case? How should the light fall when writing? How should the birdhouse be located?
How to sew in the hips
The procedure for reducing volume in the hips is similar to adjusting the product in the waist area. The main difference is that the work is aimed at suturing the seams from the side.
The step-by-step algorithm of actions is as follows:
- The product is turned inside out and put on to mark the desired volume for reduction.
- After applying the bastings, the belt loops located nearby are removed, and the belt is unsealed.
- The side seams are unraveled and new ones are basted.
- The sides are sewn on a sewing machine, the edges are processed with an overlocker and ironed. If there is a front side, it needs to be restored.
The work with the belt is carried out as follows: if there is a zipper on the side, it must be transferred to a new seam until the new belt is sewn.
Trying on a skirt before sewing
and reducing the skirt in the belt
A simple method of reducing the waistband is suitable for summer skirts with soft, thin fabric. An elastic wide elastic band is threaded into the waistband of the skirt, equal to the waist size, with the addition of a few extra centimeters. In this case, the skirt will not be pulled “tight” at the waist, but will lie with a slight slack.
It is possible to narrow the top of the skirt in another way. First, we rip the belt in the areas of the side seams. Next, we reduce the hip line by sewing away the excess tissue. We reduce the belt detail on the sides by the same number of centimeters. We connect the belt and skirt, basting the parts to each other. It is important to ensure that the line of the side seam goes strictly to the line of the belt. At the end, we sew it on a sewing machine.
The third, perhaps the roughest and fastest option, is to sew the side seams along with the waistband. In this case, reducing the waist is possible only by 1-1.5 cm and only on thin fabric.
How to sew on the sides
It is not always possible to adjust a denim product to size by reducing the volume of the belt or increasing the darts. Often it is necessary to suture along the entire length to remove excess tissue on the sides.
It is important to pay attention ! If you need to reduce a skirt with darts by three sizes, you should not remove excess fabric only by adjusting the side seam allowances.
It is recommended to remove some of the excess fabric into darts. This will help prevent the center from shifting to the sides. Otherwise, the skirt will look bad on your figure.
The adjustment procedure begins with a fitting, where new seams are marked. Then the work process looks like this:
- Excess fabric should be evenly distributed on both sides and secured with pins.
- The product is removed, and a dotted line is drawn on the reverse side where the chips were.
- The pins are removed.
- It is important to check the symmetry before you start basting.
Excess fabric is cut off, then the seams are processed. Finally, all that remains is to iron the skirt.
Sizing
How do you know if a dress is too big?
You should also pay attention to the following 4 parameters: waistline, shoulder seams, darts and armholes. The shoulder seams on a well-fitting item will end just below the shoulder joint. If it happens lower, the thing is too big and will not fit in the shoulders. If it’s higher, it’s too small, and the sleeves will constantly “run” up.
Interesting materials:
How to disable the Ban on mobile payments service? How to disable video playback in Odnoklassniki? How to disable sticky Shift key? How do I disable protection in Microsoft Security Essentials? How to turn off the sound of the on-screen keyboard in Windows 10? How to turn off the sound when pressing keys on Huawei? How to turn off the sound when pressing keys? How to mute the sound in a WhatsApp group? How to unscrew a hex bolt with broken edges? How to open Android via computer?
How to shorten a pleated skirt
Often a beautiful skirt turns out to be too long. In such a situation it may be necessary to shorten it. The greatest difficulties arise with a product in the shape of a sun or half-sun. To give things the desired size at home you will need:
- Mark the length of the product. To do this, it is recommended to put on shoes and look at yourself in the mirror. Having chosen the optimal length, you can make marks at this place, the fabric is secured with pins. Then the skirt needs to be removed, placed on the table and straightened.
- Using a measuring tape, measure the distance from the mark to the edge of the skirt. Next, you need to mark this distance using chalk along the entire hem. All dotted lines are connected to form a new hem line.
- You need to step back three centimeters from the new line. This will be the fabric reserve for folding. The excess fabric is cut off, and the cut is processed using an overlocker or overcasting line. Then the edge is steamed with an iron.
- If the hem is very small, then the chalk line may overlap the decorative line at the bottom of the product. In such a situation, first of all you need to rip the stitch, then steam it, and then take measurements. When shortening a skirt with a slit, the stitching is unraveled and the bottom is ironed. Then both parts are fastened with a pin, and hem lines are drawn.
The bottom of the skirt is folded along the top line, then carefully fastened with pins. Then you need to hem the hem using a sewing machine.
Pleated denim skirt
Reducing volume without tearing
If the product needs to be reduced in the waistband by only 1 size, the method without ripping is ideal. They try on the skirt, draw new seam lines, and sew them down. If the seam is located in the center, then the excess fabric is removed in one seam, if on the sides - then in two.
For skirts with a belt, you can place the seams right along the top of the belt. But it is important to correctly combine the upper and lower lines. This is necessary to avoid distortions that will spoil the appearance of the product.
Suturing length
How much does it cost to have a skirt hemmed?
Price list for repair of knitted fabrics
| Operation name | Quantity | Price, r |
| 1. Sew a straight skirt without lining | 1 seam | 390 |
| 2. Sew lined straight skirt | 1 seam | 490 |
| 3. Sew along the seam with a fastener | 1 seam | 790 |
| 4. Restore the bottom of the straight skirt after correction | 1 seam | 590 |
Useful tips
Beginners are advised to follow the advice of experienced seamstresses. They will help to properly sew the product without spoiling the appearance. For those who doubt whether it is possible to sew a denim skirt at home on their own, the main tips are as follows:
- 90% of success in the suturing process depends on proper taking of measurements.
- It is important not to hem an item without first trying it on. All defects can be corrected at the initial stage, when the seams are just basted.
- All seams should always be ironed well. Only in this case will the product have an ideal appearance. Ironing must be done through gauze or thin fabric, even if the iron has a steam function.
The easiest way to sew in a wide skirt
This method is suitable for skirts made from light fabric with a bright print. You can try using it, for example, to quickly sew up a summer circle skirt. This life hack will be especially useful if you discover that it is too big right before leaving the house. A sewing machine is not necessary for this, although it will certainly speed up the process.
- Try on the skirt and estimate how many centimeters it needs to be narrowed.
- Sweep the waistband of the skirt with long stitches using a thick thread (the thread is required so that it does not break during manipulation). If you do this on a machine, set the stitch length to maximum.
- Pull the thread outward to a length corresponding to the number of extra centimeters. Folds form along the entire waistband of the skirt.
- Secure the thread in an extended state. Distribute the folds throughout the waistband so that they are approximately the same distance from each other.
- Sew along the waistband of the skirt, securing the new folds. You can stitch it twice - at the bottom and at the top of the waistband. Then the skirt will look even better.
- Go over the waist with an iron. That's it, you can put it on!
What to keep in mind when sewing a skirt
Take your time when taking measurements. The more accurately you determine how much and where exactly you need to sew the skirt, the better the result will be. If this requires five or ten fittings, that’s okay. All of them will take less time and effort than ripping out the seams and sewing the skirt back in place.
Iron all seams carefully, preferably through gauze or thin fabric, so as not to damage the material. The smoother the seams, the better the result, again.
We hope our advice will help you, and the wrong skirt size will not be a reason for parting with your favorite item. And for those who prefer not to read, but to watch about various life hacks, we have found video recommendations.
Photo: Shutterstock, Getty Images
Cosmo recommends
Fashionable haircut 2020 for thin hair - long bob: styling methods
Gel polish won't stick! What other procedures cannot be done during menstruation?
Have you lost weight or rushed to buy a skirt and it turned out to be too big at home? There are several ways to fit an item to your figure without resorting to the services of an atelier.
How to sew a skirt by hand without a sewing machine
You can not only narrow a skirt without the services of an atelier - even without a sewing machine. We tell you how to sew a skirt at the waist by hand.
You will need needles, thread and sewing hooks. First of all, put on a skirt and measure the number of extra centimeters. Set aside this distance on the waistband to the right of the top point of the fastener. Sew a hook loop there.
How to brush your teeth correctly: the secrets of a beautiful smile
Attach the hook itself to the left of the clasp. It is important to ensure that the hook and eyelet are at the same level. Fasten the hook and adjust the zipper. The skirt is ready!
How to sew a denim skirt
Denim is a dense fabric, which makes stitching difficult. In addition, it can have a complex shade, for which you need to choose the color of the thread. How to sew a denim skirt at the waist - we give the procedure.
- Remove the belt loop located in the center of the waistband on the back side of the skirt.
- Open the belt on both sides of the seam by about 10 cm and cut the fabric in the middle.
- Extend the stitching from the bottom to the hip line. Manually adjust the middle seam to the required length.
- Try on the skirt and, if it fits well, machine stitch the seam.
- Trim excess fabric and sew with a zigzag stitch. Shorten the belt and sew the edges, placing it on the skirt.
- Sew the belt loop back on.
Ways to make jeans smaller without stitching
Denim fabric tends to shrink with each wash and then stretch again when worn. Therefore, the easiest way to make your jeans fit smaller is to wash and dry your jeans more often. There is no need to rush to sew in new trousers if they are a little big. After a few washes, they may shrink without using other methods.
Even very high-quality jeans can stretch when worn for a long time. Therefore, it is often recommended to buy them 1-2 sizes smaller. But this is very risky because they may be made from a type of fabric that does not stretch much.
It is better to immediately choose comfortable jeans, and if they have increased in size, then wash them in the machine at high temperature and then dry them in a hot dryer. They will definitely decrease.
Important! After washing, you should not iron jeans if they are still damp (this will cause them to stretch again) - only when they are completely dry and with a slightly dampened iron.
Proper drying allows the shrinkage to be consolidated and preserved. If there is no special automatic dryer, then the following methods are used:
- when it's heating season, hang jeans on the radiator;
- hang your trousers on a rope and place an electric heater or other heat source nearby;
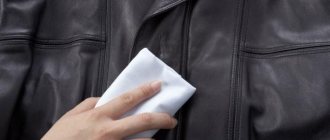
- Place a moisture-absorbing material on the top and bottom of your wet jeans on the table and change it periodically when it gets wet.
Advice! The shrinkage method reduces the size of the trousers not only in width, but also in length. This must be taken into account and first carry out thermal shrinkage, then only roll it up to the required length (if required).
Cooking method
This is an aggressive method, but it allows you to reduce jeans by several sizes at once. The main drawback is that the jeans will fade and look like the once fashionable “varenki”.
How to “weld” jeans:
- Select a container of sufficient size.
- Pour water into it and add washing powder to form a concentrated solution.
- Cook the jeans over medium heat for about half an hour.
- Remove the hot item with tongs and rinse.
How to reduce only a certain area
If you want to fit only part of the trousers, then the following method is used:
- Fill a spray bottle with warm water and add fabric softener.
- Spray the liquid only on the areas of the trousers that need shrinking.
- Dry the item in a special dryer or other suitable method. The wet areas will shrink, and the dry areas will remain the same size.
It is not recommended to shrink trousers made of thin “summer” jeans, because this is a regular denim-dyed cotton, which has lower strength. Washing at high temperatures causes it to wear out quickly.
How to make your waist smaller with an elastic band
If the belt is not too large at the waist, then the problem is solved with the help of a wide elastic band.
- Underside the belt at the back of the trousers.
- Cut the elastic to the desired length, pin it to the belt and try it on. If necessary, reduce or increase its length by adjusting with pins.
- When a suitable option is found, sew the elastic band to the belt.
- Then sew on the belt. As a result, only a slight ruffle will be visible in the back, and the jeans will fit perfectly at the waist.
How to sew a skirt in at the waist without ripping it out
We know a great way to sew a skirt in at the waist without ripping it out. To do this, we use an elastic band, a seam ripper (don’t be alarmed, it is needed to make holes and not rip the item), tailor’s pins and scissors.
- Using a sewing machine, sew the skirt parallel to the belt line, stepping back about a centimeter. Leave a distance of 3 cm from the middle of the front part or zipper.
- Use a seam ripper to make holes on the wrong side of the skirt. We make holes only on the top layer of fabric, and not right through. Do them on both sides at the beginning of the seams.
- Cut a piece of elastic equal to your waist circumference. Poke one end of the elastic with a safety pin and thread it through the holes. Secure both ends of the elastic band passed through the fabric with tailor's pins.
- Machine stitch the elastic to the skirt. The seams should run perpendicular to the elastic.
- Trim the excess elastic with scissors.
How to narrow a skirt without ripping
This method is suitable if you need to narrow the item only to Natalia. To do this, prepare an elastic band, a seam ripper to make holes, and safety pins and scissors. You need to start using the sewing machine.
- Sew the skirt parallel to the belt line, making an indent of 1 cm. Leave a distance of three centimeters from the middle of the zipper (if there is one) or the front part of the item.
- Using a seam ripper, make holes on the wrong side of the product. The holes should only be on the top layer of the fabric; there is no need to make them all the way through. Poke holes on both sides of the seam that you have already stitched.
- Next, cut a piece of clothesline equal to the circumference of your waist. Place a pin on one end of the elastic and thread it through the holes. Both ends of the elastic should eventually meet; secure them with a pin.
- Now you need to sew the elastic band to the belt. To do this, sew it with a machine. The seams from here should lie perpendicular to the waistband with an elastic band.
- Trim off the excess.
If after some time your waist becomes even smaller, you can adjust the skirt to fit yourself using the same method. Simply open these seams and thread an elastic band through the waistband that will be equal to the circumference of your “new” waist. Then do everything we described again.
unsplash.com
How to sew in the sides of a pencil skirt at home
A pencil skirt is a style that should fit perfectly to your figure. If the item has become too large, it will have to be sutured not only at the waist, but along the entire length. If the skirt has darts, some of the excess fabric can be transferred there. Otherwise, we will remove the extra centimeters in the side seams. How to sew in the sides of a pencil skirt in 5 steps:
- As always, before work you need to try on the skirt and determine the location of the new seams.
- Pinch the excess evenly on both sides and pin with sewing pins.
- Remove the item, turn it inside out and use lines to mark the places for the future stitching.
- Remove pins and baste by hand.
- Try on the skirt again and, if the item fits well, machine stitch it. At the final stage, carefully iron the seams.
Features of sewing a pencil skirt
This skirt model should fit strictly according to your figure. And it is important to understand that when reducing the waist, it is necessary to reshape the item not only in the upper part, but also on the sides for the entire length of the skirt. To give the item the desired silhouette, we take a few simple steps:
- we rip the top of the product: turning it inside out, carefully rip off the facing (additional fabric that “hides” the upper sections);
- We mark the new contours of the skirt along the sides. It is important that the line smoothly transitions into the old seam. This will help avoid “bubbles” on the sides. Additionally, the line should be long enough to complement the smoothness of the outline. Before marking future seams, you first need to measure your parameters and how many centimeters to remove on the sides;
- the facing detail of the skirt should follow the lines of the top of the skirt;
- Using threads of a different color, different from the skirt, we sweep away the lines of the new seams;
- try on the skirt, look at the smoothness of the seams. At the very beginning, we connect the skirt with the facing and sew it on a sewing machine. Next we make the side seams;
- cut off the excess fabric, process new cuts with an overlock or zigzag stitch.
Master class: how to sew a skirt on the sides and at the waist. Step-by-step instruction.
Agreement for the processing of personal data
Hereby, in accordance with Federal Law No. 152-FZ “On Personal Data” dated July 27, 2006, you confirm your consent to the processing of IP Dunaev N.A. personal data: collection, systematization, accumulation, storage, clarification (updating, changing), use, transfer solely for the purpose of collecting and transferring goods to you in your name. IP Dunaev N.A. guarantees the confidentiality of the information we receive. The processing of personal data is carried out for the purpose of effective execution of orders, contracts and other obligations accepted by IP Dunaev N.A. as binding upon you.
It is hereby specifically stipulated that you consent to the transfer of your personal data to transport companies, Russian Post or another organization through which Dunaev N.A. sends your order.
This consent applies to the following personal data: last name, first name and patronymic, email address, registration address, postal address for delivery of orders, contact phone number, payment details.