Plastic windows are already installed everywhere in our apartments, industrial and administrative buildings. We can talk a lot about the advantages of such windows, and this is true. Such windows have already become mandatory in the construction and finishing of newly constructed buildings. Well, we are all “FOR”. But that’s not what we wanted to talk about now. And about additions to any window, be it plastic or wooden. About the thermometer, which shows us the temperature “overboard” of our “everyday vessel”.
What is special about attaching a thermometer to a plastic window?
Why did we focus on the thermometer? Yes, because a plastic window is still an expensive product and structurally self-sufficient. By this we mean that drilling holes in plastic window frames is not advisable. Through holes will be a kind of small “cold bridges” when cold air enters the cavity of the frame, which means the window performs its main functions worse. This may be a minor deterioration, but for some this is not the main thing. Since, in addition, there is always a desire to keep the window in its original form. Moreover, it is unlikely that it will be possible to seal the hole and return the frame to its original appearance after removing the thermometer attached to the screws. That is why we will analyze the initial priority task. That is, the option of attaching the thermometer using elements that will not spoil the appearance and will not impair the performance characteristics of the plastic window. And then an example with self-tapping screws. In addition, let’s not forget to mention alternative thermometer options for monitoring the temperature outside. But first things first…
The device of a glass thermometer
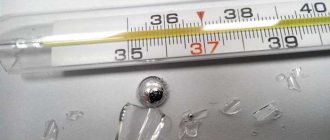
An outdoor glass thermometer is designed as follows. A graduated scale is installed in the glass tube, to which is attached a glass tube with a very small, calibrated in size, internal hole (capillary tube), to which is welded a small glass reservoir filled with alcohol. When the air is heated, alcohol expands; when the temperature drops, it decreases in volume (compresses). This is what we observe in the capillary tube in the form of upward or downward movement of a colored column. The alcohol is transparent, and in order to make the column better visible, a dye, usually red, is added to it.
How to attach a thermometer to a plastic window using double-sided tape
This option is the most preferable. After all, we have already said that making holes in the frames of plastic windows is not an option. So, you can find ready-made solutions on sale. In fact, these are outdoor thermometers that are attached to glass or frame with double-sided mounting tape. Variations of such thermometers can also be very different, both mechanical and alcohol. Regardless of the design, thermometers are mounted as follows. The surface of the window, be it the glass in the frame or the plastic of the frame itself, must be wiped dry and degreased. Next, we tear off the protective layer and expose the mounting tape that will hold the thermometer. We try again exactly how the thermometer should be installed, and press the mounting tape to the surface.
It is important to press the thermometer well. Please note that it will not be possible to re-glue the thermometer, at least not with this mounting tape (adhesive tape). This type of fastener for an outdoor thermometer can only be used once. And then, subject to weather conditions, when it’s dry outside, not hot and not cold. The optimal temperature for installing a thermometer is from +10 to +25 degrees Celsius. The best time is the evening of a dry summer day. If you do not fulfill these conditions, then it is not at all a fact that your thermometer will hang outside the window for a long time.
The most likely reasons for it to fall off would be high temperature, or humid weather while the glue on the tape has not yet set. Although it may be that the manufacturer simply used poor quality tape, which also happens. As a last resort, you can reinstall the thermometer using Moment glue or something similar. Dropping a drop onto each of the fasteners, without removing the old tape, glue the thermometer installation locations to the plastic. Use the remaining standard glue to hold the thermometer in place for a while until the “Moment” hardens. But it is unlikely that it will be possible to reliably stick the glue to the glass. If your thermometer has already fallen off, and not for the first time, and you are tired of it, then it’s time to radically change your strategy.
How to glue the suction cup?
- How to securely glue the suction cup? Fixation methods
- Installation from the street
- Attach to windshield
- Video materials
- Similar materials
- Comments and reviews
How to glue the suction cup? It doesn’t matter whether it’s new or an old one that you’re sorry to part with, the device must be properly and securely fastened. Nowadays, in almost any supermarket you can see a variety of different devices or simply decorative devices on suction cups. Before purchasing, few people think about how high quality the suction cup itself is and how long it will last. But when the installation processes begin, then we begin to indulge in reflection: will this structure withstand the “responsibilities” assigned to it?
In the interior, of course, such things look bright, positive and comfortable, and they are also quite practical in terms of fastening and dismantling. Mostly, small shelves for the kitchen or bathroom are equipped with suction cups: soap dishes, all kinds of holders for hair dryers, combs, toothbrushes, washcloths, hooks, towel rings and other things. As well as various devices that are attached to windows and glass in the form of thermometers, recorders or any other gadgets. The devices are often small in size and designed to hold light weight.
How to attach a thermometer to a plastic window using self-tapping screws
Although we do not support this method, many people use it. Some people simply don’t take care of government-issued frames, while others think there’s nothing wrong with screwing a thermometer onto the frame of a plastic window. Well, let's look at this option. In fact, everything is simple. Everything is the same as in the previous case, with one exception, self-tapping screws are used instead of mounting. Here you can use self-tapping screws and mounting tape together. Which will lead to better results. Also if you use self-tapping screws, we would even recommend using mounting or sealant. This is necessary in order to seal the hole from the self-tapping screw into the frame cavity. Well, this procedure for installing a thermometer is very simple. We pre-drill holes for screws in the plastic fasteners. If you don't drill, the plastic will simply crack, trust us. Nothing good will come of this. So don’t be lazy, find the tool and strength to drill holes in the thermometer mounts. Next, attach the thermometer to the mounting tape. If there is no tape, then do not forget to squeeze out a drop of sealant. Now, screw the screws through the holes in the thermometer mounts.
It is not necessary to drill holes in the window frame; the likelihood of cracking there is negligible. That's it, the outdoor thermometer is attached to the sash of the plastic window. However, there are other alternative options so as not to “spoil” the frame...
Velcro installation
Before you start attaching the thermometer, you need to buy an outdoor thermometer with Velcro. An example of such a thermometer is shown in the photo below.
Now you need to decide on the installation location. The thermometer shown above can be turned in reverse by rearranging the lower and upper legs.
Next, remove the mosquito net from the window, holding it by the “ears” located on the sides.
Mosquito net for plastic window
Clean the entire window or just the part that will be installed. After the dirt has been completely washed off and the glass has dried, it is necessary to wipe the glass unit with alcohol or window cleaning liquid. They will degrease the window and improve adhesion.
Window cleaner
We remove the pieces of paper from the Velcro and install the thermometer, pressing the Velcro tightly to the glass. It is not recommended to glue the thermometer to a plastic profile for two reasons. Firstly, the glue can leave marks on the profile. Secondly, the distance from the thermometer to the glass unit should be minimal to ensure good visibility of the thermometer readings from the room, especially at night.
Remove the film from the thermometer's Velcro strips
That's all, all that remains is to install the mosquito stack back.
Alternatives for a window thermometer that do not mount it directly on the window
The main purpose of a thermometer on the frame is to be able to look at it and see what the temperature is outside. But who said that the thermometer should be installed on the window sash!? The thermometer can be mounted on a slope outside, while its functionality will be fully preserved, and it will be convenient to monitor the readings. In this case, the frame of the plastic window will probably not be damaged. All you need to do here is to bend the metal fasteners to the diameter of the thermometer and drill holes in the wall for the dowels. Next, we screw the entire structure to the window slope and voila, the thermometer is in place. It may be unsightly, but it is pragmatic and the frame is intact.
Well, another option would be to purchase an electronic thermometer with a remote sensor. The advantages here are obvious. You can simply place the thermometer on the window sill without drilling or gluing anything at all. There is no need to talk about installation here. The wire with the temperature sensor is simply thrown outside, and the thermometer itself is located in the room. If you want the thermometer to be in place, you can embed it into the slope, which in most cases are PVC panels. They are easily cut with the simplest stationery knife.
Then the wire is routed to the frame, and there it is also brought out beyond the sash. It is even better to install such a thermometer when the slopes are being made and the frame has not yet been foamed. Then the wire can be completely routed behind the panels and frame, directly to the street. He will not be visible in the room at all. The third option is weather stations with signal transmission via a wireless channel. Such stations work as follows. A sensor for measuring temperature and more is attached to the street, often it is also a barometer and a hygrometer. The sensor is mounted on standard mounts in the housing using a dowel.
Digital telemetry data is then transmitted at high frequency (433 Hz) to the main station, where it is decrypted and displayed.
In this case, the main station can now be placed not only by the window, but also in the room, in any place convenient for you. The signal transmission range is about 20 meters. The most popular well-known brand is stations. True, the price for them is “biting”. Well, the fourth option, or special case, is a thermometer installed directly on the glass, using suction cups, or using mounting tape.
Let's say right away that the option is not very successful, since the LCD screen is located on the street. During the cold season it may fail. It is better not to consider this option as a possible installation. And we also don’t need to mention about attaching the suction cup in the cold. Not reliable, which means not practical! Now that we have presented various options for thermometers and stations and methods for attaching them, let's look at all the pros and cons of each, as well as installation features. Let's start with the safety of each of the thermometers.
General installation recommendations.
After purchasing a household thermometer, you need to decide on its future location. Any model can be mounted on any part of the window. When choosing a location, remember that ease of installation and easy reading is not what you should strive for! The main thing in this matter is that the thermometer provides accurate temperature measurement. When installing such a temperature meter, follow some simple rules.
Attach the thermometer to the window so that it is simultaneously at a certain distance from heat sources and from direct sunlight. Heat sources that influence the correct operation of the thermometer outside the window can be in the form of a ventilation system, the external part of the air conditioner that emits heat during operation, and even in the form of a window - the level of heat release from them is quite high. Factors such as these can have a direct impact on whether a window thermometer accurately determines the temperature.
- As you know, in winter the temperature difference outside the window and indoors can reach 50 degrees Celsius. Due to this, infrared radiation emanating from the house can affect the readings of the thermometer located outside the window.
- Also, the correctness of the measured temperature values depends on the absence of direct sunlight on the fixed device.
Due to the two factors described above, the correct location for installing a window thermometer should be on the north side of the house .
Existing thermometers for plastic windows can also be used on modern wooden windows with double-glazed windows. Due to the fact that they are attached to the adhesive tape (supplied in the kit) on the outside of the glass.
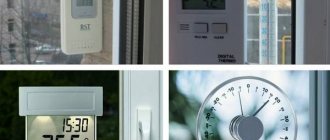
What types of thermometers are there:
1. "SOLAR"
Outdoor window thermometer for plastic and wooden windows with a bimetallic spring. The case is matte. Recommended application: pad printing. Size: 75 x 75 mm. Fastening: 4 Velcro. Manufacturer: Russia .
2. "BARON"
Outdoor window thermometer with barometer for plastic and wooden windows with a bimetallic spring. The case is transparent. Recommended application: pad printing. Size: 90 x 90 mm. Fastening: 4 Velcro. Manufacturer: Poland .
3. Outdoor thermometer MU121878
When installing this measuring device, it is necessary to take into account that it is inertial - it takes about 10-20 minutes to “adjust” to the street temperature.
If possible, you should avoid installing a thermometer on a window that opens too frequently - this will help avoid the risk of accidental damage.
In addition to attaching to glass, the thermometer holder can also be glued to plastic, but not every type of plastic. Therefore, to ensure reliable installation, it is still better to attach the sticky holder directly to the glass itself.
Is an outdoor thermometer safe?
Let’s say right away that mechanical and electronic counterparts do not raise any questions. But what is this red liquid in tube thermometers!? Many already know, but for those ignorant of this issue, we’ll tell you. The red liquid is colored alcohol. That is, if the thermometer breaks, then nothing bad will happen, unless of course you cut yourself. This outdoor thermometer is absolutely safe. The alcohol will evaporate and the glass will be thrown into the trash. This thermometer is not akin to a medical thermometer, which sometimes uses mercury. But that's a completely different story.
Which type of outdoor thermometer is the most reliable and most accurate?
Mechanical thermometers are the most capricious of those mentioned above. It may fail within a few days after installation. Or even initially show the wrong temperature. And changes from extreme minus to plus will even more quickly render it inoperable. Let's just say this is not a reliable thermometer. Of the 2 I bought, the first one failed after a week, the second after a year. At the same time, even incorrect temperature readings can be considered a breakdown of such a thermometer, when it seems to react to temperature, but shows it incorrectly. But alcohol thermometers have proven themselves since Soviet times. The design is reliable and proven. Except that the plastic ears holding the tube often break off, and here you have to do something tricky, like in the photo above. Electronic thermometers can be called the most reliable. Even Chinese manufacturers produce such thermometers quite successfully. If you don't mess with them and only change the batteries on time, they will serve you for years. This does not apply to electronic thermometers when they are installed outdoors. We have already talked about this option. ZhKI does not like cold weather. As a result, it can simply “spread” between the glass of the screen, that is, it will become unusable. If we talk about the accuracy of each of the thermometers. Here the palm can also unconditionally be given to an electronic copy. They are the most reliable and accurate!
How often should you change the battery in an outdoor thermometer and weather station?
Let's start with a thermometer with a wired sensor. Firstly, there are half as many batteries here, since they are installed only in the main unit, and the sensor is powered through a wire. Secondly, the principle of signal transmission here is provided via wire, which also saves battery energy. As a result, you can change the batteries in such a thermometer once every 2-3 years. Or you can simply use it from children's toys or cameras. Such batteries have a fairly low potential to turn a toy engine in cars and provide energy for a flash in a camera, but they can last another year in an electronic thermometer. With weather stations, everything is more complicated, especially with a remote unit installed outdoors. It can be cold there, which affects the capacity and chemical reaction in the battery, and it is also necessary to transmit a radio signal to the main unit. In the end, if the batteries last a year, then this is a good result. But in the main unit, the batteries can last akin to a thermometer with a wired sensor, that is, 2-3 years.
A little about thermometers (thermometers)
Traditionally, in everyday life, two types of thermometers are used to measure outdoor air temperature: alcohol and bimetallic. The first are a hermetically sealed capillary tube with colored alcohol, which, as the temperature rises or falls, the air either expands or contracts, sliding along the capillary along the applied metric scale.
Bimetallic thermometers are a spring consisting of an alloy of two metals with different expansion coefficients, at the end of which an arrow is installed. When heated or cooled, the spring either compresses or unwinds. In accordance with this, the arrow located at the end of such a spring also moves, showing a certain value on an arcuate degree scale.
The third type of outdoor thermometers are electronic ones, which receive signals from a sensor located outside the room and transmit it to an electronic device that displays the temperature digitally on an LCD display.
Currently, these three models are distributed to approximately the same extent and serve as the subject of endless complaints from owners about the quality of the devices and the reason for mathematical calculations of the arithmetic average in the event of a discrepancy between the readings on two or more thermometers.
How to install a thermometer or its sensor correctly
We have already told you a lot about installation, about the types and features of thermometers. At the same time, they have not yet spoken about the most important thing, about ensuring the accuracy of the readings. Let's start from afar. If you have ever seen how thermometers are installed at a weather station, then you know that for correct readings they must be placed in a place protected from the sun, not in the open wind, and not on the ground.
To be more precise, the thermometer must be protected from direct sunlight, otherwise it will greatly distort the result. Also should not touch metal. The ideal solution is to install the thermometer sensors or the thermometer itself in a ventilated casing, protected from the sun. Something like that.
Well, now that you already know so much, not only about installing and attaching thermometers to the window, you can summarize all the above information.
The safest and simplest methods for fixing a product
First of all, it is worth considering options for fixing the thermometer to the window, in which installation will take only a few minutes, and the frame material will not be subject to aggressive influence.
- Without the use of aids. The simplest and safest method for a window, which can be used if you need to secure a thermometer with flat elbows. You just need to use a knife or a thin screwdriver to pick up the rubber seal that holds the glass and push the upper part of the device under it first, and then the lower one.
- On glue. This composition will also not spoil a plastic window, but it is better to use it when working with very light and oversized objects. The difficulty is that for reliable fixation you will have to wait several minutes, creating increased pressure on the thermometer, only then will it stick securely.
- With Velcro or double-sided tape. Simple and quick approaches that, subject to process technology, guarantee reliable and long-lasting results. However, if the first time it was not possible to stick the product onto the plastic window evenly, nothing can be corrected.
- On suction cups. Not the most reliable option. Most often, a thermometer with suction cups is glued only under conditions of minimal exposure to external irritants, for example, on a closed but unglazed balcony.
Before fixing the thermometer with a sticky base, you must do the following:
- Wipe the working surface with turpentine, alcohol or other degreasing solution. This rule applies even to newly installed windows.
- Wipe the surface dry with a lint-free cloth, otherwise the structure will not even stick.
- Once the product is pressed to the window with the sticky side, it is prohibited to move it.
- If the item is glued so unevenly that it simply needs to be removed, it is best to use a knife on which we place a cloth soaked in solvent. Carefully remove the Velcro or tape, being careful not to scratch the material. After this, it is better not to glue the device to the same area; you will have to select a new zone.
Related article: Rustic style window curtains
Of course, such approaches will not hold the thermometer if there is a hurricane wind outside, but in other cases you can count on the device’s many years of service without any failures.
To summarize how to attach an outdoor thermometer to a plastic window
It’s good if you are still at the stage of purchasing a thermometer and are still choosing it. Here we would advise you to purchase an electronic copy of the thermometer. It doesn’t even need to be fastened, and its accuracy and reliability are top notch. If you have already purchased one of the thermometers, then we think it will not be difficult for you to install it using the material in the article, as well as the instructions for it. All this can be done easily and naturally. All we can do is wish you daily accurate readings from your device, which will help you decide on your mood and wardrobe choice when going out.