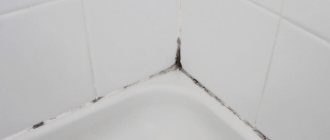
Today we will touch on a sore subject for car enthusiasts, since there is dampness in most garages. It is formed in the presence of condensation. This leads to increased humidity in the garage itself. Everyone knows that moisture is very harmful for a car, as well as for the entire building. It can easily ruin the finish and other structures. It is not recommended to leave a car in such a room; moisture can damage it. The interesting thing is that only some areas of the walls or ceiling can become damp; this will help you determine the source, and behind the source, the cause.
In our article you can find many useful tips that will help you get rid of dampness in your garage.
Why does condensation appear in the garage?
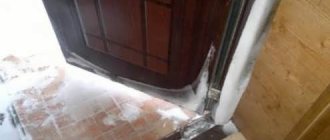
During the cold season, the ceiling (walls, gates) of the garage are cooled, and the air in the garage is much warmer than these surfaces. When the temperature difference reaches a certain limit, the moisture contained in the air begins to condense.
Billy@BonesFORUMHOUSE Member
The principle of condensation formation is the same everywhere - the presence of a surface with a temperature below the dew point.
The air from the floor of the garage and the car is humid and warm, the ceiling is cold - which means condensation is inevitable.
To eliminate excess moisture in the garage, the first thing you need to do is:
- equip a high-quality ventilation system;
- make proper insulation.
Dehumidifying air using improvised methods
If the air in the garage is damp, and purchasing a dehumidifier is not yet possible, then the following methods can be used as a temporary solution:
- silica gel balls poured into containers and placed in different places in the garage. Some craftsmen pour them into a bottle, and to make the air circulate better, attach a small fan. Silica gel can be dried and reused;
- white moss in powder form, placed in containers around the room, work in the same way as silica gel. It actively absorbs moisture;
- Calcium hydroxide has good absorbing properties;
- Another option is clay brick. It is heated well in the oven and placed in the garage. As the brick cools, it absorbs moisture. For high-quality drainage, you will need several of these bricks, and you must work carefully so as not to get burned;
- some advise using hydrochloric and sulfuric acids, but the possible risk of burns and poisoning is higher than the likely benefits of the methods, so they should not even be considered.
You can check the effectiveness of such improvised dehumidifiers using a hygrometer. The simplest devices cost a penny, but they measure the humidity level quite accurately.
When using these homemade dehumidifiers, remember that a device specifically designed for dehumidification will always work much more efficiently, especially if it is chosen correctly.
Tags:Garage
Air exchange rates
According to SNiP 21-02-99 “Car Parking”, a warm garage must be equipped with supply and exhaust ventilation, and in such a room the air temperature must be maintained no higher than 5°C.
Ventilation in the garage is needed to:
- dry the room intensively;
- dilute and remove exhaust gases;
- dry the car.
ABOK standard “Residential and public buildings. Air exchange standards" requires at least 180 cubic meters of fresh air per hour per passenger car.
Foreign manufacturers of ventilation equipment (XPELAIR, UK) believe that a garage should provide 6-10-fold air exchange: for a garage with a volume of 60 m3 - from 360 to 600 m3/h.
MatildaFORUMHOUSE Consultant
No one in their home adheres to these standards, but it is necessary to ventilate at least 0.5 - 1 volume per hour, otherwise the machine will begin to rust.
How to make a ventilation system in the garage with your own hands
In an ordinary garage, natural ventilation is sufficient; this primitive scheme is chosen by most motorists - this is a pipe with an outlet at the highest point of the roof on one side and an inlet opening at the ground of the garage on the other side (at a level of 30-50 cm from the floor).
The supply and exhaust openings should be located diagonally in opposite walls of the garage.
The “supply” is usually done on the side of the gate, and the “exhaust” is on the opposite side of the garage.
This is what the ventilation diagram for a garage without a basement looks like.
sergey040FORUMHOUSE Member
The inlet opening is located near the garage floor at a height of at least 100 mm. Exhaust: the hole is located near the ceiling (100 mm below). The outlet pipe rises above the roof by at least 500 mm.
For effective ventilation, the height difference between the supply and exhaust ducts must be at least three meters.
Therefore, they try to raise the exhaust pipe on the roof of the garage as high as possible by 1–1.5 m.
To arrange ventilation for a garage with a basement, the following scheme is used
Under no circumstances should the vent from the basement communicate with the garage space, and the entrance to the basement should be sealed.
To enhance ventilation, city owners quite often make two exhaust pipes and two supply openings (or a gap under the garage door with the ability to close it).
If natural ventilation is not enough, you need to consider installing fans.
Methods for waterproofing a burial pit
It is necessary to check all sources of moisture in the basement and isolate the room from them
. In order not to dry out the underground every month, you should initially take effective and efficient measures to prevent moisture from penetrating into it.
It makes sense to use one of the following technologies for passive drying of the structure:
- External drainage. This method is possible if the garage is a separate building, not combined with a residential building and not among its cooperative counterparts. A ditch is dug around the perimeter into which perforated pipes are inserted. The trench is filled with crushed stone and sand, and the pipes are led into wells located below the level of the garage foundation.
- Internal drainage. With the help of such a system, you can quickly and effectively combat dampness even in pits with a high groundwater level. The essence of the method is that a ring water collector is installed around the perimeter of the pit floor and is discharged into an external well, from where it is pumped out by a pump.
- Injection method. This method does not require any effort or excavation work, but considerable funds are required. They are required to purchase an expensive product that penetrates the mass of concrete or other material that makes up the walls and floors of the pit. It is introduced through drilled holes and after crystallization forms a waterproof layer.
The choice is made individually both during construction and after a critical situation arises.
Internal insulation of the garage
Ventilation may not cope with condensation - you may need to insulate the garage from the inside to change the location of the dew point. To do this, choose moisture-resistant materials with low thermal conductivity. Most garages in Russia are insulated with polystyrene foam, although its modern analogues, polystyrene foam or penoizol, are thicker and insulate better.
To insulate a garage, it is not recommended to use mineral wool and other fibrous materials, which get wet, lose their properties and inevitably lead to local disasters in the garage.
Alexb4FORUMHOUSE Member
I insulated the ceiling in the garage with mineral wool, which I don’t recommend. When the temperature changed, condensation accumulated on the floor slab, and as soon as the stove was heated, it all began to flow down. The mineral wool was getting damp and was of no use.
When insulating a garage, remember that:
- Polystyrene foam and its derivatives are mounted on the sheathing, and sheets of finishing sheathing are attached to it.
- There is no point in installing thermal insulation in a damp and cold room, so before starting work, the garage is heated with a heat gun or a hair dryer.
- Thermal insulation will not work properly without sealing the joints between the materials. One of the reasons for the appearance of condensation is poor sealing of seams.
- In brick garages and shell rock garages, the walls are insulated on both sides. There is no external insulation in a metal garage.
Solid garage floor
Another important measure for eliminating and preventing condensation in the garage is concreting the entire surface of the earthen floor and the inspection pit of the garage so that moisture from the soil does not enter the room. If for some reason this cannot be done right now, you need to find another way to completely cover the ground.
AfavaFORUMHOUSE Member
The most budget-friendly option is to lay roofing felt, linoleum, or whatever you find from this range under the garage.
The problem of condensation in the garage can be solved by installing a blind area (without it, rainwater may flow under the garage) and eliminating possible foundation defects.
Preventing dampness
Do-it-yourself bathhouse in the basement of a private house
As usual, this “disease” is easier (and cheaper) to prevent than to treat. Still being decided at the design stage:
- If groundwater is close or its level rises significantly in spring/autumn, external waterproofing is necessary. Liquid compounds are applied to the outside walls (better) or rolled ones are fused (cheaper, but less effective).
- If the cellar is being built on a slope, a drainage pipe must be laid in the ground above it, which will drain the precipitation flowing down the slope.
- A blind area is made around the cellar (or the building under which it is located), which removes precipitation flowing from the roof.
- Inside the cellar, in opposite corners, there must be two ventilation pipes with a diameter of at least 125 mm. One of them ends at floor level - 10 cm higher. Air from the street or room enters through it (supply pipe). The second ends almost at the ceiling - 10 cm below its level. This is a hood. Ventilation pipes on the street should be covered with umbrellas to prevent leaves and precipitation from getting into them. The exhaust pipe (the one that ends near the ceiling) should be higher and it is better to install a deflector on it to activate the draft. It can be painted black: due to heating from the sun, the draft should be better. Another subtlety: for good traction, ventilation ducts with natural air movement must be straight. If it is necessary to make a bend to the side, its angle of inclination must be at least 60° relative to the horizon, and the length of the inclined section should not exceed 100 cm.
- Between the room located above and the basement there should be a vapor barrier that prevents moisture from penetrating both from the basement and into the basement.
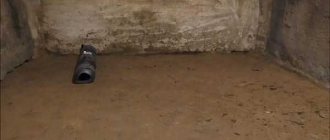
Inspecting the floor
Very often the floor in the cellar is made of earth. This is often the source of excess moisture. Through it, the moisture contained in the soil gets inside. To reduce humidity in the cellar, you need to level the earthen floor, compact it and cover it with thick plastic film. You can use roofing felt, but it breaks more often. Although it seems more durable, it breaks due to less elasticity.
There is no need to pour sand or soil on top of the film. Sometimes there is a large amount of water in the basement (accidental flooding). Then you simply remove the film, the water goes partly into the ground, partly evaporates through the ventilation. After the dampness has gone, you can re-cover the floor. If there is earth or sand on top, you will need to poke around in this slurry, extracting the film.
If the floor in the cellar is earthen, most of the moisture enters through it
If after laying the film the humidity level in the cellar has decreased, then you have found the reason. You can leave everything as is, just change the “flooring” periodically, or you can make a concrete floor with full waterproofing. The choice is yours. To prevent the film from tearing when people walk on it, knock down the wooden panels and throw them on the floor.
Improving waterproofing
The second reason why humidity increases in the basement is an insufficient degree of vapor barrier or waterproofing of the walls. This usually occurs if the cellar is lined with brick, especially silicate brick. The material is very hygroscopic and allows water vapor to pass through well. They settle in drops on the ceiling and all objects.
The problem can be solved if you make good external waterproofing: dig out the walls and apply bitumen mastic in two layers. Previously, they were coated with resin, but mastic is more effective and easier to handle.
Brick walls require additional waterproofing
But excavation work is not always a joy, and it’s not always possible to dig out the walls. In this case, you can make internal waterproofing of the cellar walls. For this purpose, there are cement-based impregnations: “Pnetron”, “Kalmatron”, “Hydrotex”, etc. They penetrate to a depth of up to half a meter into the thickness of the material (concrete, brick, etc.) and block the capillaries through which water seeps. Water permeability decreases significantly. Their only drawback is the price. But they are really effective.
All these measures will prevent the appearance of high humidity in the basement. But what to do if there is already moisture, how to dry the cellar? Next, we’ll look at ways to reduce humidity.
Garage roof insulation
When they get tired of the drops falling from the garage ceiling every time the heater is turned on, car owners think about insulating the ceiling.
The easiest way to insulate a garage ceiling is to pour a thick layer of brick chips or expanded clay onto the roof. These materials:
- perfectly absorb moisture;
- dry well.
Typically, these bulk materials are covered on top with roofing felt, which is placed on a screed, or plywood (OSB). This design lasts for 10 years.
If you don’t want to spoil a good roof made of corrugated sheets, there is an option to glue sheets of 55mm EPP or other insulation onto the mounting foam from the inside.
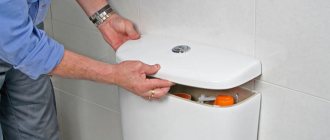
Modern technology is an effective alternative to natural resources
This method provides good results, but the devices must be used wisely. Thus, in the process of drying walls with an electric dryer, excess moisture loss in certain areas should be prevented. If the walls are already covered with plaster, it is better to put the device aside: sudden removal of moisture will lead to the appearance of cracks on the surface of the wall. In this case, preference should be given to natural drying.
Similar methods of drying a wooden house include an infrared heater and the electroosmosis method. In the latter case, it is better to use the services of a professional.
Summarizing
Condensation in a garage is a serious problem that leads to corrosion of the car body and slow but steady destruction of the garage premises. Therefore, it should be eliminated immediately. To understand how to get rid of condensation in the garage, you first need to find out the reason for its occurrence. But, in any case, a garage always needs good supply and exhaust ventilation, and if it doesn’t work, you need to move on to insulating the walls, ceiling, gates and waterproofing the floor.
At FORUMHOUSE you can learn more about how to get rid of condensation on the garage floor, how to properly arrange ventilation in the garage, and how to better insulate the garage. Read our article about the interior arrangement of a garage, watch a video on how to build a garage-workshop with an attic.
Subscribe to our Telegram channelExclusive posts every week
How to dry a basement after a flood
When flooding occurs, water is pumped out with a drainage pump.
Most property owners have to deal with this phenomenon after snow melts or heavy, prolonged rainfall. The problem is serious and you need to get rid of it as quickly as possible, since water has a destructive effect on the cellar, its contents, foundation and garage walls.
The first step is to remove the liquid from the pit. Considering that there may be several cubic meters of it there, you should use means of mechanization. Scooping with a bucket may take several days.
- Motor pump. You can rent it or contact a rescue service that has similar equipment. If flooding situations tend to occur regularly, it is advisable to buy the product and always have it on hand.
- Ilosos. Calling a sewage disposal truck solves the problem of pumping out and at the same time disposing of dirty water, most likely contaminated with pathogens.
After getting rid of the water, you need to remove all the food, things and furniture located there from the cellar. Based on their condition, a decision is made regarding restoration or disposal to a landfill. Then you need to clean the room from accumulated contaminants. They are first cleaned with a scraper, then with a brush, and finally wiped with a rag soaked in a chlorine solution. Next you need to assess the damage caused to structures. If necessary, they are repaired, strengthened, and ventilation ducts are cleaned.
After this, all that remains is to dry the cellar in the garage. This must be done immediately, using all available means and possibilities.