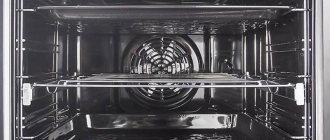
| Canon head restoration | cleaning the HP print head | Epson head cleaning | Brother head cleaning |
Cleaning the print head of an inkjet printer is a complex, painstaking procedure that requires a lot of experience and care.
Moreover, cleaning the head requires special solutions and specialized equipment. Complais professionally performs head cleaning, inexpensively and with a high recovery rate. Cleaning the head on your own most often ends in its death. We regularly receive printers with heads that have been cleaned themselves, but they can no longer be restored.
Software testing and troubleshooting
The print quality of inkjet printers directly depends on the condition and performance of the nozzle. The software provides specific ways to deliver ink through the nozzles. Blocking even one hole negatively affects the quality of the resulting image. Before starting work, it is recommended to test the printing device.
Print head check result
Nozzle test, internal test mode to check optimal ink supply to the print head. Perform a similar test on an Epson printer, perhaps using available computer software. By following the instructions of the “conductor” (selecting a printer model, “setting up”, “maintenance”, “checking nozzles”, “printing”), the test result will be displayed on the monitor. The image will show the actual performance of the printing device compared to the reference image. You can see what it looks like in the photo. The program will automatically detect the need to clean the injectors and offer to do so.
you can diagnose and clean injectors using the software
It should be remembered that frequent cleaning (more than 2 times in a row) can lead to malfunctions of the waste ink counter (“pamper”). This is especially true for Epson printers and MFPs.
It is also possible to perform the DS test without using a computer, using the software built into the printing device. The combination and sequence of control buttons on Epson printers can be found in the video.
For different models, the DYUZ test may differ only in the information displayed on the computer monitor or in the combinations of control keys used. But the principle remains general: if the quality of the printed sample differs from the reference one, you will be asked to clean it.
How to remove the print head
Canon iP3600 Print Head Latch
Open the cover while the printer is turned on to remove the carriage from the parking space. Turn off the printer. Remove the cartridges. The print head is clearly visible, but it is too early to remove it.
In different printer models, the latch holding the PG looks different, although the principle of operation is the same in almost all models. On the right side there is a lever or frame has a certain shape. You have to pick it up.
The MG5440 model has a slightly different principle. The catch here is the strip with the image of the ink colors, which does not rise up - you need to pull it towards you until it clicks. Now the PG is free, tilt it forward and carefully remove it from the printer.
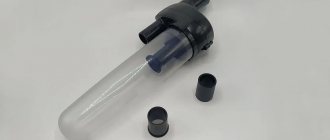
Cleaning the head on the cartridge
If your printer has a built-in head cartridge, remove the container from the device, turn the nozzles up and apply a few drops of product to them. After 10 minutes, wipe off any excess detergent with a napkin and check to see if any dye gets on the napkin. If it was not possible to wash the nozzles in this way, they must be immersed in a container with detergent. You need to soak for at least 2-3 hours.
To help the liquid get into the nozzles better, you can place a small piece of toothpick under the inkwell so that the nozzles do not come into contact with the bottom of the container and remain immersed in the solution.
After immersion, dry the entire surface with a napkin, especially the contacts. The cartridge is inserted into the printer and the nozzle check pattern starts. If the cleaning quality is poor, try blowing the nozzles through the vent:
- Cut the syringe needle in half and put it on the syringe.
- Place a soft rubber band on the needle. This will ensure that the syringe fits snugly against the walls of the ink container.
- The needle is inserted into the air intake hole of the cartridge, and the elastic band is firmly attached to the walls.
- The air from the syringe is carefully pressed inside. There should be a piece of gauze or napkin under the bottom of the ink container, along which the ink will flow under pressure.
- Color ink bottles with three holes at the top are cleaned in the same way.
Cleaning methods
Soaking is often necessary before cleaning the head. You don't always need to remove it to do this. For example, you can fill the trays in the service unit by flushing to the brim and move the carriage to the parking lot. After several hours, clean the printer using cleaning agents. You can even print. But more often the PG is removed and placed on a napkin with washing. Then you can move on to the cleaning itself.
Methods:
- use cartridges with flushing fluid
- pumping with a syringe through the fittings
- digging
- in an ultrasonic bath
In the first case, we fill the cartridges with rinsing agent and start cleaning the head. Not a fast and ineffective method.
Pumping with a syringe. We draw the wash into the syringe, then some air and pump the channels in both directions. This method is for experienced craftsmen because the head can be easily damaged.
Digging is a simple and very long way. We place the head on a napkin with rinsing and drip rinsing onto the filters. We continue until clear liquid comes out of the nozzles. Not always possible and effective. A lot depends on the cleaning agent. Impossible if fluid does not pass into the channel.
Cleaning in an ultrasonic bath is very effective for HP and Canon PGs. But you need a lot of experience.
I will also give an example of printing a nozzle test from a computer for Canon printers
1. I'll repeat: Click the Start button, go to Control Panel, and open Printers and Faxes or Devices and Printers, depending on your operating system. A window like this will open (see below) and let's say your printer is now a Canon Pixma MG2140:
2. Then “Print Settings”:
3. Find the “Service” tab:
4. Just like the Epson printer in the "Support" tab, the "Maintenance" tab of the Canon printer has various functions to maintain the printer, the moment we need to "Check Nozzles", click:
Review: FormLabs Form 2 vs. Ultimaker 3
FormLabs Form 2 and Ultimaker 3 are perhaps the most popular 3D printers today, capable of high-quality printing with incredible surface detail quality. Moreover, these two devices use completely different technologies, and therefore there are a lot of differences between them. Many will say that it is wrong to compare them or Read more→
- 05 February 2022 23:53:22
- Reviews: 0
- Category: News
Manual cleaning
It is not always possible to solve the problem of ink flow and print head channel clogging using the built-in software and the utilities offered. You will then have to do the cleaning manually using injector cleaning and rinsing solutions and regular syringes.
Cleaning the print head with a syringe
Solutions can be divided into three main groups:
- neutral;
- slightly acidic;
- alkaline.
Neutral solutions (distilled water, isopropyl alcohol) are considered the safest. But that's just blushing. In the case of old dried ink and possible contamination by debris, conventional washing is not always effective and requires first dissolving the resulting block. In this case, weakly acidic and alkaline solutions are used.
For example, cleaning the nozzles on an Epson is different from cleaning the nozzles on other models. Epson laundry liquid cannot be used with Canon models due to the different types of ink used. They will crash on Canon models.
Please note that too high a solution concentration may permanently damage the print head. For various models of printing devices, only those tools that are specified in the operating instructions are used.
Fluids for cleaning injectors
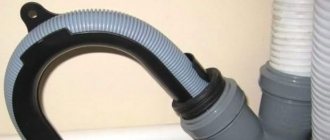
After checking the CISS systems for mechanical damage and leaks in the supply system that impede the normal flow of ink (hoses, interconnections and cartridge), it is necessary to deal directly with the cartridge and ink supply fittings (all colors). You will need a clean bandage or wipe, a syringe, and cleaning fluid. The diameter of the syringe nozzle must match the diameter of the nozzle. One by one, releasing air from the syringe (admittedly technical, but therapeutic), wash each nozzle. In case of severe blockage, put a plastic pipe of the appropriate diameter on the contaminated fitting and leave it for some time. Typically, it will completely dissolve and wash away the old ink that is causing the blockage. Forcibly cleaning the injector using a syringe and a tray filled with flushing fluid in the opposite direction is not recommended due to the possibility of air entering the system.
If all the manipulations do not lead to the restoration of ink permeability, all that remains is to contact the service center. Unfortunately, even there it is not always possible to restore the functionality of the print head and print quality.
Signs you need cleaning
Any printing equipment requires timely maintenance to avoid malfunctions, operational problems or complete failure. Carrying out preventive measures is a sign of good form in modern realities. If in a large office the services of specialized companies are used for such purposes, then at home everything can be done independently.
The printer itself will “inform” its owner about the need for cleaning due to the poor quality of printed text or photographs. The first signs may be:
- If, when printing a test sheet for checking the nozzles (head nozzles), gaps, white lines, and incorrect color reproduction are visible (for example, the printer prints in a red or pink tint), while one of them may be completely absent, then there is a high probability that a blockage has occurred. This problem occurs from time to time when printing equipment is used intensively.
- The printer head deals with liquid ink, which due to its physical properties can dry out. If you don't use your device for a long time, this is guaranteed to happen. For different models, the drying time is different - from several days to a month.
- Using different types of ink or refilling with ink from another manufacturer may cause the chemical solutions in the printer to mix. Due to internal reactions, the ink may harden and even damage some parts of the print head.
- For preventive purposes, cleaning is recommended after each ink refill.
If you decide to use consumables from another manufacturer, then before refilling it is necessary to completely flush the ink containers, delivery channels inside the device and the head itself.
Teams:
-c | –Clean-head Cleans the printer head. -n | –Nozzle-check Prints a nozzle check pattern. Gaps in the pattern indicate dirty or clogged nozzles. If there are gaps, you need to clean the printer head. -a | –Align-head Aligns the printer head. ATTENTION! Using this feature incorrectly may result in poor print quality and/or damage to the printer. -s | –Status Displays the printer status. -i | –Ink-level Shows the ink level in the printer. This requires read and write permissions for the printing device. -e | –Extended-ink-info Get detailed information about the ink in your printer. This requires read and write permissions for the printing device. -d | –Identify Retrieve information about the make and model of the printer. This requires read and write permissions for the printing device. -X | –Reset-ink Resets ink levels. This requires read and write permissions for the printing device. -l | –License Displays the license/warranty terms for this program. -M | –List-models List of available printer models. -h | –Help Print this help.
Extreme methods
So, in fact, we have run out of methods that still have a high chance of saving the print head. If the goal cannot be achieved, you can use several more much riskier methods:
- Press out the liquid with a full syringe without an air cushion. The pressure on the nozzles will increase significantly, as will the risk of damaging them. Do not press the head against the fabric, but lift it slightly. Press the piston carefully, as before, the pressure is much greater due to the lack of an air cushion.
Hold the steam generator nozzles over the steam for several minutes and push through the flushing heated to 40–50 degrees.
Place the head on the surface of hot water for a few minutes, without dipping more than a millimeter, and draw the liquid through the nozzles.
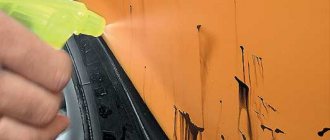
The print head is washed (picture taken from www.chernila.com) (Click to enlarge)
- Use a more aggressive product: mix 9% vinegar and distilled water in a ratio of 1:9. This composition cleans well, but has a destructive effect on internal parts, and after using it, it is necessary to rinse with an alkaline solution to neutralize the acidic environment. Do not use this method if you are not prepared for the fact that the print head will fail in two to three months.
If one of these extreme methods helped achieve the desired goal, do not rush to return the PG to the printer. After such extreme measures, be sure to dry it with a hairdryer. Do not overheat the head: take breaks for about twenty minutes. If you doubt that everything has dried well enough, leave it near the battery for two days, and before installation, drop a little flushing liquid into each gateway.
You can also order repairs (rinsing / restoration) of the Canon print head by leaving a request.
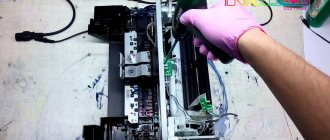
The print head in inkjet printers needs to be cleaned occasionally. Otherwise it may become clogged. As a result, print quality will be greatly reduced. And if the ink dries out completely, the device will stop working altogether. Canon devices have a hardware cleaning function. You launch the program on your computer, and the gadget itself removes blockages. You can also wash the part manually. But for this it needs to be removed.
How to clean and align the print head of a Canon printer.
We clean nozzles on Epson printers
Before proceeding with the following methods, you should know that such an operation should be carried out only when necessary, as it negatively affects the cartridges, accelerating their wear. Therefore, it is imperative to carry out the analysis, which we will demonstrate in the first version.
Method 1: Software nozzle cleaning
The printer driver has built-in maintenance tools, including a nozzle cleaning feature. It runs manually and lasts a few minutes, after which you can see the result. Let's take a closer look at this process:
- Go to the Start menu to open the options menu by clicking the gear icon.
Here you will need to find the “Devices” section.
In it, use the left panel to go to the “Printers and Scanners” section.
Left-click on the desired Epson printer.
Click the "Manage" button that appears.
Open the Print Settings category.
Go to the “Service” tab.
First check the nozzle to see if it needs cleaning.
Read the notification that appears and click the “Print” button.
All that remains is to familiarize yourself with the checklist you received. If cleaning is required, you will need to press the appropriate button.
Cleaning will begin immediately after clicking “Run”.
At the end, it is recommended to print a special pattern to ensure the effectiveness of the procedure.
If you do not see visible results after two cleanses, we do not recommend doing it again, it is better to move on to the next more effective method for the current task.
Head restoration in Brother printers
The Brother heads are also piezoelectric, but they are much more difficult to remove and clean than the Epson ones. In addition, these heads are designed differently. The main advantage of Brother heads is that they do not burn in such massive quantities as Epson.
And all because there are no fittings. In addition, the head is mounted on two rails and you need to disassemble half of the printer and remove the rails.
Removing the Brother head is a much more complicated procedure than in Epson, HP and Canon, it’s better not to do it yourself. In addition, there are many nuances when cleaning a Brother head, which you can read about here.
In order to print a nozzle test on Epson printers or MFPs, you must do the following:
1. Click the Start button to access Control Panel and open Printers and Faxes or Devices and Printers, depending on your operating system. A window like this will open and let's assume your printer is an Epson T40W:
2. When the printer is turned on and connected to your computer, its icon glows brighter than other unconnected devices.
Right-click the connected printer and select Print Settings:
3. In the window that appears, find the “Service” tab and click on it:
4. In the “Service” tab we will need the “Check injectors” button, read the description and click on it:
5. In the window that opens, read the information, fulfill the requirements specified in it and click “Print”:
6. And in front of you is another window showing the nozzle check standard for a specific printer model and a nozzle test with a possible problem (with a certain number of non-printing nozzles), as well as two buttons “Ready” and “Clean”.
If the printed test meets the standard (signed “Good”), all nozzles will be printed and the printer will produce a high-quality image, but if there are gaps in the test, cleaning is required, to do this, press the “Clean” button up.”
Attention! I don't recommend doing more than two cleanings in a row because you could clog the diaper meter and create an additional problem for yourself. This is more about Epson printers. After two cleanings it is recommended to leave the printer alone for a couple of hours, after printing the test again it is often ideal, if not, look for a problem in the ink, ink supply or in the printer itself.
On most and perhaps even all Epson printers, the ability to print a nozzle test without a computer is available by pressing a certain sequence of buttons on the printer's control panel, for example, here's how you can print a nozzle test. See the video for nozzles on most Epson printers:
Head cleaners
To clean the heads, use a special liquid, the so-called. washing, which is sometimes called cleaner.
Epson head washes
There are several cleaning liquids produced by Epson: 1. Special Repair Liquid 1, as well as A49 (discontinued) for restoring Stylus Color 400/440/600/640 heads, Stylus Photo/Photo EX and only. There are no recommendations for using it with other printers. 2. A29 shipping liquid, Washing Liquid (for canning and washing). It is developed by Epson for Stylus Color 900/980 with water-soluble ink and nothing more. S46 shipping liquid (preservative) – designed for older models, such as:
- Color 300...Color 880, Color 1160, Color 1520, C20...C62, Photo, Photo 700-1290 with water-soluble ink
- C70, C80, Photo 2000/2100 with pigment ink.
CR02 Shipping Cleaning Liquid (for canning and washing). A69 is intended for all more or less new models of printers and MFPs. Suitable for both water-soluble and pigment inks: C58-C87/88, CX2800-CX7800, R200-R2400, RX420-RX700.
Cleaning the Epson R200 head, Epson L800 printer, and Epson RX500.
Not original service fluids
For cleaning heads, the German company OCP produces the following basic liquids.
OCP ECI is a non-aggressive liquid for resuscitation of blue EPSON print heads. It allows filling directly into printer cartridges. But it only helps with small blockages.
OCP RSL is a basic service fluid for all types of printers. But the liquid works best when heated to 35-45 degrees.
OCP LCF III is a service liquid for pigment soaking.
WWM: Washer fluid WWM-CL08 for Epson with water-soluble ink; Washer fluid WWM-CL06 for Epson with pigment ink.
Home-grown cleaning products from forums
For example, Mister Muscle (MM), HELP for glass.
MM with ammonia, green - effective cleaning for inkjet printer heads. Good for washing Epson water-soluble ink (that's what they say).
MM with acetic acid can be blue and orange. It is recommended for Epson pigment inks.
HELP pink.
The main components in the products are isopropyl alcohol, sodium sulfoethoxylate, and ethylene glycol. To make a rinse, you need to add 10 parts of distilled water to the product. Those. dilute 10 to 1.
Our opinion of Mr. Muscle is a completely useless thing. Because it has never helped with severe blockages. All the stories on the forums about the miraculous properties of MM are the tales of Scheherazade. In reality, water-soluble ink can be washed with water.
Solving problems with Epson equipment
Paint is sometimes produced in violation of technological standards. Sometimes the driver supports a profile if it does not play correctly.
You can solve the problem with the help of professionals as follows:
- reflash the printer by setting the correct color profile;
- change ink;
- It is possible that the supplier bought the paint from a seller of counterfeit cartridges. In such a situation, the printer prints in blue instead of black, since the manufacturer does not know the exact formula of the ink pigments;
An experienced technician should be able to find out what is causing the problem with your Epson. It is impossible to properly reflash an MFP without the services of a professional. However, eliminating this effect is a very real task.
Checking the nozzles from the printer panel
Epson models also feature a nozzle checker without connecting a computer. To perform this test, follow this algorithm (for example, for Epson L210).
- Load paper and turn off the printer.
- Press and hold "Sheet/Trash" and press the power buttons at the same time.
- After starting the device, release the power button, after starting the test, release the “List / Trash” button.
- Images will print if there are many missing dots, so cleaning the nozzles is required.
Pre-orders for Dazz3D 3D printers are now open
The Chinese company Dazz3D announces the launch of the project on KickStarter and is accepting pre-orders for the Dazz3D Basic and Dazz3D Pro 3D printers. These revolutionary new devices are aimed at both the professional and amateur markets. Read more→
- 27 September 2022 21:48:51
- Reviews: 0
- Category: News
Printing with cleaning fluid
The method helps to reset the non-removable head built into the cartridge. Detergent is poured in place of the dye and cleaning begins. If, when printing on a color printer, defects in only one color appear in the image, the cleaner should be poured only into the problem compartment. After cleaning, the device cannot be used for two hours. During this time, the cleaning liquid will have time to dissolve the paint that has dried in the nozzles.
After 2 hours, open any graphics editor and fill the page with the color that you had problems with before cleaning. It is optimal to use Photoshop, since it can use the CMYK color scheme when filling the sheet. The resulting fill is printed on a standard sheet, and first you need to set the maximum print density. Residues of the cleaner mixed with the paint will leave marks on the paper. If horizontal white streaks appear during printing, the print head has not been cleaned sufficiently. When the filling becomes homogeneous, remove the block in the head.
After washing, the cartridge is refilled with ink, the nozzles are programmed to be cleaned, and the color sheet is printed again.
Sources
- https://printergid.ru/expluataciya/promyvka-dyuzov-kartridzha
- https://skolkogramm.ru/info/printer-epson-v-linux-proverka-dyuz-i-prochistka-pechatayushhej-golovki-itc-life
- https://vseproprintery.ru/voprosi-i-otveti/dyuza-chto-eto-takoe-v-printere-epson-canon-hp-proverka-test
- https://simulatorpiano.com/ru/kak-prochistit-dyuzy-na-printere-epson/
- https://computermaker.info/epson-l210-test-djuz.html
- https://univer-irk.ru/czvet/chto-takoe-test-dyuz-i-kak-ego-pechatat-na-printere-canon-i-epson
- https://printeru.info/oshibki-i-problemy/dyuzu
- https://PoPrinteram.ru/promyvka-pechatayushhej-golovki.html
[collapse]
Causes of blockages
Most often, the print head does not want to work properly:
After a long period of inactivity
When the ink has simply dried out. In this case, several sessions of cleaning the nozzles through the printer utility program can help. If cleaning twice does not help, use the “Deep cleaning” function; you can repeat it after a day. Didn't help again? This means the problem is much more serious and may require flushing.
Due to mixing of incompatible paints
Water-based and pigment inks categorically do not want to cooperate, they curl up, give sediment, and quickly clog the nozzles. It’s good if you noticed the problem in time and the nozzles did not have time to burn out. Also, paint of the same type from different manufacturers may be incompatible. Ideally, ink tanks should be refilled with the same consumables. Some experts even advise not to print with new original cartridges if you are going to refill them later, but to immediately rinse and refill with the exact ink that will always be used.
As a result of printing with an empty cartridge
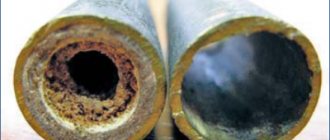
Carefully monitor the condition of the ink tanks, refill them on time, as printing with leftover ink quickly damages the ink tank. First, the nozzles become clogged, and then, if you do not pay attention to the print quality in a timely manner, the nozzles burn out. Here, washing will not help; such a head cannot be restored.