How to properly prepare dill for drying
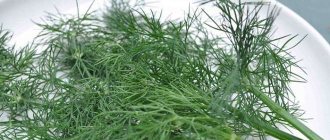
It is recommended to dry only young, juicy, fresh dill. It appears in late spring, early summer. Collection is carried out until the formation of umbrellas. At this time, greens contain the maximum amount of aromatic substances. But it is allowed to dry the seeds separately, or whole grains.
Preparation instructions:
- We collect in dry weather. Cut off at the root. It is advisable to do this in the morning after the dew has disappeared or on a cool evening. In hot weather, plants are not cut.
- Let's sort it out. We throw out limp, yellowed, pest-damaged twigs. Drying such raw materials is useless. We immediately tear off the green and fresh branches and get rid of the thick stems.
- We wash the branches under running water. Allowed to be dipped into a basin. It is important not to soak. Otherwise it will take too long to dry.
- Dry from water droplets, shake off. It is important not to delay the process. Do not let the dill wither.
- Let's cut it. It is allowed to dry entirely, depending on the chosen method.
Do you use dill seeds in cooking?
Not really
Dill can be dried in twigs, slices, and bunches. Use an electric dryer, oven, and fresh air. The shelf life of the product is 24 months. Dried herbs are used in cooking, medicine, and cosmetology.
How to properly collect a plant
How to properly freeze broccoli for the winter at home: step-by-step instructions and use of the preparation
The result of drying and the quality of the resulting product depend almost 100% on the correct preparation of raw materials. A few simple rules guarantee excellent results:
The day before cutting, the greens need to be watered. The best time for collection is dry weather, morning dew should completely evaporate. Attention. Greens collected immediately after watering or in rainy weather will darken or even rot during drying. The amount of dill required for drying is cut closer to the base.
This way the raw material will be cleaner and the roots can be pulled out later. If desired, you can pull out the plants by the roots.
Preparation of raw materials
Do you have an electric dryer? Not really
- If the greens are pulled out with roots, they should be carefully trimmed.
- Plants affected by pests, yellowed, withered and damaged branches must be discarded. You also need to sort out garbage and weeds. If the dill is overgrown, it is recommended to remove the rough stems and umbels.
- The stems are washed in running cold water, the excess of which is shaken off. Warm water will inevitably lead to a change in color, the leaves will wither and become unsuitable for drying. The greens are laid out on a clean cloth or paper towels and dried for 10-15 minutes.
- If desired, dill can be dried whole or chopped. The first option is suitable for drying naturally or in the oven; chopped greens can be dried in any way. In most cases, housewives “disassemble” the plant and dry the stems, leaves, and umbrellas separately.
In what form is it better to dry dill?
Ease of use depends on how to dry dill for the winter at home. The preservation of beneficial properties and aroma also depends on the type of product.
How can you dry it:
- whole with stems. The advantage of this method is maximum preservation of aromatic substances. The disadvantage is that the branches take a long time to dry, take up a lot of space, and need to be chopped. More often, bundles are made to dry vertically in ventilated places;
- twigs. The stems are removed and the thin branches are dried. The advantage is saving space. Disadvantage - it will require grinding before use or storage;
- slicing. It retains taste and aroma worse, but takes up less space. The advantage is that the product is ready for use, convenient to store, and can be dried in a short time.
When choosing, you should start from the purpose of dill. It is convenient to dry young greens for culinary purposes using small branches and cutting. In folk medicine, stems and seeds are sometimes needed. In this case, bundles of adult plants are tied together.
The seeds can be dried separately from the umbrellas. They are carefully separated, poured onto paper, and put away on the windowsill. The sun doesn't harm them.
Pros and cons of drying dill
To harvest harvested dill bushes, two common methods are used: freezing and drying. Many people use the first method of storing greens, as it allows them to preserve some of the beneficial properties of plants. However, it is better to use another method - drying. By drying ripe dill, it will be possible to preserve much more vitamins and other useful components. Essential oils are also preserved in dried herbs.
The disadvantages of drying plants include the complexity of this procedure, since not every vegetable grower can dry the crop correctly.
Methods for drying dill at home: advantages and disadvantages of all types
The old way is to sprinkle the greens on newspaper and leave them in the sun. And as a result, we get a yellow product without taste or smell. Dust will accumulate on it, and insects will have time to crawl. The method has many disadvantages. Let's look at how to dry dill with minimal loss of properties. We will try to maintain the purity and attractive appearance of the product. We will not dry it in the microwave or air fryer. There is still a lot of controversy around these devices.
Drying dill in the fresh air
The classic method of harvesting various herbs and medicinal plants. Used since ancient times. It is important not to dry it in the sun. Otherwise the color will be lost. We recommend choosing dark but well-ventilated places.
Advantages of the method:
- cheapness;
- simplicity;
- no need to follow.
Minuses:
- dust;
- insects;
- need good weather.
The disadvantages are significant, there are many of them. Only some people are not afraid of the cons. Let's figure out how to air dry dill greens correctly. You should arrange a suitable location in advance. Preferably under a canopy, without dust. To protect against insects, use gauze, nets, and thin paper. Horizontal surfaces are needed. Convenient to dry on tables. Sometimes trays are built into old shelves and multi-tiered structures are created.
Drying dill for the winter
Step-by-step instruction:
- Prepare trays, baking sheets, plywood sheets or cutting boards. Or set up a table and spread paper.
- Spread the dill sprigs in a thin layer. Or cut and scatter on a flat surface.
- It will take several days to air dry. Periodically stir and turn over.
- The finished dill needs to be transferred to a box or box. Leave in a dry place for a few more days. Then pack and store.
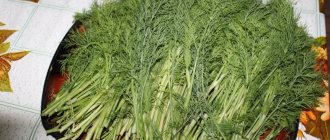
Let's look at vertical drying right away. For this method, dill is collected in small bunches of 5-7 branches. It is important not to tighten with a tight rope or rubber band. It is better to use thin sewing thread. Next, you need to hang the workpieces in the barn, under a canopy. It will take about 7-10 days to dry.
Do not use newspapers for bedding. The paint contains harmful substances and has a specific odor. The workpiece does not need it. It is better to take white paper and baking sheets. Disassembled cardboard boxes will do.
How to properly dry dill in the oven
The oven is great for more than just baking. You can dry all kinds of fruits, vegetables, herbs, including dill. The method has its advantages. The main advantage is independence from the weather outside the window and air humidity.
Advantage of the method:
- independence from weather;
- purity;
- speed.
Flaws:
- electricity/gas costs;
- need to be monitored;
- easy to spoil.
The method requires constant attention. You cannot leave for a long time or leave unattended. Gas ovens often raise the temperature above the required level. Dill will not burn even at 90-100 degrees, but the beneficial substances will die and the taste will become worse. An overheated workpiece cannot be used for medicinal purposes. Let's look at how to dry dill in the oven.
Step-by-step instruction:
- Dill should not come into contact with metal baking sheets or molds. Therefore, be sure to put paper. It is allowed to place parchment directly on the wire rack.
- Lay out the dill sprigs. Or pour out the slices. Make an even thin layer.
- Place in the oven at minimum temperature. Preferably 30 degrees. Some ovens only have 40. In any case, open the door slightly. Steam should come out.
- Dry for 2 hours. Let the dill wilt.
- Next, stir, turn over, increase the temperature to 50-55 degrees.
- We continue to dry. Periodically we stir and check. It is advisable to turn the sheets over to the other side. Near the slightly open door the process goes slower. There the temperature is lower, the humidity is higher.
- We bring it to readiness. Total time is about 4-5 hours. Exactly how long to dry cannot be determined in advance. Depends on the humidity of the dill, temperature, and thickness of the stems.
Do not place more than three baking sheets or racks at a time. Otherwise, it will take too long to dry and you will need to constantly change the levels.
Drying greens in an electric dryer
About 15 years ago, electric dryers were a curiosity. Today, almost every gardener has them. Different models have appeared in household appliance stores. Dill can be dried in the most primitive devices. It is not necessary to buy expensive equipment with many temperature settings.
Features of drying dill in an electric dryer
Advantages of an electric dryer:
- purity;
- constant temperature;
- workpiece speed.
Flaws:
- electricity costs;
- need to buy;
- limited volume.
The advantages outweigh all the disadvantages. Drying is easy and quick. The output is a clean, green, aromatic product. Let's figure out how to dry dill for the winter at home using this wonderful device.
Step-by-step instruction:
- New electric dryer trays need to be washed, wiped, and ventilated. Otherwise, a foreign plastic smell will appear.
- Next, distribute the dill in an even layer. Return the trays to the device.
- Turn on medium mode 50 degrees. Let's start drying. The simplest models sometimes have the same temperature. In this case, just turn it on.
- We turn it every hour. Every 2 hours we change the tiers. Continue drying until you get the desired result.
As it dries, the filling volume is significantly reduced. It is allowed to empty the contents of pallets and remove excess trays.
You cannot add trays of fresh herbs, vegetables, and mushrooms to pallets of almost finished dill. The humidity will increase and it will take longer to dry. In addition, different products exchange aromas.
Dry in the fresh air
How to make mascarpone at home: 7 best recipes
If the weather outside is good and it’s hot in the summer, then it would be right to dry the dill without additional equipment - you won’t have to pay for electricity or gas. The method works both in the country and at home.
It is recommended to use pallets with a perforated bottom - plastic or metal. If you don’t have such a pallet on your farm, it’s very easy to make a replacement. The gauze needs to be pulled over the top of the box so that there is a void inside that allows air to pass through.
What to do:
- Spread the dill in a thin layer over a tray or cheesecloth.
- Leave for several days in a dry, shaded place.
We recommend: “The miser pays twice”: is chipboard furniture harmful to health, and what is the cost of saving?
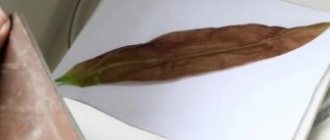
You should not lay it out in the sun if you want the dill to remain green. Overheated in the sun on a hot day, it may well turn yellow. In addition, thick branches can dry out on the outside and remain damp on the inside. And this will inevitably lead to the formation of mold, and all the work will go down the drain.
In rainy weather, it is worth bringing the pallets into the house or at least under a shed - just not in the garage, otherwise the greenery will become saturated with the smell of gasoline.
How to tell if dried dill is ready
What should greens be like? You can dry dill indefinitely. Only with prolonged exposure to high temperatures do beneficial substances die, color deteriorates, and the spicy aroma is lost. Therefore, it is important to determine readiness in time and stop. We offer step-by-step instructions.
How to tell if dried dill is ready:
- Let cool. You can't tell when a product is warm. We recommend taking a small amount and placing it on a plate.
- After a while, put it on your palm and rub it.
- The finished dill will crumble. It turns into a fine powder.
- If the branches wrinkle and do not crumble, there is a lot of moisture left inside. Need to dry further.
Stems take longer. It is not necessary to dry until completely cooked. Sometimes small branches are removed and ground over a wide bowl. Then the “naked” sticks are thrown away. In rural areas, the stems are steamed with boiling water and given to animals. They significantly increase winter milk yield and have a positive effect on the quality of milk, meat, and eggs.
Freezing in foil
This type of freezing is good because even when the electricity is turned off, the foil perfectly retains the cold. Cooking process:
- Prepare the spice. Rinse, let dry. In this case, it is better to freeze whole branches.
- Cut the foil. You can take an A4 sheet as a basis. Arrange the dill sprigs evenly in the middle. Carefully fold the edges at the top and bottom and twist the foil.
- You can add a few drops of water or oil to the stems. This way the greens will better retain their original properties. Place in the freezer.
The types of freezing listed above preserve the beneficial properties of the spice. They allow you to enjoy the taste of fresh dill for a long time. If all freezing recommendations are followed correctly, the spice can be stored for up to three years. The freshness, beneficial and taste properties of the green spice are perfectly preserved.
How to properly store dried dill
It’s not enough to know how to dry properly. Even a high-quality product will quickly deteriorate in unsuitable conditions. It is important to know how to properly store dried dill. A kitchen cabinet is suitable for short-term storage of a small portion. We recommend storing the remaining supplies in another place with a lower temperature.
Main storage details:
- temperature around +15 degrees. In a cool place, pests are less likely to appear, and the product retains the maximum amount of valuable substances. It is wiser to take a small amount for 1-2 weeks of use and leave it in the kitchen cabinet. We keep the main mass separately;
- sealed container. Linen bags and paper bags are ideal for short-term use in the kitchen. For long-term storage, choose sealed glass jars or ceramic containers with a tight lid. Polyethylene and plastic containers are absolutely not suitable;
- humidity no more than 30%. Relevant when stored in linen bags or paper bags. Sealed containers can be kept under any conditions.
Storing dried dill
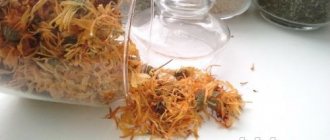
Shelf life: 24 months. Dill can be stored for years. Sometimes aromatic substances are preserved even after 3-5 years. The seeds are especially good. Only useful minerals and vitamins are not left in such a preparation. We recommend updating your inventory annually.
Foil ziplock coffee bags are great for storage. The packaging must first be wiped with a napkin, left open, and ventilated thoroughly.
Storage Secrets
How to prepare horseradish for the winter at home: 11 simple recipes
The following describes how and in what is the best way to store dried spices at home.
Optimal conditions
In order for greens to be stored as long as possible without losing the aroma of their beneficial properties, certain conditions must be observed:
- Store dried dill in a cool, dark place, protected from bright sunlight.
- The container for storing the product must provide protection from moisture and air.
- Periodically, the container must be opened to ventilate the greens and monitor their condition.
Saving methods
Dried dill can be stored by placing in:
- a dark glass jar with a tight-fitting lid;
- vacuum plastic container;
- porcelain jar;
- tin box;
- a thick, opaque bag with a zip fastener (for example, a coffee bag);
- paper bag;
- linen bag.
Important!
Greens can also be stored in a transparent container, but in this case the container should be placed in a closed cabinet.
The best containers for storing dried dill are glass containers.
It is not difficult to prepare dried dill for the winter, following the suggested recommendations. But the benefits of spicy greens during the cold season can hardly be overestimated: it will not only add a unique taste and aroma to first and second courses, but will also replenish the body’s need for vitamins, minerals and other substances necessary for its normal functioning.
Read further:
How to prepare dill for the winter and not only? How to preserve its aroma and green color?
Dill for the winter in the freezer. How to properly freeze herbs and how long does it last?
Collection, storage and use of dried mint. The benefits and harms of the plant
How to grow a rich harvest of dill? Features of bush varieties
Healing dill: how to brew and drink? What does the remedy help with?
What are the health benefits of dried dill?
Dried greens contain vitamins C, A, E, P. There is calcium, potassium, phosphorus, copper, manganese, iron, zinc, magnesium. The preparation is rich in oleic, linoleic, and folic acid. At the same time, the calorie content is only 40 kcal per 100 g. Such a supplement will definitely not harm your figure. The composition and concentration of chemical elements depends on how the dill is dried. High temperatures destroy a unique product.
Useful properties of dried dill:
- eliminates flatulence, bloating in the abdomen;
- normalizes stool, soothes the intestines;
- accelerates kidney function, relieves swelling;
- improves digestion;
- restores metabolic processes in the body;
- helps cope with nausea;
- relieves nervous tension, fights insomnia, irritability;
- facilitates the outflow of bile;
- Boosts immunity and helps fight viral and bacterial diseases.
Dill has antispasmodic, diuretic, and antibacterial effects. The plant rarely causes an allergic reaction or individual intolerance. Dill water is given to babies from birth to tame an obstinate tummy. Greens will also not harm pregnant or nursing mothers. On the contrary, it will help you stop taking chemical medications and contribute to the development of a strong, healthy fetus.
Features of drying in a microwave oven
The main advantage of this method is its speed, which is incomparable to traditional drying. The microwave removes moisture from an entire bunch of dill in just a few minutes. At the same time, the herb practically does not lose color.
For proper drying, you need to perform a number of simple steps one by one:
- Wash a bunch of fresh dill thoroughly, shake off excess moisture and blot with a well-absorbing towel.
- Then separate the branches from the stems; they are not suitable for drying, but can be frozen for soups and main courses for the winter.
- Cover a dish of suitable diameter with dry napkins and place sprigs of dill on top.
- Next, place the resulting product in the microwave for 2 minutes, then open the door and let it cool slightly.
- Repeat drying and cooling until the dill sprigs begin to crumble easily. With experience, every housewife will be able to choose the optimal scheme for how to properly dry dill in accordance with the power of her microwave.