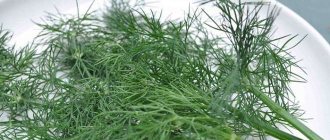
Dill is not only a tasty herb, but also a healthy seasoning. It is able to give many dishes a unique aroma and unique taste. It contains many minerals, trace elements, and vitamins that are simply necessary for the human body. There are many ways to preserve dill for the winter so that you can add it to dishes at any time of the year.
Storing fresh dill
Storing fresh dill without freezing in a regular household refrigerator cannot be called long-term. The greens quickly begin to wither and become unsuitable for consumption. But if you did not plan to store it in the refrigerator for a long time, then you just need to follow simple rules so that the greens do not turn yellow and begin to wither too early. To do this, you can resort to the following trick:
- place a bunch of the plant in a jar, but do not wash it or cut off the roots;
- pour a small amount of clean water into the jar, and cover the green leaves with a plastic bag;
- Place in the refrigerator on the bottom shelf.
Now you know how to keep dill fresh. In this form, the plant will remain juicy for two weeks! But you can store it fresh for a longer period: just plant it on the windowsill in the kitchen! Fresh aromatic herbs will not only delight you with their taste at any time, but will also become a bright decoration. So now there should be no questions about how to store fresh dill in the refrigerator. This method will also work for parsley or other garden herbs.
It is best to plant already formed plants in pots. Someone is trying to grow dill on a windowsill from seeds. Of course, this is quite possible, but often only in the summer. For winter time, you will need powerful illumination with a phytolamp.
Of course, dill can be easily bought in the store in winter. that contains more vitamin C. Therefore, it is worth learning how to keep dill fresh and fragrant for the winter. To do this, you can resort to other storage options:
- pickling;
- drying;
- freezing in cubes;
- simple freezing.
Dill dried in the microwave and vegetable dehydrator
If you don't have time for preparations, use modern kitchen assistants. They will help reduce the drying time of dill several times. Microwave the dill on a flat plate. The layer of greenery should be thin. 2-3 minutes at full power will be enough. Remove the plate carefully - it will heat up. To dry dill in an electric dryer, first sort it out, rinse with cool water and dry on a towel. Chop the greens coarsely and place them in special trays with holes. Set the temperature to 40°C or “grass” mode. In 2-3 hours the greens will be ready.
Rules for product preparation
No matter what storage method was chosen, the product must be properly prepared beforehand. To do this you need to do the following:
- Rinse collected or purchased greens under clean water. Or you can put the stems in a deep container of water. Leave them there for about fifteen minutes, and then simply rinse them under running water.
- Lay a towel on the kitchen table, place the stems on it in a thin layer, and cover with paper napkins on top. The greens must dry naturally before further manipulation.
Chemical composition, vitamins and beneficial properties of dill
Dill contains a large amount of beta-carotene and vitamins A, C, K. Fresh greens contain magnesium, cobalt and chromium salts, which are necessary for the normal functioning of the body.
The calorie content of the product is 40 kcal per 100 g, which consists of:
- carbohydrates – 6.3 g;
- proteins – 2.5 g;
- fats – 0.5 g;
- dietary fiber – 2.8 g;
- water – 86 g.
Consuming the seasoning fresh allows you to normalize the functioning of the gastrointestinal tract, especially when eating heavy foods. This occurs due to the enzymes contained in greens, which accelerate the process of fiber breakdown.
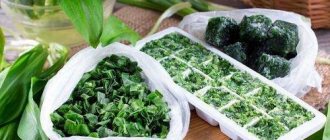
Preserving greens by freezing
Most often, housewives choose the option where they need to freeze greens in the freezer. There it can lie for a whole year without losing its rich taste and beneficial properties. It is worth noting that the beneficial qualities will be preserved 100% when frozen. Therefore, there can be no doubt that the frozen product has all the benefits that it had in the summer before it was exposed to cold.
So, how to store dill for the winter, there are two ways: store it whole or in crushed form. Each of the options is convenient and worth considering in more detail.
In order to freeze a whole plant, you need to do the following:
- Place the dried and washed stems, whole sprigs, in the freezer for two hours.
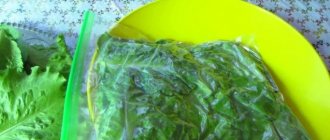
- Remove the branches and place them in small portions in perforated plastic bags. You can use cling film - whatever is more convenient for you.
- Place the bags in the freezer.
Ready! In winter, you can take out dill and start cooking your favorite dishes with it! You don't even have to defrost it before doing this. You can add whole branches to the soup for a rich flavor. But you can prepare portioned bags for winter with already chopped herbs, which you can add to any dish. To do this you need:
- Grind the washed and dried plants, the pieces should be small - a centimeter, no more.
- Place portions into bags or containers with an airtight lid. You can lay it in a thick layer.
- Place the preparations in the freezer.
It is very convenient to use such semi-finished products in winter. And how fragrant the salads are! No one will even guess that dill, prepared from the hot summer, has been added to them. By the way, many people store the plant not in bags and containers, but in plastic bottles.
Dill in a container and in foil
Dill can be frozen in a plastic container that is kept clean and dry. Place the chopped greens in dense layers all the way to the top, then close the container with a lid. Some housewives freeze greens in foil. Small envelopes are made from it, into which chopped dill is placed. The edges of the envelope are tightly twisted to prevent air from getting inside. You can also use cling film or regular plastic bags for freezing. With the right freezing technology, dill will retain its taste throughout the year.
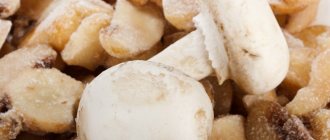
Making ice cubes
They often resort to a more interesting method of storing greens, or rather, in the form of ice cubes. To do this you need to do the following:
- Prepare the stems in the usual way, chop them quite finely with a sharp knife.
- Place the greens in small portions into ice cube trays and fill the remaining space with water.
- Place the molds in the freezer.
The finished product can be taken out of the freezer as needed and added as an aromatic seasoning when preparing first courses. It is worth noting that the semi-finished product should not be subjected to repeated defrosting and freezing - this will ruin the taste of the product.
Fragrance oil with dill
Green butter is an appetizing spread for sandwiches, croutons, rye crackers and a tasty addition to meat, vegetable and fish dishes. If you add a piece of butter to your favorite side dish, it will become even tastier. This oil is used to fill tartlets, grease savory pancakes with cheese, mushroom or meat filling, and add it to creamy soups. Dill flavored oil can be put on a hot steak - no sauce needed!
Ingredients:
- butter - 300 g
- dill - 2-3 bunches
- lemon zest - 1 tsp.
- salt, pepper - to taste
Cooking method:
- Leave the butter at room temperature for several hours. It should become soft.
- Sort out the dill, rinse it with cool water and finely chop it.
- Place the butter in a clean and dry container and mash it with a fork. Add dill and zest, salt and pepper. Mix well.
- Place cling film on a work surface. Place a strip of butter on it. When wrapping, form a sausage, secure on both sides and place in the refrigerator.
At any time, you can take out dill oil, cut off a piece of the desired size and use it in the process of preparing or serving a particular dish.
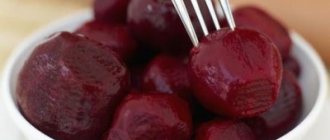
Salting method for the winter
This option is also in demand among housewives. In this form, dill can really be stored for a very long time, delighting you with its taste if necessary. The salting process is very simple:
- Prepare the greens as described above.
- Cut off the roots, it is also advisable to remove thick petioles, let only green young branches remain.
- Chop the prepared herbs and sprinkle with salt: one part of the dill and one part of the salt.
- Place tightly in sterile jars, add a layer of salt on top, and close tightly with nylon lids.
- Store jars in the refrigerator.
This harvesting method allows you to preserve the plant without loss of quality and taste until next spring. Dill in salted form is perfect as a soup dressing or a fragrant seasoning for potatoes and various cereals. But it is worth remembering that dill seasoning turns out to be very salty; when preparing the dish, you need to be careful not to oversalt it.
What method of preparation will preserve the aroma?
Preparing dill in oil allows you to preserve the aroma and color of fresh herbs as much as possible. Which method of preparing for the winter will retain the most vitamins and beneficial properties? Why?
Dill in a jar contains the most vitamins. Under the influence of high and low temperatures, some vitamins and microelements are destroyed. Salt, sugar and vinegar also reduce the beneficial properties of the product.
Summary table of advantages and disadvantages of all storage methods.
| Storage method | Advantages of the method | Disadvantages of the method |
| Freezing |
|
|
| Drying |
|
|
| Marinovka |
|
|
| Conservation |
| Due to salt, dill loses its bright color. |
| In oil |
|
|
All methods of preparing dill are good in their own way. Each housewife chooses the option that she likes most.
How to properly dry greens
Drying is a proven recipe that allows you to preserve a plant for a long time without making any special effort. This harvesting method allows for one of the longest product storage times. At home, housewives have several options available. Dried herbs are convenient to use when preparing both first and second courses.
You can dry it naturally. To do this, it is dried with whole stems . It looks like this:
- Carefully sort the greens, remove damaged parts, and be sure to cut off the roots.
- Rinse the branches under clean water and dry on a paper towel.
- Tie the stems together in fifteen pieces and hang them in a cool, dark place with good ventilation.
- After the branches dry, simply put them in fabric bags or boxes.
Dill pesto with seeds
Homemade dill sauce with sunflower seeds is a unique version of pesto sauce. It will add a spicy note to almost any vegetable, meat or fish dish. You can prepare this sauce for the winter. Sunflower seeds in this recipe can be replaced with pumpkin seeds.
Ingredients:
- dill - 200 g
- roasted sunflower seeds – 60 g
- hard cheese - 100 g
- garlic - 2 cloves
- olive oil - 100 ml
- lemon juice - 1 tbsp. l.
- salt, pepper - to taste
Cooking method:
- Sort through the dill, remove yellowed branches, and cut off the stems.
- Rinse the dill with cool water and dry lightly with a towel.
- Coarsely chop the greens.
- Pass the garlic through a press.
- Grate the cheese on a fine grater or use ready-made grated cheese.
- Place dill, garlic, seeds in a blender, pour in olive oil and lemon juice. Season with salt and pepper, then grind until smooth.
- Add the cheese to the blender and continue blending. Taste the sauce and add oil, lemon juice, pepper and salt if necessary.
- Transfer the pesto to the prepared jars. Place them in a cool place.
Rules for storing dried dill
To ensure that your own seasoning does not deteriorate over time and does not lose its aroma, you need to store it correctly. These rules apply not only to dill, but also to other garden herbs dried for the winter. You must adhere to the following rules:
- Store greens in glass jars with tight-fitting lids. No foreign odors should penetrate the product, and there are always enough of them in the kitchen.
- Greenery will fade in sunlight, so kitchen cabinet doors should be opaque.
- Avoid getting moisture into the container with dry workpiece.
This is how easy it is to preserve fragrant greens for a whole year. All the proposed methods are fast and convenient. You can use each of them to decide which one you like best. In any case, if you strictly follow the instructions, the fragrant stems will delight you with their aroma both in autumn and winter. And in the spring you can again resort to preparing dill for the winter.
Pickling dill: the best recipes
Preserving dill with salt for the winter is a popular recipe that requires a minimum of ingredients.
Salting layers in jars
This is the simplest old recipe for preparing dill.
For 0.5 kg of greens, take 1 glass of fine table salt. The chopped herbs are placed in small sterilized jars, sprinkling the layers with salt.
The grass should be separated by 1-2 tbsp. l. salt. It is necessary to compact the contents until the greens release juice.
Close the jars with scalded lids and store in a cool place.
Salting with marinade
Preparation of dill with marinade is quite popular among housewives. This method is more labor-intensive, but the result is worth it.
To prepare marinade for 3 kg of greens you will need:
- 1 liter of water;
- 1 glass of table vinegar 9%;
- 0.5 cups sugar;
- 3 tbsp. l. salt (without a slide).
In addition, you need to take spices: 2-4 heads of young garlic, several leaves of bay leaf, allspice.
The greens must be washed and dried on a towel to remove excess moisture. For this preparation, you can take both whole and chopped stems.
Peel the garlic and cut into thin slices.
Twisted jars should be thoroughly rinsed and dried. It is advisable to take a small container.
At the bottom of each container you need to place 1 bay leaf (to enhance the aroma, you can rinse them with cold water), several slices of garlic and 5-6 peas of allspice.
Then you need to fill the jars tightly with herbs. There is no need to salt it first.
For the marinade, bring water to a boil and add all the ingredients. The vinegar should be added last.
Pour the resulting marinade into prepared jars so that it completely covers the contents, and cover with lids scalded with boiling water.
Place a cotton towel in the bottom of a large saucepan and place jars of herbs in it. Pour in hot water so that it reaches the necks of the container and place over medium heat.
You need to wait until the marinade in the jars begins to boil slightly and reduce the heat. Sterilize for 20 minutes, then carefully remove the containers and roll them up using a special machine.
Each jar must be turned upside down, all the twists should be wrapped warmly and allowed to cool completely in this position.
It is advisable to store such preparations in a cool place.
You can use the recipe without vinegar and prepare a marinade based on citric acid.
For 300-500 g of dill you will need:
- 20-25 g citric acid;
- 2-3 cloves of garlic;
- 2-3 bay leaves;
- 1 tsp. salt;
- 0.5 tsp. Sahara;
- 250 ml refined sunflower oil.
Peel the garlic, cut each clove into 4 parts. In a deep bowl, mix citric acid, butter, sugar, salt, garlic, bay leaf. Boil the mixture for 7-8 minutes and cool slightly.
Place chopped and dried dill into pre-sterilized jars and pour hot marinade over them.
Sterilize the jars in a deep bowl of boiling water for 5-7 minutes, carefully remove and roll up.
Cool the containers with the workpiece upside down and put them in a cool place.
Dry salting in jars
Pickling dill for the winter in jars can be dry. For this you only need herbs and salt.
Dill leaves and soft stems must be thoroughly dried after washing - this is the key to the quality of the workpiece. They need to be chopped fairly finely and placed in a large bowl. Add table salt at the rate of 1 part salt to 4 parts herbs. Mix all ingredients thoroughly.
Small, clean, dry jars (with a capacity of up to 0.5 liters to make it easier to use) should be tightly filled with herbs and salt, constantly tamping with your hands or a spoon. It has been noticed that spices packed as densely as possible last longer.
Close the lids tightly and let the workpiece salt for 2-3 days, and then put it in the refrigerator or cellar.
When using this seasoning, you need to remember that it has a high salt content and you need to add it to the dish in small quantities.
Oil seasoning
The universal oil seasoning can be frozen - fill ice cube trays with finely chopped dill, add olive oil and place in the refrigerator.
An equally tasty and aromatic dressing can be easily made by softening good butter, mixing it with finely chopped herbs and freezing it again in ice cube trays. Then remove, pour into a plastic bag and store in the freezer. This seasoning is good to add to boiled potatoes, pasta, cereals, and sauces.
Infusion of dill plants with oil
You can save dill for the winter in jars if you pour finely chopped (or crushed into a pulp in a blender) greens in any quantity with any high-quality vegetable oil. The main thing is that it is refined and has no foreign odors.
After infusing for 2 weeks in a dark place, an aromatic oil mixture is obtained, which is good for seasoning ready-made dishes and salads.
Pesto sauce
You can stock up on original pesto sauce for the winter, the basis of which is dill. It goes well with meat and vegetable dishes.
To prepare you need to take:
- 2 cups chopped dill;
- 1 large lemon;
- 10 cloves of garlic;
- 100 ml olive oil (sunflower can also be used);
- salt to taste.
Finely chop the dill and place it in a large bowl. Cut the garlic cloves into small cubes and add to the container with herbs. Grind the lemon zest there on a grater. Squeeze lemon juice into a bowl and add salt to taste.
Drizzle with olive oil and mix thoroughly. The resulting mass must be whipped with a blender for several minutes.
The prepared sauce should be placed in pre-prepared sterilized jars and sealed with scalded lids. It is advisable to keep the product in the refrigerator.
Storage conditions and periods
Preserving dill in its original form is not an easy task. But if you provide it with comfortable storage conditions, you can significantly increase the shelf life of the product:
- The optimal temperature is from +1 to +5°C.
- Acceptable humidity is no more than 85%.
- No direct sunlight.
- Limited access of oxygen.
The shelf life of herbs depends on the method and place of its storage:
| Storage method | Storage period (months) |
| In a refrigerator | 1-1,5 |
| Freezing | 6-8 |
| Drying | 18-24 |
| Pickling | 6 |
| Marinovka | 12 |
The choice of method depends on the purpose of using dill. It is convenient to add dried herbs, which have a concentrated taste and aroma, to first courses. Freezer preparations fit better into salads and appetizers.
Useful tips
Advice from experienced housewives will help extend the shelf life and value of products:
- When storing dill in bunches in water, wash the greens only before use.
- Before harvesting greens, it is important to sort them out from dry and rotten leaves.
- Sterilizing containers for storing greens will increase shelf life.
- Dried dill is stored in closed bags or jars in a dry, dark place.
- Salting the seasoning preserves its beneficial properties.