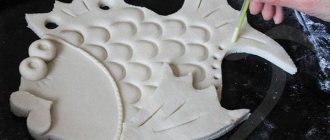
Frozen dough is a good help when you need to quickly prepare a pie, dumplings or pizza. This can be a store-bought product or homemade. The taste of products made from defrosted dough depends on the correct choice of semi-finished product. You need to check the expiration date, the tightness of the packaging and the appearance of the product. Young housewives are often interested in how to quickly defrost dough so that it retains its original qualities as much as possible. Some tips may be useful to experienced cooks.
Choosing frozen dough
To keep the dough better and longer, it is subjected to shock freezing.
There is no need to freeze the product the second time. For each type of dough, separate defrosting conditions are used. There are a couple of types of frozen dough: shortbread, puff pastry, puff pastry without yeast, gingerbread, chopped.
To purchase a good and high-quality product in the market, you need to know a few secrets.
- Package. It must be airtight.
- Freezing method. Traditionally it is indicated on the label.
- Number of layers. The more layers the dough has, the tastier the baked goods will be. This information is indicated on the product packaging. For example, yeast must have 35 layers, while yeast-free must have 225.
- Best before date. The fresher the product, the better the products will turn out.
- Composition of the finished frozen product.
It is imperative to study the composition on the packaging and make sure it is harmless. - Price. High quality products cannot be cheap.
- Product type. Products must move freely throughout the packaging, not stick to it and not have foreign inclusions.
Is it possible to freeze yeast dough for pies?
Croissants made from ready-made puff pastry
There is a common myth that the semi-finished product is only suitable for making pizza, buns and bagels. But pies with poppy seeds or cottage cheese cannot be made from it at all.
Be sure to read:
How and where to store wine to preserve the rich taste and aroma of the drink?
The dough is suitable for any baking: pie, bread, rolls, buns and so on. You can even freeze ready-made products.
If the pies have already been made and frozen, then when baking they must be immediately placed in the oven without prior defrosting.
The quality of baking is affected not by the freezing process, but by the products from which the dough is made. If the dough is not suitable, it is possible that poor quality flour or expired yeast was used during freezing.
Before making the dough, you need to check the expiration date of the ingredients.
Is it possible to re-freeze yeast-free and yeast dough?
The technology rules do not provide for re-freezing the product. It is believed that the quality of confectionery products in this case decreases.
Sometimes housewives re-freeze dumplings, but do not advise freezing yeast dough. Most of the fungi die, and the dough does not rise well.
It is better to use all the dough from the freezer at once, and if necessary, freeze the finished products. You can bake pies, buns or preparations (pizza bases, crusts, baskets). Later they are heated in the microwave or oven.
Fast and slow ways to defrost dough
Dough shelf life: where and how to store it correctly
Before you quickly defrost your dough, you should consider slow-processing options. Despite the fact that they take more time, the workpiece turns out to be as fresh and elastic as possible.
- In a refrigerator. Place the frozen dough directly in the package on the refrigerator shelf as far away from the freezer as possible. Defrosting time will be 10-12 hours.
- At room temperature. Place the product on a silicone board, cover with a thin cloth and leave at room temperature. The composition will reach the desired state in about 5 hours.
- In warm water. Place the workpiece in a plastic bag and lower it into a container with warm water. The ends of the packaging should remain outside; water should not be allowed to get on the dough. How long it takes to defrost depends on the volume of dough. Usually 2-3 hours are enough.
Among the quick approaches, the most accessible and safe are the following:
- In the microwave. If the device has an “auto-defrost” mode, then use it. Otherwise, we carry out the manipulation at a power of 100 watts. Remove the dough from the packaging and place it on a suitable stand. It needs to be turned over regularly. Do not allow the product to become hot. The processing time for a component in the microwave is strictly individual, but does not take more than 20 minutes.
- On the battery. The dough can also be defrosted on a radiator. We place it on the stand directly in the package. It is strictly forbidden to refuse a stand in order to save time. The procedure will take no more than 30-40 minutes.
It is worth considering that such approaches are not universal. In the case of some products you have to act differently.
Defrosting phyllo
Greek yeast-free baking product consists of thin sheets covered with parchment. Strudels, pies, and snacks are made from frozen phyllo. When stored properly, phyllo remains fluffy and tender after freezing.
Quick methods using high temperatures will not work in this case. The most suitable option is to put the sheets on the refrigerator shelf. After 10 hours the dough can be cooked.
How to defrost yeast dough
What is proofing dough and how to do it?
To make your baked goods fluffy, frozen dough requires a special approach.
This type of dough can be thawed in several ways:
- in the refrigerator compartment - slow defrosting;
- at room temperature;
- in warm water;
- using an oven or microwave.
For any product exposed to freezing temperatures, one rule applies: the faster it freezes, the slower the defrosting process should be. Otherwise, you risk getting a product with a damaged structure, which will make it difficult to work with, and cooking will turn into torture.
Therefore, if you have time, use the bottom shelf of the refrigerator: without removing the dough from its original packaging, put it in the refrigerator overnight, and the next day you can start baking.
If the dough is in the form of balls (some manufacturers freeze yeast dough in balls), they are first removed from the original packaging, placed on a dish, covered with a towel or bag (this is necessary so that the dough does not dissipate) and put in the refrigerator for 8-10 hours.
At room temperature, defrost the dough one piece at a time for about 5 hours, in balls - from an hour to two. When choosing this method, remove the dough from the bag and place it in a pan or bowl dusted with flour. Cover with a towel or lid to prevent airing and leave for 5-6 hours.
To defrost yeast dough in warm water, remove it from its original packaging, wrap it in several bags and immerse it in warm water. You can change the water while it cools. With this method, the yeast dough will be ready for use in 40-50 minutes.
The oven and microwave are very undesirable “helpers” when defrosting dough. Since there is a high risk of oversight and overexposure, the dough will then turn out dry and unsuitable for baking.
To defrost in the oven, heat it to 50 degrees and leave the dough for a few minutes. If you need to defrost the dough incredibly quickly, the microwave will come to the rescue. But once again: this method is the most undesirable. Just set it to defrost and place it in the chamber for a few minutes.
Be careful: when defrosting in the microwave, the dough should not heat up! Remove and check every half minute. Once the dough is defrosted, remove it and let it come to room temperature.
Recipe for “Shortcrust pastry “Guests on the threshold””:
Frozen shortbread dough can be stored in the freezer for 3 months in the form of flat cakes or “sausages.” The latter are especially convenient when you need to quickly bake cookies: without defrosting, cut the dough into circles and put it in the oven - that’s it!
The first dough is sweet, for the base of sweet pies or cookies. Sift flour onto a board. Make a well, put sugar, egg and butter in it. Since now the dough is nut, add chopped nuts (3 tablespoons). Instead of nuts, you can put poppy seeds, zest, candied fruits, raisins and even tea.
Chop all ingredients until small crumbs are obtained. Knead the dough and roll it into a sausage.
Put it on film. And wrap once. Write the composition of the dough on a piece of paper, we must know what we are baking from, wrap it also and tie a film on the sides. Place in the freezer.
Defrosting yeast and puff pastry
Yeast and puff pastry are considered the most capricious; they need to be defrosted especially carefully. You must know all the nuances to defrost such dough correctly without spoiling the baked goods.
Yeast dough
When defrosting yeast dough, the slightest mistake can lead to the dough not rising during baking.
To avoid this, pay attention to the following features of defrosting yeast dough:
- When defrosting in water, the dough must be wrapped in several plastic bags. The water temperature must be maintained and not allowed to cool.
- Place the dough in a container and place it next to a lit burner.
- We strongly do not recommend defrosting yeast dough in the microwave. There is a theory that microwave radiation kills the beneficial properties of yeast. But if this doesn’t bother you, you need to defrost the yeast dough as quickly as possible; do not set the timer for more than 2 minutes.
Puff pastry
Puff pastry is no less demanding than yeast dough for high-quality defrosting. But there are some nuances here. For example, if yeast dough can be carefully defrosted in the microwave, then puff pastry cannot be defrosted under any circumstances. It's best to just leave it in a warm room for a few hours. Below are some more helpful tips for defrosting puff pastry.
- Cover it with a towel. This will help prevent a hard crust from forming.
- If the dough is roll-shaped, it is possible to remove the top, already thawed layers and start working with them. Just do it carefully, otherwise you will damage the structure.
- When defrosting on the radiator, wrap the dough in a towel.
Conditions for defrosting Filo dough
The easiest and safest way to defrost this dough is in the refrigerator: transfer the dough from the freezer to the shelf farthest from it overnight, and in the morning you can safely prepare your favorite dishes.
You can defrost at room temperature without opening the package, since the dough will begin to dry out and become chapped in the air.
How to defrost dumpling dough
The dumpling dough is defrosted gradually: first in the refrigerator, then at room temperature. On the shelf of the refrigerator farthest from the freezer, the mass is defrosted within 6-12 hours. The time depends on the volume of the product. Finally defrost the dough at room temperature after 2-3 hours.
Compliance with two stages of defrosting allows the product to return to its former plasticity.
How to quickly defrost pizza dough?
Dough for unleavened pies and pizza can be defrosted in a water bath.
How to quickly defrost pizza dough:
- For these purposes, you need to place the dough in a pan, after placing several paper towels on the bottom.
- Place a lump of dough wrapped in plastic on top. The container is immersed in a bowl of boiling water and placed on low heat.
- From time to time, it is necessary to turn the dough over so that the upper layers that come into contact with the walls of the vessel do not overheat.
Defrosting methods
Depending on the amount of free time, there are several answers to the question of how to quickly defrost dough.
Slow defrost
If there is a lot of time for preparing products, then you can use gentle defrosting methods.
- You need to remove the product from the package.
- Place it on a board or plate and leave for several hours. Typically, five hours is enough to defrost at room temperature.
- Can be defrosted in the refrigerator, on the lowest shelf. It will defrost in ten hours.
Fast defrost
When you are sorely short of time and you need to start preparing baked goods urgently, you can resort to quick defrosting methods. There is no need to worry in vain that the finished products will turn out tough or tasteless; the main thing is to follow all the rules of thawing.
- The dough is placed in a plastic bag, tied tightly and dipped in warm water. After three hours you can start baking.
- You can also defrost in the microwave using the “auto defrost” mode. If the microwave oven does not have such a function, it will be enough to turn it on at 100 watts. The main thing here is to make sure that the product does not become hot. It needs to be turned over very often.
- A regular warm battery is suitable for thawing the product. The finished frozen product must be placed on its surface directly in the package. It will defrost in an hour.
You should not use defrosting in the microwave or in warm water often, as these are not the best options for thawing the product. These methods can be safely used in the case of pizza dough, but it is better to defrost yeast or puff pastry using other methods. Do not place rolled puff pastry in the microwave, as it may spoil there.
Defrosting yeast dough
Most often, difficulties arise when working with yeast dough, which is very capricious and, if you make a mistake during defrosting, may not rise.
To understand how to defrost yeast dough, you must follow certain rules.
- You can put it in two plastic bags, release excess air and put it in warm water, which needs to be changed periodically.
- Defrost the product by placing it on the lid of a hot pan, wrapped in a bag or foil. In order for thawing to proceed evenly, it must be constantly turned over.
- To defrost, place the product in a saucepan and place it on the stove next to the lit burners.
- To quickly defrost, the product is placed in a pan and placed in a water bath. In this case, you need to make sure that it does not stick to the bottom.
It is better not to defrost yeast dough in the microwave. It is believed that yeast loses its properties with this method of thawing. But if such a need arises, then put the dough in the oven for no more than a minute, otherwise the top layer of the product will dry out.
Defrosting puff pastry
Experienced housewives can tell you how to quickly defrost puff pastry. It is not as capricious as yeast, and there are fewer problems with it. The main thing is to adhere to the basic rule: never defrost it in the microwave. The puff pastry will thaw on the counter at room temperature for two hours. For urgent defrosting, you can put it on the battery.
Puff pastry will be tastier and more tender if, after kneading, you place it in the refrigerator for an hour.
To prevent the product from becoming crusty when thawing in air, it is covered with a cloth or paper.
Each housewife has her own way of defrosting. The main thing is that it is correct and does not spoil the quality of the product. It’s better to take care of defrosting the dough early, and then tasty and airy baked goods will be guaranteed.
Experienced housewives call ways to quickly defrost dough “emergency measures” and use them only when absolutely necessary. The slightest mistake - and the dough can easily turn into a lump, covered on the outside with a dry crust.
Recipes with ready-made puff pastry without yeast
Ready-made yeast-free puff pastry contains more oil, which means it is higher in calories (on average 454 kcal per 100 g) than puff pastry. After baking, it turns out more layered (it contains at least 140 layers), brittle and crispy. The taste of this dough is more neutral than that of yeast dough. Its advantage is that, unlike yeast, it does not require proofing time, which means you save time at this stage.
Homemade baklava
Baklava, or as it is also called - baklava (from the Mongolian baγla - to wrap) is a sweet pastry made from puff pastry or phyllo dough, most often with walnuts or pistachios, generously soaked in sugar or honey syrup.
Those who often make homemade baklava from puff pastry recommend immediately cutting it into diamonds: this way the layers of dough bake faster and open better. Just don’t cut through all the layers to the bottom of the mold so that the filling doesn’t leak out and start to burn.
Homemade baklava
To prepare 12-14 small sweet diamonds you need:
- ready-made puff pastry without yeast – 800 g
- melted butter – 100 g
- yolk – 1 pc.
- flour for rolling out dough
For filling:
- honey – 250 g
- sugar – 100 g
For filling:
- shelled walnuts – 2 cups
- powdered sugar – 1 tbsp. l.
- ground cinnamon – 1 tsp.
- For the filling, chop walnuts and mix with powdered sugar and cinnamon.
- On a table sprinkled with flour, roll out the prepared dough very thinly and cut into layers according to the size of the form in which the baklava will be baked.
- Place 2 layers of dough on top of each other in a greased ovenproof dish, greasing each with butter. Apply the filling in a thin layer, cover with another layer and grease with the filling again.
- Continue layering the dough and filling until you run out of ingredients. The top layer should be made of dough. Grease it with yolk.
- Preheat the oven to 180°C. Cut the baklava into small diamonds and bake for 40-45 minutes. until a golden crust forms.
- Meanwhile, prepare the filling. Boil 80 ml of water, dissolve sugar in it and cook for 5 minutes. Add honey and cook, stirring, for another 8 minutes. Remove the baklava from the oven and let cool slightly. Cut into pieces along the marked cuts. Pour over the honey mixture and leave for 7-8 hours at room temperature until the baklava is well soaked.
Hungarian cheesecake
We call this pastry “Hungarian cheesecake”, and the Hungarians themselves call it “turos taska”, that is, “knot”.
Some culinary sources suggest preparing Hungarian cheesecakes from puff pastry, but we chose a crispy, yeast-free one. The filling of cottage cheese with whipped egg whites should be tender, literally melting in your mouth. And don’t forget to add lemon zest to the filling; without this, a Hungarian cheesecake cannot be considered Hungarian.
If the filling turns out to be runny, you can add a little cornstarch or regular wheat flour (no more than 1 tbsp).
Hungarian cheesecake
To prepare 8-10 cheesecakes you need:
ready-made puff pastry without yeast – 400 g low-fat cottage cheese – 300 g eggs category C1 – 2 pcs. sugar – 100 g lemon – 1 pc. egg whites – 2 pcs. flour for rolling out dough, powdered sugar for sprinkling
- To make the filling, rub the cottage cheese through a fine sieve. If it is too wet, place it on a piece of gauze, folded in four, tie it in the form of a knot and place it under pressure for 2-3 hours.
- Beat the eggs for the filling with a mixer with sugar until a fluffy mass of homogeneous consistency is obtained. Combine with cottage cheese and mix thoroughly.
- Using a fine grater, remove the zest from the lemon and add it to the egg-curd mixture.
- Beat the egg whites with a mixer until stiff. Add to the cheesecake filling and stir quickly. The consistency of the filling should resemble thick sour cream.
- Roll out the dough on a table dusted with flour into a layer 5-7 mm thick and cut into squares with a side of 10 cm.
- Place a little filling in the middle of each and overlap the ends over it. Leave for 15 minutes.
- Preheat the oven to 200°C. Place the Hungarian cheesecakes on a baking sheet lined with baking paper. Place in the oven for 15-20 minutes. Let cool slightly and sprinkle with powdered sugar before serving.
Strudel with meat and cabbage
Why don’t we break away from tradition and make strudel with meat?! The finished puff pastry without yeast combines harmoniously with the meat filling and provides the strudel with a particularly pleasant crispy texture. Do not wrap the roll too tightly so that the dough can show all its layers.
Instead of Savoy cabbage, you can use young white cabbage or even Chinese cabbage. If you don't like lamb, take beef pulp with fat. Let it be, for example, inexpensive brisket. Add more greens to the minced meat to suit your taste.
Strudel with meat and cabbage
To prepare 1 strudel you need:
ready-made puff pastry without yeast – 250 g Savoy cabbage – 1 head of onion – 1 pc. garlic – 1 clove butter – 30 g parsley – 100 g thyme – 10 sprigs marjoram – 10 sprigs lamb pulp – 500 g egg – 1 pc. flour for rolling out dough; yolk – 1 pc. milk – 1 tbsp. l. salt, freshly ground white pepper
- To fill the strudel, separate the 4 largest leaves from the head of cabbage. Fill a saucepan with a capacity of at least 3 liters with water and bring to a boil. Add some salt. Place cabbage leaves in water and cook for 3 minutes. Place in a colander and rinse with cold water.
- Cut the remaining cabbage leaves into strips. Finely chop the onion and garlic. Heat the butter in a small frying pan and, stirring, brown the prepared vegetables for the filling. Let cool.
- Wash and dry parsley, thyme and marjoram. Remove the leaves from the branches and chop them finely. Pass the meat through a meat grinder with a fine grid. Finely chop the cabbage.
- Add an egg, spicy herbs, chopped savoy cabbage, and onion fried with garlic to the meat. Season with salt and pepper. Stir.
- Roll out the puff pastry on the table into a thin layer. Place savoy cabbage leaves on top and distribute the lamb filling with herbs and vegetables.
- Carefully roll the dough with meat filling into a roll. Bring the edges together and pinch. Lightly whisk the yolk with milk. Lubricate the strudel with the resulting mixture.
- Preheat the oven to 180°C. Place the meat strudel on a baking sheet lined with baking paper. Place in the oven for 30-40 minutes. Let cool slightly before serving.
Curls with tomatoes and parsley
These curls are easy to break off and eat with soup or a green salad dressed with a mixture of olive oil and balsamic vinegar.
The taste of this pie does not depend on the quality of the tomatoes. they don't have to be summer. The main thing is not to forget to peel them, chop them coarsely and mix with salt, spices... and sugar. The latter makes the tomato taste richer.
Curls with tomatoes and parsley
To prepare 1 pie with a diameter of 15-18 cm you need:
- butter for greasing the pan
- ready-made yeast-free puff pastry – 250 g
- medium bunch of parsley – 1 pc.
- 4-6 cherry tomatoes or 1 medium tomato
- Russian cheese – 50 g
- olive oil – 1 tsp.
- salt, freshly ground black pepper
- Preheat the oven to 180°C. Grease a round ceramic baking dish (diameter 15-18 cm) with butter.
- For the filling, wash the parsley and tomatoes and dry. Finely chop the parsley leaves with a knife and place in a small bowl. Cut the cherry into quarters, and if the tomato is large, then into cubes. Grate the cheese.
- Roll out the dough layer and stretch it a little with your hands so that it becomes rectangular. Spread cheese evenly onto the dough, then parsley and tomatoes. Drizzle the filling with olive oil, pepper and add a little salt (salt will be added from the cheese). Roll into a roll: it should be quite dense. Press the dough along the edges of the roll well so that the filling does not fall out.
- The roll needs to be cut into 7-8 pieces (about the same thickness of 3-4 cm). Then transfer the roll pieces into the pan, laying them cut side up. One piece in the center, and distribute the rest around, like flower petals.
- Bake the pie for 20 minutes. Serve warm.
How to defrost puff pastry
Puff pastry is rightfully considered the most capricious, so defrosting must be approached wisely.
It is important to remember forever that the product cannot be defrosted in a microwave or oven. For urgent defrosting, heating devices (stock heating or oil fireplace) are used. The best and most correct way is considered to be defrosting naturally.
To do this, just leave the product at room temperature for 3-4 hours. Do not forget to cover the dough with cling film (can be replaced with gauze cloth). If you are in a hurry, use water defrost. However, there is no need to place the dough in warm liquid. The water should be at room temperature. Otherwise, the dough will lose its layer structure. If we are talking about puff pastry, there is another way. Wrap the frozen product in food foil and gauze. Turn on the gas burner, place the dough in a glass bowl and place it at a distance of 30-40 cm from the device.
There are not many ways to defrost dough at home. The fastest option is using a microwave or oven, but the methods listed are not suitable for puff pastry. You can leave the product at room temperature or place it in water. Choose the method you like and start implementing it.
Is it possible to refreeze the dough?
Dough that was initially frozen can be stored in the freezer for 2 months. If the product was frozen in large quantities and was not completely used after thawing, it cannot be re-frozen. Otherwise, food poisoning is possible. This is especially true for yeast dough.
Leftover flour products can be used to prepare various dishes, which are then placed in the freezer and used as needed.
To avoid problems with excess quantities, the dough should be frozen in portions and used completely after defrosting.
Effective defrosting methods
There are several basic technologies that will help defrost dough without damaging the structure.
Top articles: How to store quince for the winter at home
Particular attention is paid to the puff composition; it cannot be defrosted using thermal appliances
Method No. 1. Natural conditions
This type of dough processing is also called slow, because the procedure takes place under natural conditions.
Open the package of dough and place it on a flat plate or cutting board. Leave for 4 hours at room temperature. During this period, the dough will thaw, as a result of which it can be used for cooking.
Turn the mixture over every hour to ensure even defrosting. If the dough is rolled, after 2 hours it can be unrolled.
If you have time, move the mixture from the freezer to the fruit and vegetable storage drawer (bottom of the refrigerator). In this way, the dough will defrost in 10-12 hours, it all depends on the serving size.
Method No. 2. Oven
Preheat the oven to 90 degrees. For 10 minutes, make sure that there are no fluctuations in the set mode.
Take a baking sheet, line it with 2 layers of parchment paper, sprinkle it with flour. Remove the dough from the packaging (!), then place it on a baking sheet.
Send the mixture into the cabinet cavity, stick to the middle shelf. The duration of defrosting is about 3 minutes, no longer. Throughout the entire period, you need to monitor the process so that the dough does not bake on top.
Method No. 3. Heating radiators
If it is not possible to use an oven, use heating appliances. You can use either a standard radiator or an oil heater. The method is suitable for defrosting dough in the cold season.
Place the product on a flat dish and place it on top of the heating device. Watch the process carefully, turn the dough every half hour.
It is important to prevent the formation of a crust, which usually appears during the chapping process. To do this, place a piece of cling film on the dough. The duration of defrosting depends on the room temperature
As practice shows, the dough becomes soft in 1.5-2 hours
The duration of defrosting depends on the room temperature. As practice shows, the dough becomes soft in 1.5-2 hours.
Method number 4. Microwave
In most cases, after defrosting in the microwave, the dough loses some of its taste. To prevent this, carry out a small preparatory phase.
Remove the mixture from the freezer and leave it on the middle or bottom shelf of the refrigerator for 45 minutes. During this period, the composition will soften, as a result of which defrosting will take place without compromising quality.
After preparation, begin the procedure. Remove the product from the packaging and place it in a microwave-safe glass container. Cover with a lid, leaving a small opening.
Set the power to about 90W or use the “Defrost” mode. It is difficult to say for sure how quickly the dough will defrost. It all depends on the individual characteristics of the device.
To begin with, set it for 10-15 minutes, after this period you can evaluate the result. Every 30 seconds, pause the microwave and turn the dough over.
This move will allow the composition to defrost evenly. Otherwise, a crust will appear on the surface or the dough will begin to bake locally.
Method No. 5. Water
Many housewives prefer to defrost the dough, as they say, the old fashioned way. For this, cold or room temperature water is used.
Prepare thick plastic bags without holes. You will need about 5-6 pieces
It is important that liquid does not penetrate into the cavity, otherwise the dough will become unusable.
Wrap the product in plastic and tie tightly. Pour cold water into a bowl and lower the dough into the cavity. Remove it after 20 minutes.
Now fill the container with slightly warm water and put the dough inside again. Take it out after 35-50 minutes. During this period the product will defrost. To increase the effectiveness of the procedure, change the cooled water with warm water every 5-7 minutes.
What is the best way to store fresh yeast?
I cut them into pieces and put them in the freezer.
Today, after defrosting, I discovered that the yeast was dead (or almost dead, it lost 50% of its strength)
What temperature do you need in the refrigerator?
I was somewhere around -5..-7.
Yes, defrosted at 7 for 12 hours.
Question: How can crystallization be prevented? immerse in oil?
Two or three weeks are perfectly stored in the refrigerator (depending on the manufacturer and shelf life) at 2-3. then only in the freezer. if I don’t plan to use during these two weeks, then immediately into the freezer. I don’t really understand why they died for you? Is there a characteristic smell?
Yes, and they completely melted away.
Eat. Grow your own starter.
even I find it funny))
this is a little off topic
This is a good method if the yeast is initially of normal quality. I buy a kilogram and divide it into 50 grams. I wrap it in foil and freeze it. A 50 gram pack thawed in the refrigerator can be stored for at least 2 weeks
I’m curious, why do you need yeast in such quantities, if you have repeatedly stated that you have finally and irrevocably switched to Sourdough (TM)?
We suggest you familiarize yourself with Washing faux leather products – Home tips – Home
1 kg is yeast produced in Russia?
if so, do you consider them to be the best in terms of quality relative to the French ones?
I clarify that we are talking about pressed baker's yeast
what is the loss of strength? I'm around 60%
I'm sorry, but why keep them? They must be bought when they are needed, and they must be stored dry.
and when I'm not working, they do the same
What to do if the body experiences acute pie deficiency? I just open the freezer and...
Crystallization of Cellular Structures!
You are jealous of the clarity of thought and are simply finding fault.
After deciphering, I would venture to assume that comrade means the destruction of cellular structures due to crystallization. I am not ready to discuss the reasonableness of the assumption itself - they are tenacious mushrooms, what do they need this crystallization.
I would not freeze the yeast - even in 6.12 weeks, up to 40.50% of the “yeast” dies. In addition, when freezing, yeast cells are partially damaged, lose their viability, some of them die, and this reduces the elastic properties and gas-holding capacity of the dough (if you are using dough). And dead yeast cells impair gluten cohesion. The result is that the dough becomes sticky and stretchy.
Freezing yeast can be slow, quick at temperatures down to -24ºC, or deep in a nitrogen environment at -195ºC (I think you should especially like this method). Such yeast should be stored at a temperature from -8ºС to -25ºС. The longer the shelf life, the lower the temperature should be.
For freezing, you need to choose stable yeast. Stability is affected by many factors, including the strain, its cold tolerance, and the freshness of the yeast. It is recommended to freeze yeast that does not have very high fermentation activity (so-called compressed yeast with an average rate of gas formation).
To increase the protection of yeast, they are sometimes treated with glycerin, oleic or linoleic acid, sunflower oil, phosphate concentrate, egg yolk, etc.
Of the brands of yeast I know, the best for freezing is .
Some experts do not advise speeding up this process. The ice should melt naturally. They claim that sudden temperature changes very often cause overheating and then breakdown of freezing devices. Remember, for example, what happens to a glass jar if you suddenly pour boiling water into it. But it’s up to you, dear hostesses!
How to quickly defrost puff pastry
Before you plan to bake using puff pastry, you need to clearly know the defrosting time for store-bought goods. Processing with water will take half an hour, in the oven at 70-80 degrees - 3 minutes.
If the portion is small, you can use the microwave. The product is released from packaging and put into defrost mode.
Here is the best and fastest way. It is used without an oven or microwave oven.
For quick and high-quality results you need:
- Place the semi-finished product on the table.
- Warm up its surface with a hairdryer at minimum power.
- Turn over and heat the other side.
- Turn over again and repeat the procedure.
The good thing about this method is that the product changes temperature evenly.
Attention! If the housewife uses the oven, she must clearly note the time. If you overexpose it even a little, the semi-finished product will become an inedible dried crust.
Conditions for defrosting Filo dough
This type of product consists of thin layers and cannot be quickly defrosted.
In order to preserve the structure of the semi-finished product and its taste, it is necessary to remove the product from the freezer, remove it from the packaging and place it on the middle shelf in the refrigerator.
If you thaw a semi-finished product in the kitchen, the thin sheets will stick together and become completely unsuitable for baking. This is the main disadvantage of Filo compared to other types of ready-made baking dough. While the product is thawing in the refrigerator, the housewife can start preparing the filling for homemade pies.
Self-freezing
After cooking the dish, there may be excess dough left. To avoid throwing it away, it is frozen at home. For example, this can be done in the freezer. There the product will not lose its beneficial and nutritional qualities. You can freeze not only the dough, but also dishes made from it, for example, pies, pies, bread, dumplings, manti. Finished products are stored frozen for a very long time, up to 2 months. If necessary, you can take them out of the freezer and quickly prepare lunch or dinner.
To preserve the quality of the dough, it must be frozen correctly. To do this, it is rolled into a thin sausage and chopped into small pieces. Finished parts are wrapped in a plastic bag or cling film
An important rule: moisture should not get into the packaging before freezing, otherwise it will negatively affect the quality of the product.
The dough is then placed in the freezer. It sets the minimum temperature. This is necessary for the product to set quickly. When 2 weeks have passed, the temperature can be lowered by 3 degrees. In order for the product to be stored correctly when frozen, the following rules must be observed:
- The yeast dough is laid in this way: the separated pieces are placed at a distance of 3 cm from each other. Over time, the yeast composition increases, but maintaining a distance between the parts will prevent them from sticking together.
- Any type of dough can be stored in the freezer for no more than 4 months. After this, the product dries out and loses its beneficial properties and adhesiveness.
- Once a frozen product has been used, it should not be re-frozen. The remaining pieces are discarded.
- There is a way to freeze in foil: the dough is chopped into pieces, each sprinkled with flour. Then the total mass is gently kneaded until the surface becomes matte. The field of this composition is wrapped in foil. Do not allow air or moisture to enter.
Freezing at home
It is always necessary to take into account that the quality of homemade dough and products made from it will compare favorably with the quality of a store-bought frozen product.
You can make your own frozen dough at home. It will last in the freezer for as long as needed, retaining all its beneficial properties. Once defrosted it will look like it was just made. You can freeze not only the dough, but also products made from it: pies, buns, pizza. Such products can be stored for several months. It is very easy to freeze the finished product correctly. It must be divided into pieces and wrapped in foil. It must be packaged to prevent moisture from entering. The temperature in the freezer should be very low for two weeks, then it can be increased.
Advice
It is necessary to take a responsible approach to the choice of flour. The quality of products after freezing largely depends on this. You need to pay attention to the percentage of gluten in it. He must be around thirty. The finished pieces must be placed correctly in the freezer. For example, the yeast will increase and grow at first, so the portions need to be placed closer to each other. The maximum shelf life of the finished product is four months. Repeated freezing is not recommended.
The product can also be frozen in plastic bags, after sprinkling them with flour and releasing the air from them.
We recommend: What is the difference between refined and unrefined olive oil - which is better for salads and for frying?
How to choose a frozen product
The purchased composition is subjected to express freezing, as a result of which the dough is stored longer
It is important to always remember that you cannot freeze a product twice. There are several main types of dough, each of them uses its own freezing option. Depending on the purpose, the following varieties are distinguished: puff, yeast-free, yeast, shortbread, gingerbread, etc.
Before purchasing, carefully evaluate the product for compliance with storage conditions. It is worth remembering forever that high-quality dough based on natural ingredients cannot have a low price policy. As a rule, leading manufacturing companies ask for 80-140 rubles per 0.5 kg. composition. Inspect the dough for the presence, or rather absence, of foreign debris. The composition must move freely within the packaging and not stick to the film. The correct dough has a matte surface, the product is rolled into a roll. Study the label. On the reverse side you should find information about the manufacturer, supplier, date of production and packaging. Particular attention is paid to the shelf life, it should not be prohibitively long. The film in which the dough is placed must be hermetically sealed. The presence of holes or soldered places indicates that the composition has previously been opened. It is also important to know how the dough was frozen. The number of layers is of particular importance. The larger it is, the softer, richer and more nutritious the finished baked goods will be. As a rule, dough with yeast has 30-40 layers, while without yeast the figure varies between 220-230 layers. Read the “Ingredients” column on the back of the package. Make sure the dough does not contain any harmful ingredients that you are not aware of. Make sure that there are no cracks or crusts on the surface of the product.
Many housewives understand that the quality of the dough will be higher if you freeze it at home. After the procedure, the product is sent to the freezer; this move will help preserve its beneficial properties. Not everyone knows that not only “raw materials” can be frozen, but also finished products based on them. This includes buns, pies, dumplings and even bread. In this case, the shelf life will be 1.5-2 months. To properly freeze the prepared dough, roll it into a “sausage”, then chop into pieces. Wrap the products in a thick plastic bag. Make sure that no moisture gets into the packaging. Place the mixture in the freezer. Make sure that the cavity is set to the minimum temperature. This move will ensure quick setting. After two weeks, the temperature can be increased by 2 degrees. To increase shelf life up to 3 months, place finished dough pieces correctly. Place the yeast dough at a distance of 2 cm
from each other as it will begin to expand in size after freezing. It is important to remember that any frozen dough should be stored in the refrigerator for no longer than 4 months. After the specified period, the composition loses its properties, becomes less sticky and dries out.
Do not re-freeze after partial use; throw leftovers in the trash. You can freeze it in foil. To do this, sprinkle the chopped pieces with flour and knead a little. When the surface becomes completely matte, wrap the product in foil. Keep air and moisture away.
Recipes with ready-made puff pastry
Yeast dough does not have a very high layering (up to 30 layers in total), but this is not its strength. It is soft, lower in calories (on average 245 kcal per 100 g) and expands well when it rises. Many people believe that it is better used for snack cakes, but we disagree with this statement. Sweet pastries also turn out great with it.
Pies with eggs and green onions
Boiled eggs and green onions are a proven combination over the years. But try to diversify the classics a little. Use three types of onions: green, onion and leek (white part and 2-3 cm of green). Finely chop all vegetables. Fry green onions with butter for 2-3 minutes or until softened. Fry the remaining onion with vegetable oil until golden brown. Mix the prepared ingredients, salt and pepper. Add finely chopped eggs - the filling is ready.
If you want, add a little grated hard cheese with a piquant taste to the classic filling, as well as finely chopped young parsley and cilantro.
To prevent pies with eggs and green onions from “opening” during baking, brush the edges of the dough cakes with egg white (the remaining yolk can be added to the egg with which you will grease the products) and only then pinch them.
Pies with eggs and green onions
To prepare 16-18 pies you need:
- ready-made puff pastry dough – 800 g
- eggs – 4 pcs.
- green onions – 500 g
- butter – 70 g
- vegetable oil – 1–2 tbsp. l.
- flour for rolling out dough
- salt, freshly ground black pepper
- For the filling, boil 3 eggs for 10 minutes. Drain the water, cool the eggs, fill with cold water and peel.
- Wash the green onions and dry them well, spreading them on a paper towel. Then cut into thin rings.
- Melt the butter. Finely chop the eggs or mash them with the same masher you use to make mashed potatoes. Stir in green onions and butter. Season with salt and pepper.
- Place the dough on a table dusted with flour and roll out into a layer 5-7 mm thick. Using a glass or special molds, cut out round cakes with a diameter of about 10 cm.
- Spread the filling over the flatbreads. Fold in half, carefully pinch the edges. Grease a baking sheet with vegetable oil and place the pies on it.
- Preheat the oven to 220°C. Brush the pies with the remaining raw egg using a brush. Transfer to a baking tray lined with baking paper. Bake for 20-25 minutes. Serve warm.
Puff hearts with sugar and nuts
These are heart-shaped cookies generously sprinkled with granulated sugar and walnuts from Elena Bon, one of the most devoted and active authors of our site.
If you don't have special heart molds, just cut the dough into squares. And remember that this must be done with a very sharp and thin knife.
Place the remaining dough (if using molds) on a baking sheet lined with baking paper. And bake until done. Then crumble and use as a topping, for example, for homemade dried fruit sweets or truffles .
Hearts made from ready-made puff pastry with sugar and nuts
To prepare 26-28 puff hearts you need:
- Heat the oven to 200-220 °C. Line a baking tray measuring 28x38 cm and height 1.5 cm with baking paper.
- From the defrosted, elastic and slightly risen dough (no need to roll it out first!), cut out hearts using an appropriate special mold that fits into a circle Ø 4.5-5 cm. Place the pieces on a baking sheet at some distance from each other. Place in a warm place, such as on the stove top with a preheating oven.
- At this time, grind the walnut kernels into fine crumbs. Beat the egg until fluffy and brush the top of the dough with a pastry brush. Sprinkle with granulated sugar and chopped nuts.
- Bake for 15-18 minutes. The top of the cookies should be golden. After 7 min. After starting baking, it is advisable to turn the baking sheet over to the other side to ensure even baking of the baked goods.
- Remove the finished cookies from the oven and cool on the baking sheet. Carefully transfer to a plate to cool completely.
Pie with kiwi in egg-sour cream sweet filling
Kiwi pie is a rather unusual pastry, although this fruit is no longer exotic for us. Choose moderately soft fruits for the pie so that they do not “float” during heat treatment, and it will be more convenient to clean them. If the kiwis are too sour, add a little honey to each slice before baking.
Please note that for this pie the puff pastry base is baked twice. The first time - with a load (in this case with dry beans), and the second time - with the filling. Dry beans do not allow the dough to rise much, they hold it back. This technique is also used when baking quiches from shortcrust pastry. If you bake these types of pies often, use the weight multiple times and keep it in a separate bag or jar.
Kiwi pie
To prepare a pie with a diameter of 26 cm you need:
- ready-made puff pastry dough – 250 g
- butter for greasing the pan
- eggs – 4 pcs.
- sour cream – 250 g
- sugar – 150 g
- vodka – 40 ml
- kiwi – 6 pcs.
- apricot jam – 2 tbsp. l.
- powdered sugar – 2 tbsp. l.
- Roll out the dough thinly on a table dusted with flour. Transfer to a short, ovenproof 26cm baking dish, greased with butter. The bottom and sides should be covered with dough. Trim off excess dough.
- Place baking paper on the dough and add dry beans. There should be a lot of it to form a layer of at least 2 cm. Place in an oven preheated to 200°C for 15 minutes.
- For the filling, beat eggs with sour cream, sugar and vodka. Peel the kiwi and cut into 0.5 cm thick slices.
- Remove the pie crust from the oven and remove the beans and paper. Let cool slightly, then brush the surface with apricot jam.
- Set aside 10–12 kiwi slices. Distribute the remaining ones over the pie, pour them with the egg-sour cream mixture.
- Reduce the oven temperature to 180°C and place the pie in it for 20 minutes. Take it out carefully. Place the reserved kiwi slices over the pie and sprinkle with powdered sugar. Return to oven for another 5 minutes. Serve completely cooled.
Apple pie in 30 minutes
The “trick” of this particular apple pie is in the filling. Here, the sourness of slightly caramelized apples is offset by the velvety creamy taste of butter. We recommend cutting a couple of thin strips of dough from the layer. Make small decorations out of them (leaves, flowers) and decorate the pie before baking (you need to “glue” them onto the yolk mixture and brush the top of the pie with it). Serve pie with ice cream or heavy cream. A good addition would be rich sour cream, whipped with a small amount of fine vanilla sugar.
You can add a generous pinch of grated lemon or lime zest to the filling while frying the apples (after adding sugar).
Quick apple pie
To prepare 1 pie for 6 servings you need:
- sweet and sour apples – 2 pcs.
- butter – 20 g
- sugar – 80 g
- ready-made puff pastry dough – 500 g
- flour for rolling out dough
- yolk – 1 pc.
- drinking water – 1 tsp.
- To make the filling, peel the apples, cut them into quarters and remove the cores and seeds. Cut the pulp into small slices.
- Melt butter in a frying pan. Add the apples and fry, stirring, over medium heat for 3 minutes. Sprinkle with sugar and keep on low heat for another 8 minutes.
- Roll out the dough sheets on a floured surface. If the dough is in a roll, cut it in half and roll it out. Place one layer on a baking sheet lined with baking paper. Place slightly cooled warm apples onto the dough layer and spread them evenly with a spatula, leaving 2 cm from the edges.
- Cut the second layer of dough crosswise with a sharp knife to make 4-5 parallel cuts 10-12 cm long at a distance of 2-3 cm from each other.
- Place the prepared layer of dough on the apples. Bring the edges of the dough together and seal tightly with your fingers or a fork so that the filling does not leak out during baking.
- Grease the top of the future quick apple pie with yolk, beaten with 1 tsp. water. Bake in an oven preheated to 180°C for 12–15 minutes. Serve warm.