High heel lovers have most likely been in situations where a heel broke, and at the most inopportune time and in the most inopportune place. And could there be a right time and place for breaking heels? But don't worry, even celebrities and runway models in high heels go through this. Even rockets fall! What can we say about shoes? Women find themselves in this situation every day and all over the world; exceptions, perhaps, can only concern those countries where women walk barefoot and do not understand why women need heels. We will try to help you correct the situation if it has already happened.
First of all, make sure you don't have any serious injuries! Perhaps now you need to think about how to get to the emergency room, and not what to do with your shoes. If everything is fine with you, then here are our options.
The best option is to find a shoemaker
Stop a passerby and ask him if there is a repair shop nearby. If there are no passers-by nearby or you are simply embarrassed to stop them, then an excellent solution would be to look on your smartphone using the Internet for a list of shoe repair points in the area where the trouble happened to you.
If you don’t know how to use the Internet, then call your children or your friend and ask them to “dig up” information about shoemakers nearby for you.
Remember, no one can fix your heel better than a master shoemaker. Moreover, it often takes no more than 10 minutes to solve a problem.
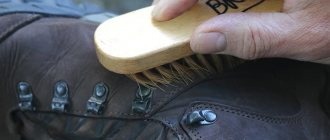
Nuances of repair depending on the material
The method of restoration largely depends on the material of the shoe. There is no single restoration recipe for leather, suede and patent leather shoes.
The patent heel has peeled off
On patent leather, scratches will be less noticeable if you lubricate them with Vaseline and buff with a soft cloth. Larger damage is painted over with acrylic paint or nail polish to match, and topped with colorless paint.
Leather heel peeling off
Scratches or nicks on shoes made of thin leather can be eliminated as follows:
- the material collected at the site of damage is slightly heated with a hairdryer to make it softer;
- smooth;
- BF-2 glue is applied to the damaged area and to the back of the skin;
- The skin is slightly stretched and pressed.
- Remains of glue are removed with a damp cloth, and areas with scratches are covered with a marker, varnish or paint in color.
The leather material must be pulled carefully so that new holes do not form.
The suede heel is peeling
You can mask scratches on suede using fine-grained sandpaper, salt and a hard eraser by simply rubbing the torn area. If painting is required, it is carried out with special products for suede.
Before work, wipe the suede with a cloth moistened with ammonia.
There are many ways to remove scratches from shoes, but if you can’t do it yourself, you can use special pads that are produced by many companies. As a last resort, a professional in a shoe shop will come to the rescue.
Gromova Anna, professional in the shoe business. Owner of a small store and shoe restoration and repair workshop.
Just a couple of decades ago, peeled heels were not considered a problem. Previously, this was easier - immediately after purchasing shoes, the hairpin was wrapped in a metal plate, which protected it from various damages. Even wealthy ladies sported “glasses” on their shoes.
Today this method of shoe restoration is not relevant, but there are many others that can hide a scratch from the eyes of others.
If the advice above did not help and there are no shoemakers nearby, then we will solve the problem on our own.
First of all, you need to find the broken piece or the entire heel.
Then try to sit down and appreciate the scale of the tragedy. Sometimes you just need to insert the heel back into its place in the sole. Some heels are secured with nails. In this case, place the heel in its old place and tap it with something hard until it snaps into place.
It's good if you have quick-drying glue in your purse. It can be purchased in supermarkets, hardware stores, markets and stationery stores. This is an indispensable thing in solving many women's problems! You can tape someone's particularly annoying mouth shut or fix a heel.
Clean the broken area from dirt and dust, apply glue following the instructions on the tube. Be careful not to glue yourself to the shoe. Now you need to wait a while for the glue to dry.
If you cannot cope on your own, try to resort to the help of passers-by.
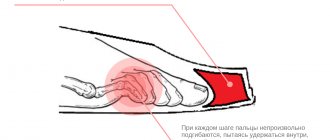
If everything works out, you can continue moving, but remember, your heel is still broken! Walk carefully, trying to keep your weight on the ball of your foot rather than resting on your heel, otherwise the heel may break again. And even more so, you shouldn’t wear these shoes to a club.
If you were able to fix your shoes yourself, then we are very happy for you. However, it is better to take your shoes or boots to a shoemaker for repairs, if, of course, they are worth the expense, so that he can check the quality of your work and, if necessary, strengthen the heel. If you think that this pair of shoes is not worth the effort, then you have a reason to treat yourself to a new thing.
How to repair sports shoes
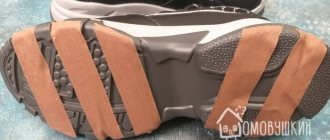
If sneakers or sneakers are worn out at the location of the socks, treat the damaged areas with sandpaper and degrease. Take rubber or polyurethane of different thicknesses and cut out a patch. A thicker material is applied to the site of damage, and a thinner thickness is applied to the normal sole.
Sand the patch where it is adjacent to the damaged area. Then cover the material with glue and press it to the sole of the sneaker or sneaker. Keep under pressure for a day.
If a hole has formed in the sole of a sneaker or sneaker, the edges of the hole must first be cleaned and degreased, then an adhesive compound must be applied. A fiberglass mesh (serpyanka) is inserted into the large hole.
To repair a broken sole on figure skates, special glue is also used. Such shoes can only be helped if the rupture does not occur in the places where the blade is attached. We looked at how to seal the damaged shoe sole. How to properly clean and wash sports shoes, read the link.
If repairing the heel is not possible.
Try to keep your emotions under control
Chances are, you may feel uneasy about the situation you find yourself in. You may feel like passers-by are laughing at you. But most likely this is not the case. Many women have been in your shoes and they have experienced the unpleasantness of the moment, but men would rather want to help a lady who finds herself in such an awkward situation, and this is a good reason to get acquainted.
If a breakdown occurs during some kind of special event in a hall, restaurant or on a summer playground, then this can really spoil your mood. However, in reality, nothing irreparable happened. You always have the opportunity to continue communication while sitting at the table. Well, if you really want to dance, then you can take a taxi home or to the store for a new pair. Perhaps someone will offer you help and give you a ride to the right place. Even if the new pair doesn’t quite fit the occasion, there’s nothing wrong with that. They will understand you. And the most important thing is that you will feel comfortable.
How to prevent unpleasant consequences. We act proactively
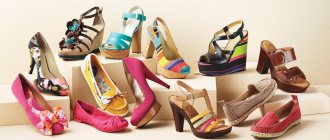
Carry a spare pair of shoes with you
It is a good habit to have a spare pair of shoes with you. Alternatively, you can use ballet flats for this; they are very light, compact and fit with any clothes. They can be used not only if you broke your heel, but also if you simply rubbed your feet while dancing.
If you like wearing high heels and are worried about them breaking, then carry a spare pair of shoes with you, perhaps in your car. They will be very useful there, since driving a car in high heels is not entirely safe, and having such a “spare wheel” you can always get maximum comfort when driving a car.
Also, you can have an additional pair at your workplace; it can be used as a replacement.
Ballet flats easily fit into an average women's handbag.
Why does the heel break?
The heel usually breaks in shoes that were poorly made. Not every manufacturer today closely controls the production process of footwear products.
Most enterprises opt for inexpensive materials when sewing shoes. And there are many violations in the technological process. Therefore, the end consumer must be able to determine for himself whether he is being offered quality shoes or not.
The heel may break if the manufacturer decides to make a poor quality insole. As a result, the nails that secure the heel will tear the insole completely.
The second reason for heel breakage is improper use of shoes.
The third reason is the height of the heel. The larger it is, the faster problems can arise with fixing the heel and arch support. Models with high heels experience maximum stress. Therefore, the heel quickly wears out and breaks.
Our online shoe store obuvka.rf recommends using the selected model correctly.
In our wide range you will find only shoes from trusted manufacturers. We carefully approach the formation of our assortment, and therefore we choose proven brands, such as: Rieker, Remonte, Janita, Dockers, Romika, Baden, Sketchers, El Tempo, Pitilos and many others.
Our catalog contains more than a thousand models.
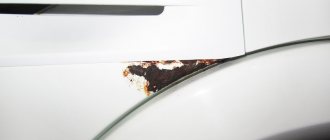
Causes of cracks
The lower part of the shoe is subjected to constant mechanical stress, which leads to its deformation. If the material does not have good wear resistance, then in a short time its integrity is damaged.
The following factors also cause the appearance of cracks:
- frequent contact with moisture and chemicals that corrode the material;
- the composition of the base is not adapted to temperature changes;
- poor performance properties of the material;
- damage to the instep support. Cracks appear near the heel. Untimely repairs will lead to broken shoes.
There are some features of different types of soles that affect its wear resistance. If it is made of polyurethane, then due to the high density at low temperatures, the elasticity of the material decreases greatly. In the area of folds, defects are formed that resemble ruptures in appearance.
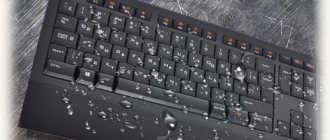
The PVC sole does not initially have high frost resistance, so it often cracks in winter. This is also facilitated by the loss of elasticity of the material over time, which occurs due to the evaporation of plasticizers.
Important! Buying shoes that have been sitting in a warehouse causes a short service life. Following the care instructions will not help.
Another reason for the appearance of cracks in the soles of shoes is mechanical damage. There are often sharp objects lying around on the roads, and upon contact with them, small punctures appear on the road. Gradually they will increase in size and turn into a large gap. Therefore, if any defects appear, you must immediately take the thing with a burst sole for repair, and if this is not possible, you must revive it yourself.
Cautions:
Don't be shy to ask people around you for help.
See a doctor immediately if you feel you have injured your leg.
If you fall, do not stand abruptly on your injured leg; in the event of a fracture, this may lead to displacement.
Periodically check your heels for wear or looseness. Don't risk leaving the house on loose heels! This could result in serious injury. Avoiding a problem is always easier than dealing with it.
No woman is immune from the fact that at the most inopportune moment a shoe may tear or a heel may break. Don't worry, I have a couple of tips that will help you get to your destination barefoot.
We use super glue
Do you like heels? Then I’ll give you a little hint, always carry a tube of super glue with you just in case. If you realize that your heel has come off, then with the help of glue you can easily fix it and calmly walk home, work or store in damaged shoes. There is a possibility that, even while on the street, you can glue the heel so that you can wear your favorite shoes for a very long time.
How to do this?
- Take off your shoes.
- First, wipe the torn part free of contaminants: dust, dirt and water.
- Then apply super glue to the edges and carefully press the edge of the torn heel onto the shoe.
- You have to wait a bit for the glue to set.
- When you realize that the glue has dried, you can put it on.
Important! Be careful, even when the glue has completely dried, try to lean on your toe and not your heel, so as not to create additional stress.
Preparation for the process
Before proceeding to work on sealing the hole in the sole, the shoes must be thoroughly washed and all dirt must be completely removed . Let's move on to the degreasing procedure. To do this, apply acetone or gasoline to a cotton pad and wipe the sole. Afterwards the boots need to be dried.
Experts recommend drying boots naturally without heating devices. If the hole is through, carefully remove the insole. Once the shoes are cleaned and dried, you can begin repairing them.
Tear off the second heel
Probably, many people remember the commercial of the 90s about the chewing dragee “Mentos”. It was this advertisement that showed many girls that you shouldn’t despair if your heel comes off, you can tear off the second one and walk calmly. Having got rid of the problem, we got quite comfortable ballet flats, well, at least you can walk home or the nearest shoe store in them.
The main thing is not to overdo it and not tear off the heel along with the sole.
To get rid of the second one, you can use the help of the stronger sex or try to do it yourself. If they are held on by glue, then you need to warm up the joint a little, so it will come off easier.
Find a quick repair shop
Nowadays there are workshops at almost every step. Try to find out where the nearest one is. If you are located near a workshop you know, it is, of course, better to go there.
Carefully, slowly get there, try not to twist your ankle. When you contact a repair shop, you will have to wait a while, but unlike other DIY repair methods, you won’t have to throw out your favorite shoes. If you don't know where the nearest workshop is, ask passers-by or look for information on the Internet.
It is better to find an express workshop where shoes are repaired immediately and quickly. This, of course, will not guarantee that the shoes will be repaired efficiently and will last for many more years, but you will spend much less time waiting. The workshop services are also guaranteed, so you don’t have to worry about wasting your money.
If there are any studs left, drive them in and put the heel back on.
A heel that is held on by nails can be driven back, but this will not help for long. Remove the shoe, look at where it was attached to the sole, insert the nails into the same recesses in which they were located. Take the shoe and tap the heel on any hard surface until it clicks into place.
In any case, you will have to use additional glue. Not a very effective repair method, but it will still help you get home more comfortably and evaluate what to do next with your broken heel. If home is far away, go to the store for glue or new shoes.
To avoid problems, periodically check your shoes for wear before heading out. Shoes periodically require maintenance. If you see that the heel is loose, do not risk going out in such shoes far from home.
When going out, on the road or close to home, we recommend that you pay attention to the condition of your heels so that you can always be sure that you will reach your desired destination. Agree, it’s not very convenient to walk in one shoe, even a super-brand one. Moreover, it is inconvenient both in the literal and figurative sense of the word.
How to repair shoe heels
Repairing a heel is generally quite simple: just purchase all the necessary parts and then glue them together following the instructions, or simply take the shoes to a shoe repair shop and make sure the shoes are repaired correctly. By choosing any of the proposed options, you can walk a couple more miles in any pair of your shoes. You can find out more information about high-heeled shoes in the article: High-heeled shoes that are good for healthy feet.
If you need to repair your shoes, you will have to give up heels for a while, at least until you get home, where you can really assess the damage and the effectiveness of the repairs performed.
Glue
Glue can help repair high heels in an emergency.
Of course, you will need a stronger glue than Elmer's Products, Inc., such as Super Glue and Shoe Glue. Do not overdo it, there should be enough glue so that you can stand firmly on your feet. We recommend that you use the following brands of glue:
- "Krazy Glue": Just 30 seconds and "Krazy Glue" will reliably and quickly put you on your heels.
- Super Glue: Super glue comes in different forms: a gel that is easy to apply, a strong or long-lasting glue.
- Shoe Goo Hot Shoe Adhesive: Shoe Goo Hot Shoe Adhesive can help restore or repair a broken heel.
- Elmer's Carpenter's Wood Glue: If the heel and heel of your shoes are made of wood and are secured with nails, try using wood glue to firmly hold the broken part in place.
Note: if you happen to look into a shoe repair store, in any case, in addition to glue, also buy nails to achieve the best results.
If the heel has previously been repaired by gluing without using nails, you will need to scrape off the old adhesive before applying a new layer of adhesive. This way, your shoes will be the same height as before the repair, but the heels will be more durable.
Installing heels
The heels are prepared for installation, wooden plugs are driven into the heels, and it’s time to install the heels on the shoes.
To securely fasten heels on heels, I use a combined fastening, gluing, followed by nailing with long shoe nails, which experts call Tex type TR. Shoe nails differ from ordinary nails in that they have flat edges, a diameter of 1-2 mm and a length of about 15 mm. The head of shoe nails is also of a special shape, small in diameter, but thick. The flat edges on the nail shaft prevent it from twisting when walking, and the shape of the head acts as a heel section and increases its service life.
If there are no shoe nails, then to attach the heel you can use simple finishing nails, shortening them and giving the rod a shoe shape, grinding it off with a file or on an emery column. Finishing nails are usually used to attach trim to doors.
To accurately hit the nails into the plugs driven into the heels, before gluing the heels, it is advisable to first mark the driving points on them. To do this, the heel is applied to the heel, the polyurethane is slightly transparent and the plugs are visible. All you need to do is put dots with a marker where the plugs are visible.
If the plugs are not transparent, if the heels are made of rubber, then you can attach the heel to the heel, move it toward you and make one mark at the level of the plugs, then move the heel to the side and apply a second line. You will get a cross into which you will need to hammer a nail. Since the diameters of the plugs are 5 mm, this method will provide sufficient accuracy.
You can nail the heel by placing the heel directly on the heel, but this is inconvenient, since the heel may move and not be installed accurately. Therefore, I prefer to first hammer all the nails into the heels so that the sharp ends appear on the opposite side of the heel. You need to drive the nails by placing the heel on the board so that the sharp ends of the nails do not flatten and become blunt.
For more reliable fastening of the heel, before nailing, the mating surfaces of the heel and heel are generously lubricated with waterproof “Moment” glue. After waiting for 5 minutes recommended by the rules of use, the heel is applied to the heel and pressed firmly.
There are special paws for repairing shoes using nails. But I make do with a large file with a wooden handle. I rest the file on a massive piece of metal, and rest the heel of my shoe on the handle.
As you can see in the photo above, the nails are hammered in, the heel is firmly installed on the heel, but the edges of the heel protrude somewhat beyond the contour of the heel. The protruding part of the heel must be removed by cutting it with a knife or using an emery column.
Shoes with new heels installed by yourself look no worse than new. If desired, the heels on the end side can be painted with a waterproof marker or paint.
Wobbly, unstable heels
You can repair a loose or unstable heel in the same way as a broken one - with glue. Also, pick up a couple of matching shoe studs and drive a couple into each heel.
At the same time, pay close attention not only to the broken heel, but also to the whole heel: purely for reasons of your personal safety, both heels must be stable. In addition, if your heels are stable, this can significantly relieve your joints.
Heel bindings
The strength of the heel attachment is determined by the materials of the parts that form the heel fastenings and the methods of attaching the heels. These two factors are to a certain extent interrelated, since the method of their attachment also depends on the properties of the materials and the height of the heels.
Adhesive heel fastenings used to attach rubber heels are quite reliable when shoes are worn: the significant thickness and high rigidity of rubber heels prevents them from partially or completely peeling off from the shoe. The strength of these bonds is determined by the same factors as adhesive plantar bonds.
The strength of nailed heel fastenings of low heels is most influenced by the method of driving nails (outside or inside the shoe), the length and diameter of the nail rods, the combination of nailing heels with their preliminary gluing, etc.
The strength of attaching heels externally with cylindrical nails with flat heads and long points is determined by the same factors as plantar nails. As in the latter, the points of the nails are bent on the inner surface of the insoles, and the heads are recessed into the thickness of the heels. The tearing of heels attached with cylindrical nails from the outside is usually accompanied by the nails being torn out of the insoles as a result of straightening and breaking off the bent point or breaking through the insole material. Only in rare cases is it possible for nail heads to break through the heel, so the strength of the fastening is almost independent of the properties of the heel material. With the correct selection of nails according to the diameter and length of the rods, the proper angle of inclination of the nails, good bending of the tips of the nails on the surface of the insoles (and when fastening with nails cut from spiral-knurled wire, also bending their opposite end), appropriate recessing (deepening) of the driven nails into heels on the running side, high strength and reliability of heel fastenings are achieved.
The strength of attaching heels from the inside with cylindrical nails with conical or flat heads and short points is determined by the contact friction forces developing between the surface of the nail rods and the walls of the punctures in the heel material. When heels attached from the inside with nails are torn off, the latter usually tear out of the heels, since the resistance to breaking through the insoles by the heads of the nails is much greater than the forces of contact friction. Only sometimes, when selecting particularly thick leather for heel fleeks or when the insole is insufficiently dense, nails remain in the heel that is torn off. The strength of attachment of heels from inside shoes is significantly influenced by the diameter and length of the nail rods, their angle of inclination, and the nature of the surface of the nail rods. In particular, the strength of attachment of plastic and wooden medium and high heels with screwed nails, despite the fact that they are driven in, is significantly higher than the strength of attachment with smooth nails.
Broken heels
You may suspect, but most likely, everything is exactly the opposite - you don’t even suspect that your heel is about to break. Maybe you just ignored that it was loose, or maybe it just broke. Either way, your shoe is now in two parts.
You can repair a broken heel in the same way as a loose one, using glue. The only difference here is that you need to very accurately align the two parts of the shoe. But since in this case the heel did not just become loose, there are no clear instructions on how to act in this situation. Just do what you think is necessary.
Material for heels
The best material for new heels is sheet polyurethane with a thickness of 5-6 mm of medium elasticity. It can be purchased at junk dealers. When choosing, you need to check the rigidity of the polyurethane. When you apply strong pressure with your fingernail, it should bend slightly.
If polyurethane is not available, then rubber from car tires will work well. It also has high abrasion resistance. But to get a piece of flat rubber out of a round tire you will have to tinker.
If your heel fails you when you are not at home: a quick solution
Super glue. This, of course, is not the most durable repair option, but if there is no shoe repair shop nearby, then super glue will definitely help you out.
After applying the glue, let it dry thoroughly, and then tug on the heel and make sure that the heel is well secured. Super glue is perfect for impromptu heel repairs due to the fact that it dries quite quickly. And for some brands of glue to dry completely it may take a whole day. If you want to try making shoes with your own hands, then this article is for you: How to make shoes with your own hands? Step-by-step master class.
If nails are protruding from the heel, then before gluing the two parts of the shoe, apply glue to the nails, then connect both parts together. If you can use shoe glue instead of super glue, that's even better. If you do not apply glue to the nails, then they will constantly stick out, and it does not matter at all how many times you have already driven them back.
How to remove the heel
In order to change worn heels, you must first remove the factory ones from them. The contact line of the heels with the base of the heel is usually clearly visible. There is a light stripe in the photo above.
To remove a worn heel, you need to place the shoes on their side on a hard surface and apply forceful pressure with a shoe knife, rocking it in the plane of the blade, to the border between the base of the heel and the heel. You can also use a simple knife or even a flat-blade screwdriver. In this case, it is better to remove the heel from the side of the sole so that possible minor damage to the heel is not visible from the outside.
The heel has been torn off from the base of the heel of the shoes, and now removing it will not be difficult. In the same way, the heel is removed from the second shoe.
The photo shows a view of the removed factory-made heel from the installation side on the base of the heel of the shoes. Some factories include spare heels with shoes. Check to see if there are spare heels lying around in the box from these shoes. Then all repairs to replace heels will come down to spreading the factory heel with glue, for example “Moment”, and installing it on the heel of the shoes.
If there are no spare heels, then you can look in stores. Ready-made heels are available in plastic and metal. In the photo there is a metal powder heel for shoes with stiletto heels.
After removing the heels, you will see the heel of the shoes approximately the same as in the photo. Depending on the heel area, there can be two, three or even four holes for pins for factory heels. But the repair technology is the same for all cases.
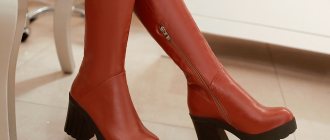
Worn out heels
The heels of stiletto heels tend to wear out over time. If you don't want to overpay for stiletto shoe repairs, just go to your nearest shoe repair store and buy everything you need. Namely, heels, which are easy to attach: just follow the instructions on the packaging with heels. It's very simple, and most importantly, fast.
Preparing the heel for installation on the heel
To make a heel, you need to apply its outline onto a polyurethane or rubber plate. To do this, you need to attach the heel of the shoe to the workpiece and circle it around the perimeter with a marker or ballpoint pen.
The shape of the heels for the right and left shoes, as a rule, is different and this must not be forgotten when cutting the workpiece. You can also trace a worn out heel with a pen, but I prefer to trace the heel.
After applying the markings, it is necessary to cut out the heels. You can cut polyurethane with a sharp knife, wetting its blade in water to improve sliding. But polyurethane is very difficult to cut with a knife, and I prefer to cut it using a jigsaw with a wood saw installed. Polyurethane is easily cut with a jigsaw.
For cutting, the plate with the applied markings is clamped in a vice. As soon as a few millimeters have been sawn, the plate is pulled back by hand so that the jigsaw file does not get pinched. Then the heel can be cut out quite quickly. You need to cut along the outside of the line so that there is a margin. The protruding part of the heel due to the level of the heel of the shoes can then be ground off using an emery board or cut off with a knife.
The new heels are ready and you can start installing them on the heels of your shoes. But before that, the heels themselves need to be prepared for installing heels.
Failed repair
The ability to repair a broken or loose heel of your favorite pair of shoes at the right time will allow you to save not only time, but also money, and will also definitely come in handy in an emergency (and, most importantly, unexpected) situation, when you least expect that your favorite shoes can let you down.
However, there are situations when the heels do not stick, and you really want to save your favorite shoes, then go to a shoe repair shop. There your shoes will be given a correct diagnosis and they will be told whether they can be saved or whether it’s time to buy a new pair that will definitely become your favorite.
Shoe repair. How to change a heel. part 1 (video)
How to replace a heel. part 2. Shoe repair (video) Probably everyone knows what tests accompany the choice of shoes and how much enthusiasm arises when you still manage to discover some models that will suit you. If you don't want to say goodbye to your shoes after just a few months of wear, providing them with the necessary care can significantly extend their life.
3 Tips to Extend the Life of Your Shoes
Replace soles
Did you buy shoes with leather soles? Before wearing it for the first time, take it to a repair shop and have them reattach the rubber soles. Leather soles will actually wear out very quickly and the shoes will not last long. Thin rubber soles will significantly extend the life of the shoes, they are inexpensive, lightweight, unobtrusive and available in many colors. In addition, they increase the moisture resistance of the shoes.
Don't buy used shoes
Do you think you'll save money by buying shoes from a thrift store, or are you bringing back the shoes your cousin left for you? Wrong. The only thing you'll end up with is broken and sore feet, because every person wears their shoes in a unique way. And it is likely that you will end up investing more in treating your feet than in new shoes.
What should I use to seal the soles of my shoes?
Given - moccasins with seemingly rubber soles. As usual, the sole is inside a honeycomb structure, so as soon as it becomes leaky, you can see a rectangular void. What should I fill it with? I tried silicone - it doesn’t last very well.
- View profile
- Private message
I tore off the insole and filled the voids with all sorts of rubber-like scraps and filled them with silicone. It worked out quite reliably, although the view from the inside was not ideal. It’s best to stick another thin insole on top later.
- View profile
- Private message
VUV wrote: I tore off the insole and filled the voids with all sorts of rubber-like scraps and filled them with silicone. It worked out quite reliably, although the view from the inside was not ideal. It’s best to stick another thin insole on top later.
Cut pieces to size from the micropork and fill the void, but this will only prevent the heel from falling through. If you already expect such an outcome, and quickly, then it’s better to immediately apply prevention, or even better, just avoid such shoes.
- View profile
- Private message
For street wear, no matter how much glue you use, the number will not work. I tried with a variety of solvents from acetone and hexane to butyl acetate and dichloroethane and with a variety of fillers.
- View profile
- Private message
Odinets wrote: For street wear, no matter the glue, the number will not work
Absolutely right. Either change the entire sole or throw it in the trash.
- View profile
- Private message
What if you add a little less hardener to the epoxy and fill in the voids. There is a resin with a plasticizer, or it can be mixed with dust from micropores.
- View profile
- Private message
The restorer wrote: What if you add a little less hardener to the epoxy?
Come on. Epoxy is crap, I'd be afraid.
- View profile
- Private message
Flier wrote: It's even better to just avoid such shoes.
How can you get around her when she’s almost all like this.
- View profile
- Private message