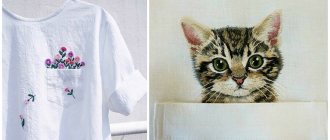
Printing production is rapidly developing, opening up new additional opportunities for modern people. One of these is creating pictures that can be “translated” onto clothes at home. The basis of such images is a special film. And the products themselves are appliques, only with the “thermo” prefix.
Self-application of thermal decal is possible only on a cotton base. In the case of other materials, it is better to sew decorative elements so as not to inadvertently damage the item.
Features of thermal stickers and their varieties
You should choose a thermal appliqué for clothing based on the following parameters:
- Material. The basis of the sticker is thick flock fabric. The design can be fabric or embroidered.
- Design. Thermal appliqués are available in children's, lace, rhinestone, sports, and with the logo of famous brands.
- Size. Stickers come in different sizes: small (1 cm wide) and large (up to 25 cm wide or more).
In addition to classic stickers, you can use thermal film. A design is applied to it with special ink. Using high temperature it is transferred to fabric. Film stickers stick to things for a long time.
Depending on the adhesive used, embroidery can be permanent or temporary. Permanent ones cannot be removed from a thing without damaging it.
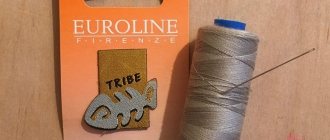
The sticker can be purchased at a fabric or accessories store.
Is it necessary to additionally sew on a thermal accessory?
Sometimes the fabric applique comes off for some reason. The reasons may be: expired expiration date or poor-quality adhesive base. For greater reliability, the accessory can be sewn to a wardrobe item manually or using a sewing machine. In the second case, use the zigzag stitch. The stitches should go along the edge, following the outline of the sticker. The top thread is matched to the color of the picture.
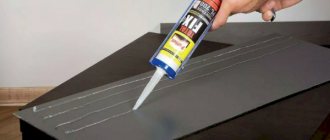
How to properly glue an applique
To work with the sticker, you need to prepare an iron, applique, item, and clean cotton fabric.
Gluing steps:
- Clothes are placed on a flat, clean surface. It is better to use an ironing board. Place the thermal decal on the selected location.
- The sticker is covered with cotton cloth.
- Turn on the iron at maximum power.
- Pressing the iron, iron the surface of the embroidery, paying special attention to the edges.
If a thermal adhesive was used to mask a hole, then a layer of adhesive interlining should be laid on the inside to strengthen the fixation. Cotton fabric should be clean and plain.
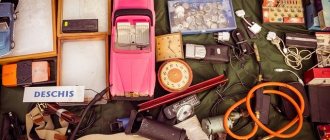
Be sure to read:
How to pack a suitcase without wrinkles: packing a dress, skirt, suit, shoes
Thermal film
When using an application based on thermal film, you must:
- Prepare a place to work. You will need a flat surface, clothing, an iron and a clean cloth or paper for thermal film.
- Heat the area of the product on which you plan to apply the sticker with a hot iron.
- Put a sticker.
- Cover the applique with fabric or paper.
- Place the hot iron on the embroidery for 5-7 seconds.
- After 10 seconds, carefully remove the protective material.
- Check how well the thermal adhesive adheres to the fabric, paying special attention to the corners. If the film comes off in some places, then go through the iron again.
Fabric based applique
Fabric appliqué is traditionally sewn onto clothing by hand or using a sewing machine. A picture is selected, all the elements are cut out and pinned onto the fabric with sewing pins.
It is important that the pattern fully matches the finished product. A mismatch will result in the individual parts not fitting together. A seam is placed along the edge of each part. The more voluminous and contrasting the threads are, the brighter the drawing will look.
To make the applique more rigid, you can lay adhesive interlining at the bottom and run a hot iron through the protective material.
The decorative element is sewn onto the item. If you need to glue a picture, use special fabric glue.
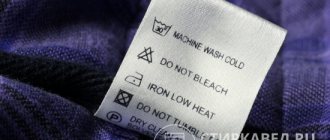
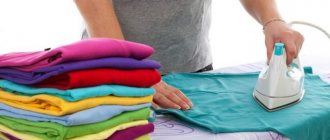
Rules of care
To ensure that the thermal adhesive lasts as long as possible, you must adhere to the following recommendations:
- It is better to wash a product with a patch by hand. Or, if we use a washing machine, we need to choose the appropriate gentle mode.
- The water temperature should not be higher than 40°C.
- Since most patches are bright, you may want to avoid using bleach.
- The product with the applique should be dried on a flat surface.
- It is better to iron such things either from the wrong side or through gauze.
How to make a thermal sticker with your own hands
To have an original applique, you should make it at home yourself. You will need a drawing, dublerin and an iron.
The work flow is as follows:
- Cut out the image you like from flock or other dense material.
- The parts of the picture are pre-sewn together.
- The finished applique is placed on dublerin and stitched along the edges. When the fabric frays, the edges are treated with an overlock or decorative stitch.
- Place a sticker on the item.
- Iron the sticker with a hot iron using a protective cloth.
- Inspect the drawing for defects.
Homemade thermal adhesive differs in durability from professional ones. The service life will be up to 5 washes, then the adhesive layer will need to be renewed. To avoid this, thermal appliqué can be additionally sewn onto clothing.
Be sure to read:
How to remove iron marks from white, black or dark clothes
Plastic bag
To create a thermal sticker, an ordinary bag with the desired design is suitable. The application procedure is simple, but this method is short-lived. The sticker will fall off after a few washes. How to quickly remove glue from a sticker from clothes and the iron-on sticker itself.
How to create an application from a package:
- Cut out the picture and put it on the item.
- Cover with protective paper. Iron the entire applique for 30 seconds.
- Carefully remove the top material, being careful not to damage the design.
- If the bag comes off at the edges, repeat the procedure.
Printer
To create original stickers, 2 types of printers are used:
- for printing on thermal film,
- for printing on fabric.
Thermal transfer can be ordered from professionals or done yourself. For home creativity, you will need an HP inkjet color printer and special paper for printing thermal stickers.
Printing stickers at home allows you to create original decorations for clothes and add any inscriptions. A graphics program is used to create the drawing.
Before sending for printing, you should mirror the image so that when applied to clothing, the image will appear correctly.
Making a Fabric Sticker
To create a sticker you will need a fabric printer and a web of glue. If you don’t have such a printer, you can contact a printing house.
To get a sticker on fabric, you must follow these steps:
- Print the sticker.
- Carefully cut along the contour.
- Place on clothes with adhesive web.
- Heat the sticker area with an iron through the protective material.
It is better to glue a fabric applique onto clothes made of cotton fabric. This will prevent the picture from stretching and increase its service life.
Types of decals
Before gluing the applique onto the fabric, you need to select it and purchase it from a specialized store that sells sewing supplies. There are several fundamentally different types of thermal application, which differ from each other in the base and material of the design element. The table below lists all existing types of thermal adhesives, indicating their features.
Table - Types of thermal decals
| Type | Peculiarities |
| Flex | — Thermal film; - has a smooth front side |
| Phlox | — Thermal film; - has a velvety “face” |
| Thermal adhesive with increased elasticity | — Stretches well on fabric; - used for silk, guipure, synthetics and other delicate materials |
| With effect | — Shiny surface (glitter); — with 3D drawing; - holographic |
| Reflective | — With special coating; — the “face” of the application shines when exposed to light in the dark |
| Phosphorescent | — Has the ability to accumulate sunlight; - glows at night |
Applications with an adhesive layer must be stored away from sunlight. Ultraviolet light reduces the adhesion of glue to the fabric surface. The shelf life of such products should not exceed 12 months.
Tips for choosing
If you intend to apply a iron-on adhesive to clothing, but do not know what type of product to prefer, answer a simple question: “What exactly do you want to apply the applique to?” The choice of sticker type depends on the type of fabric on which it will appear in the future.
- Knitwear and thin cotton items. To decorate or “save” these elements of your everyday wardrobe, thermal film with a thin base is suitable. It is easy to stick to a cotton base. During use, the applique will shrink and stretch along with the product, without a single hint that it is not “native” to it.
- Jeans, bologna jacket, fabric bag. Thermal films with a thin base are not suitable for thick clothing. The best option for this case would be applications with a thicker base. For example, thermal stickers made of fabric.
- Overalls or child's clothing. In this case, you should give preference to phosphorescent thermal stripes on clothes or applications with reflective elements. At night, these details will attract the attention of others to their wearer, which is especially important for road safety.
- Fashionable wardrobe items. If your goal is to decorate your favorite item, use holographic applications or thermal stickers with a 3D effect. They are suitable for skirts made of leatherette, synthetics, and silk.
If desired, you can order a thermal sticker with any image, even a photo from a family album. It is enough to provide a drawing or photograph to the printing house - and specialists will transfer it to thermal film.
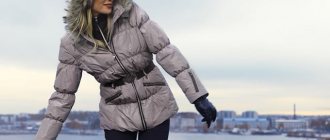
Application to a bolognese jacket
Applying a decal on a bologna jacket is more difficult than on a T-shirt. Bolon is a synthetic material and will melt under high temperatures.
Outerwear contains insulation, which makes gluing the appliqué difficult.
Rules for applying thermal stickers to jackets and pants:
- Dry the jacket thoroughly.
- If there is a hole, sew it up first.
- Make the surface smooth; if the applique is applied to a sleeve, then insert a folded towel into it.
- Attach a sticker.
- Cover the sticker with cotton cloth.
- Using a heated iron without steam, press the sticker for 5 seconds. The soleplate of the iron must be on a protective cloth.
- For reliability, you can secure the sticker with threads, sewing it over the edge.
Be sure to read:
5 ways to lengthen trousers, jeans or sweatpants at home
Reviews for reliability I grab with threads
The child often makes holes in almost new things, so I always have a few iron-on stickers in stock. Sometimes after washing the interlining comes off and the edges separate. Mom advised me to go over it with threads after gluing it, now the applique holds up much better!
Elena V.
When I make patches on thick fabric (jeans, jacket), I carefully stitch it with threads. This takes a little time, but it increases the service life of the thermal sticker several times, and the clothes do not lose their neatness.
Anastasia G.
Thermal stickers always stick well on thin fabric (on T-shirts, T-shirts). But there are problems with denim materials. Rather than re-gluing it several times and suffering from loose edges, it is easier to additionally stitch it with thread immediately after gluing.
Konstantin M.
We repair children's things using iron-on stickers
Iron-on adhesives allow you to practically hide holes and stains on children's clothing . The hole must first be patched. If sewing is not possible, then the fabric must be glued on both sides.
On a multi-layer item, only the layer where the hole has formed will have to be sealed. The adhesive fabric and sticker should be 1 cm larger in diameter than the hole.
How to fix an item:
- Apply non-woven fabric from the wrong side as a working layer to the clothing.
- Place the clothes flat, without folds.
- Run a hot iron on top without steam (over cotton fabric),
- Place a thermal sticker on the front side.
- Using a hot iron for 5 seconds, pressing on the applique, iron the fabric.
- After the sticker has cooled, check how firmly it has stuck.
Video material
Now you need to lay out the fabric on the surface so that there is not a single fold or wrinkle. The stickers are applied to the fabric in the place where they will be located in the future, with the pattern down, and the paper should be on top.
The iron must be heated to a temperature that the fabric on which the applique is being applied can withstand. Place paper on top of the sticker to prevent the fabric from getting damaged. Place the iron on the paper under which the sticker is located and press firmly.
If the design is larger than the iron, then you need to press it several times along the entire perimeter of the application. Allow the sticker to cool, otherwise it may pull on the paper and ruin it. After the paper has cooled, remove it from the design, only carefully, and be sure to make sure that the entire pattern lies evenly; if suddenly a defect is discovered somewhere, go over it with the iron again.
If you do something wrong, both the applique and the clothing will end up damaged. That's all! Now the clothes can be worn and washed. If you want to hide flaws in the fabric, you may need to glue a patch to the underside of the actual garment you are working on. Before gluing the iron-on adhesive, place gauze on top of the fabric and the picture glued with the adhesive side, and then begin ironing the surface, pressing the iron to the surface of the fabric or clothing.
Comments are closed, but trackbacks and pingbacks are open.
No matter how hard a child tries to be careful in wearing things, little troubles inevitably happen: either a chocolate stain will remain on his favorite sweater, or his pants will tear. There is no point in scolding children for these minor troubles, especially if they can be easily put in order. For example, winter outerwear sometimes tears and you have to patch it. This happened to us the other day. It seems like it would be possible to sew it up neatly, as some mothers do, but having sewing experience behind me, I want to advise you on another way out and I’ll explain why: when sewing up torn elements, you need a certain amount of fabric for strength so that the seam holds and does not come apart ( approximately 3-5 mm). This option is good if the hole is along the seam - sew it up and no problem. In the case (as in the photo), it is better to eliminate the hole in another way - seal it on both sides. The main thing is to do this as soon as it appears before the edges fray.
Plastic bag
If the sticker is a three-dimensional picture, then it is not always possible to do everything correctly if you do not follow the instructions:
- If there are plastic tips on it, for example, in the form of eyes, inside of which beads-pupils dangle, you need to heat the heater very carefully, and only from the wrong side, so as not to melt the thermoplastic.
- Be sure to straighten the fabric evenly before fixing the image of the sticker - otherwise it may wrinkle and you will have to throw away the sticker and completely redo everything.
- The movement of the iron must be done only in the form of application. Manipulation from side to side or up and down is not suitable here, since in this case the image may shift due to its volume.
Having achieved the desired result, you need to turn the clothes inside out and run a heated iron over the place where the image was transferred from the inside out.