How to properly and tasty prepare semi-finished meat products in various ways? How long does it take to prepare semi-finished cutlets?
Semi-finished products are indispensable products for those who simply do not have enough time to cook. Semi-finished products can be homemade or store-bought. Of course, homemade semi-finished products are considered healthier and tastier. When buying store-bought preparations, you need to pay attention to their composition and appearance. But how to prepare such products? This article will try to answer this question.
Do I need to defrost semi-finished cutlets before frying?
Do I need to defrost frozen cutlets?
- Of course, you can try to defrost semi-finished cutlets naturally or in the microwave. But such a procedure often leads to loss of product shape. The fact is that during the defrosting process, all the moisture begins to come out of the semi-finished products, and the cutlets simply fall apart. In some cases, thawed cutlets turn back into minced meat.
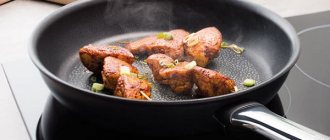
- That is why culinary experts recommend not defrosting semi-finished products, but sending them immediately to a frying pan in a large amount of hot oil.
- At the same time, it is worth paying attention to the same moisture released by the melting cutlets - it will provoke the appearance of oil splashes in the frying pan.
Choosing minced meat
For a semi-finished product to be truly tasty and healthy, it must be made from high-quality meat. The best way to do this is to buy the pulp and twist it yourself. In this case, you will be sure that no foreign ingredients, such as large amounts of fat, will get into it.
The choice of meat type should also be conscious. Fatty pork is not very healthy. Also consider frying in oil. Lean pork will be tender but dry. The same can be said about chicken. The beef is too tough. Through trial and error, the housewives found the optimal solution. It is a mixture of beef, pork and turkey. Then the cutlets turn out juicy and tender. Ask your moms if you can freeze ready-made cutlets. Surely they will answer that they themselves have done this more than once.
Cutlets in tomato sauce
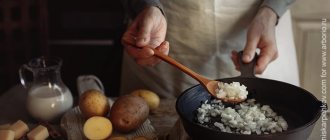
Use homemade or store-bought cutlets, and serve boiled buckwheat or mashed potatoes as a side dish. Chop a medium sized onion and 2 cloves of garlic. Place the onion and garlic in a frying pan with vegetable oil and fry until golden brown. Grate 1 large carrot on a coarse grater and fry it in oil as well.
Pour boiling water over 3-4 ripe tomatoes, remove the skin, finely chop the pulp and add to the vegetables. Salt the mixture, add 0.5 teaspoons of dried basil and rosemary, as well as freshly ground black pepper to taste. Stirring, simmer the vegetable sauce until the carrots are soft.
Place the cutlets (4-5 pieces) in a heat-resistant form without defrosting. Pour tomato sauce over them, close the mold with a lid and place in the oven preheated to 180°C.
Cook the cutlets for about half an hour, serve hot, topped with sauce.
Selecting a frying pan and oil
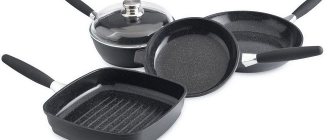
A frying pan should be selected mainly with a thick bottom, then it will be possible not to burn the product, but to allow it to fry well - a cast iron or Teflon-coated one will do. If deep frying is intended, then the device must have high sides. Pork and beef cutlets need to be simmered a little more, so it’s a good idea to have a tight lid on the frying pan.
As for oil, not every fat can be used to fry delicious cutlets. Margarine or spread definitely won't work. It’s not that such a trick won’t succeed, but the taste of the product can change greatly, and these fats themselves are not very healthy for humans.
Chefs suggest frying cutlets like this:
- refined vegetable oils (corn, olive, sunflower) - universal and can be used for any type of cutlets;
- lard, rendered fat - pork, lamb, beef cutlets;
- butter – chicken Kiev, schnitzel.
How to deliciously cook ready-made, store-bought frozen steamed cutlets?
How to deliciously cook frozen steamed cutlets?
Frozen steamed cutlets can be prepared in several ways:
- In a colander over boiling water in a saucepan.
- In a steamer.
- In a sleeve in the oven.
For a richer and more piquant taste, it is advisable to pre-fry the semi-finished products a little in a frying pan, and only then send them to “steam”.
Frozen cutlets in a steamer
And here’s an example of the simplest recipe for cooking steamed frozen cutlets in a double boiler without pre-frying:
- Pour 1 liter of water into the steamer.
- Place a wire rack in the steamer.
- Lubricate the grill with vegetable oil (you can use a special silicone brush).
- Place the cutlets (not defrosted) on the grill.
- Set the steamer to “Steam” for 25 minutes.
- After the specified time has passed, remove the cutlets from the steamer.
In a slow cooker
Many housewives prefer to cook frozen cutlets in a slow cooker, because the technological process in such a device is simple and reduces the time it takes to create food.
What ingredients will you need?
To obtain a deliciously designed treat, you will need the products indicated in the table.
| List of components | Number of dish components |
| Sunflower oil or butter | for frying |
| Frozen cutlets | 500 g |
| Ghee | For frying |
Step-by-step cooking process
Order of execution of the recipe:
- First you need to turn on the multicooker and wait for the device to heat up.
- Then you should remove the cooled cutlets from the freezer and free the semi-finished product from the packaging material.
- Now you have to grease the bowl of the electrical appliance with oil, then you have to carefully place the cutlets on the bottom of the container, and set the device to the “Baking” or “Frying” mode.
- The product should be cooked until golden brown on both sides of the cutlets.
- After obtaining an appetizing crust, you need to pour a little water into the container, after which you need to continue the process on the “Stew” program for 35–40 minutes.
The finished dish must be kept for approximately 5–7 minutes. in the container of a closed device, then start preparing the hot food.
What are the cutlets served with?
You can present meat products made from lamb, beef, pork or chicken with almost any side dish, fresh salad or pre-made sauce.
Recipe for homemade semi-finished cutlets
Take a larger cutting board, put a plastic bag on it, sprinkle it lightly with flour, and carefully place the formed cutlets.
Put it in the freezer. A day later (or earlier), when the cutlets are thoroughly frozen, transfer the cutlets to a bag or box to free up the cutting board.
Now you always have homemade semi-finished minced meat cutlets in your freezer. You can take out as much as you need and fry quickly. You can also separate some minced meat and make meatballs for soup and freeze, you can prepare dumplings and dumplings. You can also make meat hedgehogs with rice in advance.
There is no need to defrost the cutlets to fry them. Heat a frying pan, pour in vegetable oil and add frozen cutlets. Cover with a lid and fry over low heat for 30-40 minutes. Don't forget to turn the cutlets over. Shortly before the end of frying, the lid can be opened.
This classic recipe for homemade minced meat cutlets will help you stock up on semi-finished products in the freezer.
You can also prepare tzatziki sauce for the cutlets.
Ingredients:
- beef 350 g
- pork 350 g
- unsalted pork lard 100 g
- large onion 1 pc.
- loaf 4 slices
- milk or water ½ cup for soaking the loaf
- salt, pepper to taste, seasonings
In the microwave
A special feature of preparing a frozen semi-finished product in a microwave is the fact that the microwaves of the device penetrate into the product simultaneously from all sides, but not deeper than 2 cm. For this reason, the thickness of the cutlets should not exceed the specified value.
What ingredients will you need?
To create the dish you will need the products listed in the table.
| List of components | Number of recipe ingredients |
| Hard cheese | 100 g |
| Homemade sour cream | 60 g |
| Frozen cutlets | 1 kg |
The duration of the heat treatment process of the product depends both on the size of the designed products and on the power of the electrical appliance. Defrosting and frying food takes an average of 24 minutes.
Step-by-step cooking process
Description of preparation steps:
- First, you need to remove the cooled semi-finished product from the freezer, remove the products from the packaging, then place them in a container intended for the microwave.
- After this, you need to turn on the device (power 800 W), using the “Grill” program, then you have to bake the food for up to 20 minutes. If this mode is not available in the device, you should use the steam cooking option.
- To speed up the process, it is recommended to pour a little broth or drinking water into the dishes with the placed products.
- You can get an appetizing crust on your cutlets using a simple technique - shortly before finishing processing the products in the microwave, you should sprinkle them with salt water.
The finished dish should remain in the switched off unit for a short time to ensure uniform heat distribution inside the product.
What are the cutlets served with?
The best way to present such a treat to the table is with tomato, cream or other homemade sauce. As a side dish you should serve boiled pasta, fluffy mashed potatoes, rice, buckwheat, and pearl barley porridge.
How to deliciously cook frozen semi-finished cutlets in the oven with gravy?
Frozen cutlets in the oven with gravy
Ingredients:
- Frozen cutlets - 12 pcs.
- Onion - 1 pc.
- Carrots - 2 pcs.
- Tomato paste - 2 tbsp.
- Adjika - 1 tbsp.
- Salt
- Sugar
- Ground black pepper
- Vegetable oil
Cooking algorithm:
- Pour vegetable oil into the frying pan.
- Place frozen cutlets in heated oil (no need to defrost).
- Fry the semi-finished products for literally 5 minutes on each side.
- Peel the onions and carrots.
- Grate them on a coarse grater or chop them finely.
- Pour vegetable oil into another frying pan.
- Fry onions and carrots in oil.
- Pour adjika and tomato paste over fried vegetables.
- Add a little sugar, salt, pepper and water.
- Stew vegetables in gravy.
- Place the cutlets in a baking dish and pour the gravy over them.
- Place the mold in the oven for 20 minutes at 200-220 degrees.
Grilled
You can also cook frozen cutlets on a grill, which can be stationary (portable) or built into a microwave or oven.
What ingredients will you need?
To obtain and bake semi-finished products on the grill, you will need the components indicated in the table.
| List of products | Number of recipe ingredients |
| Sunflower oil | of necessity |
| Beef (shoulder part) | 1 kg |
| Spicy sauce | taste |
| Dry wine | 1 tbsp. l. |
| Egg | 1 PC. |
| Granulated garlic | 1 tsp. |
| Worcestershire sauce | 2 tsp. |
| Pepper mixture | ½ tsp. |
Step-by-step cooking process
Sequence of cooking steps:
- First you need to prepare the ground beef. To do this, you need to strip the meat of films and tendons, cut the piece into pieces, then grind the product in a home processor using the coarsest grid.
- Now you need to pour dry wine and sauce into the resulting mass, add granulated garlic, salt, a mixture of peppers and an egg.
- After this, the resulting composition must be thoroughly mixed, beaten, kept in the refrigerator for about 1 hour, then formed into flat cutlets about 1 cm thick.
- The prepared semi-finished product should be packaged in one layer, after which it should be sent to the freezer. It is recommended to store this product for up to 2 months.
- When the need arises to use chilled cutlets, for example, for hamburgers, you should remove the products from the cold and place them on the grate of a previously turned on unit, greased with sunflower oil.
- To use the option of defrosting semi-finished products, you need to click on the “snowflakes” icon on the panel, then fry the products over coals or bake in a special device - an electric grill.
- If you have a grill pan, frozen cutlets can be placed in one layer on baking paper, then put the workpiece on the corrugated surface of the device, and fry the food over a slightly less than medium heat.
The semi-finished product should be cooked over low heat, turning each portion as a golden brown crust appears.
What are the cutlets served with?
The fried products can be shaped like a hamburger by placing them with the desired vegetable composition in a bun cut in half. In another variation, meat food will harmonize well with fresh vegetables located on lettuce leaves along with golden cutlets.
Frozen cutlets in the oven without frying
The main advantage of frozen products is that they can be turned into a hearty and healthy meal at any time. You just need to choose the optimal cooking method - in a frying pan, in the oven, in a slow cooker, in a convection oven.
Cooking in the first option is the most useful method of heat treatment of the product. In addition, it is not necessary to constantly stand at the stove and make sure that nothing burns.
If you have time and opportunity, it is better to set aside a few hours and make the largest possible number of cutlets from self-prepared minced meat for several days or even weeks. The products are laid out on a board and sent to the freezer. As soon as the blanks freeze, they need to be taken out and put into bags.
Required components:
- frozen meat products - packaging;
- vegetable oil - 1 tbsp. l.
Cooking frozen cutlets in the oven is as easy as shelling pears:
- Remove the semi-finished products from the bag. Wait a little until the frost melts.
- Grease a baking sheet.
- Place the meat products on a metal sheet and place it in the oven. There is no need to add salt or seasoning. Both purchased and home-made cutlets already contain all the necessary spices and seasonings.
- Cook at 180 C for at least 35 minutes.
You can also use foil. This method will definitely appeal to adherents of a healthy diet, since this method of heat treatment does not require the presence of oil. Baking in foil allows you to completely retain all the meat juice, resulting in a very juicy and soft treat. To do this, you need to cover a baking sheet with a layer of foil and place the pieces. Cover them with a second layer of paper of the required length and width, then tightly connect the edges.
Bake for a little over half an hour.
Useful tips and tricks
Getting delicious and golden-brown pre-frozen cutlets out of the oven is a feasible task if you take into account the following culinary recommendations:
- In order to prepare the most juicy products intended for freezing, it is recommended to add components of your choice to the minced meat, such as approximately 1 tbsp. l. sunflower/olive oil, beaten egg, crushed ice, pre-softened butter, finely shredded cabbage or other vegetables;
- Raw onions included in the minced meat in frozen cutlets will lose their taste and aroma, so it is advisable to sauté the diced vegetable in oil until soft before placing it in the ground mass;
- It is advisable to pour a little lemon juice into the minced fish, which will serve as a natural flavor enhancer, or heavy cream. A small amount of cottage cheese will not only add juiciness to such products, but also minimize the fishy tint in the food;
- garlic in frozen cutlets will acquire an unpleasant odor, and bread crumb added to the recipe can make the pieces thawed and baked in the oven slightly “rubbery”;
- minced meat for cutlets that are planned to be frozen must be immediately salted and peppered;
- You should not leave “for later” the coating of raw products with flour or breading mixture. It will not be possible to arrange such a procedure for semi-finished products removed from the chamber;
- Place cutlets formed from minced meat into the freezer in proper packaging - in regular or silicone cupcake or muffin cups, in a special zip-lock bag. The ideal option is glass trays for baking in the oven. A dish prepared in such a container does not need to be transferred to a serving bowl for serving;
- To preserve the taste and quality of frozen cutlets, you need to monitor the temperature indicator in the freezer so that it does not exceed -18 °C.
- To thaw minced meat products, if necessary, proceed in the reverse order - you need to remove the semi-finished product from the chamber, place the portions on a tray, and leave it on the bottom shelf of the refrigerator.
Frozen meat/fish cutlets intended for baking in the oven are recommended to be packaged in portion order with stickers on the packaging indicating the date of placing and the name of the dish.
Frozen cutlets fried in a pan with sauce
If you often cook frozen semi-finished products, you probably know that sometimes the product is fried on the outside, while the inside remains raw. This is usually typical for bulky products (for example, frozen Kiev cutlets), which are recommended to be cooked in the oven.
In this recipe we will not resort to using the oven, but will simply prepare cutlets with gravy. This dish will not only protect you from an “unpleasant surprise”, but will also delight you with good taste.
Ingredients
- Frozen cutlets - 1 package;
- Ketchup or tomato sauce - 4-5 tbsp;
- Cream or full-fat milk - 100-150 ml;
- Wheat flour - 1-2 tbsp;
- Sunflower oil - for frying.
How to properly cook frozen cutlets in a frying pan with sauce
- Take the cutlets out of the packaging, lay them out and let them sit a little for a couple of minutes.
- Pour oil into the frying pan and set it to heat over fairly high heat.
- Using a slotted spoon or spatula, carefully place the cutlets so that they cover the bottom of the pan in one layer.
- Cover the pan with a lid and fry for a couple of minutes.
- Remove the lid and carefully turn the cutlets over to the opposite side; by this time they should be browned.
- In a small deep container, mix milk and tomato sauce. Using a mixer or fork, achieve homogeneity of the mixture. Add flour here and mix again.
- Pour the resulting mixture over our cutlets, fried on both sides.
- Bring the sauce to a boil, then reduce the heat to moderate and simmer for 15-20 minutes.
The finished dish will be an excellent addition to almost any side dish, but such cutlets with gravy are especially harmoniously combined with mashed potatoes and boiled cereals.
Turkey
It is advisable to include not only dietary turkey meat in the composition of this type of minced meat, but also carrots, sautéed onions, cheese shavings and spices (salt, pepper). Adding such components to meat will make pre-frozen and then baked cutlets especially tasty and beautiful.
What ingredients will you need?
To prepare food you will need:
- sunflower oil - for processing the baking sheet;
- frozen cutlets - 15–20 pcs.
Step by step process and cooking time
Sequence of creating food:
- First you need to remove the required amount of pre-formed and frozen turkey meat products from the chamber. It is advisable to thaw semi-finished products a little to get rid of the frost that has formed on them.
- After this, you should sprinkle a wide baking dish with sunflower oil, then place raw cutlets on the bottom.
- To ensure that the finished food does not turn out dry (turkey meat is not a fatty product) and becomes as tender and juicy as possible during heat treatment, you need to pour about ¼ tbsp into the container. filtered water or cover the dish with a sheet of foil.
It takes approximately 35-40 minutes to submit the completed form. into an oven heated to 180 °C.
What and how to serve it with?
In summer, the best accompaniment for turkey cutlets is fresh vegetables from the garden. At any time of the year, homemade pickles will be an excellent addition to baked products. The still-smoking meat dish, garnished with slices of ripe tomatoes, laid out on a plate will appeal to both adults and little eaters.
How to fry frozen cutlets
Ready-made frozen cutlets can be reheated over low heat without defrosting. You can also stew them in sauce or reheat them in the oven or microwave. The cutlet is already ready to eat; it is simply brought to the desired temperature.
It takes a little more time to cook cutlets that are frozen raw. If you plan to fry them, coat them in breading before placing them in the pan. They are prepared in the same way as fresh ones, only they are defrosted in a frying pan during the cooking process.
Using the tips above, you will no longer rack your brains about what to cook something quick and tasty. We cooked the porridge, took the cutlet out of the freezer, and dinner was ready in a hurry. Take the time to prepare homemade frozen cutlets, and you will be sure that you are provided with a delicious meat dish for the whole week.
A modern person constantly has to choose what to spend every minute on, since work takes up too much time. Most often, busy people try to simplify the cooking process by using semi-finished products, and therefore the topic of our conversation today is how to fry frozen cutlets in a frying pan. This product is a real lifesaver for those who do not have the opportunity to make minced meat and make meat balls from it themselves.
First you need to figure out how to choose the right product and what you should pay special attention to when purchasing. Why is it important? A low-quality semi-finished product cannot be prepared well, and therefore all efforts, even small ones, will go down the drain.
- We carefully inspect the packaging - check the expiration date and the period of time within which the product should be consumed after opening it. Also, if it is possible to look inside the package, we will examine the contents for the presence of ice - a sign of defrosting and re-freezing of the product.
- We choose only those products in which preservatives and other excipients are either not used at all or are present in minimal quantities. We also pay attention to the presence of breading - with it, cooking is much more enjoyable and easier.
- Be sure to remember that semi-finished products such as cutlets do not require a preliminary defrosting procedure. As a result, the product will lose its shape and it will be impossible to cook it.
- If you purchased a product without breading and find frost on the surface of the cutlets, carefully remove it with your hand before lowering the cutlets into the frying pan. This will significantly reduce the amount of splashing.
(1 rating, average 4 out of 5)
How to form semi-finished products
For a kilogram of cutlet mass you will need 100 g of breadcrumbs. Pour it into a convenient cup and start shaping the products. There are several ways to do this, among which you can choose the most convenient one.
- With clean, slightly damp hands, form a patty of the required size and roll well in breadcrumbs. To prevent the products from sticking together and moving away from the packaging, it is recommended to use crackers rather than flour. And then the crust turns out more interesting. Is it possible to freeze ready-made cutlets in muffin tins? Very simple. And housewives are happy to use this method. After freezing, simply pour them into a bag.
- You can lay out semi-finished products ready for frying on a cutting board, covering it with film. Be sure to leave space between the products and cover with cling film on top. And in this form, send it to the freezer.
- If you plan to make a large quantity, you can lay it out in several layers. To avoid damaging the shape, it is best to make thin minced meat cutlets, otherwise the top ones will flatten the bottom ones. Or give the first batch time to freeze.
Chicken cutlets “heroic with surprise”, deep fried
How to properly and tasty prepare semi-finished meat products in various ways? How long does it take to prepare semi-finished cutlets?
Semi-finished products are indispensable products for those who simply do not have enough time to cook. Semi-finished products can be homemade or store-bought. Of course, homemade semi-finished products are considered healthier and tastier. When buying store-bought preparations, you need to pay attention to their composition and appearance. But how to prepare such products? This article will try to answer this question.
Advantages and disadvantages
Freezing food has a number of advantages:
- food in the freezer lasts much longer than in the refrigerator;
- products do not lose their beneficial properties;
- There is always an option for a quick homemade lunch or dinner at hand.
The disadvantages of freezing semi-finished meat products include only the need for storage under strict temperature conditions - at least -18 degrees. Otherwise, frozen cutlets do not differ in their properties from freshly prepared ones.
Do I need to defrost semi-finished cutlets before frying?
Do I need to defrost frozen cutlets?
- Of course, you can try to defrost semi-finished cutlets naturally or in the microwave. But such a procedure often leads to loss of product shape. The fact is that during the defrosting process, all the moisture begins to come out of the semi-finished products, and the cutlets simply fall apart. In some cases, thawed cutlets turn back into minced meat.
- That is why culinary experts recommend not defrosting semi-finished products, but sending them immediately to a frying pan in a large amount of hot oil.
- At the same time, it is worth paying attention to the same moisture released by the melting cutlets - it will provoke the appearance of oil splashes in the frying pan.
The last notes
How to cook and freeze grape snails at home
BellaRussa — Nov 13th, 2016
Category: Freezing
The grape snail is a real delicacy and an aphrodisiac that the French and Spaniards are crazy about. In our stores you can buy ready-made frozen snails, but it’s more interesting to prepare a masterpiece yourself. In the southern regions of Russia, the grape snail is also not uncommon, and for the winter holidays you can prepare as many snails as will fit in the freezer.
Khinkali: tricks for preparing and freezing for future use
AnyutaN — Nov 13th, 2016
Category: Freezing
The Georgian dish, khinkali, has recently gained great popularity. Delicate thin dough, rich broth and aromatic filling can win the heart of any person. Today we’ll talk about how to prepare and freeze khinkali in our article.
How to freeze kebab
BellaRussa — Nov 2nd, 2016
Category: Freezing
Troubles happen and the barbecue trip is postponed indefinitely, and you have to think something about the marinated meat. Is it possible to freeze kebab?
Tricks for freezing jellied meat in the freezer
AnyutaN — Oct 30th, 2016
Category: Freezing
Jellied meat is a very tasty dish! Due to the fact that it takes a lot of time to prepare, jellied meat is not prepared at home very often. In this regard, homemade jellied meat is considered a festive dish. Today I propose to talk about whether it is possible to freeze jellied meat in the freezer.
How to properly freeze meatballs
Skwerl — Oct 24th, 2016
Category: Freezing
The modern housewife has so many things to do that she simply doesn’t have time to devote more than 30 minutes to preparing dinner every day. But you want to pamper your family with fresh food, so what should you do in this case? Freezing homemade semi-finished meat products comes to the rescue. Many types of preparations can be frozen, but one of the most successful and variable for further use is meatballs.
How to cook and freeze meatballs for future use at home
AnyutaN — Oct 12th, 2016
Category: Freezing
Meatballs are a very convenient thing! Frozen for future use, they will become a lifesaver for the housewife. From frozen semi-finished products you can cook soup, prepare gravy or steam them. Meatballs have also proven themselves excellent on the children's menu. This article will discuss how to freeze meatballs in the freezer.
How to properly freeze minced meat in the freezer
AnyutaN — Sep 27th, 2016
Category: Freezing
Sometimes you have a great opportunity to buy a good piece of fresh meat. There may be too much of this meat to prepare one dish. Therefore, housewives often turn the meat into minced meat and try to freeze it. Read this article about how to do this correctly so as not to lose taste and save time on defrosting.
How to freeze cutlets - a simple recipe for preparing homemade semi-finished products
Evrouk — Sep 23rd, 2016
Category: Freezing
Any working housewife wants to save her time in the kitchen, but at the same time feed her loved ones tasty and satisfying food. Ready-made store-bought semi-finished products are expensive, and it is not clear what they are made of. The solution in this situation is to prepare semi-finished products yourself. In particular, you can cook and freeze cutlets for future use.
Maximum shelf life of frozen foods
For meat and semi-finished meat products, the maximum shelf life in the freezer is 2-3 months. As mentioned above, it is preferable to store frozen foods at a temperature of at least -18 degrees Celsius. It is at this temperature that the bacteria contained in the product slow down their vital processes as much as possible.
When placing food in the freezer, use the “quick freeze” function or set the temperature to minimum. This is the most gentle cooling method. With a gradual decrease in temperature, ice may form inside the products, which will worsen their taste after defrosting.
How to quickly defrost minced meat at home
Defrosting meat products at home is carried out in compliance with sanitary and professional standards. When the process follows the rules, the structure of the minced meat is preserved, the attractiveness of its appearance is preserved, and the likelihood of spoilage is reduced.
Defrost in the refrigerator
Using a refrigerator to bring minced meat to the proper condition is not a fast method.
The process is very simple: put the bag of minced meat in a bowl, place it on the refrigerator shelf (preferably the middle one). The speed of defrosting depends on the size of the piece. As noted above, a 1 kg piece can take up to 24 hours to defrost.
The temperature maintained inside the refrigerator has its influence. For example, 4 degrees will promote rapid thawing, which cannot be achieved at 2 degrees of heat.
Do not cover the container with minced meat, otherwise air exchange will be difficult and the thawing process will slow down.
To check if the minced meat is ready for cooking, press it with your finger. When a visible dent remains on the surface of the piece, the minced meat is ready for cooking.
Do not delay cooking for a long time; after defrosting, heat treat the product. If your plans change, don’t wait for the minced meat to thaw, just put it back in the freezer.
In cold water
It is very convenient to defrost meat products by exposure to cold water. An average portion of minced meat weighing half a kilogram will be ready for further processing after an hour.
The defrosting process goes like this:
- remove a piece of minced meat from the freezer;
- put it in a bag equipped with a zip fastener;
- close the flap tightly;
- check that there are no holes on the surface of the bag (if you miss this moment, water will get into the minced meat, this will make the finished product watery);
- pour cold water into a container large enough to hold the meat;
- Place the bag of minced meat in it.
Some housewives prefer to use a kitchen sink in the form of a container. In this case, wash the sink thoroughly first.
To speed up the process, change the water to fresh water every half hour. Minced meat subjected to this type of thawing cannot be re-frozen. Therefore, cook the minced meat immediately when it has melted to the desired state. Otherwise, after 3 hours the product will deteriorate.
In hot water
Particularly impatient housewives use hot water poured into a container for defrosting, or use warm running water. In this case, the meat will melt very quickly, after about a quarter of an hour.
This type of influence is not recommended, because under the influence of hot water, active protein folding occurs, which changes the appearance of the product, leads to loss of taste, and the appearance of hardness in the finished dish.
When choosing this method, be sure to place the piece in a tight plastic bag to prevent liquid from getting inside.
In a water bath
An excellent way to thaw frozen foods is to use a water bath. The method is considered ideal for small pieces.
- fill ¼ of the pan with water;
- place on the stove;
- remove the minced meat from the packaging;
- place the meat in another container, smaller in size than the pan;
- check whether water from the pan gets into the container with meat;
- bring the water in the pan to a boil and maintain it;
- Turn the product periodically so that it thaws evenly, remove the already softened layer.
In the microwave
After the appearance of a microwave oven in every kitchen, the process of defrosting food has become easier. The method is fast and requires minimal effort; use it immediately before cooking. Minced meat melted in this way cannot be stored.
The microwave is used in this way:
- remove the minced meat from the freezer and unpack it;
- place in a microwave-safe container;
- select the defrost mode, if it is not available, set the power to 50 W;
- run the program;
- periodically stop the operation of the device and turn the piece over with different sides;
- after 15 minutes, check if the surface of the meat has become soft;
- if solids are present, continue defrosting.
How to deliciously cook ready-made, store-bought frozen steamed cutlets?
How to deliciously cook frozen steamed cutlets?
Frozen steamed cutlets can be prepared in several ways:
- In a colander over boiling water in a saucepan.
- In a steamer.
- In a sleeve in the oven.
For a richer and more piquant taste, it is advisable to pre-fry the semi-finished products a little in a frying pan, and only then send them to “steam”.
Frozen cutlets in a steamer
And here’s an example of the simplest recipe for cooking steamed frozen cutlets in a double boiler without pre-frying:
- Pour 1 liter of water into the steamer.
- Place a wire rack in the steamer.
- Lubricate the grill with vegetable oil (you can use a special silicone brush).
- Place the cutlets (not defrosted) on the grill.
- Set the steamer to “Steam” for 25 minutes.
- After the specified time has passed, remove the cutlets from the steamer.
From fish
Frozen cutlets cooked in the oven from the presented product will turn out especially tasty if the minced meat recipe contains several types of fish, shrimp meat, lard or lard.
What ingredients will you need?
To bake items from the freezer you will need:
- olive oil - to taste;
- frozen semi-finished products - 10 pcs.;
Step by step process and cooking time
Step-by-step preparation:
- First you have to get the fish cutlets out of the freezer. There is no need to thaw a product prepared at home.
- If you want to bake industrially produced semi-finished products, if there is an ice crust, you need to carefully separate it with your hands or using a knife.
- After this, you need to grease the baking sheet with oil, place the cutlets on a sheet, keeping a small distance between each portion.
The completed workpiece should be sent for approximately 25–30 minutes. into an oven heated to 180–190 °C.
What can I add?
Frozen fish or meat cutlets are best cooked in the oven with the addition of vegetables, marinade, various sauces and gravies.
What and how to serve it with?
You can imagine a hot treat with boiled rice, complemented with green peas, canned corn, and onions sautéed with pieces of bell pepper. After placing deliciously baked fish products on a wide flat plate, a beautifully decorated side dish should be placed next to them.
Ingredients:
(4 cutlets)
- 2 medium-sized chickens (1.5 kg each)
- 80 gr. butter
- 80 gr. hard cheese
- 2 chicken eggs
- breadcrumbs
- bunch of dill
- vegetable oil for frying
- We make the filling for chicken Kiev based on butter, so first, an hour or two (depending on the air temperature), take the butter out of the refrigerator and leave it to heat up.
- When the butter becomes soft, it is the turn of the greens. Some cooks use parsley, others dill, others cilantro or various mixtures. Personally, I still think that a real Ukrainian cutlet should have dill, and it goes best with chicken. So, chop up a small bunch of dill.
- In a shallow bowl or saucepan, mix the oil with chopped dill.
- Grate some hard cheese (Dutch or Gouda is best) and add it there.
- Mix all three ingredients (butter, dill and cheese) thoroughly again, add salt, after which we form four small sausages from this mixture, which has a consistency similar to plasticine. This should be done with wet hands and fairly quickly, otherwise the heat from your hands will cause the butter to melt. Formed sausages are the ready-made filling for our Kiev cutlets. We hide the filling in the refrigerator and proceed to cutting up the bird.
Preparing meat for chicken Kiev
- Kiev-style cutlets are prepared from chicken breast or, in another way, from chicken fillet. The bird has two breasts, therefore, from each chicken we can make only two Kiev cutlets. That's why for 4 cutlets we need two chickens. We will put the rest of the carcass in the refrigerator, and later use it to prepare other dishes.
- The breasts are cut as follows. Place the chicken on its back and use a sharp knife to make a cut near the keel bone. Then moving along the surface of the sternum. The traditions of the Kiev cutlet recipe require that each cutlet resemble a small leg and have a bone by which it can be held when eating. That is why the wing is cut out along with the breast.
- After the breasts with wings are cut out, we cut off two outer wing fragments.
- Next, using a sharp knife, we completely remove the meat from the last wing bone, which, thanks to the tendons, continues to remain securely attached to the brisket. Then, using a powerful sharp knife, we cut off the articular thickenings at the end of each bone. This is done solely for aesthetic reasons.
- The result is these beautiful chicken breasts with bones.
- Everyone knows very well that each chicken breast consists of two parts: a small and a large fillet. Using a knife or kitchen scissors, separate the small fillets. For chicken Kiev we use both parts.
- Now beat all the fillets (both large and small) well with a hammer. This is done in order to obtain a thin “meat wrapper” in which we will wrap the filling. Some chefs do not resort to beating, but cut the brisket into layers like a folding garland, but I believe that flattening the meat is much easier, more convenient and faster than doing curly cutting))). So, beat the briskets with the flat side of the hammer. I would like to draw your attention: the chicken fillet is very tender and we will not beat it with the toothy side of a hammer, but will turn it into real porridge.
- We beat off all the small fillets. We use cling film to protect the kitchen from meat splashes. The photo shows a “before” frame and an “after” frame.
- We beat off all large fillets in the same way.
- If you overdid it a little and made holes in the meat, then it’s not a problem. In the future, this entire defect will be covered with other layers and sealed with egg batter.
- When the pieces of chicken fillet have already been cut off, take the filling out of the refrigerator and begin assembling the Kiev cutlets. First, salt the meat, then wrap the sausage from butter, dill and cheese in a small chicken fillet.
- Then we place this blank on a large fillet, as shown in the photo. Don’t forget to lightly salt large fillets too.
- We wrap the small roll tightly into a large fillet. It's a bit like swaddling a baby. Lightly squeeze the resulting meat cutlet between your palms so that the meat layers stick together and our cutlet holds its shape.
Breading cutlets Kiev style
- In addition to the special filling of butter and dill, a real Kiev cutlet must be breaded. For this we need flour, eggs and breadcrumbs.
- To make the flour stick better to the meat, first moisten the cutlets with a wet hand. When the surface of the cutlet is moistened and shiny, roll it in flour and then press it between your palms. It is after the flour procedure that the Kiev cutlet will begin to acquire its original, well-recognized shape.
- Next, our cutlet should bathe in egg batter. The batter is made from eggs, flour and a pinch of salt. All this is whipped in a blender or, if you don’t have one, simply mix thoroughly with a fork. I make the batter for four Kiev cutlets from two eggs and a tablespoon of flour. If you are preparing two cutlets, then naturally this portion should be halved.
- After water procedures in batter, the Kiev cutlet should be completely covered with the egg mixture, of course, with the exception of the bone.
- Then we send this yellow, shiny cutlet straight into breadcrumbs and roll it there. You can add a little parsley or dill seasoning to the breadcrumbs.
- We take the cutlet in our palms and form its final form. If you suddenly feel that the cutlet is not smooth and pretty enough, then you can repeat the last two operations again: batter again and breadcrumbs again.
Cooking cutlets Kiev style
- That's all, our cutlets are completely prepared for heat treatment. We start it by frying it in oil. Anyone who has a deep fryer at home can do this in it, but it is much more convenient, and most importantly more economical in terms of oil consumption, to fry chicken Kiev in a small saucepan.
- So, pour vegetable oil into a saucepan and put it on fire. The oil level should be such that the cutlet is completely immersed in it, otherwise during frying you will have to turn it over all the time, and even after that, no matter how hard you try, one side will turn out more ruddy and the other paler.
- After a few minutes the oil will heat up. You can check that it is already at the right temperature using one piece of spaghetti. We lower the end of the spaghetti into the oil, and if a violent boiling process begins around it, then the oil is already hot enough.
- Place Kiev cutlets in hot oil and fry them there until they are beautifully golden brown. This will only take about a minute. You cannot fry the cutlets longer. We still won’t cook the meat this way, but we risk completely burning the beautiful golden brown crust.
- Using a metal slotted spoon or just two forks, remove the cutlets from the boiling oil and proceed to the final part of the sacrament - frying in the oven.
- To fry in the oven, cover a metal baking sheet with parchment or special baking paper, and then place our chicken Kiev on it.
- Place the cutlets in an oven preheated to 180 degrees (it should be turned on in advance) for final frying. Chicken - the meat is very tender and cooks quite quickly, so bake the cutlets for 10-15 minutes.
- Beautiful and flavorful chicken Kiev, with a delicious crispy crust, remove from the oven and arrange on plates. Kiev cutlets turn out to be quite large, so one cutlet goes for one serving.
- Yes, another very important detail. The peculiarity of Kiev cutlets is that inside the meat shell there is a delicious butter sauce. If you serve the cutlets piping hot, this very sauce can spill onto your clothes and ruin the whole holiday. Therefore, before cutting the cutlet, it is recommended to pierce it with a fork, thereby releasing some of the heated steam from it.
- Kiev cutlet in itself is an exquisite delicacy with a delicate taste, and therefore does not require a special side dish. But if you still think that one cutlet will not be enough for a feast, I advise you to cook for it
What determines the correct defrosting?
The correctness and speed of the process of thawing frozen minced meat depends on several factors:
- type of meat;
- weight;
- product form;
- type of freezing.
Does the type of minced meat affect the thawing process?
There are no big differences between the principles of defrosting chicken or pork, beef or fish, or mixed types of minced meat. Almost all methods can be applied with equal effectiveness to each type of minced meat.
The only difference is the time it takes for the product to defrost to room temperature. Fish raw material will thaw the fastest; chicken meat will last longer.
Weight and shape
When the minced meat is frozen in the form of a large solid piece, it will take a maximum of time to thaw. For example, a kilogram piece freezes completely during its stay in the freezer. Even after its surface thaws, a solid piece of ice remains inside. Scrape off any thawed bits with a knife. This will let warm air in. It will take at least 4 hours for complete thawing.
Experienced housewives recommend breaking the minced meat into small portions before freezing, or immediately forming semi-finished products from it, which are subsequently laid out in separate bags.
Experts advise simplifying the defrosting process by rolling out the minced meat, already placed in the bag, into a thin layer with a thickness of up to 2 cm. This will facilitate the storage process and speed up the time of defrosting the product. This layer can be easily divided into portions using a sharp knife or Chinese chopsticks. This way, you will get rid of the need to wait a long time while defrosting a large piece and leaving it to re-freeze after removing the required volume.
How long will it take to defrost?
The duration of the defrosting process depends on the size of the piece and its shape. The larger the size, the longer the thawing process will take. For example, meat measuring about 2 kg will melt under natural conditions for up to two days, and a kilogram cut will take a day.
Each kilogram of minced meat takes about 24 hours to melt.
Minced meat, divided into portions, will defrost faster, in about 10 hours. The main thing is that all its elements lie separately from each other.
How does the type of freezing affect the thawing of minced meat?
The type of freezing has a separate effect:
- the meat was simply put in the freezer;
- minced meat was frozen using a special mode;
- freezing was carried out industrially.
Deep freeze
Industrial freezing involves the use of special equipment that guarantees the speed and high quality of the process. Before the product is placed in the freezer, it is pressed, sealed in plastic film and then heat treated.
This type of freezing is called deep freezing. After its implementation, the maximum of vitamins and microelements is preserved. This minced meat can be stored for up to three months; the specific expiration date is indicated on the packaging.
Quick home freezing
Home freezing is sometimes carried out using a special mode in the refrigerator. This variety also helps preserve valuable elements in the product.
The method is used to quickly freeze the product, preserving its taste and aesthetic appearance. This mode will be a real godsend for housewives who prepare semi-finished products (cutlets, meatballs) in the form of intricate figures. The defrosting speed here is no different from other freezing methods.
How to deliciously cook frozen semi-finished cutlets in the oven with gravy?
Frozen cutlets in the oven with gravy
Ingredients:
- Frozen cutlets - 12 pcs.
- Onion - 1 pc.
- Carrots - 2 pcs.
- Tomato paste - 2 tbsp.
- Adjika - 1 tbsp.
- Salt
- Sugar
- Ground black pepper
- Vegetable oil
Cooking algorithm:
- Pour vegetable oil into the frying pan.
- Place frozen cutlets in heated oil (no need to defrost).
- Fry the semi-finished products for literally 5 minutes on each side.
- Peel the onions and carrots.
- Grate them on a coarse grater or chop them finely.
- Pour vegetable oil into another frying pan.
- Fry onions and carrots in oil.
- Pour adjika and tomato paste over fried vegetables.
- Add a little sugar, salt, pepper and water.
- Stew vegetables in gravy.
- Place the cutlets in a baking dish and pour the gravy over them.
- Place the mold in the oven for 20 minutes at 200-220 degrees.
Problems of choice
Before you start frying, you should choose the right product in the store. Experts advise abandoning weight options whose composition is impossible to read, as well as tracking the expiration date.
You shouldn’t trust a multi-component semi-finished product either - this is an attempt to disguise the high content of preservatives. When choosing, look carefully at:
- packaging - it should be intact, informative, with a fairly wide transparent window to clearly see the product;
- condition of the product - the cutlets must be smooth, without chips or cracks, neat and appetizing in appearance, sticking is not allowed;
- color - good cutlets should have a pinkish tint; if gray color predominates, then this means you have a product with a high water content.
And so the ideal cutlets are selected, and we go to fry them. How to do it?
Step by step recipe
| Mix butter, chopped parsley, minced garlic and salt in a bowl until smooth. Divide the butter and herbs in half and place on a plate. Place in the freezer for 10 minutes. |
| Place chicken on a clean work surface and season with salt and pepper. Place 1/2 of the herb butter (from the freezer) in the center of each shredded chicken breast. Wrap the chicken pieces around the butter mixture. Repeat with the second cutlet. |
| Wrap each cutlet in plastic wrap and tighten slightly to create a cutlet shape without it falling apart. Place on a plate and place in the freezer for 30 minutes. |
| Meanwhile, preheat the deep fryer to 200 degrees C. |
| Place flour in a bowl, beaten egg in a second, and breadcrumbs and bell pepper in a third. Remove the film from the chicken. Dredge each chicken cutlet first in flour, then in beaten egg and finally in crumb mixture. |
| Place the breaded chicken in the air fryer basket. |
| Fry for about 10 minutes. Transfer to a cutting board and let Kiev cutlets rest for 5 minutes. Then serve. Bon appetit! |
(2 ratings, average 4 out of 5)
Beef
Cutlets prepared at home from dietary minced beef, baked after freezing in the oven, are especially suitable for PP.
What ingredients will you need?
To create the dish you will need:
- sunflower oil - as needed;
- frozen cutlets - 20 pcs.;
- potatoes - 1 kg;
- salt, spices, herbs - optional.
Step by step process and cooking time
Sequence of baking steps:
- First, you need to remove the meat pieces from the freezer and let them thaw a little on a cutting board. If desired, you can leave the preparations on the bottom shelf of the refrigerator in advance for a little thawing.
- In the meantime, you need to peel the potatoes, rinse them and dry them with disposable towels, then cut them into round, not very thick (up to 2-3 mm) circles.
- Now you should place a layer of tuber slices on the bottom of a wide refractory dish, greased with oil, lightly salt and pepper them, and sprinkle with the desired seasonings.
- After this, you need to place frozen cutlets on the vegetables, cover them with the next row of potato slices.
- Next, you need to sprinkle a new layer with spices and herbs, sprinkle sunflower or olive oil from a special spray bottle, pour ¼ tbsp into the container. drinking water or broth.
The completed workpiece should be sent for 45–50 minutes. into an oven heated to 180 °C. If the potatoes begin to brown before the allotted time, cover the dish with a sheet of foil.
What and how to serve it with?
The presented dish does not require additional preparation of a side dish. Hot cutlets should be placed in portions on plates, the desired amount of baked potatoes should be placed next to them, then you can decorate the food with fresh herb leaves. Homemade pickles - mushrooms, cucumbers, tomatoes or sauerkraut - go perfectly with this treat.
Frying process
Meat dishes are always laid out on a hot frying pan. As the cutlets gradually warm up, they will either begin to lose their breading or stick to the bottom.
- Place the cutlets in the heated oil at a considerable distance from each other so that it is convenient to turn over. It is better to make several passes than to lose the appearance of the product
- Roasting continues for the specified time, depending on the type of meat. To better control the degree of frying, turn the semi-finished products every 2 minutes.
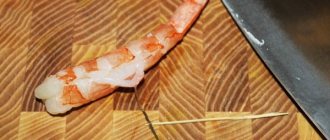
- If these are fish, turkey or chicken cutlets, then regular frying is enough for them. You can check readiness by poking a toothpick into the middle: clear juice means complete readiness, pinkish liquid means you need to keep the cutlets on the fire a little longer.
- It is better to simmer pork, beef or lamb a little. To do this, after frying, pour a little water into the pan or make gravy. If you want to maintain crispness, you can fry the cutlets, bringing them to readiness in the oven, or after frying over medium heat, let them fry further under the lid over very low heat for 7-10 minutes.
That's all the wisdom of frying semi-finished products. Of course, you shouldn’t get carried away with them, but sometimes you can allow yourself a little rest and whip up dinner. Moreover, manufacturers of semi-finished products offer a huge selection, including many worthy specimens.