Home → Useful tips → Socks-slippers made from leftover knitwear or unnecessary items
For the first time I saw and bought knitted sewn socks for foot care. Do not think that this is an advertisement, I want to draw your attention to their price and delivery costs. And there are many varieties of cosmetic socks.
My article is not about how to buy socks, but about how to sew socks yourself from scrap materials without buying anything extra for this.
But the socks turned out to be extremely comfortable and since then I periodically sew such socks not only for cosmetic and health procedures with my feet, but also successfully wear them at home so as not to walk barefoot and especially in slippers.
You need a lot of these socks for your home. They wear out to holes within a few months, especially if after water procedures you lubricate your feet with apple cider vinegar to prevent fungi and sores.
Required materials and tools
You can sew socks from any elastic fabric, ideally elastic.
Perfect for:
- various types of fleece;
- Jersey;
- any knitted fabric, including used knitwear;
- thin drape;
- stretch denim. Old, faded jeans are perfect.
You don’t need any special equipment to provide your family with warm socks, but it is advisable to have an overlocker.
The overlay machine simultaneously trims, stitches and overcasts the edge of the product.
Other necessary equipment:
- Sharp scissors - some types of fleece and knitwear are difficult to cut.
- Double machine needle for knitwear . Creates a convenient double stitch.
- Soap. It crumbles less than chalk, which makes it easier to work with fleecy fabrics.
This is interesting: Pattern Men's classic jeans (size 26-40)
Is it possible to start your own socks production at home?
If you want to start your own socks business, but you don’t have enough money to rent premises, hire staff and a lot of equipment, you can start your business from your home - provided that you have enough space to accommodate the main equipment. You can buy several necessary machines, a small batch of raw materials and get down to business.
For those who have design skills, this is a good chance to show creativity and come up with truly unusual and stylish products. Exclusive handmade goods are now gaining popularity. If you make your products unique, you can make good money at home.
How to sew baby socks with your own hands
You can sew socks for your child like booties. Options for finished patterns are presented below.
Connect the cut elements by matching the control points marked with the same letters. Sew along the outline, then sew on the cuff. For babies, it is advisable to place the seams on the outside.
Simple socks - booties for a child
How to adjust the pattern to size: measure the length of the baby’s foot, then reduce or increase the sole of the finished pattern. Measure the circumference of the lower leg and compare it with the pattern, make changes if necessary.
This master class shows two-layer booties, so for each leg the parts are cut out in two copies: the lining and the outer part.
How much money will it take to open?
The bulk of the money will be spent on purchasing equipment. But besides this, there are several costly expense items.
Below is an approximate list of the main cost items for starting a business:
| Expense item | Amount in rubles |
| Registration and taxes | from 20 thousand |
| Equipment | 1.5-4 million |
| Purchase of raw materials | from 35 thousand |
| Communal expenses | from 10 thousand |
| Rent | from 25 thousand |
| Salary (6 people) | from 125 thousand |
| TOTAL | 2.025 - 4.025 million |
As a result, the approximate amount for starting a business is from two to four million rubles. The amount varies depending on your region, the choice of suppliers of raw materials and equipment, and the scale of production. Read how to find an investor.
Step-by-step construction of a pattern for fleece socks with your own hands
Pattern for sizes 34-36.
By increasing or decreasing the size of the squares - cells, we can adjust the size of the socks.
Important! Remember that we need all the details in duplicate, a mirror image. Our socks need a pair.
This model is not as difficult to implement as it seems; it is carried out entirely according to the measurements shown in Figure 1.
Uncover
- We transfer the pattern details to the prepared fabric, chalk it, and do not forget about the seam allowance of about 5 mm.
- Cut out the details.
It is not necessary to baste our blanks; we perform machine or overlock seams right away.
Advice! Fleece can be sewn simply by hand, using a seam “over the edge”, without pulling the thread tightly. This material practically does not fray; there is no need to overcast its edges.
For convenience, you can put marks on the pattern and patterns, and, when sewing, make sure that the marks match on different parts.
For convenience, we add an elastic band or cuff along the top edge.
We know that socks are a fast-wearing product. Having a pattern on hand, we can easily and simply provide our family with comfortable, lightweight socks.
Sew socks
The simplest part. In order not to return to this for several months and work on other projects, I prepared several types of material to make several pairs of socks at once for the month ahead. You can take any stretchy material, the so-called stretch. You can use fabric with lurex. But I highly recommend not taking such types of material as, for example, silk. Firstly, such material does not stretch, and secondly, the foot will sweat in it, but the foot must breathe. If your feet are constantly wet, problems are not far away. We place our templates on the fabric, carefully trace and cut out. The fabric can be washed to shrink before use. Let me remind you that there should be four templates, two for each foot, if you want the perfect comfortable pair of socks.
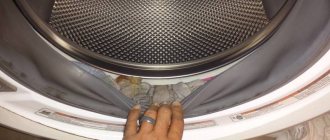
Sewing is also very easy. You will only need one seam. Place the fabric on the leg as it should lie and secure in three parts with pins or tailor's needles. We fix the material on the big toe, on the convex side of the heel and at the ankle. Carefully remove and stitch. This will create one seam. To make cuffs, you can fold a few centimeters inward, iron and cut, and secure the cut with an overlocker or by hand so that the fabric does not fall apart into threads.
Found a violation? Report content
Sewing technology
1. Cut. All details are cut out according to shares. So that the toe stretches wide.
3. We make a temporary auxiliary stitch on the sole of the sock to adjust the fit along the length. We fit the cut of the sole, tightening the bottom thread of the stitching, adjusting it to the length of the top.
4. Sew the upper to the sole and back and remove the temporary stitching.
5. Process the upper cut of the sock.
The sock should not be turned inside out. The seams should stick out.
How to open a business
Registering a business is the most exciting moment, especially for beginning entrepreneurs. To open your own hosiery business, you don’t need a lot of documents and permits.
You can open both an individual entrepreneur and an LLC. If you do not plan to launch a huge business in the future, reach large customers and work throughout the country, then it is enough to open an individual entrepreneur. If your plans are different, it makes more sense to open an LLC right away. However, the registration process will take a little longer and will cost more.
When choosing a tax system, it is more profitable to choose the simplified tax system. You will also need permissions from services such as:
- Rospotrebnadzor.
- SES.
- Fire inspection.
You can find a complete list of documents required for this on the websites of the relevant services.
To make hosiery you will need OKVED code 14.31. This includes knitted and knitted products.
Feet warm
Warm socks are made from used items. This could be an old blanket, sweater, pajamas made of fleece or other soft fabrics. With the right pattern, fleece socks are comfortable, warm and very cozy. It is necessary to decide on the correct dimensions and material.
Original items are made from old sweaters, hoodies, and thick pieta. To sew them, you need fleece sleeves and a socks pattern.
Instead of sock cuffs, use elastic from a sweater.
This is interesting: Pattern for men's shirts with regular and regular button fastening (p 44-60)
What equipment is needed to produce socks?
To produce socks, you will need several types of installations, which are used in turn at all stages of production.
Their number and power depend on the volume of products you will produce. Below is an example of a list of basic equipment for small production.
| Name of equipment | Quantity |
| Knitting machine | 4-5 |
| Molding plant | 2-3 |
| Sewing machine | 2-3 |
| Packing machine | 1-2 |
The cost of the equipment will differ depending on which manufacturer you choose and whether you buy new equipment. On average, new equipment will cost about 1.8 - 4 million rubles.
Why do you need a sock knitting machine?
A knitting machine is the unit where the base of the product is made. It directly affects the quality of knitting, density and other elements of the product. Also, what size cylinders you use will determine what size socks you end up with.
For example, for men's sock models, diameters of 3.5-4 inches are suitable. For women's products, it is necessary to acquire smaller diameters.
What should a knitting machine be like for producing socks?
The quality of your knitting machine will be reflected in the quality of the finished hosiery products. The machine must be selected based on what products you are going to produce, in what volume and from what raw materials. These characteristics determine which unit is best suited to your needs.
It is also important to carefully select your machine supplier. Domestic manufacturers, as a rule, make relatively inexpensive cars, but this will affect the quality of the product. Chinese and Korean analogues will cost a little more. But their quality is also inferior to European standards. Italian and Czech equipment will cost much more. But this way you can produce truly high-quality products.
What products can be produced using a sock knitting machine?
You shouldn’t stop at just one type of hosiery. After all, there are a lot of them, and the larger the assortment, the greater the turnover and profit of production. Of course, subject to excellent quality, interesting design and competitive prices.
It’s better to start with one type of product – for example, men’s socks in dark colors. They are in greatest demand. Once you have mastered this segment, you can start producing women's socks, adding different colors and original design elements.
In addition, it is also worth taking a closer look at other types of products. You can start making tights, leggings, and knee socks. Various headbands and tops for dress boots can also be made on knitting machines. This should be taken into account when expanding the range.
What to look for when buying a sock knitting machine
When choosing a machine, be sure to pay attention to how suitable it is for the production of your products, is it powerful enough? After all, it depends on how many pairs of socks you will produce. At the initial stage, a small factory can produce 300-500 pairs of socks per day. Also pay attention to other technical details.
If you are planning to purchase used equipment, think about how profitable such an investment is. The machine may already be pretty worn out and often break down: then you will spend much more on repairing it than you could save. If you definitely decide to buy such a machine, seek advice from a specialist who can objectively assess the condition of the unit.
How to correctly take measurements from a child or adult?
We will need a measuring tape to determine the size of the legs.
For some models, the foot is additionally outlined on paper, and the sole is cut out along this contour.
Advice! A cut out and then sewn sole made of felt, felt, drape, rubber will turn your socks into soft house slippers - boots.
First of all, we are interested in the following measurements:
- sole length (G1);
- product height (G7);
- leg volume in the elastic area (G3);
- leg volume under the bone (G2);
- heel height (G6);
- foot circumference (G5).
Other measurements are given for a more comfortable fit and are taken into account as desired.
How socks are made: 5 stages of production
The production of sock products does not require a huge amount of equipment, but still, one machine at all stages of product manufacturing is not enough.
The process itself is quite simple and takes place in several stages:
- The base of the sock is made. First, the main part of the sock is formed on a special knitting machine. Depending on how fine the yarn is needed and what raw materials are used in production, the type of machine will differ. The density of the product will directly depend on which needles are used. The thinner the needle, the tighter the sock.
- The toe of the sock is sewn up. This stage takes place using a kettel machine. The machine can be semi-automatic (preferably) or manual. Since the sock processing process requires a worker to manually place each warp on the machine, it cannot be fully automated. And further processing takes place without human intervention.
- The socks are formed using a press, and then the base is steamed using a special unit. Drying of the product also occurs at this stage. It uses semi-automatic pressing machines, which are controlled by only one worker.
- At the next stage, the products are marked, embroidered, and a logo is applied. This process can take place in different ways depending on what equipment is used.
- The last, final stage is the packaging of the finished product. Some manufacturers ignore this element, considering it an unjustified waste of money, but this is not at all the case. It is the packaging that attracts the first attention. Therefore, it is important that it stands out among others and attracts the attention of potential buyers.
There is nothing complicated in the production of socks. It is quite easy to master in a short time, after which you can start working.
Warm socks for little ones
Little kids love soft, cozy socks. They are comfortable to run, play and sleep warm in. Children find slippers uncomfortable; they are often capricious and do not want to put on their shoes. Thick, warm socks protect a child’s feet no worse than slippers and do not interfere with rapid movement on the carpet or sofa.
A pattern of children's socks made of fleece and bright fabric will help create not only warm, but also very cute socks for babies that children will wear with pleasure.
The principle of operation when sewing products for babies is the same as when sewing adult socks. You can decorate the product with bunny ears, applique, beads, bows, and cute inscriptions.
If a woman does not know how to knit, then you can warm the children’s feet by sewing fleece socks using a pattern with your own hands. It won't be difficult.
Socks for guests (instead of slippers)
Recently I thought of another purpose for such socks (it’s necessary!!!) - for guests!
As you know, it is not customary for us to wear shoes around the house. And walking barefoot or in tights while visiting is not at all pleasant. Offering your own slippers is not hygienic. So I came up with an idea, why not have a supply of such slippers for guests!? You can even make them personalized! And give it as a final gift.
And on New Year's Eve, if you have time, you can make socks with a festive design. These socks can be given to mothers and grandmothers. The gift is inexpensive, but warm in every sense of the word.
Fleece socks + pattern
The pile side is one, stretches strongly in the transverse direction.
This pattern may not work with other fleeces or knits! There is a lot of information about fleece HERE in Tamara Nikitina’s blog “Fleece Diary”.
Where to sell products and how to promote your business
With the development of the Internet and shopping and entertainment networks, it is now not difficult to find a way to sell your products. You can sell socks to wholesalers, arrange for the supply of products to retail stores, create your own website for this, or use social networks. It is best to use several distribution channels.
When will the investment pay off?
If you work in two shifts of 10-12 hours, then 1 knitting machine will produce about 400-500 pairs of products. If there are four machines, then approximately 1600-2000 pairs. Up to 60,000 pairs can be produced per month.
The wholesale cost of one pair of products is approximately 10-15 rubles. In this case, the maximum revenue at 100% sales without deducting expenses will be 600-900 thousand rubles. Net income minus rent, wages, taxes, utility bills and other deductions - from 100 to 500 thousand rubles. Of course, it will be difficult to achieve such indicators in the first months of work. On average, the payback for such a business is 1.5-2 years, but with a competent approach and hard work, the period can be reduced to 7-9 months.
Beautiful socks with a semicircular heel (another way of knitting the heel, the so-called horseshoe heel).
Men's socks, size 27. You can clearly see where the 100 g skein of yarn ended. A detailed description of the knitting process is in the same article below.
How to knit socks.
Men's socks, foot size 43.
Yarn “Winter Comfort” 100 g = 220 m, 2 skeins, sock knitting needles No. 2.5.
Cast on 48 loops + 1 (for closing in a circle)
I knitted 11 rows with an elastic band *knit 2, purl 2*.
Then 3 rows in garter stitch: 1 row with purl stitches, 2nd row with knit stitches, 3rd row with purl stitches again. To prevent a step from forming when moving from the purl row to the front row, we knit the last loop in the row of purl loops together with the broach raised after it.
Next are 5 rows in stockinette stitch.
3 rows in garter stitch.
11 rows according to scheme 1.
And repeat 3 rows in garter stitch, 5 rows in stockinette stitch, 3 rows in garter stitch.
Let's move on to the heel.
Knitting sock heels.
We take loops on 1 and 4 knitting needles.
The toe on the left shows the front side of the heel, the toe on the right shows the reinforced heel from the inside.
It turns out that the heel can be: firstly, compacted, and secondly, tied in another way. Almost straight heel, only the line of the sole will not be clearly visible.
The heel seal is a good idea. We will compact it with a pattern:
Knit rows: all stitches are knit.
Purl rows: purl 1, remove 1 without knitting.
We knit the edge loops more tightly so that holes do not form when we later lift the loops from them.
Convex tracks are obtained on the front side (see photo above). Knit to the desired length. I need a high rise, I knitted 24 rows. The last row is the front row.
How to knit a heel on a toe with knitting needles. Step by step.
A horseshoe heel is knitted almost the same as a straight heel. Only in the straight heel, after we have tied two together, do we immediately turn the work, but here you need to knit another loop and then turn the work. You need to start from the middle of the heel, leaving the central 2-4 loops single.
If it's not clear, watch the video.
Now we will knit the pattern on the 2nd and 3rd needles, and on the 1st and 4th needles the heel in stockinette stitch. When we cast on loops from edge loops, we insert the knitting needle under both walls of the edge loop. We dial it tight. If the loops are raised freely, you can knit the first row crossed.
I got 14 loops on each side. Ideally, there should be the same number of loops on the knitting needles as you cast on, i.e. 48. We will use a wedge to decrease the extra loops. On 1 knitting needle we knit the penultimate 2 stitches together with a knit stitch tilted to the right, the last one with a knit stitch. On the 4th knitting needle: 1 knit, 2 knit together, tilted to the left. We make decreases through the row.
We make the drawing on the upper part of the sock according to the diagram
To make the pattern symmetrical, add one broach loop in the middle. It turned out on knitting needles 2 and 3 in total 25 loops.
We alternate the pattern according to the pattern with 3 rows of garter stitch and 5 rows of stockinette stitch. So we knit the desired length, approximately to the little finger. Before the toe, it is recommended to shorten the stocking stitch by two loops on both sides to make it more comfortable in shoes. That is, in a row of purl stitches, knit the first 2 and last 2 stitches. You can switch to knitting needles that are a little thinner. I knitted the entire sock with one knitting needle.
How to knit the toe of a sock with knitting needles.
We decrease the loops on both sides: on 1 knitting needle we knit the 2 penultimate loops together with a knit stitch tilted to the right, the last one with a knit stitch. On the 4th knitting needle: 1 knit, 2 knit together, tilted to the left. Also on the 3rd knitting needle we knit the penultimate 2 stitches together with a knit stitch tilted to the right, the last one with a knit stitch. On the 2nd knitting needle: 1 knit, 2 knit together, tilted to the left. In each row until the loops run out. Cut the thread and hide it inside the sock. Wash socks.
Ideas from the Internet.
No matter what they say, thick woolen socks are the best for Siberia.
These socks are knitted in 2 threads using sock needles No. 4
How to knit socks with knitting needles in a two-color pattern.
We will knit socks with a two-color pattern, knitting 2 rows in one color. If the pattern requires a different color, remove the loop of the desired color without knitting.
You will need: thin wool yarn of two colors: pink 30 g and green 50 g. Sock knitting needles No. 2.
We cast on 2 knitting needles folded together 48 loops + 1 loop for closing in a circle. Distribute evenly onto 3 or 4 knitting needles (as convenient to knit).
We knit with an elastic band *1 knit, 1 purl* 3-4 cm. My elastic on the front and back sides turned out different, I turned the sock inside out and continued knitting on the wrong side. There are paths of crossed facial loops. You don't have to turn it inside out.
Next we knit according to the pattern, repeating it 3 times, starting from the 1st row.
We knit even rows according to the pattern.
Then 2.5 cm with pink threads in stockinette stitch. Then 2-3 rows in green. And we begin to knit the heel. How the heel is knitted is described above.
Here's another comfortable heel.
How to knit socks.
Knitted with needles No. 3.5 from Derevenka yarn 100% wool 100 g = 170 m, it took 100 g for socks size 42.
Description.
I cast on 44 +1 loops to close the circle.
Rib *knit 2, purl 2* 18 rows.
Knit 7 rows.
How to knit the heel of a sock.
I distributed the stitches onto 3 needles: 15+14+15.
I knitted the heel on two knitting needles, each with 15 stitches. 16 rows in stockinette stitch.
12 knit, 2 knit together, 2 knit, 2 knit together. Expand the work.
Slip 1 loop, pull up the thread, purl 3, purl 2 together, unfold the work.
Slip the first stitch, pull up the thread, knit 5, knit 2 together, unfold the work.
Knit like this until there are 16 stitches left. This is how the heel turned out.
I picked up 9 loops from each edge of the heel. There are 9+14+9+16=48 stitches on the needles. Next we knit all the front stitches for 28 rows.
4 loops need to be decreased. We will knit the outermost of 14 loops in two rows of 2 together. In one row we made decreases, knit 2 rows without decreases, in the next row we again decreased 2 loops in the same places. There are 44 loops on the needles.
When you have knitted the required length of the sock (so that the little finger is hidden), we distribute the loops onto 4 knitting needles. Then in each row on each knitting needle we knit the first 2 stitches together. When all the loops have been reduced, we cut the thread, fasten it and hide the end inside the sock.
This is how the toe turned out.
Beautiful socks made of Italian wool (100 g=170 m).
The shortest description of how to knit socks.
The heel should be knitted based on the loops you cast on (36/4) * 2 = 18 loops, the number of pairs of heel rows is one less, that is, 8 pairs of rows, after the heel the number of rows is knitted to the little finger, and then the knitting is closed .
LiveInternetLiveInternet
Quote from cashmere
Read in full In your quotation book or community!
Fleece socks.
The basis was taken from the “Wanderer” website, but made it a little more anatomical - my version fits better on the leg and forms fewer folds, although it is a little more difficult to sew. The pattern consists of three parts, let’s call them conventionally “heel”, “foot” and “shaft” and in the future we will call them exactly like that:
The outer contour is designed for size 42-43, the inner (light green) - 39-40. The “bole” is universal, from size 39 to 43. We save the images in the original size using the link, print them (resolution 300dpi, scale 100%, grid step is 1 cm everywhere) or redraw them on paper, cut out the details. There are no seam allowances in it - fleece is one of the few materials that allows you to make seams exactly butt-to-butt, so we don’t need allowances.
We check in which direction our fleece stretches (most often transversely) - this direction will be the width of our socks. If the fleece stretches in both directions, it is better to place the patterns along the grain thread, that is, with the long sides parallel to the edges of the fabric (I had leftover fleece from sewing thermal pants, so don’t be alarmed when looking at the photos of the layout). We fold the fleece in half and pin our patterns to it:
You can ignore the folds when pinning the paper: fleece is a fairly elastic material and forgives a lot. And cut out each detail in pairs at once:
Immediately mark a line of symmetry on each part - with chalk or pins, I find it more convenient to use pins - it won’t be erased while you sew, and the line will be thinner (and more accurate):
Then along these lines we will combine the centers of the parts when sewing.
And then we start stitching. I recommend that you first select the softest and most pleasant-to-touch stitch on the fleece scraps - on my machine, oddly enough, it turned out to be not an overlock stitch (on the left in the photo), but an ordinary zigzag with a width of 7 mm and a pitch of 1.5 mm:
At the same time, you will practice making butt seams. If the machine comes with a transparent foot, it’s better to put it on, this will make it easier to control our joints so that they don’t run apart. We put on a knitting needle, thread our soft thread and - let's go!
We will sew both socks at once - the order of the seams has been carefully worked out and, for convenience, numbered. 
1. Start with a heel dart (only one!) of each sock. My machine bites such soft fabrics if you start the seam from the very edge of the material, so we won’t start from the edges. We put the “heel” into the machine so that the seam starts from the middle of the heel, and sew end to end, then do the same for the second sock. For now we sew only one heel dart on each half, this is important - later it will become clear why.
2. We sewed one heel dart on each sock, take our first “heel” and sew the second dart in the same way from the middle. We don't cut the thread! Closer to the end of the seam, we carefully slide two parts of the top of the sock under the foot - the “foot” and the “shaft”, making sure that the nose on the “foot” and on the already sewn “heel” look in the same direction, that is, the relative position of the parts remains the same, as in photos 5-6.
3. And, without interrupting the seam and without pulling the thread, we continue to sew the “boot” with the “foot” with the same seam, making sure that the pins pinned along the center line and the edges of both parts coincide with each other - for this you will have to slightly stretch the “boot”, Since initially the seam line on the “foot” side is longer than the same line on the “shaft” side, pay attention to the position of the pins and seam edges first and then:
Then we carry out the same operation with the second sock - we sew the second heel dart and the “foot” and “shaft” parts with the same seam. You get two such “semi-finished products”:
4. And then the fun begins. We take our first semi-finished sock, turn it with the sock towards you, and the shaft away from you, put it into the machine and begin sewing the main seam. It is better to start it a little higher (towards the top of the sock) of the place where the heel dart and the seam connecting the “shaft” to the “foot” meet - for example, stepping back up 5 centimeters. In the photo on the right - the “heel”, on the left - the sewn “foot” " and "boot":
We are especially careful at the junction of the seams - there is a rather sharp angle there; we need to stitch it slowly, periodically lifting the presser foot and turning the material manually so that our joints always fit together without holes. It turns out this nice corner:
There are no further difficulties - the length of the patterns for the upper and lower parts of the foot is adjusted quite accurately and the middle should fit without problems, but just in case, make sure that the pins in the center coincide with each other:
Immediately after passing through the middle of the sock, the pins can (and should!) be pulled out, so that later you do not have to pick them out of the inside of the sock. All other pins can also be pulled out if you haven't done so before. Again, carefully go through the corner on the opposite side and calmly finish this seam to the very top of the sock, not forgetting to make a bartack at the end - the only place where it is needed. We sew the second sock in the same way.
5. Well, the last, final chord: we need to sew the only unfinished piece - the bootleg just above the heel seam. It is sewn quite cleverly: we put this sock on the machine foot from the back of the foot itself (grabbing part of the previous seam), and during the sewing process the sock is “removed” from the machine:
Don't forget to make a tack here too. We repeat the same with the second sock, and please: the pair is ready! If you want, wear it like this:
but if you want, it’s the other way around:
The history of the New Year's sock
To prevent boredom in the process of making a sock-decoration for the New Year's fireplace, involve children in the creative process. And while making a New Year's boot for gifts with your own hands, tell your children a very fascinating legend of its appearance:
“Once upon a time in a small town in England there lived a poor old man. He was rich only because he had three daughters. The poor man was very sad that because of poverty he could not marry off his daughters - they had no dowry. He was very worried about how they would live after his death.
Christmas boot with mini gifts
And on Christmas Eve, this man shared his grave grief with his friend. Santa Claus heard this conversation and decided to help the old man. But since the old man was proud, he did not take the money. Therefore, Santa decided to make gifts for the daughters of the respectable man.
At night, when everyone had already gone to bed, Santa Claus came down the chimney into the room.
In this family’s room there were no Christmas decorations, no beautifully decorated Christmas tree, but only the girls’ washed socks and stockings hanging by the fireplace.
Klaus had no choice but to put a bag of gold in his socks.
In the morning, when the girls woke up and found precious gifts in their socks, they were very happy that they could now get married. The young ladies began to tell all their friends and acquaintances about the miracle. Over time, the entire population of the city learned about such a diva. And since then, on Christmas Eve, every family hung socks by the fireplace with the belief that in the morning they would find a wonderful gift there.”
Knitted personalized New Year's socks by the fireplace
How to knit socks with boomerang heels.
A beautiful heel, knitted like a boomerang heel. These socks are knitted from NAKO Tweed yarn 100 g = 260 m. 32 loops, knitting needles No. 2.5, child age 3 years.
Knitting the heel of a sock with knitting needles step by step. Heel boomerang.
First, divide the number of loops in half. We will knit on two of the 4 needles. Let me first explain how we will knit. It's simple, the main thing is to understand the meaning. We divide the number of loops into 3 parts, the middle part will always be knitted with stockinette stitch, and the two outer ones at the top of the heel will be knitted in short rows, adding yarn overs, and, on the contrary, adding loops at the bottom of the heel.
MK here.
Next we knit the required length of the sock and close the toe. Easy to knit and looks beautiful!
Socks with boomerang heel.
Author @made_by_billy
Knitting needles No. 2.5.