Wooden boards are a popular construction and decorative material. But very often they have to be cleaned of resin.
There are several effective ways to help achieve the desired result. These include mechanical and chemical cleaning.
When choosing a suitable folk or professional remedy, you should follow all the rules of use and prohibitions.
We will tell you more about how and how to remove resin from a wooden board (for example, pine) in the article.
How to remove resin in a steam room
Steam room in the bathhouse, incl.
shelves, built from coniferous wood and resin exudes from the boards. How can you fix such a bathhouse? What can be done? Resin usually comes out of knots, which is where you have to dance))). If it is possible to replace shelf boards with knots with boards without knots, then try to do this, otherwise sitting on such a shelf will be quite uncomfortable and nothing else has been invented yet. The resin will flow out for a very long time. As for the walls, I won’t suggest changing them, it would be very troublesome. You can try to drill out the knots from which the resin is flowing with a feather drill and hammer a chip into this place and sand it. I think the problem will be solved.
I sympathize, I am familiar with this problem and this problem will last for a long time. The resin will be released, depending on the thickness of the boards, for a long time, several years. If it is not possible to change the casing, then get ready for righteous labor after the bathhouse. Once the bathhouse has cooled down, carry out a major inspection of the bathhouse, scraping off all the droplets of resin that have emerged. You can rub with turpentine, acetone, solvent, but it all stinks; using a knife is easier and faster and there is no smell. You will have to frolic like this for 2 years, but if you heat the sauna often and clean it after each fire, then maybe the resin will come out faster. It is better to heat the sauna high, so the resin comes out faster. Resin, when the bathhouse is heated, sticks and burns, so it is better to make several temporary removable lattices of linden, aspen or birch on the shelves and floor so as not to stick and burn. When cleaning the resin, remove the gratings and then put them back in place. Resin will not last forever, sooner or later it will end up in the boards, but if you don’t fight it, it completely spoils the impression of the bathhouse.
The formation of resin in a bath is a natural process. When heated, coniferous wood begins to release this substance to the surface. Sooner or later, every bathhouse owner encounters this phenomenon. What options are there to get rid of this problem?
What not to do with a resin trace
Before choosing how to remove tree sap from clothes, you should consider some important factors, otherwise you may accidentally damage the item irrevocably.
Before using one of the suggested cleaning methods, you need to scrape off the resin itself. All the proposed options are aimed at getting rid of its traces, but none of them will help get rid of it completely, without preliminary cleaning.
Brightly colored items made from delicate materials should not be cleaned with alcohol or any acids, because they can discolor the fabric at the point of contact. Vinegar, even diluted with water, should not be used on silk fabric. Strong alkaline solvents and especially bleaches are safe to use only for white things, otherwise the color will begin to peel off. Turpentine or gasoline are only suitable for rough fabrics
It is rational to use them for jackets, trousers and other things that do not require careful handling. They are also most suitable for hiking clothing, which is made from durable materials - gentle products may be ineffective
To prevent the stain from spreading further during the cleaning process, you can moisten the cloth around it with plain water or sprinkle it with starch/talcum powder. The directions of movements when cleaning should be from the edge to the center, and not vice versa, otherwise the dirt will spread and be firmly absorbed. It is advisable to clean from the inside out and move to the front side.
Before doing this, make sure that the fabric is not discolored. It is not advisable to leave the product on for longer than the recommended time, otherwise it may begin to corrode the fabric.
Since resin can be dissolved using different methods, the item stained with it will not be damaged forever
It is only important to know which methods are suitable for a particular material, as well as to have the necessary tools at hand. Even for delicate fabrics there are safe options with which the item will return to its normal state. In any case, you shouldn’t worry and throw away an item if there is a chance to save it
There are many ways to get rid of tar stains, and one of them will definitely help.
In any case, you shouldn’t worry and throw away the item if there is a chance to save it. There are many ways to get rid of tar stains, and one of them will definitely help.
Warming up
The method is suitable for newly built baths. In order to remove resin from new boards, the steam room must be heated to the highest possible temperature.
The optimal incandescent room temperature is 150 degrees.
Under such conditions, the resin begins to actively release from the wood, after which it must be scraped off manually or using a solvent.
Method No. 4: processing with a router or drill
One of the best ways to eliminate resin stains is to combat the “bags” in which the substance is formed. To do this you will need a drill or router. The action algorithm is as follows:
- After heating, the beginning of resin streaks are found in the boards.
- These areas are drilled out using a milling machine or drill.
- Patches are prepared from similar wood.
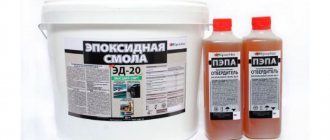
- Take the sealant and fill the area into which the patch is stuck.
You can use any glue that is resistant to high humidity, intense heat and temperature changes.
Round router bit for drilling out resin Source blingfeel.com
Scraping
In order to melt the caked formation, you will need a soldering iron, which must be used to burn the damaged area. Once the resin is in liquid form, it can be easily scraped off. It is best to use a spatula for this purpose.
Any of the proposed methods will help the owner of the bathhouse get rid of tar stains in the shortest possible time.
Share on social media networks:
The interior, made of natural wood, looks very solid, presentable, soft and pleasant. Coniferous material is especially valuable, which also, during operation, contributes to the natural health of all residents of the house. But there is one problem that arises when laying coniferous wood - how to get rid of resin on the boards, which must be solved correctly. How to remove resin from wood in a pine bath or steam room? This is exactly what this article will be about.
Video material
When giving preference to coniferous boards, remember that you will not be able to completely get rid of resin on the boards. It can appear at any moment, the most unexpected for you. But this is actually not such a global problem, because the “resin” can be removed, and the beauty, environmental friendliness and benefits of such wood cannot be compared with any modern plastic or other material. Let your home be filled with only the pleasant aroma of pine needles and always look cozy. And now you know how to deal with minor resin problems.
Why remove resin?
Coniferous wood species such as pine, spruce, and larch are extremely beautiful, but they emit natural resins not only after cutting, but also during growth. This resin is a very viscous, fluid substance, so the process of interior finishing becomes significantly more complicated, because:
- The boards where the resin leaks out become extremely sticky and quickly adhere to any tools or materials they come into contact with.
- Typically, the places where the “resin” leaks out look somewhat darker than the entire board, so a uniform coating cannot be achieved.
- It is impossible to perform staining while the substance is leaking, and it is also unprofitable. Paint or varnish will not harden on resin stains, and accordingly, convex areas of the coating, unprotected from the harmful effects of moisture, will remain, standing out with their color.
Stages
If the master has chosen pine as a material for the floor or other elements of the room, then you need to take into account the properties of this wood when processing it with stain and varnish. The steps for proper operation are:
- Buying high-quality “correct” boards.
- Grinding.
- Primer.
- Impregnation with stain.
Many carpenters and woodworkers love pine because it is easy to work with, light weight, and low cost. In addition, this wood is available everywhere.
When finished with transparent materials, the pine surface seems to radiate warm sunlight. This effect is rarely found in other breeds.
Because of this drawback, you should not refuse to process such material. You can tint pine boards evenly if you know the technology and how to do it correctly. This will require only a few simple steps and a little more time to prepare the wood.
How to remove resin from a board?
In order to correctly prepare all the elements for laying the floor, wall covering or ceiling, you need to properly get rid of the resin on the boards. This can be done in several ways.
Mechanical removal
In this case, in order to remove the resin from the boards, you must wait until the fluid mass has completely hardened. Then, armed with a knife, remove each piece by hand.
Important! After removing all unwanted deposits, it is necessary to sand the surface of the wood with sandpaper or a special tool.
Solvents
To dissolve the “resin”, you can also use available chemicals. The following tools are suitable for this purpose:
- alcohol;
- White Spirit;
- turpentine;
- refined gasoline;
- acetone;
- nitro solvent.
Important! The use of any of these solvents does not affect the structure and shade of coniferous wood. But when using it, it is advisable to protect yourself with gloves and a respirator so that caustic volatile vapors do not provoke irritation of the skin and mucous membranes.
REPAIR OF RESIN POCKETS
The problem was solved mechanically: a section of wood along with a resin pocket was cut out to a depth of 5 mm. Then the recess was sealed with a so-called boat - an insert made of dry, non-resinized wood, installed with glue. We made all this by hand with single resin pockets.
After sealing the resin pockets, we began to eliminate the resins. These are volumetric defects, and the tarred areas must be repaired with a continuous layer of clean wood. To do this, the front sections of the frames with tars had to be cut to a depth of 3-5 mm using wide chisels and sandpaper.
Inserts made of healthy wood were tightly fitted and glued onto these cleaned areas. After the glue had dried, the window frames were sanded and thoroughly treated with acetone to remove any residual resin, and then the areas of the frames to be repaired were thoroughly washed with hot water and soap.
Now we could begin to restore the paint layer. The areas to be repaired were plastered with finely dispersed putty. Then they carefully sanded, primed and painted in two layers.
Safe recipes
In order not to damage the wood either by mechanical or chemical influence, or in the case of a small amount of “resin”, use the following means to get rid of resin on the boards:
- 25 g of wood or any liquid soap mixed with 50 ml of ammonia and 1 liter of hot water;
- acetic solution of concentrated acid and water in a ratio of 1:50.
Important! The latter remedy is also good for removing alkali residues after using any other substance or solution in order to get rid of resin on boards. It helps a lot, including when you are washing finished walls and you need to remove cleaning residue from the joints of the crowns.
Other ways and means
You can also get rid of resin on boards using traditional methods, which involve using available kitchen and pharmacy solutions and powders.
The following methods effectively help solve the problem:
- Ammonia or ammonia solution. This product is diluted with acetone in a ratio of 2:1. Apply to the surface with rubbing movements until foam forms. Remains of foam and resin are removed after 20 minutes with a clean damp cloth.
- Potash and soda in equal proportions (50 g each). Both substances are mixed and poured into 1 liter of hot water. To enhance the effect, you can add 250 ml of acetone.
- Caustic soda. It is dissolved in half a liter of cold water. You can also add 250 ml of a solvent such as acetone.
Important! Any of these products can only be applied to a sanded, but not painted surface. Otherwise, the acetone will dissolve the paint and the finished finish will not look the most attractive.
IF YOU ARE BUILDING A LOOGUE
In houses with log houses made of timber or rounded logs, there are also resin pockets and even tars. The problem is that GOST 8486-86 “Softwood lumber. Technical Specifications" allows for the presence of resin pockets even in premium (selected grade) lumber on any one-meter section in the amount of 1 piece. length no more than 50 mm. In lumber of 1st and 2nd grades, 2 and 4 pockets are allowed in any one-meter section along the entire length of the workpiece. Therefore, in a contract for the construction of a house made of timber or rounded logs, special attention should be paid to resin defects.
Of course, there is practically no spruce and pine wood without resin pockets, but let them be as in a selected type of wood - few and small in size.
As a consolation to homeowners who already have log houses with resin pockets or tars, I want to say: wood with resin is more durable, and the smell of the resin, which contains many essential oils, is not only pleasant, but also useful.
- RESIN POCKETS
IN WOOD ARE CALLED CAVITIES OR INSIDE THE ANNUAL RAYS. OR BETWEEN THEM. FILLED WITH RESIN DURING THE LIFE OF THE TREE. - RESINERS
ARE CALLED AREAS OF WOOD COMMONLY IMPREGNATED WITH RESIN. FORMED DUE TO WOUNDING CONIFEROUS TRUNKS. CONTAINING RESIN CUTES AND RESIN CELLS. RESIN ACCUMULATES A LOT ON SUCH AREAS OF WOOD AND REMAINS THERE FOREVER.
Replacing the lower crowns
The lower crowns of the bath structure are subject to strong moisture and climatic factors. As a result, they quickly rot and the building collapses. Therefore, during construction, the lower crowns are made of larch, which only becomes harder from moisture. In another situation, replacement of elements is required. If the crowns are not removed and repaired in a timely manner, the bathhouse will become warped, cracks will form in the walls and the structure will fall apart.
The lower crowns of the bath can be made of larch or oak
Replacement of the lower crowns can be partial or complete. The first option is optimal if only some elements are damaged, for example, in the drainage or slope area. Complete replacement is necessary if the structure is severely damaged. The procedure requires careful organization, and the scope of work is as follows:
- You need to remove all objects and furniture from the bathhouse, remove glass from window frames and doors. If the floor joists are embedded in the lower crown, then the covering is dismantled. The chimney is separated from the ceiling, which will prevent damage to the roof;
- Crowns that do not require replacement are fixed. To do this, about 50 cm are retreated from the corners of the building and 40 mm bars are nailed vertically. The lower ends of the bars are fixed on the crowns of the second level, and the upper ends are nailed to the very last elements;
- Timing of a log house - two logs fastened with a corner joint. We determine which logs will be the top ones in the crown being replaced. The jacks will be fixed under them. You need to retreat 1 m from the corner in the foundation and knock out an opening 40 cm wide. Opposite this opening, you should cut out part of the lower crown log. As a result, the overall height of the niche is sufficient for installing a jack. On two opposite walls, 2 niches are also cut out at the same distance from the corners. The jacks are fixed, and their number is 2–4 pcs. This way you can raise either the entire building or each wall in turn. If you install 4 jacks, the distortion will be less. Using jacks resting on the upper logs of the dressing, you need to raise the frame by 7–10 cm;
- The lower logs are removed and temporary support bars are fixed. The jacks are lowered, the upper logs of the crown being replaced are also lowered and removed. Install new elements and tighten them with jacks. Temporary supports are removed and the following lower elements are replaced. All jacks are lowered simultaneously and the gaps between new and old logs are sealed.
Replacing the lower crowns of a bathhouse requires physical effort. Therefore, structural repairs cannot be carried out alone with your own hands.
Repairing a bathhouse requires good preparation
Rules for caring for bath premises
Most of these problems can be avoided.
Pine and spruce lumber must be of ideal quality, without a single knot, because basically they are the gateway for the released resin.
Boards with cracks, knots and blue stains are not suitable for a bathhouse.
Pine boards should be selected with almost no defects
You need to carefully inspect all lumber you purchase. A tree affected by fungus or rotten is immediately visible. If you notice specimens that are black or blue, it would be advisable to contact another supplier. There is a high probability that the entire batch is affected, even if the fungus is not noticeable on all the boards and logs.
It is better to buy wood cut down in winter. Frost will prevent fungus from spreading in the wood. And before use and after assembly, wooden elements must be treated with antifungal impregnation.
Fungus on a log cut is immediately visible
Application of impregnations
This remedy can protect you from many problems associated with the operation of the bathhouse. For a modern busy person who does not want to use impregnation, there are only two ways to avoid the appearance of dirt:
- rarely use the bathhouse or allow a small number of people into it (and dry it well each time);
- every two to three years, completely change the furniture, lining on the ceiling and walls (but this method is not suitable for everyone).
Fans of a healthy lifestyle claim that treating wooden surfaces inside a bathhouse is not only unnecessary, but also harmful. They believe that impregnation and paint coatings, when heated, give off a strong chemical odor and emit harmful volatile substances. This is true if you use ordinary products not intended for use in a bathhouse. But if you leave the tree in its original form, it cracks, and fungus multiplies in the cracks and micropores.
Wood bleaching. Resin removal of wood
Pine wood, like other coniferous trees, is permeated with resin channels, from which resin is released. Deresining wood, which is often combined with bleaching, is carried out so that over time the resin does not appear on the surface of the product.
Almost always, carpenters ignore these procedures - they are quite labor-intensive and time-consuming. But over time, resin begins to release from the wooden product and even from the veneer, destroying the paint or varnish coating. Therefore, if you are doing it for yourself, do not be lazy, use de-resining of coniferous boards or veneer.
TROUBLE CAME FROM WHERE WE WERE NOT EXPECTED!
Large wooden windows and doors with double glazed windows were ordered for the country house. Previously, we studied both the manufacturer's samples and even the finished installed window units in a residential building that had been in operation for several years.
There were no quality issues. Under a layer of clear varnish, the pine window units looked flawless. It was considered unnecessary to overpay for oak structures.
For the house we chose brown for the window blocks and doors. Looking ahead, let's say that this was our first mistake.
The beautiful window units were installed in September. Until next summer the windows did not cause any problems. But with the onset of hot summer, paint blistering on the surface of the frames was discovered on the south side of the house, which immediately caused concern.
After a few days, resin began to seep through the paintwork. And there were at least two dozen such areas on window blocks. The initially beautiful windows immediately lost their view. What to do?
We urgently called a contractor who manufactured and installed our window units. A company representative immediately stated that this was the first case of such a defect.
After removing the paintwork, resin pockets and areas of wood heavily impregnated with resin were discovered in areas with resin. In the sun, a dark brown surface warms up more than a light one, which contributes to the release of resin from the wood.
Reasons for the appearance of soot on the walls of the bathhouse
Soot often forms on the walls and ceiling in the bathhouse
The formation of smoke in the furnace occurs due to the low combustion temperature of the fuel in it. But good draft in the chimney removes all the smoke outside. The release of smoky combustion products into the room occurs in cases where the movement of air in the stove system is difficult. With weak draft, it is impossible to even simply open the firebox door without clouds of smoke escaping from it.
The reasons for poor air movement in the furnace can be different:
- Errors during construction. They can only be corrected by rearranging the entire structure.
- A reduction in the cross-section of the pipe due to a foreign object getting inside or the chimney being heavily clogged with soot.
- Cracks in the stove masonry through which air is drawn in, disrupting normal circulation.
- Weak oxygen flow from the blower. This can happen when the door is not open enough. Sometimes the ash pit simply becomes clogged with ash from previous kindlings.
- There is a strong wind outside, preventing smoke from coming out of the chimney normally. Partially, a skate installed at the top can help with this problem, but if the wind direction is unfavorable, it won’t help either.
- Smoke at the beginning of kindling after a long break. In such cases, before lighting, you need to warm up the stove riser by burning several newspapers or a rag doused with gasoline in it.
- When lighting a stove with raw wood, the smoking will stop only after the firebox and chimney have been warmed up for a long time.
You will have to constantly wash off the soot in the bathhouse when installing a heater that is heated “black”. In this case, the soot will come out along with the steam.
Preparing for cleaning
Having discovered a dark tar stain on the leg or sleeve of a blouse, the first thing you need to do is remember how it could have appeared. If trouble occurs after a walk in a park planted with coniferous trees, or while picking mushrooms in a pine forest, then we are talking about tree resin. It’s another matter if the stain appeared during repairs or after going to a construction site. In this case, we can assume that the resin is epoxy.
Resin type – wood (natural) or epoxy
There are two types of resins: natural, or wood, and synthetic. But they are all characterized by incredible stickiness, the ability to quickly penetrate the fabric fibers and glue them together.
Before cleaning begins, it is necessary to correctly determine the type of resin.
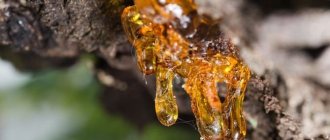
- Tree resin (tar) is a viscous, oily liquid of a dark brown color. It is formed as a result of the hardening of the sap of some trees. Resin is produced by pine trees, spruce trees, larches, poplar buds, thuja and other plants.
- Epoxy resin is a representative of synthetic substances, as it is produced chemically. Such resins are widely used in households, construction, and manufacturing. Epoxy exhibits its binding properties only when combined with a hardener and is resistant to acids and alkalis.
Vegetable stains are much easier to remove than stains caused by epoxy resin.
Fabric material
To select a cleaning product, it is important to know what fabric the stained jacket or blouse is made of. Otherwise, a hole may form in place of the stain, the paint may peel off, or some other trouble may occur.
The composition of the material and methods of caring for the product are indicated on the label. If the information is erased or the label is cut off immediately after purchase, you should follow these rules:
- Wool and natural silk do not tolerate exposure to strong alkaline solutions. To clean the surface of these materials from resin, ammonia or a mixture of starch (1 tsp) and turpentine (5-6 drops) is used.
- Turpentine or acetone will help remove the viscous substance from cotton fabric. When the resin has dissolved, wipe the contaminated area with alcohol and rinse with water.
- Acetate silk and bologna fabric are treated with purified gasoline. Acetic acid and acetone should not be used to process these materials.
- Nylon and nylon do not tolerate treatment with gasoline, benzene and alkaline solutions. Resin stains from these materials must be removed with warm water and laundry soap.
- Leather items cannot withstand exposure to solvents. For them, the best cleaning agent is vegetable oil.
- Jeans stained with wood resin can be easily cleaned with turpentine and ammonia, using them in equal quantities. Potato starch is added to the solution to obtain a thick paste, and the area of contamination is coated. After drying, the remaining paste is brushed off and the pants are washed.
- A jacket made of membrane fabric can be scrubbed using turpentine and laundry soap. Turpentine is diluted with water in a ratio of 1:2, grated soap is added to the mixture and the soiled part of the clothing is washed.
Fresh or old stain?
A fresh stain that has just appeared is always easier to remove than an old one. Therefore, as soon as a resin blot is discovered, you must immediately begin cleaning:
- Use a paper napkin or handkerchief to blot the resin, trying to collect a thick mass from the surface of the material.
- Do not wash, much less soak, the product. This will not help the matter; the stain will spread even more.
- If you don't have a stain remover on hand, you can try to get rid of the stain using vegetable oil. In case of failure, you will have to start processing with other substances suitable for the composition of the fabric.
Fresh stains usually have a blurred outline and are darker in color than the fabric. Old stains have a clear outline, they are lighter than the fabric, and appear both from the face and from the inside.
How to prepare things for stain removal?
Before applying the cleaning agent, the affected product must be prepared as follows:
- Shake out the dust and clean the surface of the clothing with a brush.
- Test the durability of the fabric in an inconspicuous area, such as a pocket or side inseam.
- Place the product on a table or floor and place a board wrapped in cotton material under the stain.
- If the product has a lining, it is peeled off in advance so that it is possible to place a board between the top and the lining fabric.
- The fabric around the stain is moistened with water. This will prevent the formation of divorces.
How to bleach
Darkening of wood is a natural process associated with moisturizing the wood during bathing procedures. There are several ways to fix this defect.
Firstly, mechanical - scraping the surface or grinding it using a power tool.
Secondly, the use of ready-made or homemade antiseptic bleaches for baths based on chlorine or oxygen. In the simplest case, fabric bleach “Whiteness” and hydrogen peroxide are suitable.
IMPORTANT! Chlorine still destroys wood, so if it’s worth using it, it’s rare.
There are quite a few ready-made antiseptic bleaches on sale, which, of course, will cost more than Belizna.
If the darkening is associated with soot from the stove, then you can bleach the boards in a bath using alkali - it can be found in the form of a ready-made product for removing the consequences of fires, or you can also buy it yourself as caustic soda and make a solution (the concentration varies depending on the degree of contamination).
ATTENTION! Strong alkalis, if handled carelessly, can cause a chemical burn that is difficult to heal. They can also burn the mucous membrane of the larynx when inhaling vapors. Protect your skin, eyes, and respiratory system
Rinse thoroughly from the treated surface, check with a vinegar solution (does not hiss - everything is washed away). In case of contact with skin, pour vinegar solution, not water.
Protect your skin, eyes, and respiratory system. Rinse thoroughly from the treated surface, check with a vinegar solution (does not hiss - everything is washed away). In case of contact with skin, pour vinegar solution, not water.
Laundry soap contains some alkali. Therefore, it perfectly removes some contaminants. Also a kind of antiseptic. Try to start cleaning the bathhouse with a concentrated solution of laundry soap - apply it to the boards and leave for a while, then start scrubbing and rinsing.
ADVICE! If you don’t want to repeat everything again in the near future, then after cleaning, apply an oil impregnation or water-based varnish to the boards; they will protect the wood from water and dirt.
TWO OR THREE LAYER FINISH
I had to paint it by hand, with a small roller and brushes. It was not possible to achieve high-quality painting the first time. I had to sand it down and repaint it. Some areas were painted well the second time, and some - the third. But perseverance brought the desired result. The repaired areas became practically indistinguishable. True, doubts remained: how would the renovated places behave next season? Will the resin come to the surface again? But no, a summer inspection showed that the resin had not leaked anywhere through the barrier of healthy wood. The windows were saved.
Main recommendations
An important rule is to never use water or abrasive devices to clean wood walls. Immediately exclude such aids as:
- bleach or other chlorine-containing preparations;
- water;
- abrasive sponges;
- metal brushes;
- liquid soap;
- cleaning powders;
- sprayers;
- Karchers and steam cleaners.
Cleaning soot from the ceiling in a bathhouseSource alfaclean.by
Using a mechanical method to clean soot and deposits in a bathhouseSource remontnik.ru
When cleaning the bathhouse, be sure to follow safety rules and wear clothing that makes contact with chemicals safe. These items include:
- working headdress (cap, headscarf, scarf);
- latex gloves;
- plastic buckets, basins (metal may oxidize);
- petal respirator (a four-layer gauze bandage is also suitable);
- robe;
- protective glasses.
When using special cleaning products for wood, be sure to read the instructions. Otherwise, you may harm the wood partitions.
Petal brush for cleaning wooden walls in a bathhouseSource ecosrub.ru
Causes of chimney blockage
If the pipe in the bathhouse is clogged with soot, there are several reasons for this. Its deposits settle inside the chimney during combustion, although ideally this should not happen: all solid particles should be removed. Unfavorable conditions are to blame for these consequences. The causes of clogged pipes are:
- Undried firewood. If the humidity is more than 24%, then when they burn, steam is released along with the smoke, which is encountered in the chimney with cold air. The result of the “rendezvous” is the formation of condensation, which instantly settles on the walls, and solid particles of smoke readily adhere to it. The more often the owners use wet firewood, the more “deposits” are formed inside the pipe. The chimney section is slowly but surely closing off. If you don't take action, it will soon become completely clogged.
- Using a variety of waste as fuel - scraps of plywood, chipboard, etc. Such materials containing chemical binders provoke the formation of sticky soot. It is optimal to heat the sauna stove with dry hardwood. It is also better not to use coniferous plants, the reason is the resinousness of the wood, which leads to a similar result.
- Lack of insulation in the section of the chimney that is close to the street. Hot smoke passing through a cold pipe causes condensation to form; the consequences of this phenomenon are described above.
- Pipe bends and turns, horizontal sections. These are ideal places for soot to appear and “multiply”. Therefore, in such problem areas it is necessary to cut out small hatches to remove soot.
- Brick chimney. It is more “friendly” to deposits, since the surface of such a pipe is rough, which allows soot to settle on its walls without much effort.
If the cause of the problem is found, then it is better for the owners to try to eliminate all unfavorable conditions in the near future. Otherwise, the soot will become a permanent “settler” of the chimney: it will have to be cleaned constantly.