We'll tell you how to refresh an embroidered picture.
Cross-stitching is one of the favorite hobbies of needlewomen. Viewers are simply amazed at how complex and detailed paintings can be achieved using a generally simple method. And what a painstaking work this is - hundreds, thousands, or even millions of crosses, dozens of shades of floss! But it happens that this work of art needs to be cleaned for many reasons: traces of sebum remain, a stain is accidentally placed, you need to wash off the water-soluble canvas on which you created the drawing. We will tell you in this material how to wash cross stitch so as not to ruin the result of the craftswoman’s long and painstaking work.
For what?
Let's first make sure the action is appropriate. Do I need to wash cross stitch at all? This should be done after finishing work for several reasons:
The hoop deforms the canvas
- Removing dust and dirt after prolonged interaction with the skin.
- Getting rid of small fibers from the thread.
- Fighting bends and deformations obtained while working on the product.
- Washing marking lines.
- Elimination of deformation of the work resulting from stretching with a hoop.
- Straightening the material.
- Leveling, fluffing the floss.
- Adding brightness to the picture.
Advice! Is it possible to wash embroidery with a pattern applied to the canvas? When making marking lines, do not use a regular slate pencil, but a water-soluble felt-tip pen - it will be much easier and easier to remove. Such a marker then needs to be washed off only in very cold water to remove without a trace. If you wash it under warm or hot water, it will “seize”, and cleaning out its traces will be a problem.
Selected tips
The steam generator will help to cope with distortions and dented places
If the markings are applied to the fabric with a water-soluble marker, they can usually be removed with a cold rinse before soaking. But not all pigments used for this purpose are amenable to this procedure.
The following tips will help you avoid deformation when washing:
- Secure the ends of the threads (for example, with knots), otherwise there is a high risk that the material will begin to fluff, and in the worst case, the pattern will unravel.
- If short stitches sag on washed work, you can unravel these areas and embroider them again . Another option is to tighten it from the wrong side and then secure it.
- You can clean the product using foam polyurethane . The embroidery is attached to it with pins, treated with a detergent solution, and then proceed to rinsing.
Editorial Voice
Matryona
Fan of embroidery and sewing
Ask a Question
The steam generator copes well with distortions . The work is fixed on a solid base and thoroughly steamed. After this, the embroidery remains in this position for 3-4 days so that the shape is fixed.
Fighting stains
If there are contaminants on the product, the removal agent is selected in accordance with their type. Do not use aggressive substances (chlorine, acetone, ammonia, potassium permanganate) and compounds containing them, as well as gasoline, glycerin, and petroleum products.
Diluted citric acid (10 g per 0.1 liter of water) works well on tea stains, hydrogen peroxide on coffee, and blood drops from a pricked finger. Alcohol is suitable for removing various types of fats (including cosmetic creams). If you need to remove marking marks (including from stylus or pen paste), you can buy Antipyatin soap.
Contaminants need to be treated pointwise , without affecting the entire area of the pattern. After this, the product is thoroughly washed off with cold water. The item is then soaked and washed.
Floss and wash
A very important point: you need to know what type of thread was used to determine what kind of washing the product will withstand:
- Hand dyed floss. One of the most capricious materials. Perhaps washing is generally prohibited for him - carefully read the instructions.
- Cotton floss. In fact, cotton can easily withstand temperatures up to 95 degrees, which is almost boiling. But do not forget that the floss threads are very thin, and the dye may not withstand such heat.
- Sectional dyed cotton floss. Theoretically, it can be washed at water temperatures up to 60 degrees.
- Floss with Light Effects, as well as embroidery threads that glow in the dark - washable with water heating only up to 30 degrees!
Much depends on the quality of the floss
. The best threads that will withstand high-quality washing are products from well-known manufacturers: DMC, Madeira. Manufacturers always indicate the appropriate temperature for washing and its rules.
The quality of budget threads often suffers when cleaning. This is especially true for floss in black, blue, red, and brown colors. In water, they begin to shed heavily, which risks the fact that they can “infect” neighboring cells of other shades with their color. If such a problem occurs during washing, then there is only one way out: rinse the product until the water becomes clear. Of course, these colors will no longer be so bright, but the embroidery will not be completely ruined, becoming covered with stains from them.
It is better to choose products from well-known manufacturers
Advice! If already while working you notice that the threads are staining your fingers, then it is 100% certain that the design will fade when washed. You can counteract this like this: fix it with a solution of 7-10% acetic acid (1 tablespoon of the substance per 1 liter of water), briefly immersing the embroidery in it. This will bring another positive effect - vinegar will increase the brightness of the threads.
Preparation for processing of the finished product
Before you begin the main wash, the product must be properly prepared.
Procedure:
- Remove the canvas from the hoop.
- Remove dust by shaking it several times.
- If preliminary markings were made with threads, they are removed.
- When the markings are applied with a marker, it must be washed off before the main wash by rinsing the product under running water.
- Treat the edges of the fabric to prevent it from unraveling.
To secure the edging, use PVA glue or colorless varnish. These substances are invisible on the fabric and will prevent the border from unraveling and the painting itself from becoming deformed.
If the threads are prone to shedding, then the product requires pre-fixing the color. For this purpose, vinegar with a concentration of 9% is used.
To prepare the solution you will need:
- table vinegar - 1 tbsp. l;
- water 30 degrees - 1 l.
Soak the embroidery in the prepared mixture for 30 minutes. After this procedure, you can begin the main wash. If the product sheds heavily, then add 1 tbsp to the solution. l. table salt.
Detergent
The first thing we need to do is find something at home or buy something with which we will wash the embroidery. This must be a liquid product - grains of powder can get stuck in the canvas, between the threads of floss, or, unwashed, disperse in streaks. Under no circumstances use detergents for white clothes - they may contain bleaching components that will discolor the tones that were carefully selected.
Whether to use dish gel is a controversial issue
Is it possible to wash canvas with cross stitch? Yes, but remember that floss is a rather capricious thread. Thin and fragile, they quickly lose their color saturation under the influence of an aggressive environment - high temperatures, chemicals. Therefore, cleaning products must be free of chlorine, hydroperite and other bleaching components.
You can use colorless shampoo
You can safely use the following for washing and soaking:
- Detergent for colored fabrics.
- Liquid soap, shampoo - but only colorless ones.
- Regular laundry soap.
- A solution of water and powder for hand washing (the resulting product must be filtered to get rid of grains of powder).
- Dishwashing gel. Opinions about it are divided: some needlewomen consider it suitable for washing embroidery, while others absolutely disagree with them. Opponents of “Fairy” and its analogues argue that compositions aimed at combating fat dry out the thin fibers of the floss and spoil their structure.
If you decide to use laundry soap, the price of which is very reasonable, then you need to prepare the following composition from it:
You can also use laundry soap
- Grate a piece of the block.
- Pour the shavings into a saucepan and fill with hot water (including 0.4 liters of water per 20 g of household soap).
- Heat over heat until completely dissolved, remembering to stir.
- Cool and use as directed.
Can only be washed with powder solution
There are no stupid questions, there are arrogant masters
It often happens when you are busy with a simple task for the first time and come across an incomprehensible little thing. Craftswomen who regularly wash their embroidery do it automatically, like morning coffee. Beginners often have additional questions.
It seems nonsense, but is it necessary to soak the canvas before starting embroidery to remove factory dirt? And can all floss be washed?
It is better to first read the instructions from the manufacturers. The labels usually indicate the temperature and washing method. This information will help you avoid major problems with the finished product.
Before soaking the painting, select water at the correct temperature. If you pour boiling water into a bowl, cheap floss will fade, and the canvas may become deformed along with the design. Therefore, the optimal temperature is considered to be 30 degrees.
If the powder dissolves well in water, you still shouldn’t use it. In addition to grains that can stain the fabric or threads, foam with small powder residues can settle on the surface of the canvas. After drying, the embroidery produces unsightly white streaks. They are very difficult to wash. Try to remember when you washed a black T-shirt in this powder. Has the item ever left artistic streaks after drying?
While embroidering, you notice paint residue from the threads on your fingers. This indicates that the floss will begin to stain everything around during washing. Use a simple way to fix the color: pour a 10% acetic acid solution over the embroidery. This advice is also useful for those who dye floss themselves, for example, creating melange or multicolor at home. Although a little vinegar can be added during washing, regardless of the quality of the threads, it just further fixes the color.
When drying the product, do not leave water to drain near radiators, heaters or in direct sun. Although the drying time will be reduced, the embroidery will lose its appearance.
May I remind you of the words of Matroskin from the cartoon that you need to get dirty less. But smart thoughts come already with the last stitches in the work. Yes, you remember that you didn’t wash your hands before embroidering. They forgot to put the tea and buns away so that the cat wouldn’t turn them over into the picture (after all, tailed friends are always to blame for such troubles). We prepared a piece of material 5 months ago to cover the work when not embroidering. But he still lies on the sofa next to him. There was so much intention not to erase the work at the end.
But even if you take additional measures to ensure the cleanliness of your embroidery, you should not neglect or forget to wash the finished product. Refresh it, rinse it again. But you will be 100% sure that your embroidery is as clean as a baby’s bottom (it seems that this comparison is used for something else, but you should understand the essence).
Leave comments, share your experience with newcomers, give advice to colleagues on your favorite activity. Each craftswoman finds her own secrets for the perfect look of the finished embroidery. You can simply wash the painting in running water, you can use convenient techniques. Tell us about your methods, maybe your advice will help save someone’s job.
Soak
We will soak the embroidery like this:
- Strain the powder solution, simply dissolve liquid products in warm water.
- Be sure to add 1 tablespoon of salt to the water for both soaking and washing. This will save the threads from fading and from the appearance of plaque, which is caused by microelements in hot water.
- Despite the fact that, according to the label, the floss can withstand higher temperatures, the embroidery is washed at a maximum of 40 degrees. This is done because the typical contamination of handmade work is sweat, sebum, and particles that flake off from the skin of the fingers. The items listed are best washed at the specified temperature.
- Soaking time is half an hour to an hour.
Salt will save the threads from fading
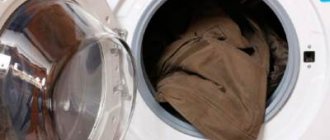
Wash
Washing cross stitch should be very careful so as not to tangle or tear the threads. Therefore, do not rub the painting too much, making an exception only for serious stains. In this case, you still can’t “squeeze” or rub too hard - just move your palm lightly over the contaminated area or pat.
How to wash a cross stitch display: do not rub or wring!
The embroidery is erased by light squeezing movements and rapid movements in water. Severe dirt is rubbed with a soft bristle brush from the underside of the work. This must also be done carefully: there is a risk that the threads secured with weak knots will unravel.
Now let's look at special cases of washing.
On stretch
How else to wash cross-stitched pictures? Use stretching. It can be a wooden or plastic hoop. Stretch embroidery on them and hang this thing over the bathtub. Wet the product thoroughly with a shower. Apply liquid detergent to the sponge and lather it.
You can not only embroider on the hoop, but also wash it
Now is the time to clean the embroidery with a soapy sponge using light circular movements. Fight tough stains by adding foam rather than using physical force. Finally, rinse the embroidery thoroughly to remove any cleaning agent in the shower.
Regular overlay canvas
This element is simply pulled out before washing. Before this, the embroidery is soaked with water from a spray bottle, after which the base is softened and removed manually.
Washing the embroidery occurs in the usual manner described.
Water Soluble Canvas
Is it possible to wash cross stitch on canvas in this case? An important point: the waterproof canvas (pictured) completely dissolves when soaked in hot water (50 degrees) for 10 minutes. Therefore, color-fast floss is used for this work. It would also be a good idea to conduct a test: embroider a simple pattern on an unnecessary piece of fabric and soak it in hot water. If nothing happens to the threads, then large-scale work can begin.
Water Soluble Canvas
When you missed such a point in the test when working with water-soluble canvas and are afraid that the floss may become discolored, we advise you to follow these recommendations on the topic “How to properly wash cross stitch”:
- Soak the work in water at a temperature of no more than 40 degrees with added salt for half an hour.
- If the canvas has not completely dissolved, then you should carefully wash the product in water at 50 degrees.
- Rinse as recommended below.
easycross.ru
Dear friends
, we have received a lot of requests about how to wash and iron embroidery. Some questions were discussed on our forum, but since some questions remained unanswered, I decided to write about it in detail. Very often on forums and in books on cross stitch it is written that it is not necessary to wash the finished work if it is not dirty. This position, in my opinion, is wrong. Even if you wash your hands every time before sitting down to embroider, and maintain extreme cleanliness while working, your hands still contain natural oils that stain your work. In the long term, this can lead to fungal infections. Therefore, after spending a lot of time and effort on creating your little miracle, be sure to wash the embroidery. After washing, the colors of the floss will become brighter, possible stains and marks from the hoop on the canvas will disappear, and the crosses will be leveled out. So let's get started. We have two jobs available. One is embroidered on black canvas, with traces of markings and hoops. Another work was in the hands of a small child: traces of a ballpoint pen and paints. For washing we need a bowl of water and mild detergents.
Typically washed in cold or lukewarm water to prevent the floss from shedding. If you used high-quality floss for embroidery, for example, DMC or Anchor, then you should not be afraid of shedding if you follow the manufacturers' recommendations. For washing, use any mild detergents: shampoos, dishwashing liquids, liquid powders. The main rule when choosing them is the complete absence of bleaches.
Pour water into the basin so that it completely covers the work, add a little detergent. Place the embroidery in water and soak it for 10-30 minutes, depending on the degree of contamination. Then carefully wash the embroidery with your hands, avoiding strong friction. The remaining stains can be cleaned with a dental bead and detergent, being careful not to damage either the floss thread or the canvas. In my case, I soaked the first piece for 10 minutes, the second for 30. After rubbing the embroidery a little, the marks on the poppies immediately disappeared. I had to work hard with the teddy bear: the marks from the ballpoint pen were washed off quite quickly, but the gouache just didn’t want to come off. I had to carefully wash the embroidery using antipyatin soap; it does not contain bleach, does not spoil the colors and is excellent at removing difficult stains.
Now the work needs to be rinsed. We rinse the embroidery in cold water, changing the water several times until we are sure that there is no soap left in the threads and fabric. In the last rinse, add 1 teaspoon of vinegar per 1 liter of water to preserve the brightness of the threads and give them a special shine. We take out the embroidery without wringing it out and lay it out on a white towel, smoothing out any possible folds, roll the towel into a roll and gently squeeze it. Do not press or twist the embroidery under any circumstances, so as not to cause deformation of the design. If you have a large enough piece of work that it is difficult to fit in a towel, hang it on a line, allowing the water to drain.
We unwind the towel, leaving the embroidery face down, and let it dry a little, but not until completely dry - the work should be a little damp. At this stage, carefully level and stretch the embroidery to avoid distortion of the fabric or pattern. To ensure that the embroidery remains embossed, it should be ironed face down on a soft substrate (for example, a towel) until the embroidery is completely dry. This must be done very carefully to avoid deformation of the design. The optimal ironing temperature depends on the composition of the canvas and floss used and can be different, so you should focus on a lower temperature.
Let's see what happened after washing and ironing the embroidery. All visible stains were washed off, the crosses were straightened out and the marks from the hoop were gone. Now the embroideries are completely ready to be framed.
Fighting stains
We will present you with brief recommendations for combating specific stains in the table. For example, how to remove pencil from embroidery.
Peroxide
Vinegar
Pharmaceutical alcohol
Soda
Lemon acid
"Anipyatin"
| Hydrogen peroxide | Iron marks, blood, coffee marks |
| Acetic acid | Rust |
| Medical alcohol | Grease stains, traces of unabsorbed hand cream |
| Baking soda | Mold and traces of it |
| Citric acid (solution with water 1:10) | Tea |
| Antipyatin soap | Traces from a pen, felt-tip pen, marker, pencil |
Apply the product only specifically to the contaminated area, and not to the entire canvas. Be sure to rinse the stain removing component under running water, then soak and wash the product.
Smoothing out the work
Advice! When cleaning embroidery from stains, refrain from using the following products: potassium permanganate solution, gasoline, ammonia, acetone, glycerin, chlorine. To combat particularly stubborn stains, you can take a chance and use oxygen bleach.
Bleaching after finishing work
Embroidery cannot be bleached, but if the fabric surrounding the cross pattern has turned yellow or gray, action must be taken. In order not to spoil the canvas during the cleaning process, you need to adhere to the following recommendations :
the selected bleaching composition is applied only to the fabric that has no stitches;- if there are colored threads near the stains, then use a cotton pad or even a cotton swab for treatment;
- after cleaning is completed, the detergent is rinsed under strong water pressure;
- The completion of the bleaching procedure is regular washing.
Means that can safely bleach embroidery:
- Lemon juice . It is used in its pure form.
- Hydrogen peroxide . It is diluted with water in equal proportions.
- Ammonia . It is diluted with water in a ratio of 1:3.
- Baking soda . It is mixed with water until a thick paste is obtained.
All selected products are left on the fabric for 15-30 minutes, after which the main wash begins.
Rinse, dry
We figured out how to wash a cross-stitched picture. Now the next stage. The work is rinsed in several waters: start with warm water (no more than 30 degrees), and then, when the foam is washed off, in cold water. Here you can use a little trick that will help the product remain bright for many years: add vinegar (1 tablespoon per 3 liters of water).
Under no circumstances should you squeeze the product! You can only wrap the embroidery in a towel like a roll and gently squeeze it several times.
This is how we dry the embroidery
Lay the painting horizontally to dry on a dry terry towel. It is better not to do this on a clothesline or dryer - creases may form that even an iron will have difficulty removing. As soon as the towel has absorbed all the water and the embroidery becomes a little damp, you can proceed to ironing - this will happen in a few hours.
Ironing
Iron the embroidery only from the wrong side, laying it out on a towel. This also helps save the voluminous crosses from flattening. Therefore, you need to choose a terry towel with a pile that suits the occasion: if it is too long, the floss will look too convex, if it is too short, it will look flat.
Iron work only on a towel
Make sure that the fabric does not warp. If the canvas is deformed in the hoop, then give it the correct volume slowly, without much zeal, without stretching the canvas. The iron setting is set to delicate - “Silk” is best.
While cotton floss tolerates ironing well, the same cannot be said about synthetic inserts or monofilament with beads. Therefore, if your work contains such decor, then the operating mode of the iron must be chosen taking it into account.
Ironing should not damage this relief
The video in this article will clearly show how to wash handicrafts.
Recommendations
Little tricks will help you avoid annoying mistakes.
For example, if you want to use embroidery with ribbons, beads, beads and metallic threads in your work, then it is best to do this on a washed and ironed picture. Otherwise, the washing and ironing process will be very difficult. This decor is done on a carefully stretched canvas. You can also adapt the machine for embroidery.
Expert opinion
Irina. Housewife.
Ask a Question
Decoration with cording or long stitches is also done last - otherwise all their beauty will lose its shape, sagging. If short stitches hang after washing, this can only be corrected by unraveling them and doing the work again. If the deformation is not serious, try tightening the threads from the inside out.
Using a steam generator can greatly facilitate the process of bringing your embroidery into a decent appearance. Such a device will cope even with overdried fabric, without disturbing the volume of the crosses, and will ideally secure the result of leveling out various distortions.
Other embroideries
If you decide to clean work that contains other elements, then we will present several recommendations in this regard: how to properly wash embroidery.
Beads
Embroidery with beads is the most fragile and capricious. Even the most expensive high-quality material fades when exposed to water for a long time, let alone budget “beads”. What is the best way to wash bead embroidery? This can only be done before sewing on this decor. If you just need to remove a pencil or marker from your work, then there is only one way to do it: quickly rinse the product in the prepared soap solution.
It is not recommended to wash bead embroidery
Still, is it possible to wash bead embroidery? It's better to do without it. Another option for cleaning stained bead work: carefully use an old toothbrush dipped in soap suds to carefully treat the specifically dirty area. If the beads themselves become dirty, you can quietly clean them with a damp cloth—hygienic or intended for office equipment.
Wool threads
Wool threads have the following annoying drawback - they shrink when washed. To prevent this from happening, you should wash your work only in cool water. When it comes to detergents, you need to use those that are specifically designed for woolen products. You can secure the result with a rinse aid for the same material.
Wool threads may become distorted in hot water
Such work is dried in the same way as embroidered floss. Iron only when completely dry on a soft towel, being careful not to lean the iron tightly against the product.
Stain removal methods
Embroidery tends to get dirty. How to remove stains of various types:
- Traces of ink are removed using Antipyatin, a soapy foam solution or a glycerin aqueous solution.
- Blood stains and fatty secretions are removed with hydrogen peroxide and ammonia.
- Remains of the lead pencil are removed with soapy water and ammonia.
- Tea or coffee stains are removed with citric acid and hydrogen peroxide, after which the embroidery is rinsed in cold water.
- Traces of a felt-tip pen or marker are removed with acetone, nail polish remover, or hydrochloric acid.
- Mold is removed with baking soda.
- Rust is removed with acetic acid.
- Cosmetics are washed off with alcohol.
The above components are applied pointwise to avoid contamination of the entire canvas. In this case, it is not recommended to soak the embroidery; you must begin washing immediately.
Good to know!
Finally, we would like to share with you a number of useful tips for needlewomen:
Tips to help keep your embroidery in perfect condition below
- Always secure the ends of the threads with a knot or any other way you are familiar with. Otherwise, the floss will fluff up when washed, or part of the pattern will completely unravel.
- Before washing, do not forget to process the edges of the canvas so that they do not begin to crumble during the process. This can be done in any convenient way: with PVA glue, colorless nail polish, or a zigzag stitch around the perimeter, done in a washing machine. Some people use moisture-resistant duct tape.
- Some needlewomen wash embroidery like this: they secure it with pins on polyurethane foam, then treat it with a soapy solution and rinse it. The method is also good for straightening a somewhat skewed product.
Don't forget to sand the edges of the canvas before washing.
- If short stitches have stretched out and sagged after washing, it is better to go through these poor-quality places with a cross again, unraveling the defect. Another way is to lightly pull it from the wrong side and secure it with stitches.
- Do not wash work with metallic threads. It’s easier to refresh the embroidery, dry it, iron it, and then embroider the elements with this material. The same can be said about the application of long stitches, ribbons, cording (sewing threads twisted into cords), and beaded elements.
- If the embroidery is a little skewed, then an invention such as a steam generator will help return it to the correct shape. The product must be attached to a rigid base that fixes its position, and then steamed with the device. The embroidery is left in this position for several days after steam treatment to further fix the shape.
The steam generator will straighten the deformed embroidery
- If the embroidery design is applied with a washable marker, then this is removed under cold running water before soaking. However, not all types of dye can be removed using this method, so be sure to read the instructions for the kit before starting washing.
Cross stitch is one of the most popular hobbies even nowadays. The work itself calms the nerves, relieves stress, teaches perseverance, attentiveness, and patience. The result of needlework is amazing - an embroidered picture is an exclusive decorative item or a lovely gift for family and friends. And how to wash cross stitch on canvas so that it has a fresh and presentable look, we have discussed in detail in this material. Good luck, inspiration and amazing work!
How to properly treat canvas so that it doesn’t fall apart
After wet cleaning, you will definitely regret that you did not pay attention to the base during pre-treatment. You need to check if the edge is secure. Otherwise, it will fray, some threads will come out, and problems with framing will arise in the future.
Tip: when the picture was embroidered on a base from a special set, there is no need to worry about processing the edges. Usually it is “closed” during production.
Ways to maintain the integrity of the canvas:
- Fold the edges in and sew with a zigzag stitch on a sewing machine. In this case, a regular straight seam is not effective.
- The short edge can be reinforced with clear nail polish or PVA glue.
Important: some craftsmen cover the edges of the embroidery with tape. But this will not give the desired effect - the transparent tape, when water gets on it, loses its properties.
Having completed all the preparation tasks, we proceed to washing.