No one remembers when and where these wardrobe attributes first appeared, which today occupy an honorable place in the everyday life of every fashionista.
The first mentions of such a headdress go far into the past of the eastern country of Japan. They were made by hand by village workers from the thinnest rice paper. Even at that time, people were worried about the beauty of their things, and even then they were wondering how to starch a cap and return it to its original appearance after wearing these clothes. This material has been in demand in Japan for many centuries. From it they made not only helmets for samurai, but also veils for brides. Some of these hats were a mandatory attribute at the Boys’ and Girls’ holidays that were widespread in this country.
The art of eastern masters in making caps has been passed down from generation to generation and has survived to this day. Thanks to this simple but very effective headgear you can protect yourself on a hot day.
How to restore the color on a cap?
There are standard folk procedures that can quickly solve the problem:
- Vinegar. Rinse the cap in cold water and add vinegar. ...
- Tobacco. ...
- Washing a baseball cap in water with the addition of baking soda gives good results. ...
- Soaking the cap in a solution of natural ground coffee and hot water.
11 Jun
2022 Interesting materials:
How to create an Apple ID on iPhone 6? How to create a conversation in VK on a computer? How to create a wireless keyboard? How to create pressure in the heating system? How to create an additional partition in Windows 10? How to create a filter in Thunderbird? How to create a Google document with shared access? How to create and send a screenshot? How to create an information base in 1c on the server? How to create a wallet for Dogecoin?
Starch
Almost every fashionista has such a stylish headdress as a cap or baseball cap. During wear, the item may become deformed, only the visor remains in the same condition. Therefore, the question “How to starch a hat and straighten a cap after washing?” is relevant.
If after washing the product has lost its shape, you can use potato starch. It can be replaced with corn or rice.
There are three degrees of starching:
- Low (1 tsp per 1 liter of water) is used for a panama hat or beach hat. The headdress will keep its shape until the first rain. It should not be worn on wet hair after visiting the sea, otherwise it will immediately become deformed. Children's hats with brims can be treated in this starching solution.
- Medium (1 tbsp per 1 liter of water) is suitable for caps and beach hats. If you use such a solution, the product will hold its shape better and longer.
- A high (2 tablespoons per 1 liter of water) degree of starch is suitable if you need to straighten a military cap or knitted panama hat. This method will give the product the correct shape for a long time. If a woman has knitted a hat and wants to stiffen it, use this method.
First you need to get rid of the stains. After the woman has washed the headdress, it is dried and, if necessary, one of the methods is used.
How to return a product to its original appearance - step-by-step guide:
- Having prepared the solution, it needs to cool to room temperature, then lower the things one by one. A cap and baseball cap are dipped into the solution without a visor.
- Allow to soak in the starch a little, 5–10 minutes is enough.
- Then take it out and gently squeeze out the excess liquid with your hand.
The hat was processed, a cap, a baseball cap or a Panama hat - it doesn’t matter. Any headgear needs to be straightened after this procedure.
The starched cap must be carefully smoothed with your hands and put on a jar of a suitable size. This way it will be possible to restore its shape and the product will not lose it the first time it is worn.
A hat with a wide brim will need to be smoothed and pressed tightly. After drying, the field must be ironed.
Do not remove the cap from the jar until it is completely dry. Then the starched item will delight you with its appearance for a long time.
Caring for a Leather Baseball Cap
For more than one season in the CIS, men and women have been choosing leather caps. Their feature is several layers: outer and inner. The latter can be wool or made of artificial materials.
The leather cap consists of two layers.
To maintain the appearance, you will need:
- Follow storage rules. Leather products can last for many years. But you shouldn’t hang it by the clasp in the closet. It is best to place the headdress on the top shelf so that it does not change its shape.
- Use cosmetics. Now there are plenty of them: glosses, creams, wax. Careful care will allow you to wear your cap for ten seasons!
- Take the time to place the leather cap on the can. This will help maintain its shape.
You need to take care of your leather baseball cap according to the rules.
By following basic recommendations, your leather hat will retain its original appearance for many years.
Suture beret: nuances
It is not always possible to hit a seam beret beautifully, but nothing is impossible, everything comes with experience.
If the suture beret does not fit tightly on the head, it will have to be sutured. After which it is slightly moistened and folded in the desired direction. To beat off a seam beret, you will need water, a towel and an iron.
Step-by-step instruction:
- The headdress should be carefully ironed on the side that will wrinkle.
- Then a towel crumpled into a ball is inserted into the beret and the opposite side is smoothed out.
- As you move from the side with the seam pressed to the side with the seam pressed, the shape should be worked out with your fingers.
- Place a piece of plastic (can be from a plastic bottle) under the cockade on the inside, cutting it to the shape and size of the cockade.
Beer
Those who don’t want to bother making solutions from starch and glue can use a proven, easy and effective method. The cap is soaked in beer for half an hour, after which it is wrung out and hung on a jar until completely dry.
The military beret is shaped using regular light beer. It is poured into a basin and the headdress is placed there.
After 30 minutes, the beret is wrung out from the remaining beer and put on, having previously been smoothed. Already on the head they give it a shape and walk like this for another half hour.
This is a slightly strange way to regain shape, but very effective.
After half an hour, the beret is placed on the shelf until it is completely dry.
Wet hand cleaning
Modern models of caps often have straight and rigid visors and the same upper part. These hats are not machine washable, so we will try to restore the hat by wet cleaning. Let's prepare a soap solution:
- take two glasses of warm water;
- four tablespoons of powder or detergent and make a soap solution;
- Using a washcloth or napkin, saturate the cap with soap;
- carefully process the rim of the baseball cap;
- after processing the product, rinse;
- You need to rinse the baseball cap with a damp cloth soaked in cold water.
Using a napkin, apply the soap solution to the baseball cap.
How to remove stains without ruining the item?
Ways to help deal with stains without subsequently washing the baseball cap:
- Traces of sweat can be eliminated with hydrogen peroxide. Apply it to dirty areas and leave for a couple of hours. Then remove the remains with a damp cloth. But this option is not suitable for colored material, since it will most likely fade.
- Mix salt with soda and add water until a paste is obtained. This composition is applied to the stains and rubbed with a soft brush. A mixture of only one salt does an excellent job of removing traces of grass, various drinks, food, and others.
- Several aspirin tablets are crushed to a powder and a little water is added. It is worth noting that this method will not help with old stains.
- Stubborn stains on white baseball caps can be easily removed with a mixture of acetic and citric acid. To do this, combine the ingredients in equal proportions and add 1 part of water. Apply the product to the stain.
How to fight off demobilization biret at home: 4 ways
Before you start working, you need to decide which side to beat on. Maroons are usually worn tilted to the left side. Blue and black berets tend to bat to the right. And during military parades, representatives of all units make the edge on the left. Having decided on the form, all that remains is to strictly follow the step-by-step instructions.
Method No. 1
- Before you beat off your army cap or beret, lightly moisten it.
- Iron it through two layers of gauze.
- Place the piece on a flat surface and hit the edge with a hammer to make it sharp. To avoid damaging the furniture, use a cutting board.
You can use a steel spoon instead of a hammer. But in this case, it will take much more time to shape.
Method No. 2
- To quickly shape a seamless beret (called a “droplet”), wet and shake well to remove excess water.
- Place the wet product on your head and give it the desired shape.
- Wait for the fabric to dry without removing the product from your head.
- To finally fix the shape and make the edge sharper, press it down with pliers.
If you don't want to wear a wet beret, place it on a ball or can or stuff it with old newspapers.
Method No. 3
- Carefully prop up the lining.
- Place the item in hot water for two to three minutes to soak the fabric.
- Put on a wet beret.
- Pull the top of your head to the right and smooth it with your palm facing forward to create an arch-shaped fold over the cockade.
- Do not remove the headdress for one and a half to two hours so that the shape is fixed.
- Remove the beret with a gentle movement and place it on a flat surface, wait until it dries completely.
To fix the shape, use auxiliary “tools”. These could be clothespins or paper clips.
Method No. 4
- Soak the beret well in hot water.
- Lightly squeeze the product to remove excess water.
- Knead the fabric vigorously with your fingers to give the edge a sharp shape.
Features of foot wraps
A footcloth is a piece of durable rectangular fabric that is used to wrap the legs. The product has the same functionality as a sock and is worn with boots. The fabric for foot wraps is selected according to the time of year. For the winter period they are made from the following types of fabric:
- wool;
- bike;
- flannel.
During cold weather, footcloths made from 50% wool and 50% cotton are in demand. In summer, a cotton or cloth product is used.
It is believed that the standard size of foot wraps is 35 x 90 cm. However, this is not entirely true. Over time, the recommended product size has changed:
- since 1978, foot wraps have been made in sizes 35 x 90 cm;
- since 1983, the parameters of the finished half-pair were 50 x 75 cm;
- since 1990, the width of the product has become 15 cm smaller. The finished footcloth measured 35 x 75 cm;
- Today, according to the army regulations, the parameters of a half-pair are 45 x 90 cm.
There are also other sizes of finished footcloths. You can make it yourself by individually selecting the dimensions. To do this, a piece of the selected fabric is cut into 2 parts so that the length of the finished product allows you to wrap the foot twice.
In some situations, such products will be better than socks. Their advantages:
- dry quickly;
- easy to wash;
- do not wear out for a long time;
- self-production is possible;
- you can wear larger shoes;
- reduce sweating of the skin;
- retain heat well.
Foot wraps in hiking conditions help maintain the health of the skin - they do not allow fungal diseases to develop. The disadvantages of the product include:
- reduction in shoeing speed;
- difficulty putting on;
- inability to wear without shoes.
This item is used not only by the military, but also by people who have to live in difficult climatic conditions. Foot wraps are widely used by fishermen, hunters, and rangers.
Flannelette
FlannelWool
Carrying out a procedure using gelatin
If you don’t have starch on hand, you can give the hat a beautiful look using gelatin. Working with gelatin is a little more difficult, but the effect of this procedure will last better and longer, since it does not crumble like starch.
The procedure should be carried out as follows:
Gelatin must be mixed with water in the following proportions: 100 ml. water for 1 tbsp. powder. The gelatin must be left for a while to swell. Add another 100 ml to the swollen mixture. water and mix it with gelatin to obtain a homogeneous mass; to do this, you need to mix the ingredients in a water bath.
After the mixture has cooled, you need to lower the item into it and keep it in it for some time.
After this, you need to carefully squeeze it out and put it on the item of the correct shape.
This method of starching a hat takes longer than the usual procedure. It is important to calculate the proportions correctly, and you must act strictly according to the instructions. This method should not be used on light-colored caps, as traces of starch may remain.
Tips and tricks
In order to get the desired result from the procedure and not spoil the item, when carrying out it you must follow the following rules:
- The processing method must be selected taking into account the type of hat;
- Before carrying out the procedure, the item must be cleaned;
- You need to use high-quality products;
- It is not recommended to starch synthetic items, as they will lose their shape;
- Knitted hats are best starched using glue or gelatin;
- It is not recommended to process children's clothes, since the treated item does not allow air to pass through.
These tips will help you avoid problems during the procedure. And if everything is done correctly, the hat will look perfect.
Hats are a must-have for many stylish looks, but they only look great if they're shaped correctly. To give the hat a beautiful shape, you can starch it; this procedure will also protect the item from contamination. You can treat the item with a special spray, or do it with improvised means: starch, gelatin, sugar or milk. Preparing the mixture is not so difficult, the main thing is to choose the right proportions of the substance and water. The hat is lowered into the solution for several minutes, it is important not to keep it in it for too long, after which the hat must be carefully pulled out, squeezed out a little and put on an object that has a round shape. After the hat has dried, its edges must be ironed; it is recommended to do this using gauze. After this procedure, the hat will keep its shape for a long time; it usually holds it until it gets wet.
History of the creation of military uniforms
In Rus', before the advent of the standing army, there was no uniform uniform. Only with the emergence of the Streltsy regiments in the 17th century did the dress uniform acquire certain distinctive characteristics, although it was worn only on major holidays. Sagittarius wore:
- red or scarlet kaftans;
- hats with edges;
- massive boots.
Under Peter I, a regular army was created. The uniform was made in a European style. The ceremonial military uniform consisted of a camisole, caftan, stockings, tight pants, a flattened cocked hat, and capes. Made from fabric in green, red, blue shades. Later, Peter I introduced shoulder straps, as well as an officer's scarf.
Military clothing was tight and uncomfortable; soldiers spent months training to put it on. During the time of Catherine II, wigs were removed from the military. The uniform became more practical; it consisted of trousers, boots, a helmet, and a wide uniform. But under Paul I, all military attributes returned, including powdered wigs and uncomfortable uniforms.
Alexander II rejected beauty in favor of convenience and functionality. The shape has become spacious and comfortable. You could wear warm clothes underneath. Overcoats, hoods, and boots helped to survive the cold winters. Alexander III's military uniform became even simpler, warmer, and cheaper to produce. In 1907, a single-breasted jacket with a stand-up collar was introduced. The clothes were fastened with buttons, there were pockets on both sides, on the chest.
Recipes for solutions
Despite the fact that the name of the procedure comes from the word “starch,” it is possible to restore the original appearance of the headdress using other means. The algorithm may differ in each case. Basically, to achieve the desired result you need to:
- prepare a solution;
- immerse the headdress in the solution for a few minutes;
- Remove and dry the hat, periodically sprinkling with water.
This procedure is complicated because after starching the fabric becomes stiffer. Therefore, before starting the operation, the hat must be pulled over an object that follows the shape of the head.
Classical
According to the classic recipe, to give the hat the desired shape you will need:
- Take a liter of water into a container and add a tablespoon of starch (potato, rice or wheat will do).
- Place the container with starch on the fire and bring to a boil.
- Remove the container from the stove and cool the solution.
After this, you need to place the headdress in the mixture for 10 minutes. This recipe is mainly used for starching knitted hats or panama hats (soft fabric items).
PVA glue
This method is not popular, but it gives a lasting and long-lasting effect. To achieve the required result, you need to mix water and PVA glue in equal proportions. If the headdress is small, then the product is completely placed in the solution for several minutes. It is recommended to wipe large and knitted hats with a brush dipped in the specified mixture on both sides. Diluted glue does not harm the fabric, since it is absorbed only into the upper layers.
Description and characteristics of the Nezhinsky cucumber variety
With gelatin
Gelatin is used to starch knitted hats or panama hats. This recipe is also suitable for processing hats with wide brims. Starching is carried out according to the following algorithm:
- A tablespoon of gelatin is diluted in a glass of water.
- The mixture is left for an hour. During this time, the gelatin has time to swell.
- The composition is placed on the stove and heated. It is important to ensure that the solution does not boil.
- The hat is placed in the solution for as long as necessary to cool the gelatin.
A solution with gelatin provides a hard starch, thanks to which the headdress retains its shape for a long time.
Sugar solution
This recipe is recommended for use in cases where there is a need to give a certain shape to knitted items. To get this result you will need:
- Mix 15 teaspoons of sugar and a liter of water.
- Bring the mixture to a boil.
- Add 2 teaspoons of potato starch to the mixture.
- Soak the headdress in the solution for 15 minutes.
Thanks to the sugar solution, the headdress does not turn yellow over time and retains its shape longer. Also, thanks to this mixture, a layer is created on the surface of the product that protects against moisture.
Silicate glue
Silicate glue is used in cases where a long-term starching effect is required. To do this, you will need to mix a teaspoon of this product with 125 milliliters of heated water. The resulting solution is then applied evenly over the surface of the hat with a brush. At the end of the procedure, the headdress is hung out to dry.
Innovative method
The younger generation, which knows how to value time, when choosing a way to shape a baseball cap, prefers universal means that, according to advertising, can return the shape of a hopelessly damaged item in a matter of seconds. Particularly popular is an aerosol containing starch. The procedure is simple: after washing, the baseball cap is treated with a spray, put on a blank and, using a steamer, takes on the desired shape. The spray does the job perfectly, but some are stopped by its relatively high cost.
Hand washing is an affordable method that restores the consumer qualities of caps.
All manufacturers of knitted hats, caps, baseball caps, sewing recommendations on their products, agree on one thing: machine washing is contraindicated. If you wash the product by hand, the above types can retain their shape if the owner fulfills the following conditions:
- pour 800 ml of water at room temperature and 1⁄4 cup of detergent into the washing container;
- foam the mixture and apply to the kepel with a soft cloth;
- carefully process the outer and inner sides;
- After making sure that there are no contaminants left, rinse the product in cool water. Do this carefully until there are no soapy traces left on the surface of the water.
Corn popcorn growing and cooking. Agricultural technology and technology for growing popping corn (popcorn)
To maintain its shape, it is recommended to stretch the wet product onto an object of the desired size and shape. Do not delude yourself - the measures taken are not enough to completely return to their previous form. This drying method will simplify the further process of restoring the product. By following the care rules recommended by the manufacturer, you can extend the life of the product, and the use of starch will restore elasticity.
Wash
Considering that hats in most cases lose their original appearance after washing, it is extremely important to know not only how to shape the cap, but also how to properly care for it. There are two washing options: hand and dishwasher. The first method is more labor-intensive, but allows you to control the process from start to finish.
In the military, manual processing is most often used. When using this method, it is important to consider the type of fabric from which the headdress is made. Based on its characteristics, the cleaning solution and water temperature are selected.
Military caps are made from materials that cannot be washed in hot water, so the temperature should not exceed 40 degrees. First, visible contaminants are removed from the surface. The easiest way to do this is to use a soap solution.
It is highly recommended not to wring out a military cap, as the shape may become even more deformed. A faster method is washing in the dishwasher. When choosing it, you must follow several rules:
- do not use stain removers containing chlorine;
- place the cap only on the top tier of household appliances;
- When removing heavy stains, soak the product for at least 20 minutes.
The advantage of washing in the dishwasher is that the hat is fixed in one position. It does not move in circles, as happens in a washing machine, which means it cannot become deformed. After washing, you need to straighten the cap and place it in a horizontal position. It is acceptable to use a three-liter jar to ensure even drying.
A special plastic shape will prevent damage to the shape of the cap during washing. Caps are convenient to wash in the dishwasher.
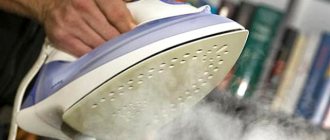
Ferry
It happens that due to improper storage or other troubles in life, leather jackets become very wrinkled. A wrinkled item can be ironed by steaming.
Is it possible to iron a leather jacket with a steamer? This method of straightening is allowed. This is the best method on how to straighten a leather jacket after purchasing it.
Steaming is less traumatic for the product, but it also has its own nuances
Therefore, it is important to familiarize yourself with how to stroke the skin with such a device so as not to spoil it. To ensure that the manipulation brings only pleasure from the work done, follow the instructions for using steam
To ensure that the manipulation brings only pleasure from the work done, follow the instructions for using steam.
How to steam a leather jacket - the correct procedure:
- First you need to remove any dirt and clean the product from dust with a damp cloth.
- You can use a steamer, a steam brush, an iron with this function or a steam generator. Any device must be filled with only clean water. Not from the tap, but filtered.
- Bring the steamer to the product at a distance of 20 cm. This way the skin begins to warm up slowly, you should not hold it too close right away, as you can injure the material.
- Then the distance is slowly reduced to 15 cm. Watch how the steamer straightens the folds.
- To remove wrinkles on the sleeve, apply steam from the inside, from the armhole side.
- Wrinkles on the collar are dealt with by applying a steamer to the side of the collar.
- The steamer should not be used in one place for too long. Condensation may form on the material, which will damage the fabric.
You may not be able to straighten the folds the first time. Then you need to use method 1 - without the use of auxiliary means, so as not to further injure the wrinkled item.
PVA glue
If there is no starch in the house, the store is already closed, and you need a hat in the morning, don’t panic. There is a way out. Use regular PVA glue.
This method is suitable for both knitted items and caps and baseball caps.
Restoring the headdress:
- The glue is diluted with water in a 1:1 ratio. The amount of water depends on the quality of the glue.
- The headdress is placed in a container and allowed to soak a little. The procedure takes 10–15 minutes.
- Then the excess liquid is squeezed out and the cap is sent to dry.
- They dry it by placing it on a three-liter bottle or a special blank, straightening the brim.
- The edges are ironed if they are wide and the material allows (look at the label).
Wearing a hat in the rain is not recommended. If moisture gets on the product, it will ruin all the results of your work.
This method is only suitable for light-colored and crocheted hats.
If a woman has previously starched in this way, she should remember that PVA glue cannot be used on dark hats. There may be streaks left that will become noticeable after drying.
If there is no starch or gelatin, do not be upset. The issue can be solved by using PVA glue. The principle of restoring a baseball cap using this tool is as follows:
- Glue is added to water in a 1:1 ratio and mixed well.
- The cap that needs to be restored is kept in this solution for 10-15 minutes. It is not advisable to dip the visor in this case.
- After squeezing out excess liquid, the cap is placed on the jar until completely dry.
Wearing the product after such treatment in rainy weather is fraught with loss of shape. Using this method, you can restore a light-colored cap because after drying, the glue may bleed through on dark surfaces.
We suggest you familiarize yourself with How to wash a down jacket with tennis balls: preparation, washing, drying
Shaping the beret
How to return a washed item to its original shape? You can restore the hat if you wash it in beer.
- you need to take a bottle or can of beer;
- straighten the cap in this drink, then stand for 30 minutes;
- remove from liquid and squeeze thoroughly;
- wear an army beret for some time until the uniform is acquired. In this case, you should smooth out the headdress yourself a little;
- You need to wear a military beret for some time.
The starched item is removed and placed in a safe place until completely dry.
What is a beat?
Initially, the cap holds its shape well, but may lose it after the first wash, so beating is a popular restoration method. The process involves the use of various tools and compounds to restore the rigidity of the structure. Beating the cap can be done using starch, an ordinary iron, sweet water and other substances.
The techniques are not complicated, so any of them can be used at home. As a rule, the soft part of the headdress is deformed; the visor rarely changes shape. Processing the material takes from 30 minutes to several hours (depending on the chosen method). All straightening methods are accessible, the main thing is to follow the sequence of actions, only then the knowledge of how to knock off an army cap will bring a positive result.
Beating allows you to return the headdress to its original shape
Drying rules
In order for the cap to remain in its original shape, it must be dried properly. Regardless of what fiber the baseball cap is made of, it should not be twisted or wrung out after washing. The cap is left in the bathroom for a few minutes to allow the water to drain, and then the excess moisture is blotted off with a soft cotton towel.
To shape the cap after washing, you need to pull it on any object that fits the shape. Most often, housewives use three-liter jars, children's balls and inverted saucepans for drying caps and caps. Sometimes baseball caps are even dried on inflated balloons.
To straighten the visor, the cap can be placed to dry on a large deep plate or the lid of a small saucepan that fits the shape.
Caps are usually not ironed, but if a wool or cotton product seems slightly wrinkled, you can use a steamer. If there is no such useful thing in the house, then the baseball cap is held over the spout of a boiling kettle for a couple of minutes, and then placed to dry a little on an inverted jar or ball.
Cleaning a cap or baseball cap at home is not as difficult as it might seem at first glance. In order not to deform the headdress, you need to adhere to certain rules, as when washing. The same goes for drying things.
No one remembers when and where these wardrobe attributes first appeared, which today occupy an honorable place in the everyday life of every fashionista. The first mentions of such a headdress go far into the past of the eastern country of Japan. They were made by hand by village workers from the thinnest rice paper. Even at that time, people were worried about the beauty of their things, and even then they were wondering how to starch a cap and return it to its original appearance after wearing these clothes.
This material has been in demand in Japan for many centuries. From it they made not only helmets for samurai, but also veils for brides. Some of these hats were a mandatory attribute at the Boys’ and Girls’ holidays that were widespread in this country.
The art of eastern masters in making caps has been passed down from generation to generation and has survived to this day. Thanks to this simple but very effective headgear you can protect yourself on a hot day.