Convection oven, Fan oven
Page 14
- Image
- Text
FB 51. FO 52. FR 54 - “Multi 5” ovens (5 programs)
The multifunctional oven combines the advantages of traditional static ovens and modern forced-air ovens.
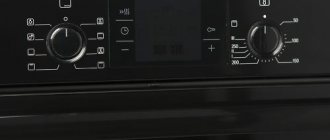
This universal equipment offers 5 different cooking modes, the selection of which is carried out using two knobs: B - knob for selecting oven modes;
C - thermostat handles.
1. Convection oven
Thermostat handle position C: any between 60°C and Max. The lighting lamp is on, the upper and lower heating elements are on. The oven heats up to the temperature set by the thermostat knob
that; the selected temperature is maintained automatically. Hot flow
air is directed from top to bottom.
Excellent temperature distribution allows you to cook many types of food in this mode.
The convection oven is still indispensable when preparing dishes from
several ingredients, such as cabbage with ribs, Spanish cod, veal chops with rice, etc.
This mode is especially suitable for cooking meat dishes that need to be cooked slowly and require adding liquid during the cooking process (e.g. goulash, stews, meat casseroles).
The mode is also suitable for preparing dry biscuits Use only one baking sheet for even heat distribution
(or grate).
Select the level of the baking sheet depending on the need for more heating of the dish from above or below.
2. Ventilated oven
Thermostat handle position C: any between 60°C and Max. The light is on in the oven, both heating elements and the fan are working.
The oven heats up to the temperature set by the thermostat knob; select
Early themesTurature is supported automatically. The warmth remains constant
bright and uniform throughout the oven, hot air cooks and bakes food
evenly over the entire surface. This mode allows you to cook different dishes at the same time, as long as they are cooked at the same temperature.
A maximum of two oven levels can be used at the same time (see §
"Cooking on several levels at the same time"). In particular, it is recommended to use the ventilated oven mode on
the final stage of cooking on the grill and for dishes that
require a long cooking time (lasagna, baked noodles, fried
chicken with potatoes, etc.). Additionally, this mode can be used
for cooking roasts at a lower temperature. The mode allows
prepare meat products more juicy and tender. Ventilated mode
oven is well suited for cooking fish using less
FB21, FB 51, FO 52. FR 54
13
Symbols on the Hotpoint-Ariston dishwasher
With the dishwasher hooked up, the next step is starting up. Before pressing the start button, you need to understand the icons on the Hotpoint-Ariston dishwasher. The instructions included with the dishwasher will help you with this; if nothing is clear in it, then we’ll try to figure it out together.
Location of buttons and icons
Various types of dishwashers are produced under the Hotpoint-Ariston brand, and the location of the panel with buttons and icons will depend on the type. Of course, most often on built-in models, all buttons and indicators are located on top of the door end. And there is no need to take them out to the front part.
It's a completely different matter if it's a freestanding dishwasher, because it has a panel with buttons and icons on the front of the door. Buttons may be labeled, but not in Russian. Therefore, without explanations and instructions, it can be difficult to understand. It’s good if these are intuitive symbols, for example, an image of a pan, an asterisk. And if not? Let's take a closer look at all the icons.
PMM Ariston badges
It must be said that the signs on the Ariston dishwasher are not the most difficult to decipher, and they are remembered quite easily. We will try to describe all the buttons that can be found on dishwashers of this brand.
- The protruding first key is the PMM power button.
- The button with the letter “P” (from English program) is the program selection.
- The indicator with the letter “S” (from the English word salt) informs about the presence of salt in the dishwasher.
- An indicator with crosses, like sparks from the shine of dishes, indicates the presence of rinse aid.
- Pots and plates with three horizontal lines - washing mode with intense water pressure, the duration of which is approximately 2 hours 25 minutes.
- Pots and plates without lines - standard wash cycle lasting 1 hour 50 minutes.
- A plate crossed out with two wavy lines indicates a pre-rinse of 8 minutes.
- Three wavy lines – pre-soak, lasting 12 minutes.
- “ECO 50” is an ecological washing mode at a temperature of 50 degrees, and the longest time is 2 hours 35 minutes.
- The plate with the inscription “R” is the fastest mode or express wash. With this mode, the machine will wash no more than 10 items of lightly soiled dishes in 25 minutes.
- Square with a fraction of ½ – half load mode, thereby reducing the time for washing dishes.
- Pots and glasses - automatic double wash, in which you can wash pots in the lower basket, and glassware in the upper, duration 1 hour 48 minutes.
- A plate with spoon and fork is an everyday sink with a limited load. For example, 4 sets of dishes, 1 saucepan and 1 frying pan. The duration of the mode is about an hour.
- A plate with vertical lines, one dotted and two wavy – this is the “Guests” mode. It is suitable for dusty, rarely used dishes for the purpose of rinsing them. Lasts 32 minutes.
- Glasses – delicate mode, for example for crystal. Dishes are washed at low temperature for 1 hour 30 minutes.
- Baby bottle with pacifier - the so-called “Baby” mode, in which only the upper basket is loaded. You can disinfect bottles, pacifiers, baby rings, cups, glasses. Duration 1 hour 20 minutes.
Top heating element q, Grill p, Ventilated grill
Page 15
- Image
- Text
mero amount of seasonings than usual, as it allows you to better preserve
the taste and aroma of the dish.
Excellent results are obtained when cooking vegetables (zucchini, eggplant, peppers, tomatoes, etc.) and baking products from yeast
In addition, this mode can be used for quick defrosting.
cooking meat, fish and bread at a temperature setting of 80°C.
Defrosting in this mode takes half the time compared to defrosting at room temperature.
For defrosting foods
cakes, etc.), set the thermostat to position 60°C or position
“O” - air circulation at room temperature.
3. Top heating element Q
Thermostat handle position C: any between 60°C and Max. The light is on in the oven, the upper heating element is working. This mode can be used for baking (browning) food at the end
preparations.
4. Grill P
Thermostat knob position C: Max The light is on in the oven and the food is exposed to infrared heat from the hot upper central heating element. This
radiation heats the surface of the meat directly (the air is heated
weak). A golden brown crust forms on the meat, which keeps the meat juicy
and soft. The grill is especially recommended for cooking dishes that require high
surface temperatures such as: steak, veal, fillet, hamburgers,
etc.
See also recommendations for using the grill in the “Practical Tips
5. Ventilated grill
Thermostat handle position C: any between 60 and 200°C. The oven light is on and the top center heating element is operating.
grill and fan. Directional thermal radiation is combined with forced
solid air circulation inside the oven. This protects the surface
prevents food from burning and enhances the penetrating power of heat. Prevos
Good results are obtained when cooking meat kebabs
with vegetables, sausages, pork ribs, lamb cutlets, portioned chicken
A ventilated grill is indispensable for cooking
fish chops, trout, tuna, cod, bream, etc.
14
FB21, FB 51. FO 52, FR 54
Defrosting
Its designation is a few drops at the bottom of the square, above which hangs the image of a fan. This mode is characterized by the simultaneous operation of the convector with the lower heating element. This mode is used for:
- rapid defrosting of food at +30°C;
- maintaining the temperature of prepared dishes;
- heating them at +40-100°C.
End of cooking control timer handle...
Page 20
- Image
- Text
End of cooking control timer handle (I) (PO 52)
To start the timer, turn the knob
I
one full turn against
clockwise then by rotating the handle clockwise (^
update the desired cooking time - to do this, combine the required amount
number of minutes on the handle with a mark on the panel.
At the end of the programmed time, a timer signal will sound and
the oven will turn off automatically.
To use the oven manually, align the mark on the handle with
symbol on the panel. When the oven is turned off, the control timer is convenient
cooking can be used as a regular timer.
Oven lighting
To turn on the oven light, position the knob
IN
into position
The light will remain on when any heating element is turned on.
hoovki.
Timer handle (O) (РВ21, РВ 51)
To start the timer, turn knob O one full turn clockwise.
arrow (L); then turn the handle counterclockwise (2) to set the desired cooking time - to do this, align the required
number of minutes on the handle with the mark on the panel.
Oven indicator (E)
A lit red indicator indicates that the oven is heating to the set temperature.
temperature.
Forced ventilation
To lower the temperature of the outer surface of the oven, some models
equipped with a cooling fan that turns on when rotating
handles
IN.
When the oven is running, the cooling fan is always on
chen and you can feel air escaping through the gap between the
control panel and the oven door.
Note:
After cooking is finished, the fan remains running,
until the oven cools down.
RV21, RV 51, RO 52, RV54
15
Comments
Select → I found the instructions for my oven here! #manualza
- Click →
Why can’t you cook dumplings on a submerged submarine? Because in the cooking instructions, on the back of the package it is written: - Cook for 5-7 minutes after surfacing.
Manualza!manualza.ru
Still not with us?
Heating from below
Its designation is an arc or straight line at the bottom of a square. The fan helps the working lower heating element distribute heat throughout the chamber using forced convection. The icons indicate that cooking requires a temperature of +50-250°C, at which the product is baked from below, while the desired temperature is maintained from above.
Safety regulations
Violations during the operation of electric and gas ovens lead to equipment failure and, in some cases, fire. There are general rules regarding these two types of devices that must be followed. Only adults are allowed to use the devices.
It is forbidden to leave the equipment open for a long time in the switched position.
The device is used only for its intended purpose; it cannot be used to heat the room. The oven should only cool with the door closed. It must be cleaned after each use. If the slightest defect occurs, you should stop operating the device and contact a specialist.
Important Operating Requirements
Many manufacturers use phrases in the device operating manual that are incomprehensible to ordinary people, and here, undoubtedly, it is worth clarifying by making the instructions more understandable to the consumer.
- Store removed packaging out of the reach of children.
- Entrust the connection to a professional.
- The electrical device may only be used indoors.
- Turn off the oven when you need to wash it.
- Do not touch the device with wet hands.
- Children are prohibited from using the product without adult supervision.
- Always unplug the oven when leaving for a long time.
- Cables from other household appliances must not touch the appliance.
- The heating elements take a long time to cool down, so after finishing work it is necessary to keep the oven open until completely cooled, and keep children away from it.
- After work, check that all elements are turned off.
- If the device behaves unusually, immediately disconnect the device from the network and contact the service center.
- It is best if the oven is directly connected to the outlet without additional extension cords.
Conclusions and useful video on the topic
What the pilot hole in a gas oven looks like and where it is located is described in the video below. Additionally, the video shows how to remove the protective plate and gain access to the burner.
Information on how to light a flame in an oven without electric ignition with gas control in the following video:
As with any gas equipment, working with the oven must be extremely careful. Pay attention to any alarming dysfunctions of the device and contact specialists in time to avoid emergency situations. .
And lighting a flame in a gas oven is quite simple: you only need to learn how to do it correctly once, after which the hostess will not need any outside help.
Would you like to supplement the information presented with useful recommendations or comments? Or do you still have questions that we did not cover in this material? Ask them to our experts and other site visitors - the feedback form is located below.
Cooking in the oven is a pleasure: about the functions of the oven + many photos of ready-made dishes in the review!
Hi all! Finally, I was able to collect my thoughts into a decent text and I want to share with you my impressions of the Oven.
I like to write reviews of a technique when I have tested the technique in all areas. At the moment , I have been using my oven for almost a year and have tried to cook many different dishes with it and have been able to fully appreciate all its advantages. So, Electric oven Hotpoint-Ariston 7O 5FA 841 JH IX HA
General data: Dimensions: 59.5x59.5x55.1 cm Dimensions of the built-in niche: 60x56x55.5 cm Volume: 71 l Grill: yes Convection: yes Oven lighting: yes Number of operating modes: 11 Self-cleaning: steam Controls and functions: Digital/ touch display Recessed switches Electronic temperature control Operating modes: Top and bottom heating Convection Large portions Pizza Grill Turbo grill Dough rising Convection Eco Auto bread Auto dessert Steam cleaning DIAMOND CLEAN Safety: 2 glass doors
Description from the manufacturer:
The Hotpoint-Ariston 7O 5FA 841 JH IX HA electric oven can be installed independently of the hob. The volume of the internal chamber, which is additionally equipped with a backlight, is 71 liters. The hinged oven door is equipped with 2 heat-resistant glasses. Thanks to the telescopic guides, it is much more convenient to remove the baking sheet from the oven. All control is carried out using a sensor and rotary mechanisms with recessed switches. Cleaning is done with steam, which makes it easy and quick to clean the device from grease and dirt. The Hotpoint-Ariston 7O 5FA 841 JH IX HA electric oven has 9 different programs built in, including convection and grill with a power of 1800 W. Safety is ensured by the possibility of a protective shutdown, in which the device automatically turns off if the cabinet has been in operation for too long. A timer and clock allow you to monitor cooking time. Information is displayed on the display, and a sound signal indicates the readiness of the dish. The cooling fan prevents the formation of condensation.
When choosing an oven, appearance was not the least important consideration. We selected the design to match the kitchen set and the hob. Our kitchen is in white and gray tones. And we chose an oven in gray and black tones. Our locker looks very stylish. I like that there is nothing superfluous: 2 buttons and a small display.
