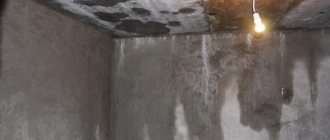
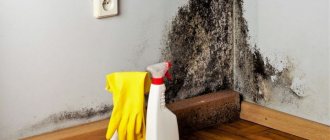
How to get rid of dampness in the cellar? A damp basement or cellar is a real disaster for the owner of the premises. To preserve things and food in the cellar, it is necessary to fight dampness, otherwise it will ruin everything. The dampness in the basement spoils all things and supplies in the room. Usually this problem arises with the arrival of autumn.
High humidity in a cellar or garage occurs due to moisture penetration through microcracks in the walls, ceiling or improperly installed communications. This can also happen due to wall defects. Trees growing nearby can also contribute to water entering the basement - water seeps out from behind the roots. The close occurrence of groundwater can also cause such a problem. In this case, it is important to know how to get rid of dampness.
Preventing dampness
As usual, this “disease” is easier (and cheaper) to prevent than to treat. Still being decided at the design stage:
- The material of the walls and floors must have a low degree of hygroscopicity, and poorly conduct water in both liquid and gaseous states. The best from this point of view is high-quality concrete - from M400 and above. But he builds a lot. You can add special substances to the regular M200 or M250 that increase water-repellent properties. (read about concrete brands and their composition here)
Eliminating condensation in the cellar is more difficult than preventing its occurrence - If groundwater is close or its level rises significantly in spring/autumn, external waterproofing is necessary. Liquid compounds are applied to the outside walls (better) or rolled ones are fused (cheaper, but less effective).
- If the cellar is being built on a slope, a drainage pipe must be laid in the ground above it, which will drain the precipitation flowing down the slope.
- A blind area is made around the cellar (or the building under which it is located), which removes precipitation flowing from the roof.
- Inside the cellar, in opposite corners, there must be two ventilation pipes with a diameter of at least 125 mm. One of them ends at floor level - 10 cm higher. Air from the street or room enters through it (supply pipe). The second ends almost at the ceiling - 10 cm below its level. This is a hood. Ventilation pipes on the street should be covered with umbrellas to prevent leaves and precipitation from getting into them. The exhaust pipe (the one that ends near the ceiling) should be higher and it is better to install a deflector on it to activate the draft. It can be painted black: due to heating from the sun, the draft should be better. Another subtlety: for good traction, ventilation ducts with natural air movement must be straight. If it is necessary to make a bend to the side, its angle of inclination must be at least 60° relative to the horizon, and the length of the inclined section should not exceed 100 cm.
Drying a cellar without ventilation is a difficult task. The figure shows a diagram of the organization of ventilation ducts to maintain normal humidity in the cellar - Between the room located above and the basement there should be a vapor barrier that prevents moisture from penetrating both from the basement and into the basement.
Inspecting the floor
Very often the floor in the cellar is made of earth. This is often the source of excess moisture. Through it, the moisture contained in the soil gets inside. To reduce humidity in the cellar, you need to level the earthen floor, compact it and cover it with thick plastic film. You can use roofing felt, but it breaks more often. Although it seems more durable, it breaks due to less elasticity.
There is no need to pour sand or soil on top of the film. Sometimes there is a large amount of water in the basement (accidental flooding). Then you simply remove the film, the water goes partly into the ground, partly evaporates through the ventilation. After the dampness has gone, you can re-cover the floor. If there is earth or sand on top, you will need to poke around in this slurry, extracting the film.
If the floor in the cellar is earthen, most of the moisture enters through it
If after laying the film the humidity level in the cellar has decreased, then you have found the reason. You can leave everything as is, just change the “flooring” periodically, or you can make a concrete floor with full waterproofing. The choice is yours. To prevent the film from tearing when people walk on it, knock down the wooden panels and throw them on the floor.
Improving waterproofing
The second reason why humidity increases in the basement is an insufficient degree of vapor barrier or waterproofing of the walls. This usually occurs if the cellar is lined with brick, especially silicate brick. The material is very hygroscopic and allows water vapor to pass through well. They settle in drops on the ceiling and all objects.
The problem can be solved if you make good external waterproofing: dig out the walls and apply bitumen mastic in two layers. Previously, they were coated with resin, but mastic is more effective and easier to handle.
Brick walls require additional waterproofing
But excavation work is not always a joy, and it’s not always possible to dig out the walls. In this case, you can make internal waterproofing of the cellar walls. For this purpose, there are cement-based impregnations: “Pnetron”, “Kalmatron”, “Hydrotex”, etc. They penetrate to a depth of up to half a meter into the thickness of the material (concrete, brick, etc.) and block the capillaries through which water seeps. Water permeability decreases significantly. Their only drawback is the price. But they are really effective.
All these measures will prevent the appearance of high humidity in the basement. But what to do if there is already moisture, how to dry the cellar? Next, we’ll look at ways to reduce humidity.
Read how to organize drip irrigation for your garden yourself here.
Formation of dampness in the cellar
Eliminating dampness from the cellar must begin by determining the point of penetration of moisture into the room. After all, increased dampness and humidity in the room lead to the formation of fungus and mold, which contribute to the spoilage of the products stored there.
Humid air is formed by capillary action; in other words, small drops of water enter the earthen floor through cracks, then the moisture begins to evaporate, resulting in an increase in air humidity. It should be noted that sandy rocks rise water much more slowly than clay rocks.
Before you start fighting dampness in the cellar, you need to determine the reasons for its occurrence:
- One of the reasons may be poor insulation of the house. Because of this, in cold weather, moisture will enter the walls of the house, contributing to the formation of mold. This phenomenon can often be observed in the upper corners of the walls, because moisture enters the room from above (from the roof).
- In addition, moisture can penetrate into the cellar through groundwater . Another cause of mold may be the lack of waterproofing under the floor.
- You also need to pay attention to the drainage system in the basement. After all, if water accumulates near the cellar, it may well penetrate inside the room.
Preparatory work
All supplies are removed from the basement, as well as all wooden structures, and thoroughly cleaned. On the street they inspect the wood - shelves/drawers/boxes. If they are not damaged, and there is no fungus or mold, they are simply laid out in the sun to dry. If there are traces of damage, the wood is impregnated with a solution of copper sulfate (concentration 5-10%, no more).
Whitewashing with lime gives good results - it will also “collect” moisture from the air. Therefore, before draining the basement, it makes sense to whitewash everything. They just do it differently from the outside. It is necessary to apply a thick layer of lime to the walls. To do this, make a bucket of thick whitewash and add a little diluted copper sulfate. It is an excellent disinfectant, but the concentration should not be higher than 5%, maximum 10. The resulting thick liquid is poured in half into two containers.
This is what a whitewash paint brush looks like
The first half is lowered into the basement, dressed in old clothes, glasses, and covered hands. Take a whitewash paint brush (it looks more like a small broom) and coat the corners well with it. Then you stir the slurry with a brush and spray it on the walls and ceiling. Just dip it in thick whitewash and spray it on the walls. They are covered with drops and tubercles of lime.
After everything is covered with lime, wait a day for it to dry. Repeat everything with the second bucket. As a result, the walls and ceiling are porous and uneven. But condensation rarely hangs on them: lime retains moisture well inside. After the lime has dried, you can begin drying the cellar.
Building a greenhouse with your own hands is described here.
Internal drainage
You can solve the problem of dampness in the garage basement by installing internal drainage. To do this, interconnected pipes (drains) are buried around the perimeter of the drained cellar, which serve to collect accumulated water. The range of pipes for this purpose on the market is very wide. They are available in various diameters, hardness and perforation. The most popular pipes are Ø110 mm.
There are special holes at equal distances along the length of the pipes. If the internal drainage was not equipped before the floor was installed, the covering will have to be broken and subsequently replaced with a new one.
Sequence of internal drainage installation.
Construction of a wall cellar.
- A trench 0.5 m deep is dug along the perimeter of the cellar freed from the floor structure. The bottom of the trench is tightly compacted and lined with a special moisture-absorbing geoseptic material.
- The trench is filled with gravel or crushed stone in a layer of 15-20 cm. Drainage pipes are laid on it with a slope of 3 mm per 1 m of length.
- On top of the pipes, the trench is filled to the brim with gravel. Gravel should be used in medium size to avoid clogging the holes with small stones. The top of the backfill is again covered with one layer of geotextile. The drainage is filled with soil or sand and thoroughly compacted.
- The lowest point of the cellar is determined, and a well is installed in this place to collect water. You can build it yourself from available materials or purchase an industrial PVC manifold. Ready-made wells are highly durable, lightweight, easy to install and convenient to use. They are produced in various sizes. The construction of a homemade concrete well increases the amount of work required to install drainage.
- A drainage pump is installed in the well and automatically turns on when the tank is filled and turns off when pumping is complete. The pumped water is discharged outside the site or into the sewer through a hose connected to the pump.
Basement dehumidification with ventilation
Sometimes it happens like this: the cellar was dry, and suddenly dampness appeared. One of the reasons is poor ventilation. First of all, check the cleanliness of the ventilation ducts. Clean if necessary. If everything is fine, but the dampness does not go away, it means the exhaust pipe is not working well. This happens when the air in the cellar is colder than outside. Heavy and cold, it will not rise up the pipe on its own. A paradoxical situation arises, at first glance: it was cold and damp outside, but it was dry in the cellar. It got warmer - drops of moisture hung on the ceiling, walls and objects, and a musty smell appeared. In this case, in order to dry the cellar, it is necessary to activate air movement. There are several solutions.
- Place a powerful fan on the exhaust pipe to draw air. Ensure the flow of air masses - open the hatch, if there are windows or dampers. In a few days (from three to ten) everything will dry out.
Organization of basement ventilation in a garage with an inspection hole - Use the old “old fashioned method” with a candle. It is suitable if there is no electricity and there is nowhere to turn on the fan. This happens if the cellar is built separately, on the street. To dry it, temporarily extend it into the exhaust pipe (the one that ends at the ceiling) so that it almost touches the floor (5-10 cm higher). A burning candle is slipped under it, but it is placed on some kind of non-combustible base. Due to the fact that the air in the pipe heats up, normal draft occurs, drawing damp air from the floor. Change the candle until the basement dries out. Instead of candles, you can use dry alcohol tablets. Sometimes a candle flame is not enough to start air movement. Then you first slip a piece of burning newspaper into the pipe (just be careful not to burn or melt the ventilation), after it has burned out, push a burning candle.
Sometimes increased air movement leads to the fact that the humidity in the cellar does not decrease, but increases. This can often be observed in hot weather. The reason is this. Heated air carries with it a significant amount of moisture in the form of vapor. Once in a cool cellar, the air cools down, and moisture condenses on the coldest surfaces: the ceiling, walls, and sometimes on shelves and jars. If this is exactly the case for you, then stop ventilation. Even close the supply pipe and slam the lid tightly, limiting the flow of warm air.
How to dry the cellar in this case? Wait until autumn, and when there is no rain yet, but the temperature is already about +10°C, start ventilation using one of the methods suggested above. Works. If your nights are cold in the summer, you can turn on the fan at night and close the ventilation ducts during the day. This way you can gradually reduce the humidity in the cellar in the summer.
Heating the cellar
If it is necessary to remove dampness during warm weather, and ventilation only worsens the situation, you need to heat the air in the basement so that it comes out on its own, carrying away moisture (the higher the air temperature, the more vapor it can contain).
To do this, take an old bucket or other metal container of approximately the same volume. Make a lot of holes in it (you can use an ax) in the bottom and walls. Such a bucket with holes is tied to a cable (attach it securely). Coals for barbecue are poured inside (you can light it yourself), the bucket should be almost full. The coals are ignited and stable combustion is achieved (to accelerate the combustion, you can adapt a vacuum cleaner by turning it on to blow). A bucket of smoldering coals is lowered on a cable into the cellar, secured so that it hangs above the bottom, and the lid is closed.
The lid on the cellar in the house should be practically airtight
Periodically, the cellar lid needs to be opened, letting in an additional portion of oxygen (every 20-30 minutes). You can put a fan on the supply pipe or periodically turn on the same vacuum cleaner. If the coals do go out, they are rekindled.
Attention! It’s better not to climb inside, do everything from above. Firstly, the temperature there is high (in a room about 2*3 meters about 70°C), secondly, smoke and, perhaps, carbon monoxide accumulate inside.
As the coals burned out, they took out the bucket and closed the lid. Don’t look inside for three days: smoke and gases will kill mold and, at the same time as drying, you will disinfect your cellar. Usually one such “firebox” is enough to dry out the basement in the house or on the street. You can also get rid of dampness in the basement under the garage.
Sometimes coke or coal is used instead of charcoal. It gives a higher temperature and takes longer to “process”, but it burns more difficult, requires more oxygen, often forced air blowing (use an old vacuum cleaner and a corrugated hose, but turn it on for blowing). But the temperature rises even higher and dries even more efficiently. But the price of coke is high, even though you won’t go broke buying a bucket.
Instead of a bucket of burning coal, you can use other heaters:
- propane burner (lower the one burning on the wire, make sure it doesn’t ignite anything and leave it hanging in the middle, you’re tired of it, close the valve, you can only open the lid every other day);
- heat gun of decent power (3-5 kW);
- kirogas;
- lower the potbelly stove into the basement and heat it.
All these methods can be used, but you have to go down into the cellar in order to light a kirogas or potbelly stove. But this is not a safe idea and do not use this method alone. You need someone to insure you upstairs. Regarding the heat gun: it is also better to lower it by tying it with a cable, rather than lowering it yourself.
How to dry a basement in a garage is described in the video.
Read how to make high beds (to increase productivity) here.
Prevention recommendations
To eliminate drops of condensation that periodically appear in the basement, a single measure or a whole set of measures may be required. Start with one thing, the simplest.
If you ignore the recommendations and leave the cellar damp, moisture will not only ruin the utensils located in the basement, but also harm your health. The most effective method of dealing with it is installing ventilation. This method not only helps remove condensation in the cellar, but also allows you to maintain a suitable microclimate in the room.
As a temporary measure, containers with absorbents will help: boxes or buckets with dry sand, sawdust, salt, quicklime. Place them around the cellar to absorb excess water. Also, do not forget to ventilate the basement in good weather so that the incoming dry air expels moist air.
You can combine all of the above methods to eliminate basement condensation for good. It is best to get rid of design defects right away - this will keep the room in optimal condition without risking your health, home and seasonal supplies.
How to dry a cellar without ventilation
If ventilation was not installed during construction, it is advisable to install it now. At least some: it will be easier to get rid of dampness. It is better, of course, to have two pipes - one for inflow, the other for outflow - as described at the beginning of the article. If the cellar is made separately on the street, it is easier to organize: they broke through the ground and roof of the cellar, inserted pipes, and filled everything with concrete mortar.
It’s more difficult with a garage, but it’s solvable that no one cares about aesthetics here. But if there is a basement without ventilation under the house, everything is more difficult to do: it is better not to break the foundation, and you cannot stretch many pipes through the floor into the room. But even in this case, make at least one pipe. Even if it’s through the lid, into the wall or ceiling, or installing a supply and exhaust fan. It can be turned on either for supply or exhaust and in this way somehow dry the cellar.
Having at least such ventilation, you can use any of the methods described above. You can also try to collect more moisture. hygroscopic materials are laid out inside :
- Pour in dry sawdust; when it gets wet, throw it away and add new sawdust. Drying this will not dry out the basement, but it will lower the humidity. There will definitely not be any drops of condensation on the ceiling.
- Slaked lime. Folds out around the perimeter, along the walls and on shelves. It not only collects moisture, but also kills fungi in pairs.
Slaked lime can be used to reduce humidity in the cellar - Calcium chloride. 1 kg of dry matter absorbs 1.5 liters of water. You buy dozens of kilos, lay them out, collect them a day later, warm them up (calcinate them) and can be used again. You just need to work carefully: chlorine and calcium vapors are also toxic.
- Dry cardboard boxes. As funny as it may seem, they also absorb moisture well. You put in a few dry ones, after 12-20 hours they are so wet that they almost fall apart in your hands. Throw it away, throw in new ones. Cheap and cheerful. Drying the cellar will not dry it out at all, but it will collect condensation from the ceiling and walls.
If all these dances with tambourines don’t inspire confidence in you (although they work), you can dry out the cellar using modern technology. There are such household appliances - household dehumidifiers . They are often installed in swimming pools to get rid of dampness in the room. You will need a medium power model. They cost about 20-30 thousand rubles, operate from a 220 V household network. In the process, they collect moisture from the air into a special container. You will need to drain the water periodically.
One way to dry out a damp basement is to install a household dehumidifier.
What is condensate
To understand why water droplets form on the ceiling in the basement and what condensation is, consider two parameters - absolute and relative air humidity.
Absolute air humidity is measured in g/m3, relative humidity is measured in percentage.
The ability of air to hold steam depends on temperature - the warmer the air, the greater the mass of moisture it can accept, and vice versa. Therefore, with a sharp cooling of warm air, the value of its maximum humidity decreases, and the excess moisture contained in the gas before the temperature dropped falls onto cold surfaces in the form of water droplets.
Conditions required for water condensation
From the process described above, it follows that for condensation to form in a room, two factors must be present:
- the presence in the cellar of bases in contact with air with a sufficiently low surface temperature;
- the entry of warm air containing moisture into the basement.
The absence of exhaust ventilation contributes to water condensation, since condensate evaporating from surfaces is not removed outside and participates in a closed cycle of evaporation-condensation-evaporation.
Reasons for the formation of condensation in the cellar
Thus, drops of water on the ceiling in the cellar are formed for the following reasons:
- lack of insulation of enclosing structures;
- Each time the hatch is opened, a portion of warm air with a certain amount of steam enters the room, condensing on the cold base.
At the same time, moisture condensation on the ceiling can occur with varying intensity, depending on the time of year. For example, if there is an unheated room above the basement, in which in winter the air temperature may be even lower than in the cellar, then the flow of cold air down will not be accompanied by the formation of condensation. In summer, on the contrary, moisture condensation will be stronger, especially after rain, when the humidity of the warm air entering the cold cellar is especially high.
Disinfection and control of fungi and mold
Increased humidity in the cellar leads to the appearance of mold and fungi of various types and colors on the walls, shelves, and ceilings, and all this beauty is accompanied by “aromas.” In this case, take everything that can be taken out of the cellar and lay it out to dry. After drying, whitewash wooden shelves, boxes, boards, and racks with lime with the addition of a solution of copper sulfate. Better twice.
In the cellar, clean off all growths from the walls and ceiling, whitewash with lime and copper sulfate twice (the technology is described at the beginning of the article). Before the main drying, you can carry out special measures that will destroy the spores (or neutralize them for a while).
Lime vapor
Place a barrel in the cellar and fill it with quicklime. Lime is taken at the rate of 3 kg per 1 cubic meter of volume. There should be a maximum of lime in the barrel, a little more than half. Fill everything with water. Don't interfere. Quickly get out and tightly (tightly) close the lid and all ventilation ducts. You can open it in two days, ventilate it well, then you can go down.
Repeat the treatment after 7-10 days. Lime vapors should burn out mold and fungi, destroy insects and their larvae. They also cope very effectively with odors of dampness and mustiness. True, the cellar will smell of lime for several days.
Disinfection of the cellar using lime vapor
Sulfur (smoke) bomb
Use sulfur bomb. They are sold in stores that sell seeds or household supplies. Each one comes with instructions. But, in short, you need to act according to the following scheme:
- take out all metal things; if this is not possible, cover them with a layer of lubricant - grease or something similar.
- You light the fuse of a sulfur bomb, it begins to smolder.
- Get out quickly, close the lid and ventilation ducts hermetically, and leave for 5-6 hours.
If the basement is in the house, it is advisable to leave it during the treatment: a couple of breaths if the airtightness is insufficient and the lungs will need to be put in order for a long time.
Disinfection occurs due to the formation of sulfuric acid. It is obtained by the reaction of sulfuric anhydride and water. Therefore, mold is killed more effectively with a sulfur bomb in damp cellars.
Place the sulfur bomb on the metal, set it on fire, quickly come out and close all the holes.
After 5-6 hours (or after the time indicated on the package), open the ventilation ducts and the lid (in that order). Leave open for at least 12 hours. The remaining gases disappear during this time. You can come in.
From the experience of operating such checkers, we can say that they need to be lit twice as much as normal. Then everything will really be neutralized.
Mold Remover
Sometimes white fluffy growth appears on wood or walls. This is a type of fungus. It can be dealt with using the methods described above, but if only it is present, you can find a product on the construction market for removing solid polyurethane foam (sold in the same place where the foam is sold). Insert the tube into the mounting gun and apply it to areas with fungus. It immediately begins to curl up. And then it doesn’t appear in this place.
You can get rid of this evil spirits using a foam remover.
Floor bedding
If you have an earthen floor, lay a thick plastic film on it (for which it is described above), knock down the wooden grates and throw them on the floor. Scatter pieces of slaked lime under them. And they will collect moisture and create “bad” conditions for fungi.
How can you tell if the moisture level is high?
You cannot store food supplies in a damp cellar: vegetables without airtight packaging will quickly rot. In addition to the obvious signs of high humidity - condensation on surfaces, puddles on the floor, an unpleasant musty smell, darkening of ceilings due to mold - there are other ways to determine this indicator.
The easiest way is to use a special device, a hygrometer. In a concrete basement, the optimal humidity should be like in a refrigerator - 85-95%.
If you don’t have a hygrometer, you can resort to traditional methods:
- Go down to the cellar with a lit candle. The flame in a dry room will move, and a crimson halo will appear around it. If the basement is humid, the flame will remain straight and stationary.
- Place wood chips on the vegetables, and after a day try to break them. In a dry basement, the wood chip will break with a crash; in a damp basement, it will bend. A silently broken sliver will show the optimal moisture content.
- Pour water into a glass bottle and put it in the refrigerator for a day. Move it to the basement. If the surface of the glass is dry, the basement is dry. If condensation forms on it, the humidity is increased. An indicator of an optimal microclimate is the absence of any changes on the bottle.
How to dry a basement after a flood
If the flooding was accidental, you need to pump out the water in any available way, and then proceed according to the standard scheme:
- Take out everything you can from their cellars.
- Leave the lid and ventilation vents open for a while.
- When it is more or less dry, remove debris, fungi, mold from the walls and floor.
- Whiten with lime.
- Dry using one of the following methods.
If the flooding is periodic, in the spring, for example, you will have to build a full-fledged drainage system, and this is a separate conversation.
All the methods described above on how to dry a cellar are mostly based on practical experience. They are used everywhere and very often. In one case, one method works, in another, another. Your task is to find the most effective one for your situation.
Causes of water in the basement
If measures are not taken to protect the basement from groundwater during construction, then eliminating the consequences of flooding will become a more expensive solution.
The first aquifer is formed in the upper layers of the soil. Moisture from atmospheric precipitation and melted snow and ice cover and nearby bodies of water gets into it. In spring there is an abundance of moisture, the groundwater level above two meters deep is considered high.
The owners erect two main barriers to prevent water from entering the house:
- waterproofing of the foundation, floor and walls of the basement, plinth, which protects the thickness of the concrete and brick layer from the gradual seepage of water through microcracks and pores of the material;
- a drainage system under the foundation, around the basement or throughout the house that collects most of the moisture and carries it outside the interior area.
The most common causes of flooding are:
- violations of the technology for arranging external waterproofing of a house;
- clogging, silting of drainage pipes or the volume of wastewater exceeding the capacity of the system;
- rupture of water supply or sewerage pipes;
- excessive condensation due to poor basement ventilation.
You can determine the high level of groundwater on a site even before building a house using a geological examination, or you can use folk signs: a high level of water in a well in nearby areas and the presence of plants such as reeds, willow, alder, and horsetail.
During construction
The most important parts of the basement that need to be worked on are the inner and outer surfaces of the walls, the floor, and the closing lid. It is best to plan for waterproofing your garage basement at the very beginning of construction. This will make your work much easier.
First of all, you need to find out the groundwater level . If the environment is not too aggressive, and a garage with an underground room can be built on the site, then you should start building a drainage system . In the simplest case, you can do without laying pipes. The mixture is poured along the perimeter of the future building. The mixture consists of soil, sand and stones.
A more complex drainage system is built with pipes . First you will need to dig a trench around the perimeter of the building. The depth of the trench is equal to the depth of the basement + 40 centimeters. Plastic pipes are buried vertically in the trench. They will let excess water pass through them.
To prevent clogging, the pipes are covered with a grill . Then the trench is covered with geotextiles and a layer of crushed stone. But even with a drainage system, protection must be enhanced by waterproofing in the basement itself.
For the inner surface of walls, an excellent solution is penetrating waterproofing .
Penetrating waterproofing is a ready-made composition of special cement, sand and chemicals.
The composition literally “penetrates” inside the walls and provides protection from moisture. The substance is suitable for capillary-porous structures. These include walls on a concrete and cement base, brick. Penetrating waterproofing gets inside the micro-voids and crystallizes there.
Crystals do not allow moisture to pass through and protect your cellar from harmful influences. Penetrating waterproofing can only deteriorate due to the destruction of the walls themselves. In other words, it will last a very long time . The substance should be applied to a slightly damp surface, so it will be better absorbed.
Penetrating waterproofing is mixed with water and applied to the surface with a brush. The thickness of the layer is about two millimeters. Manufacturers claim that the substance penetrates almost a centimeter deep. The application process is simple and does not require special skills.
Instead of penetrating waterproofing, you can use other methods, for example, liquid rubber . The substance is placed on any surface - dry, damp or simply damp. Plaster with increased protection against moisture is well suited for brick.
Any car owner can handle the process; hiring specialists is not required. To begin applying plaster, you must first clean the wall and apply a primer. Next, the plaster is applied in three layers. The first is a primer, the second will be the main one, and the third is applied to level the surface.
One of the most common solutions for the outer surface of basement walls is the use of bitumen mastic and roofing felt - a homemade multi-layer coating . Building materials are distinguished by their low price and good characteristics. Instead of roofing felt, slate can be used; it is similarly “reinforced” with a bitumen mixture .
The next step is protecting the floor . Reinforced concrete is ideal for the floor of an underground room . Typically, car owners use roll and sheet materials. The method is simple and effective. The first step is to apply a primer. Protective material is placed on it. More complex and expensive options are cast, impregnated adhesive waterproofing.
The last step in creating moisture protection is installing a cover . It prevents moisture from penetrating into the above-ground part of the garage. Even if the basement is flooded, the cover will provide temporary protection against corrosion . The lid can be made of wood; the thickness should be at least 10-15 centimeters.
How to waterproof a cellar in a garage, see below:
