The Tefal steam generator has found application in everyday life and among professionals. When it comes to ironing, cleaning clothes, and freshening the air, a steam generator will come to the rescue.
But, like any other device, it is not immune from breakdowns. To know what to do in a given situation, you need to find the source of the problem.
In this article we will talk about the main malfunctions of Tefal steam generators and do-it-yourself repair of a household appliance.
Briefly about the design
Regardless of which manufacturer produces a steam generator, for example, Bosch, Philips or Tefal, all devices are characterized by three main parts:
- electronic control unit;
- stand or so-called base;
- iron.
The household appliance is also equipped with special attachments.
Let's consider the principle of operation of the steam generator:
- The boiler heats the water.
- As a result, steam is formed.
- The generated steam is supplied to the iron through a special hose device.
- There is perforation at the base of the iron.
- The steam escaping from the holes processes the fabric, smoothing out any kind of folds.
Important! The quality of steaming is not affected by the size of the clothing or its density. Thus, the steam generator has the ability to simultaneously process bed linen, jeans, suits made of wool blends, various synthetic products, as well as materials that require very delicate handling, such as silk clothing
A household steam generator station manufactured by Tefal differs significantly from household appliances with steaming from exactly the same manufacturer:
- a significant difference is the size - the household station is much larger and more voluminous, while occupying a lot of space in the room;
- in the steam generator, water is supplied to a separate compartment of the boiler, in which it is heated until steam is formed;
- the steam generated is not wet - it is dry with an approximate temperature of about 160 degrees;
- clothes and linen are processed without a device in the form of an iron coming into contact with them, so when processing with steam there is no damage to the clothes and there is no need to worry about the integrity of things.
Aftercare
Steamer needs care. Timely maintenance guarantees long-term operation of the device. Maintenance can be regular or maintenance. Due to regular maintenance, the likelihood of repairs is halved. The procedure will require the following steps:
- after 50 hours of operation, the boiler needs to be flushed with running water;
- all tubes through which water passes should also be washed;
- then you need to rinse the pipes;
- the water storage tank is also cleaned of foreign accumulations;
- after washing, wipe all parts dry;
- Wiping the elements should be done with a soft cloth that absorbs moisture well.
Servicing must be carried out in a specialized workshop by professionals. During this procedure, the technician will disassemble the unit, replace faulty parts if necessary, and clean the structure. Such maintenance is useful, since the heater with fittings will be washed in a special liquid, which the average user does not always have. Industrial steamers are sent for service without fail, since they are often used. The frequency of such maintenance for home steamers depends on the frequency of use of the device. If a steamer was purchased to steam several items a week, a visit to the workshop is allowed once every 3–5 years.
Water preparation
Some components that are present in the steamer design may perform worse due to aging. This behavior is considered normal in almost every unit. However, most problems are related to scale, so you should take care of your steamer to avoid future repairs. To prevent scale formation, care should be taken to prepare the water. Many manufacturers indicate that for normal operation you will need distilled water, sold in car dealerships and pharmacies. However, such a purchase is quite expensive, so most users prepare the distilled liquid themselves.
To prepare, you will need a kettle, a heat-resistant reservoir and a water filter. The whole procedure takes a little time. The distillate is prepared as follows:
- water is poured into the kettle and brought to a boil;
- the liquid is poured into a heat-resistant container;
- after the water has settled, you should resort to filtering the sediment;
- For filtration, it is recommended to use containers with carbon cartridges.
Using bottled water in a steamer
You can often find bottled water in stores that is marked that it can be used in irons. Many people buy it, believing that the scale problem has been solved. However, based on observations, it was noticed that the use of such a liquid also contributes to the formation of scale. No difference was noticed using plain tap water. In addition, please note that bottled water may contain fragrances that have an adverse effect on clothing. You cannot use drinking bottled water in irons, as it contains mineral components that have a detrimental effect on the steamer device.
To learn how to clean a clothes steamer with your own hands, watch the following video.
A steam generator is a necessary device. With its help you can get rid of wrinkles on clothes. Even the most finicky fabrics can be treated with steam. The equipment is used to clean furniture and even to fight bedbugs.
Therefore, when the device fails, this causes certain inconveniences, because the steam generator requires repair.
If the breakdown is not serious, then you can deal with it yourself. In other situations, professional help is required.
What to do, if:
The doorbell rings, I open it, and a neighbor is standing on the threshold with a broken iron and almost crying: “The iron is leaking, what should I do?” There is despair and hope for help in the eyes. The picture is familiar and very common in our cities and towns.
To figure out why the steam iron leaked and what to do, you need to clarify your medical history, learn all the details from the victim, and find possible ways to eliminate the problem.
Water flows instead of steam
If water flows from the iron instead of steam, then there may be several reasons for this, which fall into one of the categories:
- manufacturing defects
- steam valve malfunction
- condensation formation inside and outside the device
- improper use of the device
With the first one, everything is simple - take the iron to the store for a replacement. We will look at other reasons and how to deal with it further.
Water flows vertically
The cause of leakage in an iron that is in a vertical position is the condensation that forms after ironing as the device cools further. Subsequently, the condensation accumulated in the space between the soleplate and the steam generator will flow out due to the difference in pressure in the water tank and outside the iron. To prevent this, manufacturers recommend draining the water from the iron reservoir after each ironing using steam. In addition, if there is strong steam formation due to condensation, which leads to the accumulation of water droplets on the outside of the iron sole, you can subsequently see wet marks on clothes.
Water flows horizontally
Often the problem of water leakage from an iron left in a horizontal position lies in a malfunction of the valve that regulates the supply of steam to the soleplate. Like any valve mechanism, it has sealing elements made of rubber. Under the influence of high temperatures, and simply from prolonged use, rubber gaskets lose their elastic properties, become rough, and sometimes crack. As a result, when the valve is completely closed, this leads to the formation of gaps through which water flows. To make sure that we are dealing with a failed steam control valve, we will carry out a simple diagnosis. The iron should be unplugged, then turn off the steam supply and shake the device. If water flows out, then the fault is due to a faulty valve. It is unlikely that a problem with a faulty steam valve can be fixed on your own at home, especially when you do not have the appropriate experience and the necessary materials. It’s sad, but you’ll have to contact the service.
The cause of an iron leaking in a horizontal position may also be improper operation of the device. It is not for nothing that manufacturers write in the consumer manual that the “steam boost” function should be used as follows:
- set the heating regulator to the appropriate fabric type
- Place the iron vertically and wait for the indicator to go out indicating that it is ready to use in the steam boost mode
Only after this you can iron the laundry by turning on the “Steam” function of the iron. Otherwise, water will flow from the sole, which the heating element has not had time to heat to the vaporization temperature.
Water of abnormal color and odor
When water flows out of the soleplate of the iron, but not clear, but rusty water, and also with an unpleasant odor, you urgently need to stop ironing and deal with the device. Otherwise, you can ruin your clothes forever. Most likely, the reason why black water is oozing from the soleplate of the iron is scale that has formed during use. As is known, the cause of scale formation is magnesium and calcium salts dissolved in water. This is usually a sign of hard and poorly treated water. To reduce the formation of scale, it is recommended to fill the appliance reservoir with distilled or softened water and regularly clean the iron. Some models are equipped with special rods that deposit scale on themselves, protecting the working elements of the iron. Other models use water softening cartridges.
Regardless of the innovations used by manufacturers to combat this scourge of irons, we are able to clean the device ourselves. To do this, you need to pour water into it, add anti-scale agent or citric acid and let it heat up. When the heating indicator turns off, unplug the power cord from the outlet and, taking the iron, go to the sink. There you need to vigorously shake the iron several times and blow out the sole nozzles, from which particles of scale and rust will come out under steam pressure. For best results, repeat this procedure until the dirt particles disappear and the yellow water becomes clear.
How does a toaster work and how does it work?
A classic toaster is a closed case with slots, inside of which there are heating elements, as well as a movable bread basket. To prepare, the slices are placed in a basket.
Toaster diagram. Non-working (upper) position
The diagram shows the following parts of the toaster in the non-operating position:
- Lever arm. Used to lower the bread basket and turn on the appliance.
- Heater. Hot nichrome wires heating the bread.
- Breaker. Placed on the building and about. Designed for emergency power outage and early termination of cooking.
- Lock. Locks the basket in the down position.
In the off state, the lever (1) is in the upper position, the heating coils (2) are turned off, the circuit breaker (3) is closed, and the basket is raised. The basket lock (4) is open.
Toaster diagram. Working (lower) position
The diagram shows the following parts of the toaster in operating position:
5. Hot coil heater. Emits heat that bakes bread.
6. Movable basket. Lowers the product to the heater.
7. Locking plate. Holds the basket during cooking.
8. Electromagnet. Magnetizes the locking bar while the bread is cooking.
9. Wedge-shaped plate. Closes the contacts when the basket is lowered.
When the user presses the lever, the basket (6) moves down, and the following processes occur simultaneously:
A wedge-shaped plastic plate (9) lowers and pushes the spring contacts.
The spring contacts close and turn on the control circuit, heaters and electromagnet.
The electromagnet creates a magnetic field that magnetizes the bar (7) to the core, thereby locking the basket (6) with the lock (4) in the lower position.
The control circuit starts the countdown timer.
Infrared radiation (5) warms the bread until the timer goes off. As soon as the cooking time has expired, the control circuit removes power from the electromagnet, the basket is released from engagement and returns to the upper position under the action of a spring. The wedge-shaped plate (9) releases the spring contacts, they open and turn off the heaters and the control circuit.
Common causes of breakdowns
There can be many reasons, depending both on the user and on the design of the device. The most common include:
- Using dirty water. Due to the large amount of iron salts, when it is heated, a plaque forms, which is very difficult to remove.
- The presence of water in the device during storage, which leads to the same plaque, plus there is a decay factor, leading to corrosion of metal parts.
- Constant use of the device at maximum mode. This leads to overheating of silicone and plastic parts, the connections of which may develop leaks due to the expansion of the materials.
- Improper storage and careless operation. Do not over-tighten the power cord, because the wires usually break at the outlet of the device.
Let's take a closer look at the most popular breakdowns.
Doesn't produce steam - what's the matter?
Common reasons:
- scale and limescale - this may be due to the fact that unfiltered water was used;
- the internal coating of the equipment has crumbled - this is most often encountered by owners of budget/Chinese models with low-quality parts;
- electrical failure (for example, a pump, thermostat or thermostat may fail) - in this case, you should take the household appliance to a service center or start thinking about buying a new one.
If it is scale, then solving this problem is simple - get rid of it using special means, for example, Anti-scale or Calgon. Citric acid will also help with this.
As for the deformation of the internal coating, it is worth contacting specialists, since the device will need to be disassembled and then cleaned the boiler and channels. Parts may also need to be replaced.
Doesn't turn on
First of all, check the integrity of the wiring. This can be done by measuring the resistance.
If the device shows it, then the circuit is working; if not, then there is a break in the cable, thermal fuse, thermostat or the heating element itself.
Don’t forget to check the power button, as due to the constantly high power, the contacts could burn out and the case could become deformed, which often happens.
In any case, if you find smoke, immediately take the device for repair, as self-repair can lead to irreversible consequences.
Water leaks from the soleplate of the iron
Make sure the steam generator is not overfilled with water. Do not pour water to the very brim.
The following situation may also be the reason: the sole of the iron has not warmed up, and you are already in a hurry to release steam. Give time for the soleplate to heat up to the desired temperature, and then only apply steam.
Before you start ironing, set the device to the appropriate mode, and then place the iron so that its sole is in a vertical position. Wait until the indicator turns off. And only then press the steam button.
Otherwise, water will pour out of the sole
Also, the reason for the appearance of water from the sole can be careless bending of the hose through which steam is supplied.
Rusty water flowed
The reason for this may be the high content of hardness salts, that is, the water contains a lot of iron; to eliminate the defect, it is necessary to use a water filter.
The steam generator itself must be rinsed with clean water, and at the same time prevent plaque and scale using Anti-scale or citric acid. In especially severe cases, you will have to figure out a mechanical cleaning device.
Stagnant water may also be one of the reasons. It is highly not recommended to leave it for a long period of time, because it will deteriorate and plaque will form. It's better to fill it fresh every time.
"Spits"
If the device “spits”, this may be due to a broken valve. To make sure of this, you need to close the valve and turn on the device (but not in the “supply steam to the iron” mode). Now you should rock it.
Are there any drops of water? So it's the valve. To solve this problem, you should contact a service center.
Featured Posts
The kit may also include a fuse. If after all these steps you understand that everything is in order with the power supply, you need to inspect the printed circuit boards.
Russian measures suggest the ruble. Capacitors often fail
Disassembling a stationary blender Please note: the spindle has a left-hand thread. The inclined gear is pressed by a pair of inclined side gears; if necessary, they are adjusted with a screw on the front of the head of the stand mixer
It's simple. Turn on first speed. But if your model has a simple mechanical switch, you can check for damaged contacts - they sometimes burn out. Be sure to read the manufacturer's recommendations and technical specifications of the device. The principle is the same, but the implementation is different.
Pay attention to the fuse. The household appliance is equipped with a rotation speed regulator, cord, plug
You can immediately tell about a burnt-out engine by the strong smell of burning. The cause of the malfunction may be the rectifier capacitor. Installation and repair of DeLonghi oil heater
The main reasons for water entering steam
There are several such reasons; we will need to examine each of them in more detail.
Reason #1
This is not a hardware failure, but this point should not be ignored. When purchasing, many consumers want to purchase more powerful equipment, but this may be the fault of the manufacturers. Let us note right away that such a problem can only be solved by replacing the equipment; in rare cases, purchasing a new iron with a hose can help.
Reason #2
The steam generator is spitting - perhaps the reason is a faulty valve. If all the rules for operating the equipment are followed and water leaks occur, the reason lies precisely in the shut-off device. But you need to make sure that this part is faulty. It's easy to do. Close the valve and turn on the steam generator in any mode except for supplying steam to the iron. We take and swing the iron from side to side.
When drops of water appear, make sure that the shut-off valves have not blocked the access to moisture. The valve requires replacement. You will need to contact a service center. Get help from specialists.
Reason #3
Errors during operation of the steam generator and its maintenance. The control of the operation of steam generators is equipped with a temperature regulator, on which there are special marks indicating the time when the steam supply can be turned on for a steam boost.
If the soleplate of the iron has not heated up to the specified value and steam should not be supplied, it is not recommended to try to rush and turn on its supply. Such inattention may be one of the reasons.
Otherwise, water will drip from the steam generator openings instead of steam jets.
If the indicator goes out, but water flows, the sole heating regulator may have failed. In this case, you will need to visit the service center and replace the part. Performing minor, simple repairs, replacing an inexpensive part, or disassembling an iron with a steam generator costs much less than buying a new device.
The filler cap in the water tank must close tightly until it clicks, otherwise water will splash out and get on your laundry or clothes.
Careless kinking of the hose
In this position, even after a few minutes of operating the equipment and turning on the steam supply, if the hose is even slightly pinched or the location of the iron is opposite the steam outlet of their equipment, and the hose itself is much lower, water may come out along with the steam.
This creates a water plug and prevents water from flowing into the steamer. Thus, the circulation of water in the system is disrupted and steam cannot pass through the plug without capturing a small amount of water. If there is a large amount of moisture in the plug, a reverse flow of water into the niche and container for collecting moisture is possible.
You can get rid of such an unpleasant situation by simply placing an iron with a hose above the steamer. After 10-15 seconds, the water will drain and the water plug in the hose will collapse. In case of a large traffic jam, you will have to turn off the steam generator and let it cool. Then we disconnect the hose from the steam generator, placing the hose over a sink or bucket, lift the iron and drain the water.
Eliminate leakage of water and steam; it may be necessary to descale the steam generator. To do this, you will need to pour in industrial products or folk substances to remove alkaline deposits, then turn on the heating of the water to the maximum temperature. Then the water with scale is drained, clean water is poured in and the operation is repeated. To remove alkaline deposits, anti-scaling agent, simple citric acid are used, even Sprite and cola successfully remove scale.
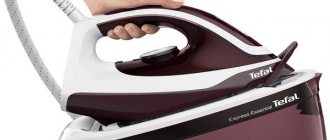
The TEFAL GV8962 iron is leaking: we describe it in detail
With the advent of the steaming function, a malfunction began to occur in the ironing equipment - water flows out of the iron. Instead of steam, liquid flows or drops appear from the holes on the sole. The problem is typical for devices from all manufacturers. Most rarely, the cause is defective; sometimes a leak can be caused by damage to internal elements, but most often the fault is due to improper use of the device. Some breakdowns can be repaired manually, others only at a service center.
Typical malfunctions and methods for eliminating them
The following breakdowns are common among Tefal irons.
Steam button sticks or fails to work
In Tefal irons, steam supply is not activated by a button command. This plastic part presses on a hollow tube, which transmits force to the corresponding contact. The part often cracks over time. Gluing is useless - the tube has thin walls and will not have sufficient strength. For repairs, you will need a heat-shrinkable hose; it can be purchased at an electronics store. The hose is placed on a plastic tube and heated, for example, with a lighter. After repair, the part is installed in its original place.
Power cable failure
The most common problem with irons is damage to the power cord. It is necessary to check the condition of the fuses (one of them may be in the plug), the absence of carbon deposits on the contacts, the absence of chafing, creases and other mechanical damage. The area where the cable enters the plug and the body of the iron is especially carefully examined. If damage is found, the cable must be replaced. The contact comb located in the rear part, under the housing cover, is also subject to careful inspection.
Oxidation
The entire structure of the iron is carefully inspected. Areas where limescale or oxidation is present are cleaned. For this, fine sandpaper, a brush, light acidic detergents, and ethyl alcohol can be used. The cleaning procedure is mandatory - in most models, water and steam directly contact the current-carrying elements of the circuit.
Clogged steam outlets
There are several ways to clean the sole. One of them is to use cotton swabs soaked in vinegar. They are pushed as deep as possible into the nozzles and turned. The availability of other methods depends on the sole material:
- Metal – clean with salt. It is enough to iron a cotton cloth strewn with fine salt at maximum heat.
- Ceramics and metal can be cleaned with a weak solution of citric acid. To do this, take a large frying pan, into which you pour the solution (about a centimeter) and put 3 coins. The iron is placed with its sole on these coins, but so that its nozzles are not covered. After this, the solution is brought to a boil and cooled naturally. The procedure is repeated 3-4 times.
Before cleaning, clogged nozzles should be pierced with a toothpick or needle. It is better to take Teflon-coated irons to a specialized workshop. Depending on the characteristics of the surface and the period of use, home methods may lead to peeling or other problems with the smoothness of the sole.
If you decide to use citric acid, contact areas should be protected. Wrap the places where the iron's heating element wires are attached with electrical tape or cover it with heat shrink, for example.
The thermostat is not working well
Cleaning the iron's thermostat is quite simple. The assembly is disassembled and carbon deposits are removed from the contacts. A strip of suede is suitable, which is moistened with alcohol or citric acid, pulled between the contacts (in the diagram - zone 2) and driven until the amount of dirt decreases. It is not recommended to use sandpapers and abrasives - the surface becomes rough, the current surges are stronger, as a result of which burnout occurs even faster.
In the iron's thermostat, the bimetallic plate, whose task is to interrupt the electrical circuit, may fail. The element is not repaired, only replaced. Another problem is a broken rod. It is made of ceramic; if desired, the part can be made from available material, for example, a resistor. But in most cases it is easier to change the entire iron thermostat.
The listed repair actions can be carried out with your own hands if you have even a little experience working with electrical equipment. More complex operations, for example, troubleshooting problems with the iron position sensor or electronic components, are best left to specialists.
Source
Features of disassembling blenders from different companies
Brown, Polaris, Redmond, Philips, Scarlet, Bosch models are widely used in everyday life. Some of them are disposable and cannot be repaired. Their disassembly is not provided.
The Brown technique is disassembled as follows:
Using pliers, remove the cartridge (holder for nozzles). A thin screwdriver is inserted into the seam between the body and the outer shell. Lightly hit the screwdriver with a hammer, thus knocking out the weld. This action is continued until the engine begins to move freely inside the housing.
Everything is done with great care so as not to destroy the fasteners. Do not use a thick screwdriver; it may damage the outer shell of the case. Press the clamps and remove the engine
Typically the control board is pulled out along with the motor. If it does not give in, it is pulled up with pliers by the lower edge. There are latches inside to secure the lid. They are folded along the arrows. Use a screwdriver to pry off the speed control cover. Unbend the power cord fastening clips located inside.
Polaris models come in collapsible and non-dismountable types (for example, PHB-0713AL), the parts of which are glued or soldered.
The elements of collapsible blenders are separated as follows:
- unscrew the screws;
- use a blade or thin knife to unfasten latches and plugs;
- carefully separate the elements.
The glued parts are cut, but such a blender will not be able to return its original appearance during assembly.
For Redmond equipment, all fastenings are locking. They must be separated carefully, otherwise discontinuities will appear at the joints during assembly.
Popular Rendmond models are disassembled as follows:
- remove the upper metal ring by bending the internal latches;
- With a little effort, remove the adjustment knob, holding the plastic axis of rotation and the spring;
- unscrew 4 screws;
- pry up and remove the lower ring, carefully pull off the metal protective casing;
- process the glue seam around the circumference of the body with a knife and remove the cylindrical part;
- remove the guide sleeve;
- pull the motor out of the housing along with the board.
Philips models are disassembled according to the following instructions:
- on the side where the speed control knob is located, disconnect the decorative cover by prying it off with a knife or screwdriver - it is secured with double-sided tape;
- the next cover, secured with self-tapping screws, is removed using a screwdriver;
- remove the plastic gear by hand;
- Unfasten the protective cover from the reverse side; to do this, press the latching buttons with a screwdriver and bend the eyelet with a knife;
- Next comes the glued shaped cover that protects the motor - it is removed with a knife.
At the final stage, the motor and control board are removed.
Submersible Scarlet models are disassembled in the following sequence:
- pry up the speed control cap with a screwdriver and remove it from the rod;
- unscrew the 4 screws that secure the cover;
- pull out the connecting sleeve covering the engine;
- remove the motor and board.
The engine is the most vulnerable part of these devices.
Parts of Bosch stationary blenders are dismantled using a wrench and pliers.
Disassembly of submersible varieties has the following features:
- fastenings on the outer surface - fragile plastic latches;
- internal parts can be fastened with bolts, self-tapping screws, screws.
A little theory
Almost all processes on Earth involve the release or absorption of heat. This is the law of nature - energy cannot disappear into nowhere. One of the representatives of heat exchangers - a steam generator - is present in one form or another in many areas of our lives: in production (for example, at thermal power plants or nuclear power plants) or even at home.
The simplest interpretation of such devices is a steam generator in an iron, as well as household humidifiers. Their task is to create steam from water. Moreover, for industrial purposes, steam must be at a very high temperature and under high pressure. Which means that the steam generator will be under critical loads throughout its entire operation. Accordingly, its service should be at the same level.
Part of the service procedures is the cleaning of steam generators, because they, like no other, due to operating conditions, are susceptible to the accumulation of deposits in the form of salts and rust. If the processes of corrosion and salt formation are started, then there is a risk of not only reducing the efficiency of the equipment or going for repairs, but also destroying it - as a rule, costing several million rubles.
Leak prevention
In order for the steam generator to operate without problems for a longer time, it is necessary to follow a number of rules:
- The frequency of steam use should be reduced. Enable this mode only when really necessary. The more this function is used, the faster the device parts wear out.
- After ironing, the remaining liquid must be drained.
If you follow these simple rules, you can significantly reduce the likelihood of breakdowns and save on repairs.
Important! If the breakdown is not complicated, then you can repair the device yourself. The most common cause of failure is scale buildup. Therefore, the device must be cleaned on a regular basis.
There are several ways to clean a steam generator - using folk or industrial products. Some devices also include a special cleaning rod. It also needs to be cleaned periodically. You can find out how to clean a Tefal steam generator from scale here, and Philips here.
When do you need professional help at home?
The help of a specialist is required if it is impossible to determine the causes of the malfunction in the steam generator, or if it is not possible to eliminate them yourself. Most often this happens when a part fails.
In order not to make a mistake in choosing a specialist and not to contact scammers, you need to adhere to the following recommendations:
- Private craftsmen most often do not give guarantees for their work, or promise the proper functioning of the device in words. Therefore, it is better to contact the service.
- After completion of the repair, you must request a receipt and warranty service.
- You should trust word of mouth. Recommendations from friends can help you find a good specialist.
- The technician will not charge money for diagnostics. Professionals do it for free.
- You should not leave the device in the workshop if the workers do not provide paper confirming its receipt.
- All documents must be stamped with information about the organization and its address.
The cost of repairing steam generators varies widely. The more complex the work and the more expensive the model, the higher it will be.
Where to order repairs?
Give preference to a service center that has been in existence for at least three years . As a rule, such companies value their reputation and will not make any mistakes.
They will have all the necessary parts for your steam generator model. As a rule, their diagnostics are free.
It is also important that one of the points of this company is to provide a guarantee for all repair work. If a company values its reputation and is confident in its employees, it provides a guarantee for service.
It would also be a good idea to read reviews about a company that offers repairs of steam generators.
Before contacting a particular service center, analyze the cost of repairing a steam generator in your region. The price should not be very low (it is unlikely that experienced craftsmen will do their work for pennies). Stick to the golden mean!
Steam generator design
Steam generators are a device with a separate station in which a tubular electric heater is located. The steam produced by heating water enters the iron through a special tube.
The station consists of several important elements. For example, it’s worth disassembling the Philips steam generator device. A water boiler is located in the center. In it, the water is heated to the required temperature. Heat-conducting tubes pass under it, which come into contact with the surface of the boiler, transferring the heat passing through them to it. The tubes are heated by heating elements located in them.
At the end of the heating element (tubular electric heater) there is a thermostat, which is needed to control the temperature. A fuse is placed next to it. In the event of an unusual situation, when the tubes become too hot, the fuse melts and closes the electrical circuit, cutting off the power supply to the device. Operating a steam generator without correctly operating protection in the form of a thermostat and fuse is dangerous.
Checking the electric heater
The heating element in modern models is a reliable unit and rarely breaks. When this problem occurs, it is better not to buy a new heater. It's easier to buy a new iron. But first you should make sure that the problem is in the heating element.
In all models, the heater contacts are soldered to the device contacts and connected to an indicator lamp. If the lamp is on, but the iron does not heat up, then the malfunction is related to the heating element.
On some models, the thermal fuse is included in one heater circuit, and the regulator is included in another. If the fuse is faulty, then a false “diagnosis” can be made, suspecting a faulty heating element. To accurately determine the cause of the device failure, it should be completely disassembled.
General design of steam generators
Manufacturers from different companies produce devices with similar design features. For example, steam generators from Tefal, Philips or Bosch include three key elements: an electronic control unit, the iron itself and a stand - also called a station.
The equipment is complemented by various attachments. The boiler is responsible for heating the water. Steam is generated inside it and flows through a hose into the iron. Holes in the base allow steam to pass through, which smoothes out wrinkles in the material.
The quality of ironing does not depend on the size or material of the item. Simultaneous work with delicate materials, bed linen or jeans is allowed. Structurally, steam generator stations, for example, from Tefal, differ from steam irons in the following ways:
- larger size;
- separate steam generating tank;
- dry steam 160°;
- ironing clothes not with the flat iron, but with steam.
Source
Important Tips
Self-repair of the device requires compliance with the following recommendations:
- when checking the functionality of the device, you need to direct the steam stream at an item that cannot be worn;
- any repair work must be carried out when the device is disconnected from the electrical network;
- It is forbidden to press the “start” button if the device is directed towards a person;
- The smell of burning or the appearance of sparks is a reason to stop working with the device and contact service.
What should I do if water is leaking from the steam generator?
To fix the problem, you need to install an iron with a hose above the steamer. After about 15 seconds, the water will rise and the plug will collapse. If there is a lot of moisture in the plug, you must first wait for the device to cool down. Next, the hose is disconnected from the device. It is located above the sink. The water is drained from the iron.
It is possible that to eliminate the cause of water leakage, descaling of the device is required. To do this, you need to pour in a special product or a folk remedy to remove plaque. Next, the device turns on at maximum temperature. Then the water is drained and the procedure is repeated again.
The water will touch the hot heating element. The contact of cold and hot, as well as the impact of the product, will allow the scale to lag behind the walls and exit through the holes in the sole.
To do this, place it in a solution with citric acid for several hours. The rod is then reinserted into the device. After cleaning, ironing must be done on unnecessary scraps of fabric, as scale will come out. If after cleaning the problem is not solved, then you need to contact a specialist.
If the valve breaks, you can try cleaning the nipples at home. To do this you need:
- Mix one part citric acid with five parts water.
- Pour the resulting mixture into the tank.
- Turn on the iron.
- After the soleplate has heated up, you need to press the steam button.
If the above steps do not help, the device must be taken to a service center. You should not repair the nipples yourself. If the leakage is due to improper use, then there is no need to take the steam generator to a service center.
It is only important to start using it correctly
Do you regularly descale your steam generator?
Not really
DIY repair tips
Some steam generator malfunctions can be eliminated yourself with minimal skills and tools. But keep in mind that if the cause of the breakdown lies in poor contact of the cord, heating element, or if the skates are stuck, you will have to disassemble the device.
Specialists from the service center do not recommend repairing the Tefal steam generator with your own hands if the cause has not been identified or if you do not have the skills to work with electrical household appliances.
This is due to the fact that in most cases, self-repair leads to even bigger problems .
To prevent this, if the device malfunctions, you should contact a service center. By entrusting the work to professionals, you will be able to bring your device back to life!
Low temperature
The operation of the device is based on the supply of water through a valve from the reservoir to the inside of the sole. There is a regulator on the body, with its help you can change the size of the holes so that the liquid flows in the required portions. Under the influence of high temperatures, water is converted into steam, which comes out through special holes on the sole.
In order for the vaporization process to be successful, it is necessary to reach the boiling point of water. The inner sole of the iron should reach this temperature.
If this value is not reached, the water will not turn into steam, but will flow out through the holes in the sole.
Operating principle of the device
The operating principle of a working device is as follows:
- water is poured into a special reservoir;
- Due to the valve device, water from the reservoir enters the soleplate of the iron and turns into steam.
Important! It is necessary to use distilled water for the device to prevent scale from appearing. Boiled water should also not be used, as it contains a large amount of salts.
Using the valve, you can regulate the amount and speed of flow. This publication will tell you which steam generator to choose for ironing and cleaning.
Common problems and their solutions
If the faults are simple, they can be fixed without contacting a service center. Experience and skills in repairing electrical appliances are required. A list of common problems and repair methods will help you.
- No steam supply:
- Inspect the system responsible for heating the water, the solenoid valve and the fuse.
- Remove any dirt from the steam pipe.
- Descale the water container.
- Install a new thermostat or hose that supplies steam to the iron.
- Take a closer look at the steam button to see if it needs to be replaced.
- Incorrect operation of the pressure switch - faulty toggle switch or microswitch. Diagnosed with a multimeter and solved by replacing the part.
- Does not respond to pressing a button on the control panel - damaged wiring. Make sure it is intact. If everything is fine, replace the button.
- A flashing indicator when the water level is low indicates a malfunction of the liquid volume sensor. Replace the part and return the water level to normal.
- Low steam pressure coming from the vents on the bottom of the iron. Replace the regulator if it is faulty.
What other problems might you encounter?
- Water level indicator won't turn off? The reason is a broken sensor. Replace it.
- Having trouble adjusting your pressure? The switch is broken. Replace it.
White streaks appear from the holes in the sole.
This indicates that the appliance is releasing scale. To prevent this from happening, you should rinse the steam heater after every 3-5 uses. If the water is hard, do this as often as possible.- The plug allows steam to pass through. The reason lies in damage to the seal of the plug (in this case, contact the support center) or it is not screwed in completely.
Common problems and their solutions
When repairing an iron yourself, you first need to know what problems may arise with it and how to make the device work again.
The device does not turn on
The iron does not turn on mainly due to the cord, which may be damaged in one or more areas. If the cord has brown areas, it means that it is burnt out in these places and they need to be cut off and replaced.
When there are no visible violations, the cable is checked with a tester. If it cannot be repaired, it is replaced with a new one.
The device turns itself off
This happens due to the operation of the temperature sensor. Having set the required temperature on the device during ironing, it will dial it up and turn off, protecting the iron from burning out.
Modern Philips and Tefal models have an automatic shutdown function. Built-in sensors help avoid fire if the iron is forgotten in a horizontal position.
Thermostat does not work
You can check the operation of the thermostat with a tester by switching heating modes. If the element is faulty, it is repaired by removing the handle from the body or disassembling the entire device.
Reasons for thermostat failure:
- Formation of carbon deposits on contacts. It is removed with a piece of suede cloth, previously soaked in alcohol or sprinkled with citric acid. Do not use sandpaper for cleaning, this will lead to the formation of a large number of scratches;
- The bimetric plate burned out. It cannot be repaired and will have to be replaced with a new one;
- The rod broke. It is difficult to repair, so it is easier to completely change the entire thermostat.
Replacing a thermostat is not a complicated process that does not require a lot of money or effort.
Heating element does not work
The heating element is the most important part of the iron. To understand whether it works or not, use a tester. If the heating element is not working properly, you will have to buy a new iron.
Before throwing away the old one, remove the cord, regulator and fuse. They will come in handy in the future.
The device does not heat up
When the cord is plugged into the outlet and the power light comes on, you may find that the iron does not heat up anyway. The point here is that the heating element is broken. You can try to clean its contacts and check the operation of the device again.
If the device still does not heat, you will have to throw it away, because the cost of a new heating element is almost equal to the price of a new iron.
Water leaks from the appliance
Water leaks out due to a malfunction of the valve supplying liquid to the surface of the sole. The iron has a regulator whose task is to increase or decrease the holes for water to flow out.
If water flows out during ironing, the valve is completely closed. This shouldn't happen. The appliance may not be warm enough and the water cannot turn into steam.
If the valve is broken and the steam generator is turned off, water will leak from the device. The valve is leaking due to bad rubber bands, which cannot be replaced at home.
The steam system is not working well
The main reason is large scale formation. It occurs when the wrong liquid is poured into the water tank. Instead of regular tap water, you only need to use purified, boiled or distilled water.
You can clear clogged holes like this:
- Pull the wire out of the socket;
- Prepare the solution. Mix 1 liter of water and 200 ml of vinegar, you can add citric acid;
- Pour the solution into a deep metal container and place the iron in it, slightly lifting the back. The water level should be 15 mm above the sole;
- Set the steam regulator to maximum;
- Place the container on the stove and turn it on;
- Wait for the liquid to boil, let it cool slightly and heat again.
The boiling procedure is repeated at least four times to remove all the scale. After completing all the steps, remove the iron from the container and let it dry completely. After drying, you can start ironing things.
The steam button is broken
A normal amount of steam is supplied if the small plastic tube located inside the device is working properly. It often cracks over time. It can be repaired using a heat-shrink tube; its diameter is 4 mm.
Cut the heat shrink to the required length, put it on the broken area and heat it with a soldering iron. After the repair, reassemble the electrical device, returning the parts to their places.
Mechanical damage
When working in blenders, not only the electrical part suffers. Mechanical damage occurs quite often, and it is quite possible to deal with it on your own.
Leaking engine gasket and bowl
Noticed a leak between the body and the bowl? Feel free to start repairing:
- remove the bowl from the body;
- unscrew the drive spindle;
- remove the old gasket;
- install a new gasket in its place.
Damage to the lid latch mechanism or attachment
If you use the blender carelessly, you can damage the lid latching mechanism for stationary ones or the nozzle for submersible ones. There is only one solution to the problem: buy a new part, since repairing the chopper lid or blender attachment can lead to injuries during further use.
You can still try to repair the whisk attachment by removing the broken rod. Only during further work, you need to be careful as part of the protruding wire may scratch.
Damage to the blender body
A damaged hull can hardly be repaired. Operating such an electrical appliance threatens your safety. Treat yourself to buying new equipment.
Damage to the blender jar
There is only one solution to the problem: buy a new bowl.
If you pour boiling water and other hot liquids into the bowl, the container will be damaged. The solution to the problem is also: buy a new bowl.
Repairing the bowl should not be done due to the fact that it is impossible to achieve the initial state of the elements.
Leg repair
As a rule, the blender leg cannot be repaired due to the fact that it is all monolithic and the structure cannot be disassembled. If the metal leg is bent, you can try to straighten it by force. Even if this succeeds, it will not be possible to achieve the same job. The internal mechanisms will not fall into place.
Gearbox repair
The problem area of the gearbox is the separation of the gears and their shafts. Due to heavy loads, this unit heats up, the iron shaft melts the gear seats and it falls off. As a result, rotation is no longer transmitted to the nozzle.
To repair the gearbox, it must be disassembled. It usually consists of two halves held together by internal latches. Then you need to examine the internal parts. If the gears are intact and simply fell out of the shafts, then we put them in place and fix them with superglue. This method will extend the life of the device for some time.
Iron temperature in degrees
In temperature-controlled devices, the “points” correspond to a certain temperature (data in the table)
| Thermal mode of the iron | Minimum t (˚С) | Nominal t (˚С) | Maximum t (˚С) |
| 75 | 95 | 115 | |
| 150 | 130 | 155 | |
| 145 | 175 | 205 |
The heating of a household iron within the soleplate can vary by 10 °C.
How many degrees does the iron heat up to?
For fabrics that are most difficult to iron, it is necessary to use a maximum iron heating temperature in degrees equal to 205˚C. In this case, the heating rate will depend on the type of material from which the sole of the iron is made, and the power of the electrical appliance.
Heating rate depending on sole material
The sole is made from:
- Aluminum. Heating occurs very quickly, and cooling also occurs, but the material is short-lived. Hard elements on clothing can leave scratches in which burnt-on fabric particles become embedded.
- Of stainless steel. It heats up quickly, glides well over the surface, and is durable. The disadvantage is the heavy weight of the device.
- Ceramics. This coating is applied to a metal base. It glides perfectly, allows you to iron fabric in hard-to-reach places, and does not catch clothes. Heating and cooling take longer. Ceramic retains heat, so even when turned off, the iron remains on for 8-10 minutes. stays hot. The disadvantage is the fragility of ceramics, susceptibility to chips and damage. To extend service life, manufacturers use cermets.
- Teflon - reliably protects clothes from burning, but does not last long. The Teflon surface does not glide well over fabric, making ironing difficult.
- Sapphire is a specially developed alloy that gives the sole extra strength. Conducts heat well.
- Titanium is rarely used in the production of household irons. The metal will heat up quickly and take a long time to cool down. The surface strength is not inferior to steel.
Maximum temperatures in different models may vary, so before choosing a mode, you should read the instructions.
If the iron has only one heating mode, there is no spray and steam function, the temperature of the iron sole will be 115˚C (±10).
Irons with a drip system are slightly hotter - about 155˚C.
Electrical appliances with the possibility of steam processing reach temperatures of 175-205 ˚C.
Influence of electrical appliance power
The speed of heating the surface, the possibility of supplying a “cloud” of steam, and the speed of cooling of the sole directly during ironing depend on the power of the iron.
In household models, the power ranges from 800 to 2200 W. Models that are not equipped with a thermostat and a humidifier have a lower power - within 400 W. Ironing them is much more difficult; they heat up more slowly and cool quickly.
Professional ironing for many hours, for example, in a laundry or dry cleaning, will require the purchase of a more expensive and powerful device - from 2800 W. Heating in such models occurs as quickly as possible, and the steam boost is extremely powerful (about 230 g/min).
Minimum iron temperature
To select the lowest temperature, you must select the “silk” ironing mode (one point). The minimum ironing temperature is 75˚C.
In irons without a thermostat, the heating temperature is about 115 °C. Since it is impossible to select a delicate treatment mode for the product, you should start ironing from the wrong side, moistening the fabric.
When straightening an item that cannot be ironed, even the mode set to one point can ruin it. To safely process fabric you must:
- moisten it with a spray bottle and hang it for leveling;
- apply steam;
- iron, placing the item between two layers of fabric: dry on the bottom, wet on top.
Steam temperature in the iron
Steam helps to moisten the item and makes it much easier to straighten the fabric, but for particularly wrinkled areas, a “steam boost” is used. The feed intensity depends on the power of the iron.
In household models, the steam force is about 20-25 g/min. More professional equipment allows you to use steam supplied at an intensity of 160 g/min. In this case, the steam temperature reaches 160-210 ˚С depending on the characteristics of the model.
Checking the thermostat
The thermostat looks like a plate with a group of contacts and a protruding plastic pin, onto which a disk is then placed.
This is the thermostat on the iron
Two contacts fit to the plate. We install multimeter probes on them and check their functionality (call them). In the “off” position, the sound of the multimeter should disappear; when turned on and turned to any position, it should continue to sound.
The damage may be that in the “on” position there is still no contact - then the iron does not heat at all. There may be a different situation - it is not turned off by the regulator and/or does not respond to the position of the regulator. Both reasons are in contacts. And most likely they got burnt.
In the first case, carbon deposits may interfere, which can be cleaned off by inserting a piece of fine-grain sandpaper between the contacts and “sliding” along the contacts a couple of times. If you don’t have sandpaper, you can use a nail file, but you need to act carefully - the temperature settings depend on the bending of the plates. So you can’t bend them too much.
In the second case - if the iron does not turn off - the contacts may have become burnt or fused. Repairing the iron in this case consists of trying to separate them. But such a trick rarely succeeds. The solution is to replace it.
Thermostat from a different angle
There may be another point: when falling, the contacts could somehow interlock. When the sole of the iron heats up, the bending thermal plate presses on the contact groups, but the contacts cannot open. The result is the same - the iron does not turn off when heating. Repairing an iron is also similar - we try to restore mobility to the plates, trying not to bend them. If it doesn’t work, we change it.
How to disassemble the Tefal Prima 2325 iron
Tefal iron model 5335. We disassemble, assemble and clean the iron. Time codes: 1:00 disassembling the iron 2:25 assembling the iron 6:10 cleaning the iron. How to identify and fix iron malfunctions at home. To disassemble a modern iron, a novice master needs to have skills. The Tefal iron repair is unique. First, he has a body.
Tefal iron repair. Here we are all at the beginning of 2. The attitude towards things that, if broken, would simply be replaced with new ones, is also gradually changing. Now it has become expensive and probably unreasonable to do this, especially since if you are smart, then a broken thing can be repaired. Moreover, the costs of repairs are not comparable, both with the cost of repairs and with the huge prices for a new thing.
A reader of the website Secret of the Master, Marina, showed engineering savvy and repaired her iron. She shares the secret of success with all of us. A steam iron is an indispensable thing in every apartment and a breakdown of the iron, especially now, can greatly disrupt financial plans and cause a serious blow to the family budget.
Sometimes the hardest part of a repair is trying to take the device apart without breaking it. Marina reveals to us the secret of how the iron fastens and, most importantly, shows us where and how to fix the breakdown.
Before you begin disassembly, you need to prepare the tool.
Features of disassembling irons with the Easycord system
Some Tefal iron models, such as Ultragliss FV4650 or Supergliss FV 3535, are equipped with the Easycord system, a distinctive feature of which is the special design of the rear panel of the device. The bolts are on a stand connected to the handle. Having unscrewed them, remove the cover covering the installation site of the cord, and then proceed to disassembling the steam supply system. The buttons are located on a removable block, which can be removed by bending special latches.
After this, you can remove the handle by gently pulling it up. The next step is to remove the screws. 2 of them are located on the back of the iron, and another one is located on the front, under the removable block. Next, disassemble the iron in the same way as standard models.
Tool
To successfully repair an iron, let's first prepare some homemade tools; It will not take much time and will not require significant expenses:
- 2-4 lid squeezers;
- squeezer for hidden latches;
- a cheap LED flashlight (namely LED) and a magnifying glass;
- a strip of suede, a nail file, alcohol;
- or, instead of step 4 - a pencil eraser, an ink eraser, a piece of a clean cloth, alcohol.
Push-ups
Opening the top cover of the iron with a table knife
The lid squeezer is made from the top, strongest layer of bamboo, the size and thickness of an ice cream stick; one end of it is cut into a wedge. The covers on the body of irons are often placed on latches without fixing. At the service center, such a cover is compressed with special pliers and removed. To remove it using a makeshift method, you need to pry off the cover: the teeth of the latches without fixing are beveled on both sides and come out of the grooves intact. But open the lids on tight latches with a table knife or a wide screwdriver, as in Fig. on the right, don’t: the steel will leave marks on the plastic. The flexural strength of the surface layer of bamboo is higher than that of plastics, and the shear strength is lower. Therefore, a bamboo squeezer will remove the lid if it is properly lifted, but perhaps it will be crushed from the surface on its own without damaging the plastic. If the lid is not lifted correctly and does not give in, the bamboo squeezer will break without damaging the iron. They use bamboo squeezers in pairs, prying the part from both sides.
A good thin squeezer for fixed latches is obtained from a plastic coffee stirrer cut into a wedge, which are issued by coffee machines. The squeezer from the stirrer fits into any gap and gently removes the latches with fixation, without scratching or breaking either them or the body parts.
Flashlight and magnifying glass
Cheap mini LED flashlights produce very hard light with harsh shadows. In this case, this is an advantage: such light penetrates deeply into thin cracks, and under a magnifying glass you can see what the part is holding there. To do this, first they pry off the lid, which is not clear how to remove, with bamboo squeezers, highlight it and look at what is holding it there.
How to handle latches
It is best, of course, to find a diagram for disassembling the iron of this model, but try it! And don’t look for typical layouts of secret locks either: they can be different for the same model from the same manufacturer. Have you read in the instructions: “The manufacturer reserves the right to make changes to the design that do not affect the performance of the product”? That is, when disassembling the iron, you will most likely have to look for hidden connections yourself.
It must be said that Western companies are gradually moving away from the principle: “Do you want to fix it yourself? Well, break it and buy a new one!” But Asians stubbornly cling to it. For example, if your iron is Chinese, then the nose mounting screw (see below) will most likely be not under the filler cap, but... under the water and steam supply buttons!
Hidden latches in the iron buttons
Let's light it up and see. Do you see the green circle in the pic? So, this is not a latch, but a sliding tenon in a groove. The latches are on the other side of the buttons. To remove the buttons and disassemble the iron, you need to:
- Push forward button.
- Insert the wringer from the mixer behind it.
- Release the latch.
- Without removing the wringer, lift the button up until it stops. You should hear a faint click of the latch tooth coming out of the groove.
- While holding the button so as not to fall, remove the wringer.
- Continuing to hold the button, move it forward with an inclination so that the sliding tenon turns out of the groove.
- Do the same with the other button.
Shaped fasteners
The screws in irons from Western manufacturers are most often either ordinary with a Phillips or hexagon head. For the latter, there is no point in buying a special screwdriver with a set of bits for a one-time repair: a screw with a hexagonal slot can simply be unscrewed with a flat screwdriver with a thin blade of a suitable width. It can also be used to unscrew screws with a trefoil slot, which the Chinese are very fond of (on the right in the figure), but without strong pressure: this creates a significant lateral force and the screw in the thread can simply jam. If the screw is tight, it is torn off with a series of small jerks, moving the screwdriver to other pairs of slots.
Shaped screws
The most difficult thing will be to unscrew the screw with the TORXX slot (on the right in the figure): scissors or tweezers will only take it if the screw is loose in the thread. It is most convenient to unscrew TORXX screws without a special key using small duckbill pliers; You can also use side cutters, but then there will be dents on the slot bridge. They won’t do anything to the screw, but if an experienced master suddenly gets his hands on this iron, he’ll charge him for repairs for previous unskilled access.
Scale formation
If water comes out of the steam generator when used correctly, limescale may be the cause. You can eliminate it yourself; for this, use a special solution or clean the removable rod (if there is one).
The appearance of rusty water from holes in the sole is a consequence of scale formation. Solid deposits stick to the walls of the container and the inside of the sole, and the water takes on a rusty hue. When ironing, it can get on the fabric, ruining the item.
Self-cleaning function
The easiest way to fix the problem is to use the self-cleaning function.
- Fill the tank with clean water until about.
- Turn on the sole heating mode at full power. The steam function cannot be activated.
- Place the device over a sink or other container.
- Press the button to turn on the self-cleaning mode. Keep your finger on the button and shake the device vigorously over the container. If everything is done correctly, dirty water will flow out of the holes in the sole and steam will escape.
- Disconnect the device from the network and leave until it cools completely.
- Rinse the tank with clean water and drain off any remaining liquid.
The self-cleaning function is not available in all iron models, and it does not always bring the desired result. If rusty water flows, you should get rid of the scale.
There are several ways to deal with scale. A suitable method is selected taking into account the design of the device and the type of sole.
Application of citric acid
The use of citric acid is one of the most effective and affordable. Necessary:
- dilute a packet of powder in a glass of heated water;
- pour the solution into the iron reservoir;
- set the maximum heating temperature of the sole;
- after the indicator goes out, disconnect the device from the network and activate the steam mode.
The iron is held in a horizontal position and rocked from side to side so that the solution corrodes the plaque on the side walls. If after the procedure the water remains dirty, you should repeat the entire operation 1-2 more times.
Cleaning the anti-lime rod
The second method is to descale the rod. Modern models of irons have a special filter in the form of a rod, which is easy to remove. Periodically, you should take out this element and soak it in a solution of citric acid for about 2 hours. Then rinse under running water, removing softened plaque, and install back.
Steaming the iron
Another option for dealing with sediment is steaming the iron, but this technique is not used often because it is not suitable for all devices. If the sole is metal, you can:
place the iron in a large-diameter frying pan or on a baking sheet; fill the bottom of the container with hot water (it is important to ensure that the liquid level does not rise more than 15 mm above the sole); add vinegar - 200 ml per 1 liter of water; place the container on the stove, bring the liquid to a boil; Turn off the gas and leave to cool.
Afterwards, it is recommended to repeat all the steps 1-2 more times, and then rinse the sole and leave the device to dry.