A child car seat is designed to protect the child while he is in the vehicle. To prevent it from becoming a source of germs and dust mites, it must be cleaned regularly.
To do this, the device is completely disassembled. After washing, you need to assemble the car seat according to the user manual.
Otherwise, it will not be able to fulfill its main function - to ensure the safety of the little passenger who will be in it.
Let's take a closer look at how to assemble a child car seat after washing, what problems you may encounter and how to resolve them correctly.
Step by step guide
This device is an indispensable thing for parents who love to travel with small children.
The chair can be washed in a washing machine. The main thing is to observe the temperature regime and not use the sports mode, jeans and other aggressive types of washing.
Assembling a child car seat usually goes without problems if you have instructions. If it's not there, you'll have to work hard.
Not everyone can handle quick installation; some take a week to assemble it. If you don’t want this to happen to you, don’t throw away the instructions or put them in a visible place where your baby can get to them. Keep this manual with all other documents.
How to reassemble a child car seat after washing?
Assembling a child car seat using the example of tarti trt un:
- First you will need to put on the main cover. First, pull the top part tight and secure it. It is attached with Velcro on the back side.
- Then put on the second part and do not forget to put on the seat belts. Straighten the cover and make sure it fits well.
- Then you need to put the soft pad in place so that the slots for the belts are opposite each other.
- Next, pass the central locking belt through them and secure it with a metal bracket (buckle, this is the point where the belts meet). Be sure to check whether this part is securely fixed.
- The next step is to attach the top padding. Place it just above the bottom pad, opposite the shoulder strap slots.
- Thread the shoulder straps and don't forget about the special pads to soften friction.
- Pass the side five-point harnesses through the padded shoulder straps. They are threaded through the cover itself and the frame of the car seat. On the back side of the product, fasten them with a metal bracket, it can also be plastic, be careful not to break it.
- Check the tension of the belts so that they are not too tight or, conversely, weak. They must ensure the safety of the child and prevent him from falling out.
- Finally, connect the straps coming from the top of the back with the straps going through the front. The latter are also put on a metal retainer.
Now everyone knows how to assemble a car seat after washing. Then the product is attached to the machine. There shouldn't be any problems with this.
A similar assembly mechanism can be used for another washed car seat.
Only instead of Velcro, which hold the case in place and prevent it from twisting, there may be buttons or other mechanisms. The rest of the assembly is the same.
If even the detailed instructions did not help solve the problem, ask for help from friends who have disassembled and assembled this device for their child more than once.
Assembling the chair quickly and correctly is not a problem at all. Follow the procedure and everything will work out. And over time, it will not cause any trouble at all; you will assemble it in almost 5 minutes and without outside help.
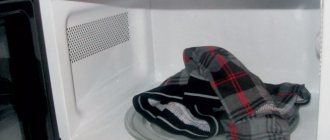
Children may only be transported in a car in a special car seat. During use, the chair becomes dirty and needs to be washed. Cleaning requires dismantling the structure, after which many drivers often encounter difficulties and wonder how they can reassemble the car seat after washing.
Useful tips for using child car seats
To ensure that you don’t have any additional problems while using your car seat, listen to these simple tips, they will help make your life much easier and save you from unnecessary expenses, and the seat will remain clean for a long time and make you and your baby happy.
- When installing, check that the fastening is secure . Here you must act strictly according to the instructions; you cannot change the order of actions in the diagram. You risk that the fixation will be weak or the chair will not be securely fastened at all. Check the tension of the internal belts; they should not press, but should not dangle or twist.
- Any stains must be wiped off immediately . If a stain suddenly appears on the cover or upholstery of a child's car seat, it is better to wipe it off as quickly as possible. You can take a regular sponge and soap solution. If you are on the road and don’t have any detergents on hand, you can simply use a damp cloth and thoroughly wipe the stain. Don't leave the stain just like that; once it dries, it will be very difficult to get rid of it.
- Be sure to clean your seat belts . It is recommended to do this regularly using a special cloth soaked in warm water. The cleaning agent should be gentle and the composition should not damage the belt fabric. Also, when installing the seat, make sure that the belts do not come into contact with sharp elements of the interior and do not rub against the elements of the body of the child seat itself. Also make sure that the belt does not get caught when closing the doors.
- There is no need to abuse chemicals and cleaning products . To clean the plastic elements of the child car seat, it is recommended to use a simple soap solution. You should not use aggressive chemicals; it can be harmful to the little passenger.
- Wash the cover only in cold water . As a rule, the manufacturer indicates the recommended temperature for washing upholstery. Usually it is 30 degrees, and this figure should not be exceeded. It is best to wash the cover by hand, so it will be less susceptible to mechanical wear. But you can also use a washing machine with a hand wash mode, setting the spin power to minimum. The detergent must be mild; the use of bleaches is strictly prohibited. It is necessary to dry only naturally.
Car mount
The seat can be secured with seat belts.
There are two commonly used methods of fixation, depending on the brand of car seat - using standard three-point belts and the Isofix system. Such methods are considered effective, safe and universal. Used in almost every model of chairs
It is worth paying attention that the belts and the holes for them should be located at the top point, namely above the child’s shoulders. This is the only way to travel in a car will be not only safe, but also comfortable.
Using standard belts
This mount is considered simple and convenient, but has its drawbacks. It is believed that such a system is not highly reliable, and during the installation of some categories of seats the belts are often not long enough. Before attaching the car seat with standard products, you need to check the presence of appropriate marks for the passage of belts (indicated in different colors depending on the purpose). If there are no mounted fasteners (internal five-point belts), you should make sure that the standard belts are of reliable quality.
Application of the Isofix system
This system is suitable for seats of any brand; it is the most reliable and safe. Special brackets make it possible to place the chair between the cushion and the backrest, on the front and rear passenger seats. Category 0 seats are easy to remove as the locks release gently. It is recommended to additionally use an anchor belt to protect the child from involuntary nodding, since with this system the upper part of the car seat will not be fixed.
Seat and top gun
The next step is to connect the seat and the rocking mechanism, which makes the chair soft and flexible for the position of the back. This device regulates how much the backrest will recline under the influence of weight and at the same time fixes the backrest to the seat. To understand how to assemble an office chair, let's look at the screws included in the package.
Typically, there are three types of screws of different lengths:
- 3 pcs. short;
- 2 pcs. average;
- 6 pcs. long.
Four holes for fastening are visible on the bottom of the seat, which means, logically, three short screws are not suitable for us. We remove two large screws for the armrests, the rest serve as fastening of the top gun to the seat. The depth of the holes is the same, but the design of the mechanism differs in the design of the front and rear fastenings.
Let's move on to the installation itself:
- Turn the seat over with the holes facing up and apply the top gun so that the holes match.
- Using the key that is included in each configuration, we tighten the long screws on the back side, where the back will be, and the middle bolts on the front side.
- It is recommended to tighten all four bolts one at a time, and then tighten them evenly in the same order.
Instructions for assembling a car seat
When disassembling the car seat, it is recommended to record or videotape the process of detaching each part, so that you can then reassemble it in the reverse order. If all the parts have already been washed and difficulty arises, you need to follow the following instructions:
- Take the seat cover and connect it to the straps on the sides and at the fastener locations.
- Pull the cover and make sure that all the parts are placed in their grooves, then fasten the latches.
- Place the cover over the back and slide it over the sides. After tightening, you need to fasten all the buttons.
- Thread the shoulder straps into the grooves located below and attach pads designed to soften friction.
- Bring the straps to the backrest and insert them into the slots, and then fasten them to the chair.
Step by step assembly
After washing, the thoroughly dried components of the cover and seat belts must be returned to their original places, strictly following the sequence of actions specified in the attached instructions. If there is no manual, you should use your own notes or photos taken during disassembly of the structure.
It is important to remember that replacing the cover with any similar product is strictly prohibited. The cover is an integral part of the car seat; for each model it is made in accordance with the features of the device.
Washing is carried out only using special detergents or using a solution prepared from water and laundry soap. Do not use chlorine bleaches or other chemicals.
All actions associated with assembling a car seat after washing are performed in a certain order:
- The cover intended for the base of the seat must be connected to the seat belts, aligned at all points where they should be fastened.
- Pull the prepared cover onto the base of the seat, check the accuracy of all buttons and other fasteners.
- Place the main cover on the back of the seat, carefully straighten it, spreading it along the sides of the structure. Fasten the existing buttons (most models of child car seats have 10 or more buttons).
- Insert the shoulder straps so that they fit exactly into the grooves of the lower latch on the back side of the backrest. Don't forget to wear special pads designed to soften friction.
- Thread the ends of the shoulder straps into the holes on the back of the car seat in accordance with the pre-selected height.
If all recommendations are followed accurately and in strict sequence, the child car seat will be quickly and correctly assembled after washing.
Most people have long ceased to perceive a car as a luxury item. It is actively used in various situations, when, for example, you need to get to work or bring groceries from the store. But over time, the car not only outside, but also inside becomes covered with dust and dirt. All this forces the car owner to regularly wash the seats. But after completing this hygiene procedure, a new problem arises - how to assemble the car seat after washing.
Expert advice
The child seat must be handled with extreme care so as not to destroy the well-thought-out design. But this does not mean that you need to put off the next wash for fear of damaging the device.
Everything will go smoothly and simply if you follow a few recommendations:
- in case of local contamination, you can clean the cover without removing it from the chair;
- the lining under the cape does not like water - it is better to clean it dry;
- You cannot put a “foreign” cover over the seat - only the original cover, which was sewn taking into account the design of the chair;
- It is more convenient to put the cover on the lower part of the chair if you place it horizontally;
- Do not put on under-dried covers - dampness will cause mold and an unpleasant odor to appear.
There is no need to be afraid of washing covers. Everything will be easy if you act consistently and according to the instructions.
The need to wash the product
Cleaning a child's car seat should be done regularly, because a dirty object inside the car not only looks sloppy, but also accumulates a huge number of pathogens. The fact that the car seat is intended for a child says a lot: crumbs and stains from spilled drinks and sand will be left on children's clothes. All this together constitutes an excellent breeding ground for bacteria that can act as carriers of dangerous diseases. This is why regular cleaning of car seats is necessary.
Error four. The baby bassinet is not installed at an angle of 45 degrees
Check: Most baby car seats have a built-in level that helps you position the seat at the right angle. However, parents often place the chair too upright. If your chair doesn't have a built-in level, take a square piece of paper and fold it in half to create a right triangle. Place the long side of the triangle - the hypotenuse - against the back of the chair. When installing the chair correctly, the top edge of the triangle should be parallel to the ground. Adjust the chair until the correct installation is achieved.
Danger: the child's airways are still very small, their diameter is no larger than a cocktail straw. If the backrest is too upright, the baby's heavy head may fall forward and block the airway so that he cannot breathe.
Remedy: Car seats are usually tilted slightly back to ensure adult occupant comfort. If it is possible to adjust them, place them in a horizontal position. If this is not possible, place under the back edge of the chair (where the child’s legs are) a “noodles” stick made of foamed polyurethane for swimming in the pool (you can buy it in sports stores) or simply tightly rolled towels.
Basic rules for installing a car cradle
- Installation for infants under 6 months is only permitted in front of the passenger seat;
- Mandatory disabling of the front passenger seat AIRBAG (side and front) when installing a car seat in front, next to the driver;
- The cradle must be attached strictly according to the instructions included with the kit;
- Be sure to check the angle of the crib, it should not be more than 45 degrees. Some manufacturers install a special indicator based on the type of building level, while others offer classic markings. This way you can determine whether the backrest is properly secured;
- Next, place the baby in the crib and secure it with straps;
- To prevent the belt from damaging your baby's delicate skin, use soft pads. Also provide a pad for your belt buckle or use a soft terry towel instead;
- Check that the straps are tight enough - the crumbs should not jump out, but at the same time they should not press on anything. Place two fingers under the straps - if they fit, the child will ride comfortably in this position even during a long journey.
Important! Before each trip, check the direction of the air conditioning vents - position them so that cold air does not enter the child.
The place in the car where the car seat should be placed and secured
The safest place in the car is the center passenger seat in the back. In the event of a frontal collision, the inertia will be restrained by the seat belt; in a side impact, the risk of injury from the door is eliminated.
A car seat with both the Isofix system and fastening with standard seat belts can be easily installed in the central passenger seat.
How to fit two or three child car seats in a car
Two child car seats in one car are installed on the rear outboard seats. Fasteners for all three locations using the Isofix system are provided by many brands of cars, so it is possible to place devices for transporting children in each of the three places.
Two car seats with Isofix system in one car
Conditions for transporting a child in the front passenger seat
- It is prohibited to transport children in the front passenger seat against the direction of the vehicle, i.e. in a car seat, if the car has an airbag installed.
- When installing a frame car seat, it is necessary to move the passenger seat as far back as possible.
- In the front seat, children under 12 years of age can be transported strictly in a frame car seat of a suitable size (from 01/01/2017);
- Other restraint devices (FEST, booster, frameless seat) in the front seat are prohibited for use at any age (from 01/01/2017).
Recommendations for selection
A child car seat is a mandatory attribute that must be used when traveling in a vehicle with a child. When choosing a car seat, you need to take into account such important points as the weight and age of the child. It should also provide the ability to adjust the level of the backrest tilt, because, as you know, it is not recommended to place a child car seat in an upright position in a car.
All car seats are divided into several groups depending on the weight of the child. Group chairs are designed for children whose weight does not exceed 10 kg. They are equipped with special additional protection, which is located in the head area. Group 1 child seats are designed for transporting a confidently seated child in a car whose weight is no more than 18 kg. Products that belong to group 2/3 are intended for transporting children weighing no more than 36 kg in a vehicle.
Tips for parents
One of the main criteria when choosing a child car seat is its safety and high quality.
In order to use the seat for a long time and not encounter problems, you should pay attention to designs from the following manufacturers:
- Siger. The Russian manufacturer produces comfortable child seats that comply with established standards and regulations. All designs are pre-crash tested and tested.
- Zlatek. To create the seats, non-toxic hypoallergenic material is used, which is absolutely safe for children. Injection molding technology reduces costs and reduces costs.
- Stiony. The anatomical shape of the seats with additional padding ensures safety by absorbing the force of impact that occurs during collisions.
- "Bebeton". This brand produces a wide variety of designs for children of different weights and ages. Modern technologies are used in production, which has a positive effect on the quality of products.
- "Mishutka." The most economical and affordable option is the Mishutka chairs, which are an order of magnitude lower than most alternatives. Despite their low cost, they meet safety regulations and undergo standard testing.
Peculiarities
The car seat is made of lightweight impact-resistant plastic. It allows the models not to overload the car and protect the baby from various problems during the trip (impacts and shaking on bad roads). The structure can be easily attached to the seat of a vehicle. The car seat is firmly secured with straps. In order for the model to provide the highest level of safety, it must be installed using special instructions.
The chair has a comfortable cover that can be easily washed both by hand and in the washing machine. There are many different color options for models, so parents can easily choose a car seat that matches the design of the car interior. “Mishutka” fits perfectly into any car. Parents can secure the backrest in four positions. The backrest helps the child form correct posture.
If the baby gets tired and wants to rest, you can arrange a comfortable sleeping place. The model has seat belts with soft pads that prevent the belts from causing discomfort to the child.
The chair is made of high-quality materials, so it can last a long time. The model has a convenient pocket in which you can put things you need during the trip or a bottle of water.
How to reassemble the car seat after cleaning?
After the car seat has been thoroughly cleaned and dried, it needs to be assembled and returned to its original place in the car. The algorithm for assembling the product is as follows:
The upper part of the cover is put on and securely secured with Velcro on the back side. The same is done with the other part, and you need to make sure that the cover is put on correctly and does not form wrinkles. The soft pad must be returned to its place so that the slots for the straps are opposite each other. The central locking belt is threaded through the slots and secured in this position.
It is important to check how secure this mount is. The upper padding is attached slightly higher than the lower one and should be located just between the slots for the shoulder straps. The shoulder straps are threaded through the corresponding slots, and pads are attached to them to reduce friction. The side straps pass through the pads of the shoulder straps, and they must also pass through the cover itself and the car seat. After this they are securely fastened to the back
The mounting bracket can be either metal or plastic, but in any case it must be handled with care. It is important to check the degree of tension of the belts - it should be sufficient to securely hold the child, but at the same time comfortable for him. The straps coming from the back of the backrest are connected to the straps coming from the front. There is also a special lock for this. The seat is assembled and can be returned to its place in the car.
Watch the video instructions for assembling the car seat:
Additional Security Measures
While the car is moving, the driver does not always have the opportunity to be regularly distracted by the child. A small passenger, left unattended, may well harm himself by unfastening the child seat belts. To avoid such situations, it is necessary to take some preventive measures:
The child in the car should be as busy as possible, so take with you toys, books, and the child’s favorite items to occupy his attention during the trip. Ensure that child seat belts are secured as securely as possible. They should be difficult to unfasten (so that the child does not master this task).. High-quality fixation systems, correct placement of the child seat in the cabin, competent organization of fastenings (in all ways available for the existing seat model) guarantee almost one hundred percent safety of your most important passenger.
High-quality fixation systems, correct placement of the child seat in the cabin, competent organization of fastenings (in all ways available for the existing seat model) guarantee almost one hundred percent safety of your most important passenger.
To fully guarantee safety and comfort, it is enough to add only the attention of elders. Manufacturers of modern reliable child car seats have already taken care of the rest.
https://pricep-vlg.ru/instruktsii/kak-ustanovit-detskoe-kreslo/https://childlands.ru/specustrojstva/avtokresla/kak-krepit-detskoe-kreslo-mashine-vidy-bezopasnyx-kreplenij-osobennosti. htmlhttps://jrepair.ru/interesnoe-na-jrepair-ru/kak-ustanovit-detskoe-avtokreslo
Since you are here...
...we have a small request. The Matrona portal is actively developing, our audience is growing, but we do not have enough funds for the editorial office. Many topics that we would like to raise and that are of interest to you, our readers, remain uncovered due to financial restrictions. Unlike many media outlets, we deliberately do not make a paid subscription, because we want our materials to be available to everyone.
But. Matrons are daily articles, columns and interviews, translations of the best English-language articles about family and upbringing, editors, hosting and servers. So you can understand why we are asking for your help.
For example, is 50 rubles a month a lot or a little? A cup of coffee? Not much for a family budget. For Matrons - a lot.
If everyone who reads Matrona supports us with 50 rubles a month, they will make a huge contribution to the development of the publication and the emergence of new relevant and interesting materials about the life of a woman in the modern world, family, raising children, creative self-realization and spiritual meanings.
Features and Benefits
Having a high-quality car seat makes transporting children much easier. Firstly, it is a guarantee of safety during fast driving, sudden braking, and even in the event of an accident. Secondly, it allows the child to have something to do on the road. For example, in addition to a car seat, you can purchase one that will be comfortable for your baby to play, read, and draw.
Replaceable covers extend the life of car seats and make them more practical and comfortable. The modern assortment offers parents a variety of options: spare and replacement products, organizer covers, covers for storing car seats, base covers that can be turned into a convenient baby carrier. Protective covers are most often purchased in order to keep the upholstery of a child seat clean.
Today, for almost every car seat model you can purchase a cover designed for it. There are also universal products suitable for any baby chairs. Conventionally, covers can be divided into two groups: those that are put on a child seat, and those that are inserted into it. For children from one to three years old, the first option is more suitable, but for older children you can purchase covers from the second group.
Such products are usually made of thin material, which makes them easier to care for during use. In addition, the cost of the products is quite reasonable, and their practicality completely pays for all costs.
Covers for children's car seats are made from special environmentally friendly materials. They do not emit an unpleasant “chemical” odor or toxic substances. Typically, high-quality moisture-wicking fabric is used. Also, products from well-known brands are usually made from ventilated materials that allow air and moisture to pass through. This allows the child to feel comfortable even on the hottest days.
All products of this type are quite easy to take off and put on. However, when choosing a cover, it is better to carefully study its compatibility with the car seat model. Even when purchasing a universal model, it will not be superfluous to clarify all the parameters of the product.
Some seats are equipped with headrests to make the child more comfortable in the car. The presence of such devices is especially important during long trips, when the child will have to spend several hours in a position that is not entirely comfortable for him.
Possible problems
After assembling the seat or during the process, various problems may arise. This is especially true for drivers who are washing a child car seat for the first time. To eliminate problems that have arisen and prevent their reoccurrence, it is worth studying possible errors.
The car seat is assembled incorrectly
Neglecting the rules of the instructions or accidentally making a mistake often leads to incorrect assembly of the structure. To fix the problem, you need to completely disassemble the car seat and reassemble it. For convenience, you can watch a video instruction that clearly shows the entire process. Using an incorrectly assembled infant carrier can result in injury and parts failure.
Inconvenient placement of belts
Seat belts on child seats must be positioned strictly at shoulder level. If the belts cause discomfort to the child or are too tight and do not stay in place, the likely cause of the problem is that they are not connected correctly. It is necessary to check whether the bases of the belts are secured in the grooves and, if necessary, re-fasten them.
Discomfort when sitting
Inconvenience when a child is in a car seat is often associated with improper assembly of the structure. If this problem did not arise before washing the seat, you will need to disassemble the infant carrier and reassemble it, following the instructions in the instructions.
Child kicks off seat belts
According to safety regulations, belts must be securely fastened in the fastened position. If your child can release the harness on their own, it is likely that the harness is not fastened properly and is too loose.
Deformation of covers
The reasons for the deformation of covers after washing are an incorrectly selected program on the washing machine or mechanical impact. A deformed cover creates discomfort for the child while in the chair and also increases the risk of injury. It is possible to restore the original condition of the covers by smoothing them.
If the deformed areas cannot be eliminated, you will need to purchase new covers. It is not recommended to use the infant carrier without covers, as this will cause dirt to get onto the inner upholstery.
The stains didn't come off well
Severely ingrained stains from the surface of a child car seat may not be removed on the first try. To remove stains, you can re-wash, use more powerful cleaning products, or have your car seat covers professionally dry cleaned.
Incorrect fastening of the chair
Incorrect fixation of the chair often leads to breakage of individual seat elements and increases the risk of traumatic situations. When securing the seat, you need to check each fastening and follow the instructions. After fixing the structure, you should make sure that it is securely and correctly positioned.
Actions before cleaning
Before assembling a child seat for a car after washing, you need to familiarize yourself with the design features and remove the cover without damaging individual small parts and fasteners.
During operation, a large amount of dust accumulates on the surface of soft parts and belts and other contaminants appear. This can cause an allergic reaction in the baby.
Removing the case and straps is quite simple, but returning all the components to their places is not always possible. Therefore, some parents refuse to wash and are content with only superficial wet cleaning. However, such treatment is not enough to eliminate severe contamination and maintain the health of the little user at the proper level.
Before washing, you should carefully study the instructions, which provide clear instructions and describe the procedure for:
- with disassembling the device;
- removing the cover;
- belts
Some manufacturers do not care about the presence of this description, and therefore parents should write down or take step-by-step photographs before the first wash to remember the sequence of attaching individual parts. It is important to return all components to their previous position in strict sequence, otherwise there will be no reliable fixation of the small passenger in the seat for transporting him.
Watch your belts
Particular attention must be paid to belts. It’s difficult to confuse them: the long ones are fixed on the back, the short ones go from the bottom
But it is better to check the fastenings again after installation.
If the belts are tightened too tightly, the child will feel uncomfortable in the seat. To correct the situation, it is necessary to loosen the blades using specially provided regulators. We remember that the straps should not only squeeze, but also dangle - the optimal distance between them and the baby is 2-3 cm. If the holders are too long, you can shorten them to a comfortable size.
The correct placement of the belts also plays a role. At the top, the straps should “come out” of the back at the level of the child’s shoulders. If the holes are located too low, under the shoulder blades, then you should think about buying a new chair. On some height-type models, the position of the holders can be adjusted.
Sometimes belts cause inconvenience due to knocked down or bent “pads”. In this case, you should remove the pads, straighten them, steam them and return them to their place.
Three car seats in the back seat without buying a new car
For families with three or more children, the problem of installing car seats is especially acute. Despite the visual width of the rear seat, in most cases, when trying to install three child seats at the same time, people are faced with cramped seats or the inability to get close to the seat belt buckles to secure the seats. What if you still need to install three car seats? We offer the following options to solve this problem without changing your car in favor of large family vans:
1. Installation of the third isofix bracket on the rear seat with the displacement of the standard brackets along the edges of the seat ISOFIX-MSK provides services for the individual development and installation of three sets of isofix brackets for the rear seat, allowing the installation of three child seats at the same time, with the removal of the standard fasteners. The company has successfully implemented such projects on Landrover Range Rover 2022, BMW X5, BMW X3. This work can be done on most vehicles, except for models where the rear seat design does not allow the standard shoulder belts to be moved to the edges of the seat. However, this limitation can be overcome by using the RiveMove track brace (see next paragraph). The cost of installing three isofix brackets averages 35-40 thousand rubles.
2. Use of RiveMove guides, which expands the space in the center of the rear seat for a third car seat. The details of this solution are described in this article, above paragraph 3 of the section “Two car seats and one person in the back seat", We repeat that due to its design, the RiveMove guide bracket allows the car seat to move sideways by up to 20 cm, significantly expanding the space in the center of the rear sofa between child seats. The price of a set of two bracket strips is 51,000 rubles. The central car seat mounting must be equipped with a seat belt (seat group 2/3)
Example of placing three car seats in the back seat using RiveMove rail brackets
Error eight. Using car seats that have been discontinued or have been in an accident
Check your chair: A large number of models have been discontinued in recent years, but many remain in use. Check the brand, serial number and date of manufacture (all of which are indicated on the seat) with the list of discontinued car seat models.
Danger: A car seat may be removed from sale for a variety of reasons, including faulty latches or flammable upholstery fabric. And while some recall reasons do not pose a serious threat, others can be deadly. A faulty fastener can lead to disaster.
Remedy: If you find that your car seat has been discontinued, contact the manufacturer for further instructions. Do not buy second-hand car seats - it is quite possible that you will buy a seat that has been taken off the market or has been in an accident.
Choosing a safe installation location
If parents believe that buying an expensive and high-quality chair is the key to the safety of their child, this is wrong. Step No. 2 - correct installation of the product in the car. Now let's look at all the options and decide how to properly attach a child seat. The author of the video from the BA channel will share information on how to attach it.
Driving with your back in the direction of the car is a convenient option. If your baby is rear-facing, his injuries in a collision are reduced by a factor of five. Installing a product for the safe movement of your baby in the back seat on the right is an excellent choice. How to install a child seat, we learn from the video from Andrey Tarti.
When installing a seat on the rear left, you need to be prepared for the fact that when disembarking, the parent and child will find themselves on the roadway. Here the opinions of experts are also divided. Some believe that it is best to install the seat behind the driver, because the person sitting behind the wheel will, by inertia, jerk to the left, protecting himself from impact. Others say that due to its proximity to traffic, it is not such a safe place.
Installing the product in the middle of the rear seat is the best option, if you listen to specialists and pediatricians. Children who sit in the rear middle seat are significantly less likely to be injured.
The reason is that the space in the middle is not squeezed by either the front seats or the side doors. And injuries inflicted from the side take second place after frontal impacts. Below we will look at ways to secure child seats in a car.
Error three. The child is placed facing the direction of travel of the car too early
Check: The child must remain in a rear-facing position in the vehicle until he is one year old or until his height and weight exceed the maximum allowed by the child car seat manufacturer. Many parents make the mistake of considering only age or only height and weight, when it is necessary that both conditions be met. In other words, if your baby weighs 20 pounds on their first birthday, they should continue to ride rearward until their height and weight reach the maximum allowed for the car seat.
Danger: The spine of a small child is not yet sufficiently developed. In the event of an accident, when the child's back is in the direction of travel, the impact energy will be absorbed by the entire back - the strongest part of the child at this age. In the forward-facing position, the child's still disproportionately heavy head will tilt forward and downward and can injure the weak bones of the spine and spinal cord.
Remedy: Drive your child backwards in the direction of travel of the car until he reaches one year of age or exceeds the maximum permissible height and weight for the car seat.
What other benefits do these accessories have?
Car enthusiasts often wonder how to properly install eco-leather covers so that they do not lose their original appearance?
- So, you shouldn’t worry about this issue, since this material has an amazing ability to instantly recover from deformation; when you wrinkle it while pulling it onto the seats, it will quickly smooth out;
- the texture of eco-leather is very dense and does not absorb moisture;
- the material is not afraid of temperature changes: at low temperatures, cracks do not appear, during heat there is no greenhouse effect;
- a wide range of colors, which will allow the covers to fit harmoniously into the interior of your car; the material is pleasant to the touch.
Installation Features
When completing the final fastening of eco-leather seat covers, Velcro, cords and elastic bands are most often used. To understand how to install eco-leather covers, you should consider the following points:
- During the process of installing the cover, you can hide the fastening system of rubber bands and hooks under the plastic parts that are located on the sides of the seats; For this, an ordinary plastic ruler or some other smooth, thin instrument of the same type is quite suitable;
- Be careful: you need to attach the covers exactly to the points that are provided for this; when you put the cover on the chair, use effort to tighten it better; the main thing is to use moderate force so as not to damage the case;
- while stretching the cover over the back, do not be afraid to squeeze the sides of the chair; be sure to tuck all the elements of the covers under the plastic parts;
- When you look for the answer to the question of how to install eco-leather covers, you will come across training resources and videos that explain that this procedure can be carried out without removing the chairs themselves. The following arguments completely refute such arguments:
- Before you begin installation, you will need to remove the plastic side trims, but this cannot be done inside the cabin.
- The process of “putting on” an eco-leather cover is quite labor-intensive, and during it you will have to constantly turn the chair. If it is in the car at this moment, you simply will not have enough space and it will be extremely uncomfortable to carry out this process.
Instructions for installing eco-leather covers
The procedure should begin from the front row of seats. First you need to dismantle them, remove the headrests from them; First of all, you need to install the cover on the seat cushion. Carefully straighten the cover, secure it under the seat front and back with rubber bands and hooks, and only then turn the chair on its side to secure the elastic bands on the sides
It is extremely important to tighten the cover well, because this will determine whether it will slip or not. If the cover is loosely stretched, folds will be created; After installing the covers, return the plastic side parts of the seat and install the seat in the car.
The algorithm for installing eco-leather covers on the front of the seats and on the back is identical
You just have to take into account that it will be much more convenient for you if you start this procedure from the first row. Before installing the covers, be sure to also read the installation instructions that come with them. Different manufacturers have their own nuances in installing their products, and becoming familiar with the individual installation features will help you avoid incorrect installation of covers.
Inspect fasteners and covers
Difficulties in tightening covers also arise when the cover becomes deformed after cleaning. Failure to follow the rules for caring for the product leads to loss of shape. As a rule, the reason for changes in size is heating the water above 40 degrees, turning on a machine spin, or drying on a heater. In any case, it is necessary to correct the situation by re-washing.
It is not necessary to run the cape through the machine, nor is it necessary to add detergents. It is enough to fill the basin with water, wet the cover and let the water drain freely. Afterwards, without squeezing, the product is placed on a flat, dry surface and left until completely dry.
We pay special attention to the correct installation of the chair itself. It must be fixed according to the instructions to ensure the safety of the young passenger
If a fastening has moved somewhere or stability has been lost, the structure needs repair.
The machine belt must run strictly along the guides. Each model has its own fasteners, but more often the strap passes over the child’s shoulder to his hip, without moving towards the neck. At the “finish”, the holder clings to the latch and is buckled into the groove. Slight rocking of the chair in both directions is allowed. The maximum deviation is 2 cm. If the seat moves more, then tighten the standard belts.
Proper washing and drying
Washing a car seat requires a lot of time and effort. It is important to understand what fabric the chair is made of and what kind of dirt is on it in order to choose the appropriate and safe detergent to care for it. A few tips will help you cope with this task in the absence of instructions:
- If possible, carefully loosen the seat cover. This makes cleaning metal and plastic frame surfaces much easier.
- It is important to read the manufacturer's care labels. This can be: by hand, machine, dry cleaning or dry cleaning.
- Machine wash recommended on delicate cycle (delicate or hand wash).
- If washing is prohibited, it is better to limit yourself to a vacuum cleaner with special accessories and a clothes brush.
- The chemicals you need to choose are special baby soap or talc. If possible, use special cleansing gels that do not leave streaks.
- If the coating is not removed, wipe the surface with a cloth or sponge soaked in a prepared soap solution, then thoroughly rinse off any remaining detergent with clean water. Finally, the chair is dried with a dry towel to remove excess moisture, then allowed to dry until completely dry.
- If possible, it is better to immediately remove fresh stains caused by wet wipes or soapy water. Old dirt can be difficult to remove.
- Don't forget about the seat belts in the car that hold the back of the chair. They can be washed with clean warm water without using aggressive detergents.
- The plastic and metal parts of the car seat are washed with a mild soap solution.
How to disassemble a car seat to make it easier to reassemble later?
You need to remove the cover from the child car seat carefully and slowly, without sudden movements. Before removal, you need to carefully look at how the key elements of the product are connected to each other. The seat belts must be removed from bottom to top. After this, you can start removing the covers.
The seat belts are disconnected first. To perform the process correctly, you need to press a special button at the junction of the belts. There is no need to pull them by force or tear them out of the cell without pressing a button - this can damage the structure. After removing the belts, you need to detach the upholstery and liner.
If you quickly and inattentively disassemble the chair, you may encounter the complexity of its subsequent assembly. Often parents forget in what order they disconnected all the elements, and there are no step-by-step instructions from the manufacturer. In this regard, it is recommended that when disassembling elements, record the order on a piece of paper. Just write down the name of the element, numbering the order.
Required Tools
What you will need:
- washers;
- 8 pieces of screws;
- 2 springs;
- 2 plugs;
- nuts;
- screwdriver;
- screwdriver
Step-by-step instructions on how to assemble a chair-bed
Follow the following sequence:
- It is advisable to first keep the parts in a warm room for at least two hours.
- Make room and prepare the necessary items.
- Place the packaging materials on the floor and unpack the products.
- Install the brackets on the sides and secure with screws and washers.
- Fix the supports and attach the nuts. Do the same with checkboxes.
- After which you can begin installing the drawer. For this you will need fastenings.
- The spring and plug should also be secured.
- Secure the sides to the mechanism with screws.
- Attach the backrest and make sure the structure is secure.
Why doesn't it work?
Not everything always goes according to plan: often it is not possible to assemble a chair. The main reason for this outcome is a violation of the order of actions. There is a high probability that confusion occurred at the disassembly stage. Most likely, the person did not follow the given sequence.
You can avoid mistakes if you record all your actions on video or photos. Then it’s easier to stick to the scheme and not forget about the Nth elements.
To avoid confusion, you must strictly adhere to the instructions. Ideally, focus on “your” leadership; in extreme cases, on “someone else’s.” There is no significant difference between the algorithms; the main thing is to be able to adapt to the existing differences, using logic and intelligence.
If you can’t assemble the chair, you should ask for help. First of all, we go to more experienced friends who have already dealt with child seats. They can also provide advice at the store where the device was purchased. There is also an option with the support service on the official website - we find the manufacturer and fill out the application form.
We do everything right when installing car seat covers
The choice has been made, the appropriate option has been purchased. Now is the time to start installing car seat covers. And in this matter the main thing is not to rush. First, remove all cases from the packaging and make sure that everything included in the package is what the manufacturer stated. Next, lay out the covers as they will be located in the interior of your car. After all, it is only at first glance that they are all the same, but very often the covers put on the left and right seats differ from each other. Naturally, you will be able to put them on the seat in any case, but it is possible that the result will not please you at all.
Diagram of how to install car covers
Pay special attention to the part of the covers that fits over the headrests. In most cars, the front headrests are slightly larger than the rear ones, so it makes sense to first compare car covers and divide them into two groups - for the front and rear seats. After this, the headrest covers can be put on in just a couple of minutes
Just make sure that the front side of the case is exactly where it should be
After this, the headrest covers can be put on in just a couple of minutes. Just make sure that the front side of the case is exactly where it should be.
Now it's time to actually install car seat covers on the car seat. The easiest place to start is with the front seats, which by this time have already lost their headrests. First, you should carefully place the cover on the back of the seat, and then carefully secure it using all the hooks and elastic bands that come with the cover. There is no need to rush in this case, since the correct fit of the cover will depend only on how successfully you managed to fix it. And it is possible that at this stage you may need outside help. After all, if you first slightly compress the side support rollers on the back of the seat, the cover will be put on much faster.
Video: How to install car covers
We do the same with the seat cushion. And since it bears the main load, we fix the cover with hooks under the seat even more carefully. But you shouldn’t overdo it with the tension of the holding rubber bands either. An elastic band that bursts at the most inopportune moment or a hook that becomes bent is not a fatal event, but it is not the most pleasant either. After this, all that remains is to tuck the edges of the cover under the decorative plastic panels and return the headrests to their place. And here you often have to use simple improvised tools. The same ruler, for example, is ideal for neatly hiding elastic bands on headrests.
Naturally, although this scheme works in most cases, it is still not universal. Whatever one may say, the variety of car covers suggests several options for their installation. Covers with a zipper, for example, are put on in approximately the same way, but you should definitely take into account that the zipper should be located exclusively on the back side of the seats, and not in any way contact the back of the driver and passengers.
Some models of car seat covers, most often relatively expensive, still require dismantling the seats for installation. And in this case, it is worth considering that installing car seat covers will no longer take the traditional 20-30 minutes, but only 2-3 hours. In addition, in this case, even before dismantling the seat, you will have to disconnect the terminals from the battery, which will avoid possible errors in the side airbag control system. In a word, it is better not to neglect the instructions and common sense when installing covers.
Video: How to properly put on car seat covers. Instructions.
We follow the same algorithm with the rear seats. Some models of covers can be installed without removing the seats, but if this is unavoidable, you will have to tinker a little. Fortunately, this process does not require any specific knowledge. Yes, and the rear seat covers are fixed in exactly the same way - with special hooks that are attached under the seat cushion, with rubber bands or Velcro.
This completes the installation of car covers. And again, the interior of your car pleases with its pristine cleanliness. Moreover, this amazing transformation was not too expensive and did not take much time. And the result... It's impressive.
(1 ratings, average: 5.00 out of 5)
Of course, the cover will fit best if you remove the seats... It’s a pain, of course, but in my opinion the result is worth it, the last time I put Akubov’s on just like that, the floor of the cabin was bombed at first, but then what a thrill - everything is perfect.
Possible problems and their solutions
Often mistakes and problems happen after the first cleaning of the car seat. If any difficulty arises, you need to know how to resolve it. Let's look at the most common situations.
Incorrect assembly of the car seat
To understand what exactly was done incorrectly and how it can be corrected, you need to carefully read each point of the instructions again and check all the actions performed. It’s even better if you have the opportunity to watch video instructions - sometimes it’s enough to see how to do it once to understand your mistake. Under no circumstances should you use an incorrectly assembled seat - this can lead to child injury, even when driving quietly in a car.
The straps are located inconveniently
It is clear that the seat belts are located at the level of the baby’s shoulders. The inconvenience may consist in their tension being too strong or, conversely, they do not stay in place. Most likely they are not connected correctly. It is necessary to check all connections again and adjust the degree of tension of the belts for the child.
The child is uncomfortable sitting in the chair
This defect may also be due to improper assembly, especially if the child did not complain before cleaning. In this case, you also need to disassemble the chair and reassemble it, following the instructions exactly.
Child takes off seat belts
According to established rules, the locking device must be such that the child cannot open it independently. If it does this, it means the straps are not fastened correctly or are too loose.
The covers are deformed
If this happens, it means that the product was washed using the wrong program. If the deformation is very severe and hard folds form, you will most likely have to purchase a new cover - the child will not be able to sit comfortably on the crumpled material. You can, of course, try to use the chair without covers, but then all the dirt will quickly penetrate inside and it will not be so easy to wash them off.
Reassembling the car seat after washing is not difficult if you do it carefully and slowly, following all the steps and securing all the elements correctly.
The article was published in the Household section
Most parents often face the problem of how to reassemble a car seat after washing in order to do it correctly. The instructions will help you deal with this easily and without extra effort, but not everyone keeps pieces of paper that seem unnecessary at first glance, and often they are simply thrown away. During active use, you will have to wash the chair quite often, so that assembly proceeds quickly and at the same time all the parts are assembled reliably, it is worth remembering simple recommendations.
Do you need a car seat cover?
Removable upholstery greatly simplifies car seat care, because removing and washing the cover is much easier and faster than cleaning the entire car seat with soapy foam and waiting for it to dry. So this factor should be taken into account already at the stage of choosing a model and clarify the possibility of removing textiles from consultants or in the instructions.
Most famous brands have long taken care of the ease of use of their models. For example, even the most budget Britax Romer car seats have a removable cover. And some manufacturers focus on fabrics that have dirt-repellent properties. But, in addition to this, you always have the opportunity to buy a protective cover; fortunately, their selection is quite wide and allows you to choose the right one for your car seat model.
The cover is especially relevant for car seats of group 1-2-3, which are used for a very long time, due to which their textiles can be worn out and washed. The protective cover can be replaced with a new one, but you will have to put up with the “original” upholstery of the car seat until the child grows up. If the car seat is used constantly, you can purchase several covers so that one of them is always washed when replaced.
In addition to protective covers, there are also summer ones, which are made from natural fabrics that absorb moisture. They are especially useful in hot weather, since the upholstery of the car seat is most likely made of synthetics, and it is very hot on the skin. There are also universal covers for any season, their materials adapt to the child’s body temperature, prevent sweating, reduce overheating and at the same time protect against hypothermia. Some covers not only fulfill their practical functions, but also allow you to change the design of the car seat, offering several colors to choose from.
How to secure a child seat in a car with a standard seat belt
Each certified car seat is supplied with detailed instructions in Russian, which must be protected and stored with documents at home or in the glove compartment of the car. The rules of care and fastening are required to be read upon purchase; this is not the case when the instruction manual should be opened after a breakdown. The installation method is duplicated on the device itself.
Car seats for newborns and infants
The principle of fastening the car seat with standard belts is the same for most manufacturers - side fastenings and fastenings on the back, although minor external changes are possible.
When installing a car carrier, you need to carefully monitor the correct position of the standard seat belt
Video instructions for installing a baby carrier - video
Installation of the base for the cradle
A device with a base gives an advantage to those who are constantly on the go with a child. It is attached to Isofix or standard belts, and the car seat/car seat can be removed with one click.
As in the case of a car seat, the base of different manufacturers is attached with a seat belt in approximately the same way:
- one end passes through special grooves in the device;
- the second is on the back of the cradle.
How to install the database - video
Chairs without base (category 9–36 kg)
With this group of chairs everything is somewhat more complicated. There are a lot of types of devices and installations, so you need to carefully study the instructions supplied with the device.
Universal car seats: installation instructions - video
Frameless car seats: step-by-step instructions
The frameless car seat is attached to the back seat of the car with two belts that the device is equipped with.
Installing a frameless car seat is easy for all parents
Types of anchorages on child car seats
Children's car seats differ from each other in many ways, including fastening methods. This point should be taken into account when choosing such a device.
Universal mounts
A universal child car seat in a car of almost any model is secured using standard seat belts. Most seat models are equipped with their own set of belts, but they are intended for small children. In models that are designed for older users, as well as in boosters, such elements are absent. When choosing a universal seat, it is necessary to check the length of the seat belts so that it is convenient to install it and fasten the child.
Such universal chairs are extremely convenient if a family uses several cars or owns a vehicle from a Russian manufacturer. For example, the vast majority of Lada models do not have any fastening devices. Moreover, there are even cars in which there are no seat belts in the back seat. Although there are seats for such purposes, there is no choice where to install the child car seat.
If you are the owner of just such a car, then installing a child seat yourself is prohibited, since such actions are regarded as serious interference. For this service, you must contact a car service center. In addition, it is prohibited to change the length of the belts by adding additional belts. In the event of an accident, even the strongest seams can come apart from the heavy load and weight that will put pressure on them.
We recommend: How to measure the pressure in the fuel rail?
The use of universal seats is also justified if taxis are used frequently. It is rare to find vehicles that are suitably adapted for transporting small passengers.
Now let’s take a closer look at how to properly fasten a child car seat using seat belts:
- we increase the length of the belt to about a meter by pulling it out to facilitate further steps;
- install the seat in the appropriate place in the car;
- tighten the belt to the maximum possible limit;
- we check the stability of the structure, which should not move freely;
- periodically you will need to tighten the standard tape, which often slides out when the car is moving;
- the restraint device can be additionally equipped with a special clip, which is intended for a seat belt;
- Pay attention to the side of the chair, if you have a certified product in your hands, you will see color guides and schematic tips that make all processes easier.
IsoFix fastenings
In 1987, as a result of joint work between the manufacturer of car seats for children Romer and the Volkswagen concern, a new type of fastening was proposed, which differed from its predecessors in its simplicity and higher reliability. Over time, this type of fastening was recognized as a standard by almost all modern automobile manufacturers. Europe even passed a law obliging all automakers to equip their models with a similar mount.
The IsoFix design includes two steel hinges, which are shaped like the letter P. They are located at a distance of 28 cm from each other. These elements are attached to the load-bearing frame of the vehicle under the back of the rear seat. Hinges and fixing elements have a set of parameters and characteristics that are strictly regulated by European legislation.
Now let's figure out how to install a child seat using this type of fastening. Here you need to follow this principle:
- we determine the location of the brackets that are located on the fasteners;
- we move the two lower brackets towards them along the guides (they are located in the rear of the car seat);
- Using special “tongues” we grab the staples.
If everything was done correctly, you will hear a click, which will indicate that the staple has been captured. To unfasten the seat, you will need to unlock the locks, after which you can move the seat away.
Many modern cars are equipped with additional brackets, due to which the seat is secured not at two, but at three points. For this third point, in most cases an “anchor” belt is used. Its design resembles an arc that has a hook at the top of the chair. This arc has a regulation system that changes its length. The hook attaches to a bracket that can be located behind the back of a car seat, in the trunk on the floor, or on the ceiling. Due to the presence of such an additional belt, the load that falls on the main fastening is reduced, and the force of the whiplash that occurs during sudden braking is also reduced.
A special floor-thrust mechanism, which is intended for seats located opposite the direction of movement of the car, has approximately the same function. The efficiency of such a mechanism is not as high as in an anchor belt, and the design is larger, but you can do without additional brackets.
No matter how reliable the fastening we are considering is, if the child weighs more than 15 kg, it is necessary to additionally fasten them with car seat belts. Seats in which IsoFix type anchorages are installed can be used without seat belts only if they belong to groups 0 to 1. If the child belongs to group 2 or 3, IsoFix anchorages are used as additional restraints. the chair is in place and well secured. In this case, the child must be fastened with a standard car seat belt. Some car seat models combine IsoFix technology with universal fasteners.
Stages of work
- Removing a child car seat The first thing to do is remove the seat from the car. Of course, you can clean a car seat inside the car, but this is very inconvenient compared to cleaning a car seat on the street or in a spacious box.
- Dry cleaning the fabric Vacuum the seat thoroughly, paying particular attention to the folds of the fabric and seams - these are where the most dust and crumbs tend to accumulate. For convenience, you can use different attachments - turbo brush, brush brush, mattress and pillow attachment, crevice brush, etc.
- Wet cloth cleaning Dilute a small amount of liquid soap or powder in warm water and then apply the solution to the car seat using a microfiber cloth. Rub the solution into the fabric in a circular motion, then leave the seat for 15-20 minutes. Once the time is up, wash off the soap/powder with a cloth soaked in plain water.
Car compatibility
Approximate list of compatibility of covers size S*
| Audi | A1, A2 |
| BMW | Episode 1 (04 – 07) |
| Chery | |
| Chevrolet | Lanos, Lacetti, Aveo, Spark |
| Citroen | C2, C3 |
| Daewoo | Tico, Matiz |
| Fiat | Panda, Punto, Albea, 500 |
| Ford | Ka, Fiesta, Fusion |
| Honda | Jazz, Civic |
| Hyundai | i20, i30, Atos, Getz, Accent |
| Kia | Rio, Picanto |
| Mazda | 2, 3 |
| Mitsubishi | Colt |
| Nissan | Note, Micra |
| Opel | Tigra, Corsa, Astra |
| Peugeot | 1007, 107, 206, 207, 306, 307, 308 |
| Renault | Logan, Symbol, Twingo, Clio |
| Seat | Ibiza, Leon |
| Skoda | Fabia, Roomster |
| Suzuki | Swift, Ignis, SX4, Jimny |
| Toyota | Aygo, Yaris, Vitz, Corolla, Echo |
| Volvo | C30 |
| VolksWagen | Lupo, Polo, Golf |
| VAZ | 1111, 2104-2109, 21099, 2110-2121, Granta, Kalina, Largus, Priora |
| UAZ | 3151 Hunter |
*The list is provided for informational purposes only and is not complete.
Sample list of vehicles with M-size seats*
| Audi | 80, 90, 100, 200, A2, A3, A4, A6, TT |
| BMW | Series 1 (since 2010), Series 3, Series 5, Series 7, X5, Mini One, Mini Cooper, X3, X6, M6 |
| Chery | Amulet, Tiggo |
| Chevrolet | Astro, Blazer, Captiva, Tracker, Aveo, Lacetti, Lanos, Niva, Cruze, Cobalt, Epica |
| Chrysler | Town&County, Voyager |
| Citroen | AX, BX, ZX, Berlingo, Jumper, Saxo Visa LN, Xantia, C2, C3, C4, C5, C8, XM |
| Daewoo | Espero, Laganza, Magnus, Nubira, Gentra |
| Daihatsu | Charmant, Sirion, Move, Rocky, Feroza |
| Dodge | Caravan, Caliber |
| Fiat | Brava, Bravo, Idea, Marea, Weekend, Panda, Punto, Stilo, Doblo |
| Ford | Escort, Ka, Maverick, Ranger, Focus, Focus II, Focus C-Max, Fusion, Escape, Galaxy |
| Great Wall | Safe, Deer |
| Honda | Concerto, CR-V, HR-V, FR-V, Logo, Accord, Civic, Jazz |
| Hyundai | Lantra, Matrix, Sonata, Santa Fe, Tuscon, Tiburon, Grandeur, Elantra, Solaris |
| Kia | Ceed, Cerato, Clarus, Magentic, Shuma, Rio, Spectra, Sorento, Sportage |
| Mazda | 626, 121, 2, 3, 6, 323 S, RX-7, RX-8, MX-5, CX-5, CX-7, CX-9, Familia, MPV |
| Mercedes | 100, 190, A-Class, C-Class, E-Class, S-Class, R-Class, CLK, SLK, GL, ML |
| Mitsubishi | Galant, Carisma, Colt, Lancer, Outlander, Delica, Diamante, Dingo, Dion, Eclipse, Pajero, Mirage |
| Nissan | Maxima, Primera, Avenir, Murano, Note, Cedric, Liberty, Cefiro, Pathfinder, Skyline, X-Trail, Terrano, Patrol |
| Opel | Calibra, Kadett, Manta, Tigra, Agila, Astra, Combo, Meriva, Signum, Vectra, Zafira |
| Peugeot | 106, 204, 205, 306, 307, 309, Partner, 406, 407 |
| Renault | Clio, Laguna, Megane, Scenicll, Twingo, Scenic, Modus, Safrane, Sandero, Logan, Duster |
| Rover | 200, 214, 400, Mini, 45, 75, ZT, ZS |
| Seat | Alhambra, Altea, Arosa, Cordoba, Ibiza, Leon, Toledo |
| Skoda | Favorit, Felicia, Forman, Fabia, Oktavia, Superb |
| SsangYong | Musso |
| Subaru | Impreza, Legacy, Leone, Forester, Outback, Tribeca |
| Suzuki | SJ 410, SJ 412, Alto, Baleno, Swift, Grand Vitara, Ignis, Wagon R, Jimny |
| Toyota | Camry, Carina, Lavd Cruiser, Lite Ace, RAV 4, 4 Runner, Starlet, Tercel, Avensis, Corolla, Prius |
| Volvo | C30, S40, S60, S70, S80, V40, V40-Cross Country, V50, V60, V70, XC60, XC70, XC90 |
| VW | Golf, Golf II, Jetta, Scirocco, Bora, Polo, Passat |
| TaGAZ | Tingo ('12- ) |
| GAS | 3102, 3110, Siber |
| UAZ | 3160, 3162, 3163, Patriot, Pickup |
*The list is provided for informational purposes only and is not complete.
Go to the catalog of universal car seat covers.
PREPARING TO USE A GROUP II CAR SEAT
О Remove the car seat from the internal seat belts, the belt buckle and the adjustment strap.
Removing car seat parts
Attention! Do not remove any parts from the car seat structure except when it is used for a child of group II (weighing from 1 to 25 kg).
Removing seat belts
Set the backrest to level 1 and unhook the straps from the connecting bracket at the rear of the car seat. Pull the straps forward from the holes in the back of the car seat. Using a screwdriver or other tool, remove the metal plates that secure the straps under the car seat base. Detach the metal plates from the seat belts. Pull the straps upward from the holes in the car seat base.
Removing a belt with buckle
Set the backrest to level 4. Using a screwdriver or other tool, remove the metal plate that secures the belt and buckle under the base of the car seat. Place this plate in a vertical position and push it into the belt hole at the top of the base. Pull the belt buckle up and release the car seat from it.
Removing the Adjustment Strap
Open the flap of the car seat cover and unscrew the bolt that presses the seat belt adjustment pedal. Release the seat from the adjustment strap. To prevent the bolt from getting lost, it is recommended to screw it back in.
Installing a Belt Buckle
Set the backrest to level 4. Set the metal plate, which is located at the end of the belt with the buckle, to a vertical position and push it into the base of the car seat from above.
Using a screwdriver or other tool, secure the metal plate under the car seat base.
Attention! Make sure the metal plate is installed correctly as shown in the picture below. Otherwise, it may cause injury in an accident.
Installing the Adjustment Strap
Fold the cover flap on the seat and stretch the strap with the connecting bracket at the end from top to bottom, then install the belt tension adjustment pedal in the base. Secure the belt tension adjustment pedal with a bolt.
Attention! Make sure that the adjustment strap is pulled through the hole in the seat and towards the back of the seat correctly. Otherwise, it may cause danger to the child.
Installing seat belts
Place the backrest in the level 1 position and pass each strap through the corresponding hole in the base of the car seat. Pull the end of the belt from the bottom of the car seat and insert the metal plate into the loop that is located at the end of the belt. Using a screwdriver or other tool, secure the metal plates under the car seat base. Pass the seat belts through the pads and thread the belts through a couple of holes in the back of the car seat. Then connect the free ends of the belts to the connecting bracket
Attention! Make sure the belt pads are installed in the correct direction
Removing car seat belts (transformation to group 2-3)
39 Remove the car seat harness by unfastening the buckle.
40 Turn the back of the car seat towards you and remove the straps from the metal connecting plate as shown in the illustration.
41 Remove the crotch strap by pushing the crotch strap lock up through the slot at the bottom of the seat.
42 Grasp the crotch strap buckle and pull it out completely.
43 Pull the adjustment strap at the front of the seat to lock the metal link plate in place. Grasp the shoulder straps and pull them out of the slots in the seat pad.
44 Remove the liner and crotch pad. Pull the shoulder pad straps through the seat back.
45 On the back of the seat, remove the 2 elastic loops of the bottom seat pad from the hooks as shown in the illustration.
46 Also remove the elastic loops that go through the vehicle's seat belt guides on the sides of the seat, as shown in the illustration.
47 Repeat this operation on the other side of the car seat. Pull the seat pad to the side to reveal the red buttons in the seat area as shown in the illustration. Slide the buttons to release the backrest from the base of the car seat and lower it to the reclined position. Support the backrest so that it does not fall back or hit any objects.
48 Remove the armrest covers as shown in the illustration. Store the insert, shoulder straps, crotch pad and car seat straps in a safe place for future use.
49 Move the seat lining fabric aside, then lift the backrest until both brackets lock into the grooves. You should hear a click when the brackets lock. check that the grooves are not blocked by any objects or parts.
50 Tuck the seat pad into the gap between the back and seat of the car seat until the 2 elastic loops on the back of the seat are exposed. Attach the 2 elastic loops of the seat pad to the hooks at the back of the child car seat as shown in the illustration.
51 Pull the elastic strap on the seat pad through the vehicle seat belt guide on the side of the seat and secure the loop to the hook as shown in the illustration.
52 Repeat this operation on the other side of the car seat. To install the car seat harness, follow the above procedure in reverse order. See pages 22-25.
What alternatives to constant washing are there?
Car seat manufacturers are constantly improving the covers of their models. It is made hardened, resistant to dirt and dust
If you don’t want to constantly wash the product, then you need to pay attention to the newest materials that are on sale. For example, you can often see car seats upholstered with a material called Crypton Super Fabrics - this is a Canadian fabric that is protected from dirt and moisture
Some car seats also have protective covers that help protect the child seat from dirt and dust. These covers are very easy to remove. Putting them on is also not difficult. Covers are often made from natural materials, which helps reduce the child's sweating during the hot season. This helps you travel comfortably with your baby.
It's not uncommon for car seats to get dirty when they are moved from home to car and back. You can deal with this by purchasing a special bag for transporting the product. Large bags will also work. If desired, the car seat can be wrapped in film while transporting it home and back.
How to wash car seat covers
We always try to choose the best for children. A responsible parent will carefully study the issue before purchasing a car seat: compare a number of models, consult with an online store specialist, and inquire about the results of crash tests. But after the purchase is made, we often forget that any thing requires care, and a car seat is no exception.
First of all, car seat care involves cleaning it regularly. During use, dust and lint from clothing settle on the cover, as well as droplets of sweat and saliva. These impurities, invisible at first glance, cause the proliferation of bacteria that can harm the baby. But there are also visible dirt: stains from food and drinks, traces of dirty shoes, etc. Even if you have a very neat baby, hygienic cleaning of the car seat is required at least once a month.
But do parents follow this rule? More often than not, no. Some simply do not pay attention to dirt, others rub stains locally, others put off washing until an indefinite “later”, others are afraid to disassemble the car seat, etc. There may be many reasons, but the fact remains that you need to clean your car seat regularly. This will keep your baby healthy and the restraint system will last longer.
Removable cover - easy care!
When purchasing a car seat, it is important to make sure that its cover is removable. Otherwise, it will be very difficult for you to wash it. You can find out information on product care in the instructions for use or on a special information label. In addition to the cover, it is desirable that the upholstery of the car seat be removable, that is, for washing it can be disassembled down to the frame. True, many parents then have the question of how to assemble car seats. To insure yourself in advance against such a dilemma, you can ask the seller when purchasing to demonstrate how the selected model is disassembled and assembled. Pay special attention to how the seat belts are tightened.
It is important to know!
On information labels, information is presented in the form of signs. The main ones that you definitely need to know are: “do not wash”, “hand wash”, “dry professional cleaning” (the product can be dry cleaned).
An alternative to frequent washing
With each release of a new model, manufacturers are trying to make the car seat cover more and more advanced: durable and resistant to stains. Don't want to wash your car seat cover often? Pay attention to the innovative materials that some brands use today. For example, Canadian scientists have developed an exclusive material, Crypton Super Fabrics, which is protected from dirt, bacteria and moisture. In addition, the innovative fabric can be easily cleaned with ordinary water and a cloth. This material is already used by Recaro to create car seats.
Some models of car seats come with additional protective covers. They protect the child seat from dirt and are easy to remove, put on and wash. It’s good if the additional cover is made of natural materials - in the summer the baby will sweat less and ride more comfortably.
As practice shows, a car seat becomes actively contaminated during the process of carrying it from the car to the house and back. If you want to have to clean the holding device less often, it is recommended to use a special bag for transporting it. A large plastic bag or film will also work.
How to properly clean a car seat?
You need to care for the car seat in accordance with the instructions. If hand or machine washing is acceptable, you can clean the car seat at home. This requires:
- Remove all additional elements (case, inserts, toys, pads, blanket). All these parts are washed separately.
- Shake and vacuum the car seat thoroughly to remove crumbs and other small debris.
- Select a detergent suitable for cleaning the upholstery of this car seat model.
- If the car seat upholstery cannot be removed, wipe the surface with a sponge or cloth soaked in a cleaning solution, and then thoroughly treat it with clean water. Upon completion, the car seat should be blotted with a towel and left to dry.
- If the restraint cover is removed, it should be machine washed, dried, and then put back on the car seat body.
7 tips on how to use a car seat correctly
1. Every time you install a car seat, check that it is properly secured.
Follow the instructions strictly and do not make any changes to the installation diagram yourself. The internal belts of the car seat and the standard vehicle belts must be well tensioned and securely fastened. Check that the tapes are not twisted.
2. Monitor the condition of the belts: tears and abrasions are unacceptable.
The belts should not come into contact with sharp protrusions in the cabin, and their friction against the body of the car seat is also not desirable. When closing the door, make sure that the belt strap is not pinched.
3. Replacing a car seat after an accident.
If a child car seat has been in an accident, it requires replacement, regardless of whether there is visible damage or not.
4. Cleaning seat belts is mandatory.
It is recommended to clean seat belts regularly with a cloth soaked in warm water. Do not use aggressive detergents, as they can damage the fabric of the tape.
5. Do not overuse cleaning products.
The plastic parts of the child car seat are cleaned with a mild soap solution. Do not overuse various cleaning products.
6. Washing the car seat cover is only possible by hand.
It is recommended to wash the child restraint cover by hand at a temperature of 30-40 degrees. But you can also use a washing machine. Set to hand wash mode and minimum spin power. Only natural drying is allowed. Bleach is not used when washing covers and upholstery.
7. It is better to immediately wipe off any stains on car seats.
If a stain appears on the cover or upholstery of a car seat, it is best to wipe it off immediately if possible. Use a sponge and soapy water. If you are on the road, simply wet the stain and rub with a cloth. By doing this, you will save yourself from unnecessary work, because old dirt is very difficult to remove.
In the comments you can share your own experience or ask your questions on this topic.
FAQ
Most often, the question is not about safety, but about whether it is legal to install such a new product? Will they draw up a report for her?
Answer: yes, this is possible, since it does not imply changes to the original design of the car. A traffic inspector who notices extension cords will not fine you.
So, a seat belt extender is a useful new product for people with non-standard sizes, as well as those who have not yet bought a belt with a reel for a longer length. It is risky to use the lock extension on a regular basis - it may not hold a passenger or a child seat - the latter breaks out and tips over in an accident.