Probably every person in his life has experienced discomfort from uncomfortable shoes. Often women cannot resist buying beautiful patent leather shoes, even if the right size is not available. The euphoria from the purchase passes with the appearance of the first calluses, and the desire to return the shoes to the store arises. And even if everything was great when trying on in the store, then after a few hours beautiful new shoes can rub and press. The thing is that our legs sometimes swell. And the more load we give them, the more they swell. What to do with expensive shoes that are too tight? You can give it to a shoemaker, who, using “magic,” will fix everything. You can also stretch your shoes at home.
There are many ways to stretch your shoes. They are all good, but the effect is different on different shoes. For example, nubuck shoes are very sensitive and delicate, while varnish shoes can crack due to temperature changes.
How to stretch leather or suede shoes
As you know, suede and leather are natural materials. Due to this, shoes made from these materials can be easily adjusted. And even stretching shoes to size is not a problem if the shoes are made of suede. Below are a few ways to do this.
- Leather shoes can be adjusted to fit your feet using boiling water. This sounds scary, of course, but in fact everything is painless. You just need to pour boiling water into the boots and then pour it out immediately. As soon as the shoes have cooled down a little, put them on your feet and walk until they dry. However, if your shoes are made of artificial leather or leatherette, you shouldn’t do the boiling water trick, since only leather can withstand high temperatures.
- The second way to stretch shoes is also based on the laws of physics. You will need a regular tight bag or a balloon. Place it in the shoe and fill it with water. Place everything in the freezer overnight. Water, turning into ice, will expand and increase the volume of your favorite shoe.
- A very common way to break in tight shoes quickly is to treat them with alcohol. Even vodka or the good old “Triple Cologne”, known since Soviet times, will do. It’s enough just to treat your shoes inside and out, put them on a thick sock and walk for two hours. Better, of course, around the house. On the street they won’t understand you like this. The heel of the shoe should be thoroughly treated with alcohol. This will make it softer and stop rubbing.
- Put on socks, tights or stockings and wear new shoes around the house for a few days. This is enough to slightly adjust the shape. For best results, wear wet socks.
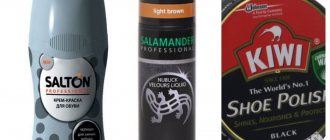
- You can purchase stretching spray at a shoe store. Just make sure it is suitable for suede before purchasing. At home, you should treat the inside of your shoes and let them dry.
It is impossible to stretch real rubber boots or galoshes. This material is graceful, but with powerful stretching it will either tear or primitively return to its original shape. Fortunately for those who missed the mark in choosing a size, real rubber shoes
It is very rare on the shelves. Typically, the product called rubber boots is made of polyvinyl chloride - PVC. And this material can absolutely be increased in size.
Instructions
1.
First, empirically determine what your boots are made of.
There is a small chance that they are made of real rubber. Then you can easily ruin them with further actions. To get the hang of it, take a needle and heat it red hot. After this, touch it to the boot, preferably not in a visible place. If the material begins to melt, it means the shoes
are made of polyvinyl chloride. You are allowed to start stretching.
2.
Polyvinyl chloride is called a thermoplastic material. When heated, it softens, and when cooled, it hardens again. How much your boots soften when heated depends on the amount of plasticizer that the manufacturer added to the material. Consequently, it is impossible to predict the triumph of stretching in advance. Typically, PVC begins to soften at 70? C.
3.
Boil water and pour hot boiling water directly into your boots. Let the shoes sit for 30 minutes. After this, add more boiling water.
4.
While the boots are softening, put several pairs of wool socks on your feet to increase the volume of your feet. Socks will also help keep your feet from getting burned by hot boots.
5.
After this, you need to pour the water out of your boots and, without wasting time, quickly put
the shoes
on your feet. Polyvinyl chloride has very excellent tensile strength. And it is quite difficult to tear it, unlike rubber products. Therefore, bravely pull on your softened boots.
6.
Without removing your boots, fill half a bath with cold water.
After this, get into the bath and stand for a few minutes. While your boots
are cooling, remember to move your toes and apply pressure from the inside of your boots. Exclusively in their front part - to increase the size.
Small shoes can ruin every day - they rub blisters, and walking in them is pure misery. You can slightly increase your shoe size at home. You don't need anything special for this. You shouldn’t believe that you can stretch your shoes or boots a lot - up to one size, or even smaller.
Instructions
1.
A special tool is stretching, which greatly stretches shoes. Its size increases by approximately 3-10 mm, depending on your dream and the quality of the product used. You can purchase it in a store that sells creams and other shoe care products. Perfectly soak the material of the shoes and put them on your feet. Walk until the stretch marks completely evaporate. If the result does not meet your expectations, repeat everything. Unnatural leather doesn’t stretch as well, and suede is even worse, but it’s still worth a try.
2.
You can use water. Stuff the shoes tightly with paper or rags and wet them with water. The result of the work directly depends on the density of the packing. After drying, try on the shoes; if they stretch unsatisfactorily, repeat what you have done until you achieve what you want. The main thing is that what you want can be translated into reality. Shoes cannot be stretched larger than 1 size.
3.
The shoemaker will come to your aid. Modern special technologies for stretching shoes are capable of much. They will be able to adjust the size to suit what you need. The master's work costs within reasonable limits, and you will be able to pick up the shoes on the same day or on a subsequent day. It all depends on how busy the shoemaker is and how the material is processed.
Buying beautiful and sporty shoes brings a lot of joy, but sometimes, in pursuit of external beauty, we forget that they may not fit. What to do in this case? Return your purchase to the store? Don't rush to hand over your sneakers
back - a few simple tips will help you stretch
your sneakers
and wear your shoes with pleasure.
You will need
- — spray for stretching shoes;
- - wooden banner;
- - Castor oil;
- - alcohol or vodka.
Instructions
1.
If you don’t want to experiment with new sneakers and use folk recipes for stretching, then virtually any shoe store sells highly professional products for you - sprays.
As usual, they are presented in a wide range and in different price categories. They are quite easy to use: shake the can, apply to the inside or outside of the sneakers and wait until completely dry. However, there is one caveat: your sneakers
must be made of natural leather.
2.
If your
sneakers
are not leather, then in this case a special wooden stretcher that needs to be inserted into
the sneakers
for 24 hours will help solve the problem. The advantage of such a stretch is that it is adjustable in length and width, which means it will allow you to stretch your shoes in the right places.
3.
If you do not go against folk remedies, and you have castor oil in your house, then apply 50 g to the inner surface of the sneakers and wait until completely absorbed.
If the leather has softened, the sneakers
under water and try walking around in them a little.
4.
It is allowed to use one more popular recipe.
Pour a generous amount your sneakers
, put thick socks on your feet and walk until you feel the shoes are worn out.
5.
If none of the listed methods suits you, then there is only one radical remedy left - contact a shoemaker. In this case, you risk less each, because expert skill virtually eliminates shoe deformation. The shoemaker will treat your pair with a special solution and place them on a wooden insert. With the help of screws, the shoes are stretched to the desired size.
Note!
Use castor oil with caution as... it can give the skin an obscene glow and leave a special smell.
The most practical footwear for rainy weather - rubber boots - can never let its owner down. As usual, breakouts occur, the soles are worn down or punctured. Usually there is only one pair of rubber, and it is not always possible to immediately make a new pair or visit a professional shoemaker. Try sealing your boots yourself. If you try and do everything right, they will still serve you.
You will need
- - rubber patch;
- - rubber glue;
- — block;
- - hammer;
- - solvent;
- - rags or cotton wool;
- - file;
- - skin;
- — soldering iron and nylon (if necessary).
Instructions
1.
Prepare your leaky rubber
boots
for repair. Before everyone else, they need to be thoroughly cleaned of all debris and completely dried. Then you need to find a suitable rubber patch. For example, it can be cut from obscene rubber shoes or a bicycle tire.
2.
File the underside of the patch and the allowances around the tear on the boot (from the front side), then go over them with an abrasive wheel or coarse sandpaper. This is necessary in order to give the surfaces to be glued some roughness - the glue will grip better.
3.
Wipe the rubber insert and the hole with solvent or acetone, soaking a clean rag or cotton swab in a degreaser. Make sure that fabric fibers or cotton wool particles do not remain on the surface.
4.
Trim the edges of the boot patch so that it is slightly smaller (about a couple of millimeters) than the sanded rough area. Now you can start gluing shoes without any hassle.
5.
Use glue for rubber surfaces (such as “Super Moment” for rubber or “Rubber”). It would be great if you have the opportunity to consult with an experienced shoemaker and purchase a highly professional adhesive composition on his advice.
6.
Read the adhesive manufacturer's instructions and follow them correctly. Apply the composition to the patch and the hole area in a thin layer and leave for 10 to 20 minutes (depending on the requirements on the glue package). Some craftsmen apply the adhesive coating twice, drying it a little both times.
7.
Press down firmly on the surfaces to be glued.
You can pull the boot onto a block or log and tap the patch with a hammer. However, be careful not to let it move. Do not use patched boots
until after 24 hours.
Helpful advice
If a rubber boot has a punctured sole or a chipped heel, try updating it using scraps of nylon tights and a soldering iron. Apply nylon lumps to the sanded and degreased damaged surface and rub it into the burning rubber with a metal rod.
Note!
This method gives a 100% guarantee that shoes made from rubber substitute will stretch. However, there is no certainty that over time the size will not decrease again. It is possible that the heating-cooling procedure will have to be repeated more than once.
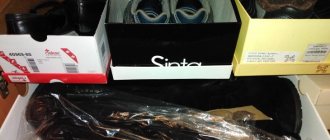
All people face the problem of tight shoes. Someone hastily tries on a pair they like, and then it causes discomfort. Some people's new boots don't fit at the top, others deliberately buy the wrong size because they liked the model. And no one, of course, comes back to change shoes.
What to do in such a situation? It is best to take the boots to a workshop. If this is not possible, then you can use proven folk tips to stretch various types of boots, including tarpaulin and felt.
Ways to seal rubber.
Method one. Glue.
- Select a patch so that it matches the color, texture and, preferably, thickness.
- ⚠️ Both shoes and patches must be thoroughly washed and dried !
- Use sandpaper to clean the surfaces to be glued so that they are rough , so the parts will adhere better. However, if you are gluing the sole, then the surfaces of the glued material (the parts of the sole at the fracture site) must be smooth!
- Next you need to degrease the surfaces . Soak a piece of clean cloth or cotton wool in acetone or vodka, and thoroughly wipe the patch and the area where it is sticking.
- Apply an even, thin layer of rubber glue to both surfaces and let it dry completely.
- Then apply the glue again to the same place, this time thicker, wait until the solvent evaporates and it thickens.
- Place the parts to be glued together and press firmly . Strength plays an important role here.
- Place a heavy weight and leave it there until completely dry.