Apply glue to the patch evenly and let it dry, using a cotton swab to unlace the sneaker and pull out the insole, coat the area around the cut from the inside (no need to do anything outside!).
Now you need to find a suitable patch, thick denim is suitable for this, you don’t need to take leather or rubber, it will then get in the way when you wear it, a piece of denim is enough.
Damage to your favorite sneakers is akin to a small “tragedy”, because they fit so well on the foot and seem to be part of the body. And here it is. What to do, how to seal your sneakers? Don't worry - there are many adhesive mixtures that will help solve the problem quite effectively, the main thing is to know what you can choose from. So here's what you can try:
You need to thoroughly wash and dry the sneaker, carefully wipe the cut area with alcohol and fold the edges, if they match and there are no holes, this is very good, the result will be good.
Yes, it turns out in the most visible place, gluing a patch on top or darning it is not an option at all, since the appearance of the sneakers would probably be digging a garden at the dacha, but not if it’s not a day off.
Therefore, you need to glue it from the inside.
You did not indicate what material your shoes are made of, so I will recommend Desmokol glue, it is universal and does not react with polymers.
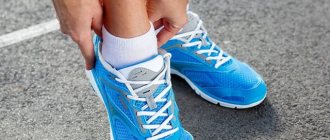
Mesh fabric is a traditional element of many branded sneakers, especially summer, running, and for indoor activities. The material is durable, but still not as strong as leather or special fabric from which shoe uppers are sewn. Therefore, sneakers with mesh are more vulnerable to mechanical damage, and an unsightly hole in the mesh fabric instantly turns your favorite shoes into a throwaway product.
But if there is no reliable workshop nearby, or maybe a specialist refused to work with this damage, home recipes will come in handy.
More homemade products: How to touch up scratches on a car with your own hands - instructions with photos
General recommendations
When planning to restore sneakers, you need to take into account that different models differ in the materials used to make sports shoes. Depending on the material, the nuances of further repairs depend. The main task of the work is to update shoes and maintain proper appearance. Without going to a workshop, you can easily glue or extend the sole, whiten the visible part of the products, and eliminate small cracks.
The toe of a sneaker is most susceptible to wear and external influences, which is why tears most often form on it. The toe section is constantly in need of repair due to increased load, so the restoration of this element should be approached with great responsibility.
Even if worn and handled carefully, sneakers will wear out faster than other shoes, especially when used for sports. Prolongation of operation is facilitated by timely repairs and compliance with preventive care measures. This reduces costs compared to purchasing a new pair of sports shoes.
DIY tread repair
The most vulnerable are the protectors located on the heels of shoes. To restore them, you will need a hard piece of rubber, which can be taken from the sole of unnecessary shoes. Among the tools and additional devices that will be useful for work are: shoe glue, a sharp knife, and coarse sandpaper. The tread repair process is as follows:
- A patch is cut out of a piece of hard rubber and fitted in place of the damaged or worn out tread.
- Using a knife and sandpaper, make a wedge-shaped patch.
- The surfaces that will be glued are treated with sandpaper to roughen them, and then wiped with a solvent and allowed to dry.
- The adhesive composition is applied in two layers to the patch and the future location of the protector. The drying time of the first layer should be about 20 minutes, the second - 4-6 hours.
- After the glue has dried, the surfaces are heated over the stove until a smell appears, applied to each other, squeezed tightly and held until cool and fixed.
Sneakers with retreads can be worn immediately after the repair is completed. If possible, it is recommended to wait a day before use to provide additional reliability.
Firmware
So, let's look at how to crochet shoes.
Place the sole in your left hand and take the awl with your right hand. Make a hole where the seam will begin. The awl must be driven at an angle of approximately 45 degrees. To avoid injury when piercing, your hand must be carefully removed from the line of the awl.
Then you need to fold the prepared thread for stitching in half. Connect the ends so that they match. From the inside of the shoe, you need to pass a hook through the hole, throw a loop formed from threads over it and pull it through so that the ends remain outside. After approximately 5 mm, make a similar hole and pull the free ends of the thread through it. Pull the loop out and thread the outer end of the thread remaining from the previous stitch. Tighten the loop from the outside. Make a 3rd hole and repeat the above steps. To complete the process, make a couple of reverse stitches to secure the seam. Tie the nylon and trim off the excess.
So, we looked at how to stitch shoes. Using this simple method, you can hem almost any shoe. And this, although small, is still a saving.
How to repair heels
To repair heels on sneakers, you need to get rid of the old tread, tearing it off the sole, cutting it in places where it is impossible to separate the element manually. To simplify the task, you can treat problem areas with a solvent.
After removing the tread, the contour of the sole is transferred to thick paper or cardboard and the erased edges are completed. Having drawn the outline, the pattern is cut out of paper and used to create a new blank. You can make the sole from a rubber mat, which is sold in hardware stores. It is impractical to partially restore the sole, so if the heel of the sneakers is damaged, the base is completely changed.
When gluing the sole to the main part of a sports shoe, you need to thoroughly clean the surface. Otherwise, the gluing procedure does not differ from the standard one.
Needles
After the hole is formed, the awl is grabbed in the right hand with the little finger. The right needle lies between the middle and index fingers. The left needle, from the wrong side, is threaded through the hole that has just appeared with the left hand.
The right needle is held with the thumb and index finger and placed behind the left needle, forming a cross.
The left needle is now pulled completely out of the hole. The thumb and index finger hold the needle. The ring finger, in the area of the eye of the needle, holds the thread, preventing it from falling out. The index finger and thumb of the left hand straighten the thread, preventing it from tangling as it passes through the hole. When the thread is pulled through, the right needle is threaded through the same hole. The right needle thread lies behind the left needle thread.
The thread threaded with the left needle is slightly stretched as the right needle passes through.
How to repair the top
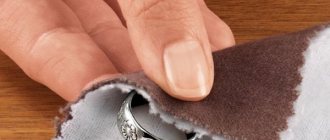
The features of repairing the upper part of the sneakers directly depend on the material used. If shoes are made of suede, natural or artificial leather, then the material wears out over time and cracks at break points. To restore the appearance, patches made of thin and elastic material can be glued or sewn onto cracked and cracked areas. Before applying patches, the old material is torn off.
The use of patches on the upper part of the sneakers ruins the original appearance of the shoes, so it is better to prevent cracks from occurring. To maintain shoes in good condition, natural leather should be periodically lubricated with cream, and suede should be cleaned with a dry, stiff brush, trying to lift the pile. To clean the upper part of your sneakers from dirt, you should use a damp cloth rather than washing your shoes under running water.
Preparatory work
Before stitching shoes, you first need to clean them and glue the fallen sole using special rubber glue. This is done so that the shoes do not absorb water through the stitching areas. There is no need to remove the glue far afterwards, since they will need to coat the thread in the stitching areas, additionally sealing the shoes and the seam.
Next, you need to draw the future seam line on the sole, stepping back from the junction by about one third of the side of the sole. Some shoes have a special groove on the sole that makes it easier to get an even seam. In this case, there is no need to draw a line.
You can start sewing. We'll look at how to stitch shoes correctly next. Remember that it is better to start the seam near the heel.
Sole
The quality and condition of the sole affects the comfort when wearing sports shoes. With prolonged use, the sole of the sneakers wears out and becomes deformed. Stepping on stones and unpaved surfaces risks damaging the sole, causing holes to form on it.
How to seal a hole
Any holes in the sole can be repaired in different ways, depending on the base material of the sneakers and the extent of the damage. Most often, epoxy glue is used to eliminate holes, which is relatively affordable and easy to use. Holes on the sole are sealed as follows:
- all edges of the hole are well cleaned and treated with a solvent to degrease;
- when the area next to the defect is completely dry, apply the diluted adhesive composition;
- if the hole in the sole of the sneaker is too large, a fiberglass mesh is placed in it to fill the void;
- when the glue dries, cover the damaged area from the outside with masking tape to level the sole;
- The sneakers are left in a well-ventilated area to dry completely.
How to increase worn out
If the soft sole of the sneakers has worn down slightly, it can be increased to its original thickness. For this purpose, you will need to purchase microporous rubber. A blank is cut out of the material in the shape of the worn-out element, the surface is cleaned with sandpaper and glued to the shoes.
It is better to use a special kind of shoe glue as glue to ensure reliable adhesion.
Replacement
A sole with a lot of damage is easier to replace with a new one. This will significantly reduce the time spent on repairing each damaged area. The replacement sole, as well as for extension, is cut out of microporous rubber. The sneaker is applied to the cardboard and the outline is outlined, and then it is transferred to the prepared material and the blank is cut out.
We sew with an awl correctly
Many needlewomen and sewing masters use such a needle with a handle. But, unfortunately, not everyone knows how to sew with an awl correctly. There are several basic ways to use this tool. We sew with an awl using two technologies:
1. We pierce holes and thread the thread by hand. In this case, the awl is used only as an auxiliary tool. This method is popularly called the old-fashioned method, but many carpenters, shoemakers and archive workers resort to this method again and again.
2. We pierce a hole and use an awl to push the thread into it. This method is the most difficult and requires additional skills, because with an awl you can easily break the thread or damage the material.
We sew with an awl using method No. 1:
First of all, you need to take the awl correctly - the end of the handle should rest against the palm of your hand;
The blade of the tool should be inclined at 45 degrees, the punctures should be uniform so that the stitches of the thread are the same;
To make it easier to pierce the material, you need to rest the fingers of your other hand against the fabric on the back side;
If the awl gets stuck in the material, try turning it around its axis several times;
One hole must be completed at a time, otherwise you will have to spend extra time redoing your work. The holes are best made at a distance of 7-10 mm from each other.
We sew with an awl using method No. 2:
We make holes in the material using the technology described above;
Use the end of the awl blade to pry up the thread and carefully push it inside. Some shoemakers still work using this technology, but more often craftsmen use a special tool - a piercing awl.
Combination top repair
On sneakers with a combined upper made of synthetic material with foam padding or natural and artificial suede, the fabric most often damaged is in the toe area, where the shoe comes into contact with the toes. On the outside, this area can be protected by a rubber insert around which there is a mesh, which is typical for running models of sneakers.
If there is minor damage to the front of the shoe, a patch can be sewn on. If there are large holes, you need to prop up the seams, adjust the size and shape of a piece of durable nylon fabric and sew it in place.
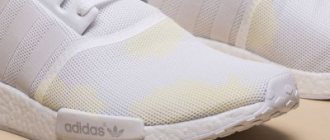
What to do if the mesh on your sneakers is frayed or torn
Even the best quality sneakers can tear or become damaged. To avoid throwing away a good pair of shoes, you should try to repair them yourself.
Sew with thread if a small area is torn
You need to take a thread that matches the color of the sneakers and a needle. A needle is inserted into the holes in the mesh and gradually pulls the material until the seam hides the torn area. You need to sew not along the edge of the hole, but a little further, capturing more fabric. This will prevent the shoes from tearing again when worn. When the seam is completed, you need to tie a tight knot and trim off the unnecessary part of the threads.
The seam should be small and tight. This way it will look neater and last longer.
Cut out the pattern and sew on a beautiful patch
This option is a little more complicated than the previous one, but much more reliable. There are two ways to install a patch.
The first is suitable for a situation where the mesh is torn from the inside (for example, in the area of the thumb), but looks normal from the outside. From dense material you need to cut a piece the size of the rub. It is better not to make the patch too large so that it does not interfere with walking. Using thread, you need to sew a piece of fabric to the material of the sneaker. The work is carried out from the inside so that the seam is almost invisible from the outside.
The second method is used if the mesh is torn through. You need to cut out a piece of fabric or leather and glue it from the inside. When the glue dries, you need to sew a mesh outside to hide the hole. The seams go through and are visible from the outside of the shoe. You can stitch it by machine or by hand. The main thing is that the threads match the color of the shoes, and the seams do not stand out in the overall pattern.
If you don’t have any handicraft or sewing skills, it’s better to have your sneakers repaired. Paying for the work of a master will cost much less than a new pair of shoes.
Fixing torn mesh on sneakers is not at all difficult. All you need is basic sewing skills and a little patience. 10-15 minutes of work can save several thousand rubles.
How to fix a backdrop
Damage to the back of sneakers manifests itself in different ways: the fabric tears, the inner lining comes out, and discomfort appears in the heel.
When repairing shoes at home, you can take the following steps:
- Carefully cut off the torn edges in the area where the lining is located.
- Select a piece of thin leather that is soft to the touch and cut the blank in the shape of a small horseshoe. This shape is required to cover the entire surface of the heel of the sneaker.
- Treat the leather blank with shoe glue, thoroughly covering the entire surface, especially the edges.
- Carefully apply the patch to the heel of the shoe and place any suitable size object inside the sneaker to spread and press the fabric tightly.
- Leave the shoes for several hours for the final fixation of the patch.
Required Tools
Before sewing your own shoes, you should prepare a minimum set of tools. It is quite possible that they will end up in your home toolbox. Otherwise you will have to go to the store. Here's what you'll need:
- An awl or sharpened screwdriver no more than 4 mm in diameter.
- Nylon thread with a thickness of 0.5 mm to 1 mm.
- Shoe hook or crochet hook.
- Glue for rubber.
Sewing fabric sneakers with an awl is easy, but leather boots will require some effort. In such cases, it is advisable to stitch the shoes with an awl. The hook may simply not pass through very dense material and break.
If you have to sharpen a screwdriver, it is important that the tip is flat, long and as sharp as possible. The sharpening length of the tip should be approximately one and a half centimeters.
The quality of the stitching is determined by what threads are used to stitch the shoes. Shoemakers recommend using 0.6 mm thick nylon thread for everyday shoe models. Then the seam will be strong and neat, the stitches will not be too noticeable. If you don’t have time to go shopping, you can remove the thread from the nylon cord. As a last resort, use strong cotton thread. The color is selected in accordance with the shade of the sole.
Before crocheting your own shoes for the first time, it is recommended to practice on a piece of cardboard.
How to reduce the number of cracks
A common cause of cracks in sports shoes is improper use. In particular, defects appear on sneakers due to wearing shoes of a larger size, excessive bending of the foot while wearing, prolonged pressure, exposure to high or too low temperatures.
If you follow the rules for using shoes, cracks will appear on them in a minimal amount.
To reduce the number of damages, it is recommended to use special mold holders, blocks and spacers during storage. It will also be useful to stuff the sneakers with crumpled paper to flatten the shells. Another factor that leads to the formation of cracks is soiled shoes. When a large number of dirt particles accumulate, the number of cracks increases and they grow faster. For this reason, the products should be kept clean.
Materials
In order to make such an instrument with your own hands, you will need a number of materials and some tools.
The easiest way is to take a long self-tapping screw as a basis. This is a very popular solution, but it’s impossible to penetrate thick material like this, since it simply won’t work with a self-tapping screw. You can, of course, grind it down, but it will take a long time and is pointless.
Another option is a long nail, but it is softer than a self-tapping screw. This means that it will need to be sharpened much more often to keep it sharp.
How to properly care and wear
To extend the service life and maintain the proper appearance of your sneakers, you need to follow a number of simple rules. In particular:
- Take off and put on sneakers unlaced. If you do not untie the laces, the resistance on the heel will increase, which will cause its deformation.
- Only wear shoes that are the right size. Otherwise, abrasion will occur faster.
- Use the correct type of running shoes. For running, training and everyday life, appropriate types of shoes have been developed, so you should not limit yourself to one pair, but choose a separate option for each type of activity.
- Buy quality shoes. Attempts to save money often lead to accelerated wear and tear and the appearance of a large number of defects, as a result of which you have to constantly carry out restoration or throw away the sneakers.
Share link: