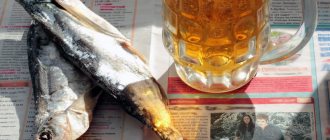
Nowadays, buying salted or dried fish has become much more expensive than just five or six years ago. When you come to a market or a store, you catch yourself thinking: “Should I have some beer with dried fish?” And then you go to the counter, look at the price and realize that you can’t get by with one fish, and buying two is already expensive. So you return home with nothing. But now, thanks to this article, you will learn how to salt fish for drying or drying.
Practical advice
At the end of our publication, following a good tradition, we give you some practical advice:
- Dishes. When salting using wet methods, it is optimal to use enamel containers or stainless steel utensils. Do not use aluminum under any circumstances - it oxidizes, which negatively affects the taste of the product. Plastic containers are also suitable, but only if you continue to use them only for these purposes: the smell of fish will be indestructible.
- Cargo. You should not use metal objects (dumbbells, weights, etc.) as weights. They are not always sufficiently protected from corrosion, and salt speeds up this process tenfold.
- Flies. Some fishermen moisten the fish with vinegar before drying, but guaranteed protection from flies can only be provided by wrapping it in gauze or netting without a single loophole. But if, despite all the tricks, you are disappointed to find eggs or fly larvae on a failed treat, do not be upset. Wrap the carcass tightly in several layers of newspaper, unwrap it after a few days - and you will get an excellent bait that an even more respectable fish will probably bite on.
- Matches. The abdomen is a particularly problematic place for drying. Therefore, when hanging particularly large specimens, it is recommended to spread out the edges of the abdomen with matches without sulfur or toothpicks inserted there.
- Layers. Particularly large specimens are not very suitable for drying, but fishermen manage to solve this problem. In this case, layers of meat are cut from the carcasses, salted and dried in the usual way, but for a shorter time: a day or two in salt, two to three days for drying.
We hope that, guided by our practical recommendations, you will soon delight your friends and family with your own homemade delicacy!
Source
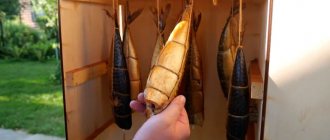
Designs for drying
If you have to dry a small portion of small items, you can do without hanging the carcasses. You need to lay foil on the table or windowsill, and clean paper on it. You need to lay out small change on these layers and cover it on top with light natural fabric or gauze (the last point is relevant in the summer, as it provides protection from flies). The fish will have to be turned over daily, replacing the sodden paper with dry paper as necessary. However, you need to be prepared that the room will smell of fish, and this aroma is not for everyone.
Usually fish is dried using the hanging method. Let's look at the most common options:
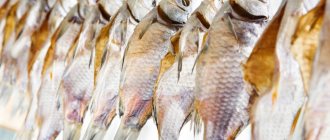
- Stretched wire . It is optimal to use stainless steel wire with a small cross-section. Threading is carried out through the eye or gills, maintaining a distance of at least a centimeter between the carcasses. The length of the “garland” is not important: the main thing is that it be possible to stretch it between the supports and securely fasten it. In the summer, protection from flies and wasps in the form of curtain tulle, gauze or light cotton fabric is highly desirable.
- Chalky . In this case, a stiffer wire is used that is capable of holding a given shape. We measure half a meter of wire, bend one end into a loop, string 3-7 fish, form a hook at the free end, fix it on the loop of the other end. Chalks can be hung on nails or hooks, or they can be strung on a crossbar or horizontally stretched wire.
- Frame structures . Frames in the form of parallelepipeds, pyramids, cones, cylinders are made of wood, metal rod, rigid wire, and so on. They are covered with a mosquito net or gauze to protect the drying fish from insects and wind-blown debris. Structures for hanging carcasses are mounted inside: crossbars or hooks for tensioning wire.
Hot marinating
1. Cut the fish into pieces, after removing the insides.
2. Sprinkle with fine salt and refrigerate for 30 minutes.
3. For the marinade: boil two liters of water, add four onions and three chopped carrots.
4. After ten minutes of boiling, add two tablespoons of vinegar, pepper, bay leaf, salt, sugar to taste.
5. Pour the marinade over the fish and cook for twenty minutes over low heat.
6. Scald the jars, put the fish in there and pour the marinade over them.
7. Close with a plastic lid.
You can store the fish for up to three days in the refrigerator.
Concept of the drying process
Drying any product involves getting rid of excess moisture in one way or another. The same applies to drying fish: moisture is removed from the carcasses, the meat becomes denser, acquiring a piquant aroma. At the same time, fish oil and other nutrients are preserved in the pulp, so this delicacy can be called a storehouse of useful microelements.
Theoretically, it is possible to dry salt-free fish in an oven or a special dryer, but does this make sense? Such a semi-finished product requires subsequent soaking and cooking, that is, in this case, the goal is only to preserve a large catch for the purpose of its subsequent use in cooking. A freezer is much better suited for these purposes.
People often ask how the drying process differs from drying? Practically nothing, just drying is a production process, and drying is a handicraft process. In production conditions, it is possible to bring the product to optimal condition while maintaining beneficial properties. If you try, you can achieve a similar result at home. So, let's begin?
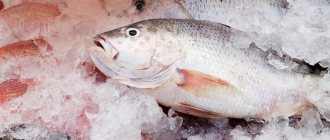
Selection and preparation of carcasses
This process works best in the spring (before spawning) and autumn. Firstly, at this time the fish accumulates sufficient reserves of fat, so the meat acquires the best taste. In summer, especially in the first half, representatives of the freshwater ichthyofauna are still recovering from the breeding season, and their meat is a bit tough and not as tasty as we would like.
However, this does not mean that fish dried in summer is not suitable for food at all: it is quite possible to eat it, even with great pleasure. The problem is different: during the warm period, the number of insects goes off scale, wanting to feast on a potential delicacy or use it to reproduce their own kind. Therefore, the issue of protecting drying carcasses from persistent attacks of wasps and flies comes to the fore.
There are no insects in winter, which is good news, but the temperature conditions are far from optimal, and the humidity sometimes goes off scale. During this period, it is recommended to move the process to the balcony (if you have a glazed one) or use artificial heat sources.
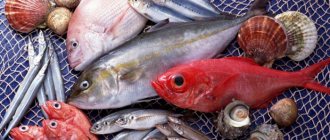
In general, the process can be carried out year-round, simply by modifying its conditions. In this case, you can take absolutely any fish. Roach and its subspecies (ram and roach), silver bream, bleak, bream and so on are optimal. Perch, pike perch and pike are somewhat dry, but there are also lovers of the tough meat of the predator. Flat-bodied fish dry best, so it makes sense to cook tench or carp in a different way.
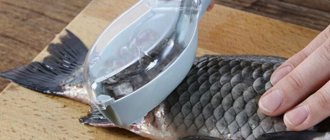
It is necessary to select fresh, undamaged carcasses that have retained the integrity of their scales. The slightest odor or other signs of decomposition will negatively affect the quality of the final product.
Before salting, carcasses must be thoroughly rinsed in running water, paying special attention to the gill slits. To gut the fish or not is a matter of taste and season. There are a few things to consider:
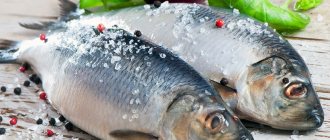
Salting fish
To salt fish before drying, the “wet” method is usually used. Unlike the dry method, it does not involve the outflow of brine (brine) from the container with fish. This way, the carcasses are salted better, throughout the entire volume, and the process proceeds faster. However, we can use any option of your choice:
To implement all salting methods, you need to use only coarse salt, or iodized salt. Salted fish must be stored in a cool place, but not in the cold!
Soaking and preparation for drying
Before drying, salted fish should be tested for doneness. If, when pressed with a finger, a dent forms in the carcass, and the spine makes a characteristic crunch when stretched, the fish has reached the desired condition. Otherwise, you still need to wait a day or two.
If, after salting, the carcasses are not washed and soaked, the fish will be “eaten” by the salt: the meat will turn out to be tough and salty to the point of impossibility. Therefore, it is recommended to rinse each carcass under running water, thoroughly washing the gills and gutted bellies. Then you need to pour water into a large saucepan or bucket and lower the fish into it. Soaking is carried out according to the following principle: the fish should be in the water for as many hours as the number of days it was salted, plus one. The water needs to be changed every hour.
Designs for drying
If you have to dry a small portion of small items, you can do without hanging the carcasses. You need to lay foil on the table or windowsill, and clean paper on it. You need to lay out small change on these layers and cover it on top with light natural fabric or gauze (the last point is relevant in the summer, as it provides protection from flies). The fish will have to be turned over daily, replacing the sodden paper with dry paper as necessary. However, you need to be prepared that the room will smell of fish, and this aroma is not for everyone.
Where can you dry fish naturally?
Optimal conditions for drying are low humidity, good ventilation, and protection from direct sunlight. Protection from blowflies, which strive to lay eggs in delicious carcasses, and wasps, which literally gnaw decent pieces out of fish, is also important.
And if you can still put up with wasp passages, then the offspring of the fly swarming inside the carcass automatically makes it unsuitable for ingestion. Therefore, all methods of drying fish outdoors in the warm season must provide appropriate protection in the form of light fabric or a mosquito net.
So, fish can be dried by hanging:
Depending on the conditions, the fish is completely dried in 3-5 days, but sometimes it takes a week or more.
Using household appliances
Using household appliances can make the drying process easier. If you follow some technological nuances, you can successfully dry small carcasses even without salt. Our grandmothers also dried small items in Russian ovens, not bothering at all with cleaning and sometimes salting. Now an alternative to the oven has become a mediocre oven.
The oven drying process looks something like this:
It is also good to use electric dryers for these purposes, and preference should be given to models specially designed for drying fish and meat. Closed electric dryers are optimal: they do not smell as fragrant during the process.
Storage of the finished product
Everyone dries the semi-finished product to their taste: some like slightly dried meat, others like it almost wooden-like. In this regard, drying times vary significantly, but rarely does anyone hang carcasses for longer than 5-7 days.
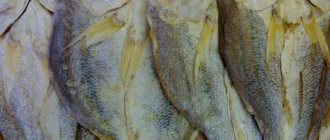
The scales of the finished fish are slightly shiny with fat, but no salt crystals appear on them. The skin is thick, but comes off relatively easily. The meat is elastic and dense, translucent, with a characteristic spicy taste, without bitterness or signs of mold.
In fact, dried fish of this condition, already removed from the wire, is ready to become an original delicacy, but connoisseurs recommend bringing it to perfection in a cool place, wrapping it in culinary parchment or placing it in a linen bag.
Practical advice
At the end of our publication, following a good tradition, we give you some practical advice:
We hope that, guided by our practical recommendations, you will soon delight your friends and family with your own homemade delicacy!
Drying is used mainly for long shelf life of the catch. This fish is also used in cooking: broths and sauces are prepared, and the crushed product is added to minced meatballs or gravy. The features and storage conditions of dried fish are not very different from those necessary for the preservation of dried fish. A refrigerator, freezer, and cellar are perfect for this.
Russia is a country of real men! And every real man from time immemorial has been a breadwinner and breadwinner! The ancestors of our men brought personally caught game and fish to their families, for which they received love and respect from their wives and fellow tribesmen.
Modern “proper men” have retained an insatiable craving for hunting and fishing, although they bring home much less game and fish than their ancestors.
Nowadays, Russian men often spend their free time fishing and constantly bring home the fish they catch. Many people have a question: how to process your catch to make a tasty and healthy product? It would seem that there is nothing complicated here - I covered the fish with salt, after a certain time I hung it out to dry and that’s it, the fish is ready to eat. However, making delicious dried fish at home requires some knowledge and experience.
Today I will tell you how to properly salt fish at home. This pickling recipe is based on many years of personal experience as a fisherman.
So, the recipe for salting fish at home
For home salting fish, it is best to use the so-called rock salt, i.e. coarse grind. Fine salt of the “Extra” brand is not suitable for salting fish, since it immediately forms a kind of salty shell on the surface of the fish, which prevents the liquid from escaping from the fish meat. Categorically refuse to use iodized salt, otherwise you will simply spoil the fish.
For salting fish, it is better to use enamel and stainless steel utensils. Wooden barrels are perfect for salting large quantities of fish. Do not use utensils made of oxidizing materials or plastic for salting fish. You salt fish for yourself and your family!
Before salting, fish must be washed in clean water; the ideal option is to wash off all (!) mucus from the fish. There is a widespread belief that if fish is not washed before salting, it will taste better. Absolutely wrong opinion! The mucus left on the fish together with the salt forms a salt shell. This disrupts the natural exchange process between the fish and the salt solution. After washing the fish and removing the mucus from it, dry the fish a little - just let the water drain.
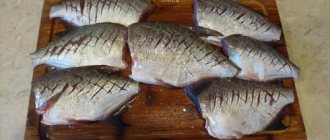
Before placing fish in a salting container, be sure to re-sort your catch. The largest and thickest fish should be placed at the bottom of the dish. Place the fines on top.
You should not salt fish of different breeds together in the same container. There are types of fish, the presence of which in a common salting container can negatively affect the taste of the finished dried fish.
For example, it is better to salt tench, pike, goby and rudd separately from roach (ram), bream, silver bream, perch, sabrefish, pike perch, bersh, vimba, shemai, bleak. The last 10 fish species listed can be successfully salted together in one container.
This issue causes a lot of controversy. My recipe for salting fish is based on personal experience. The quality of the finished fish was subjected to laboratory analysis.
How much to salt fish
:
— Fish up to 20 cm long is salted for 5-6 days. A longer period is indicated for fish with a thicker body and fattier ones: crucian carp, vimbe, shemaya; — Fish from 20 to 25 cm long are salted for 7-8 days. A longer period is indicated for fish with a thicker body and more fat; — Fish longer than 27-28 cm must be salted for 8-10 days. In this case, the fish should be spread out, i.e. cut along the spine, unfold and remove the entrails.
Fish salting technology
The best temperature for salting fish is 6-8 degrees above zero. If the process of salting fish takes place at a higher temperature, the period of time the fish is in the salt or saline solution should be increased. Salting fish at temperatures above 20 degrees is not recommended.
Soaking fish before drying
Soaking is a mandatory process designed to remove excess salt from fish. However, there is a widespread misconception about the duration of soaking: the number of days the fish is salted, the number of hours it takes to soak. Absolutely false! The fish will not take excess salt. The duration of soaking is 2.5 - 3.5 hours in cool water, the water should be changed periodically. After soaking, the fish should be rinsed thoroughly and allowed to drain. After this, the fish is ready to hang out to dry.
If for some reason the fish did not have time to dry out overnight, for example - wet weather, night fog, etc. - Lubricate the surface of the fish with sunflower oil. This will provide reliable protection against flies.
Salting fatty fish
Separately, we should talk about salting especially fatty fish species: asp, silver carp, shemai, vimba. In summer and hot weather, such fish should be salted in refrigerators, glaciers, or in fairly cool cellars. Large fish should be flattened before salting.
That’s actually all the secrets of salting fish at home. You salted and hung the fish to dry. After 4-7 days (depending on the weather), the fish you caught with your own hands will be ready to eat. Treat yourself and your loved ones with wonderful salted fish!
Dear reader! Your opinion on the publication is useful for the development of the blog! Please leave your comment! Thank you .
We'll start with the procurement process. We take a small carcass, for example, crucian carp, and gut it. After all the entrails have been removed from the carcass, it is necessary to divide it along the ridge into two equal halves.
Selection and preparation of carcasses
This process works best in the spring (before spawning) and autumn. Firstly, at this time the fish accumulates sufficient reserves of fat, so the meat acquires the best taste. In summer, especially in the first half, representatives of the freshwater ichthyofauna are still recovering from the breeding season, and their meat is a bit tough and not as tasty as we would like.
However, this does not mean that fish dried in summer is not suitable for food at all: it is quite possible to eat it, even with great pleasure. The problem is different: during the warm period, the number of insects goes off scale, wanting to feast on a potential delicacy or use it to reproduce their own kind. Therefore, the issue of protecting drying carcasses from persistent attacks of wasps and flies comes to the fore.
There are no insects in winter, which is good news, but the temperature conditions are far from optimal, and the humidity sometimes goes off scale. During this period, it is recommended to move the process to the balcony (if you have a glazed one) or use artificial heat sources.
Dried or dried fish: what's the difference?
Few can give the correct answer to the question of how dried fish differs from dried fish.
In this case, in any case, the fish is salted and necessarily soaked. The drying process takes place in well-ventilated areas with access to sunlight. The drying process in this case is accompanied by complex physical and biochemical processes. In addition, dried fish is not a semi-finished product and can be eaten immediately without subjecting it to additional processing.
On a note!
There are special dryers for drying fish, but in a pinch, a balcony will do.
As for dried fish, it is considered a semi-finished product and its consumption requires additional processing. All this is due to the fact that fish does not ripen during this process due to the nature of the process itself.
Although there are many ways to salt fish, you can only use one of the presented ones. Withering or drying fish at home is not difficult, just take water and salt. This is the simplest, classic method that does not require much time. In addition, a small fish does not require much preparation time. It is better to additionally steam salted fish (dried) before serving. As a side dish, boiled potatoes are suitable, which go well with any salted fish.
Delicious salty balyk
Well, who doesn't love fish ball? It is not only tasty, but also healthy. Balyk can be made from fatty fish: sturgeon, salmon, trout and others.
Cooking method:
1. Separate the back from the skin and place in a pan.
2. Sprinkle with salt and saltpeter (400 grams of salt per 5 grams of saltpeter).
3. Put under oppression for three days.
4. Mix the balyki, rubbing them with their own juice, and leave for another three days.
5. Remove and hang in the sun to dry.
6. Smoke or rub with liquid smoke.
How to properly prepare fish for salting
There are two types of carcass preparation.
- For big fish. If the carcass is more than 30 cm in length, then it must be gutted. To do this, it is washed, the abdomen is ripped open and the entrails are removed. Then wash everything again in cool water. It is not recommended to cut off the head, but the gills must be removed.
- For small fish. Small carcasses up to 30 cm practically do not need to be prepared. They can be salted ungutted. The only requirement is that the gills must be removed.
Soaking after salting
If the fish was salted at home using a dry, brine or hanging method, then this procedure is required.
How to make balyk from bream
For the rest, before drying, you can simply rinse it (if necessary) under running water.
Soaking instructions.
- For convenience, sort the carcasses by size.
- Large fish are soaked for 1.5 - 2 days. In this case, it is necessary to change the water three times.
- Cool water must be used and the procedure should be carried out in a cool place.
- Small fish are soaked for 24 hours, and the water is changed only 2 times.
- After the procedure, the water must be drained and the fish allowed to flow around.
After these manipulations, you can safely move on to drying or drying.
When soaking, the main thing is to change the water promptly.
Primary requirements
Before drying or drying fish, you need to decide how salty it should be. Now we’ll talk about how much to salt fish for drying, and you can make this delight yourself at home or in the country. If the fish contains ten percent salt, then it is considered lightly salted; if it contains twenty percent or more, it is considered highly salted. The brine (the juice that the fish secretes, mixed with salt) is periodically drained to prevent bacteria from multiplying and spoiling the fish. Fish for drying or drying must be fresh and chilled. Only after this can you start gutting. Salting fish for drying is a very responsible matter. It is necessary to gut the insides so that microbes do not get on the meat.
Using household appliances
Using household appliances can make the drying process easier. If you follow some technological nuances, you can successfully dry small carcasses even without salt. Our grandmothers also dried small items in Russian ovens, not bothering at all with cleaning and sometimes salting. Now an alternative to the oven has become a mediocre oven.
The oven drying process looks something like this:
- Let the fish drain thoroughly, leaving it in a colander or laying it out on a paper towel.
- We lay out the prepared carcasses on a baking sheet in one layer, having first lined it with parchment (otherwise you simply won’t wash the baking sheet).
- Turn on the oven to convection mode and set the temperature to low (about 40-50 o C). Leave the door slightly open.
- After a couple of hours, turn the carcasses over, protect the heads with foil (if necessary, if they are clearly burning) and keep them in the oven for a few more hours.
- We remove the baking sheet, thread a wire through the eyes and dry the fish overnight under natural conditions.
It is also good to use electric dryers for these purposes, and preference should be given to models specially designed for drying fish and meat. Closed electric dryers are optimal: they do not smell as fragrant during the process.