All girls are such girls! Today you want romantic curls, tomorrow you want stylish straight strands, and the day after tomorrow you want playful curls. In order not to injure your own hair with such cruel experiments, you can buy a wig, or better yet several, for any occasion and mood. But even then, the question “how to straighten a wig” remains relevant, because after transportation and long-term storage in the package, the hair can become wrinkled.
In this article we will tell you how to straighten wig hair at home and return it to its ideal smoothness and attractive appearance. We will also give useful tips on caring for straight and curly wigs.
Do I need to wash my wig after purchasing?
In order for a wig to look beautiful and last as long as possible, it is necessary to properly care for it. Therefore, the answer to the question “Can wigs be washed?” It becomes obvious that it is possible and even necessary. Beauty experts advise to wet your hair extensions no more than once every 6 weeks.
Interesting materials:
How to properly add citric acid to a washing machine? How to properly pour powder into an LG washing machine? How to clean the drain of a Zanussi washing machine? How to clean the drain hose of a Samsung washing machine? How to clean the drain pipe in a washing machine? How to clean a washing machine with citric acid? How to clean the filling valve of a washing machine? How to sell cars in Forza Horizon 4? How to disinfect a washing machine with Domestos? How to disinfect a washing machine with soda?
Before you start straightening
Carefully study the passport that each quality product has. Thermal fiber wigs can be straightened and curled with hot irons and curling irons at temperatures up to 180-200 C. These models are universal and very comfortable to wear, and in aesthetics they are practically not inferior to products made from natural hair.
But wigs made of Kanekalon and modacrylic are afraid of high temperatures and will not forgive the use of an iron and hot rollers. The fibers, which are based on algae and organic components, are very soft and light to the touch. Visually, they are similar to human hair because they lack synthetic shine.
Kanekalon has one very interesting property - it perfectly holds the shape specified in production. Therefore, if you bought a curly Kanekalon wig, you will not be able to change the hair structure even with all your diligence. After washing, the curls return to their original appearance.
It’s another matter if you have a long straight wig made of modacrylic or Kanekalon and it has become a little wrinkled after being stored for a long time in a curled form. In this case, the question is “how to straighten a wig?” can be resolved quite quickly and without much effort on your part.
Method number 3: how to straighten wig hair with hot water
This straightening method is also very simple and accessible to every owner of a wig of any length.
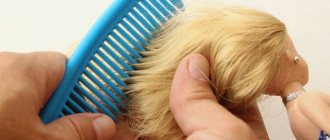
1. First, comb your hair thoroughly. If you come across knots that are difficult to untangle, cut them with nail scissors.
2. Take the wig by the crown and pour hot water (80 C) on it so that it flows down the hair. You need to hold the wig straight so that the strands do not get tangled, but it is better to water it on a stand.
3. Once the water has drained, lay the wig on a thick cotton towel so that the hair lies flat. When they are slightly dry, start combing. If your hair is still frizzy, repeat the process.
If the ends of the artificial hair look like a sponge, trim it with a thinning razor. This is an inexpensive device with which, even without professional skills, you can profile the ends and give them a beautiful, even shape.
You can straighten a wig made from natural hair using the same means as you use to straighten your own curls. The advantage of these products is that they are easy to curl using hot rollers and a curling iron, straighten with an iron and dry with a hairdryer. If your natural wig becomes wrinkled, just wash it with regular shampoo, dry it and comb it carefully. We talked in detail about how to do this correctly here.
To make combing easier, use your usual conditioning balms, and soak the ends with special oil to nourish them and make them easier to detangle.
Method number 2: how to straighten a wig with an iron
Let’s clarify right away - you will need not a simple iron, but a steam one!
1. Gently comb the wig, untangling all the knots, and place it on a stand or jar. To make combing as easy as possible and without damaging the product, apply conditioner to your curls. We talked in detail about the combing procedure in this article.
2. Turn on the iron and direct the steam to the wig strands without touching them. Move from the base to the ends, from top to bottom, and comb gradually, giving the strands the desired shape.
You cannot iron artificial hair like regular linen - this will ruin its structure and harm the appearance of the product. If you still decide to use a regular iron, be sure to cover your curls with a special ironing cloth and set the device to medium temperature. If necessary, you can add degrees, but very carefully so as not to harm the artificial fibers.
Before ironing, test the reaction of artificial strands to the set temperature. Start at the ends, in an inconspicuous place.
How to choose a wig for easy care?
Before buying a hair cap, read the tips.
If you don't have time to care for your wig, choose darker colors:
- Chestnut;
- Black;
- Brown-haired.
Blonde, ash and red hair gets dirty quite quickly, and in addition to loss of volume, the wig's hair becomes noticeably darker.
If this is not yet visible on dark wigs, and the loss of volume can be compensated for by some kind of hairstyle, then this will not work with light wigs. The color fades by 2 or even 3 tones, and often blonde hair turns into a distinct gray color. When buying a wig for yourself, pay attention to the texture of the artificial hair. Very cheap ones are made from hair so coarse that it looks like there are simple fishing lines on your head. This thick artificial hair immediately catches the eye, so no one will even question that it could be their own natural hair, everyone will immediately understand that this is 100% a wig, and the cheapest one at that.
Modern and not the cheapest wigs have very fine hair, which is difficult to distinguish from natural hair. It’s just 1 in 1. This kind of hair is easier to wash, and you can even style it. But we'll talk about it a little later.
Pay attention to the wig's thickness and hold. There are such wigs, from under the hair of which various nets, elastic bands, hairpins are visible - in a word, everything that should be hidden from the human eye. You won't see this in expensive wigs because they are made with high quality.
Also pay attention to the base. Cheap wigs will make you very uncomfortable and hot, because they create a sauna effect on your head.
The scalp should breathe and not sweat while wearing an artificial wig.
Also pay attention to the color. The first thing that catches your eye and passes off an artificial wig as a wig is the excessive monotony. With natural hair, even after coloring, this does not happen, and still some hairs will be lighter, some darker, and some will have a generally red tone. With cheap artificial ones, every hair is the same color as all the others. And they should be heterogeneous. Therefore, when buying an artificial wig, even for blondes, look for one in which the hairs have a different shade, which brings it closer to the natural hair color.
Body replacement and wig restoration for a porcelain doll
I was recently involved in restoring porcelain dolls and decided to post a report on my experience.
I'll start with what happened to them. Everything was not very good. Like this.
The second doll also had problems with its body, only they are not visible in the photo, but the fabric was unraveling at the seams, synthetic threads were coming out...
Well, now, I’ll show you what happened to them after our short acquaintance, and only then - a photo and description of the process itself.
In general, life has become much more fun for them, I think. I will note in parentheses that I only restored the makeup, and did not redo it to my taste, so their faces are still the same faces of young ladies made in China... In general, we are not talking about makeup.
I will tell you about the two most unpleasant processes in restoring porcelain dolls - now you will understand why they are unpleasant - but also the most basic: replacing the rag body and restoring the wig (it was possible to replace it with a new one, but this is more expensive and less interesting).
BODY REPLACEMENT
1. We dismember the doll as carefully as possible: first we separate the head, for which we cut the plastic clamp or threads that attach it to the body, then we gut the body, take out the thick wire inserted into the arms and legs, after which we turn the body inside out and cut the threads or thin wires with which the limbs are attached.
If you have any doubts whether it is worth changing the body of an ordinary Chinese cheap porcelain doll, then I can say that it is definitely worth it! You can’t imagine how much dust, dirt, sand there is in this body! And this is even for new dolls (I had the experience of dismembering a doll immediately after purchasing it in a store (I’m not a maniac)))!!! In addition, paper, plastic bags, hair, etc. are found in the stuffing. (in general, the process is nauseating, but you have to endure it!). In general, it’s better to redo it if the need arises, but certainly know what’s inside...
2. We cut the empty rag body at the seams to remove the pattern from it. We can improve the pattern a little according to our wishes. In my case this was not necessary. Therefore, I simply copied 3 details from fabric onto paper: body, arm, neck. She threw away the old cut up body.
3. Using the received pattern, we cut out a new body (2 body parts, 2 arm parts, 1 neck). Fabric - preferably cotton, thick enough, well, if the density is like an American one, a Soviet sheet will also work. I had exactly that. I don’t recommend using stretch fabric - the doll’s figure will be damaged.
4. We sew the new body and do not rush to turn it inside out.
5. Attach the limbs (we carefully ensure that the left and right limbs are not mixed up, and that the palms and feet are rotated correctly)
The photo shows the legs inserted into the new body and the materials needed at this stage.
We wrap the leg tightly in several rows with a thick thread, folded several times and tie it tightly. Glue the remaining fabric allowance to the part of the leg that will be hidden under the fabric (the very top of the porcelain leg). I do not recommend using wire to attach the limbs; it holds worse and protrudes more (but it’s up to you to decide).
We also attach the arms.
6. We insert the thick wire pulled out during gutting back into the body. I would like to draw your attention to one thing. I myself have porcelain dolls with a soft-stuffed body on a wire frame. They are of better quality than these patients, however, when I try to change their position - bend an arm or leg, I hear the same disgusting grinding of the iron wire on the porcelain, since it moves freely inside the porcelain limb. I decided to fix this and save the girls from the unpleasant creaking in their limbs. Therefore, I wrapped the wire with cloth (you can use a regular bandage or a medical plaster on a roll).
This photo shows the body already assembled, the head not yet attached, a wrapped wire, which I will now insert with one end into the left leg and the other into the left arm, cotton wool for stuffing and a stick with which I will push the stuffing into the limbs.
7. We fill the body. We try to do this as densely and evenly as possible. If the process was successful, the doll will be able to stand without a stand (leaning on something, of course, but not settling).
8. Attach the head to the body. For this it is very convenient to use clamps like these:
They come in different lengths. These are suitable for dolls up to 45 cm tall. For taller ones, you will most likely need longer ones. Sold in hardware and construction stores.
The collar, threaded through the neck of the rag body, forms a loop, which we tighten tightly around the doll’s neck (sorry, you can’t remove the words from the song, and associations with murder and resurrection cannot be avoided here)…
OK it's all over Now. The body replacement is complete... Now you can start sewing clothes and change the outfit called “cake with cream in creepy roses” to something more modern, for example, or maybe vice versa))) And we will move on to the second part of the Marlezon ballet!
WIG RESTORATION
1. Carefully peel the wig off your head. It is usually glued with hot-melt adhesive, which can be removed, for example, by heating it with a regular hairdryer. If the parts of the hairstyle were fastened together using the same glue, we also get rid of it simply by heating it and removing it from the doll's hair.
2. Wash the wig in shampoo to get rid of dirt, if necessary.
3. Soak in fabric softener. You can also use hair balm, but if the wig is in the same condition as in my first photos in this master class, then this is unlikely to help. I used FROSCH Almond Milk Concentrated Fabric Softener. It is not very cheap (about 150 rubles for 750 ml), but it smells pleasant of almonds. And the dolls' hair will also acquire this pleasant smell (for those who are not sensitive to odors, any other fabric softener will do).
It so happened that I left the wigs for a day in water with rinse aid. But, I think, while you are working on the doll’s body, i.e. 2 or 3 hours is enough to soak a wig.
4. Take out the wig, wring it out and carefully comb it with a comb, starting from the ends of the hair. (This is the most dreary thing! It was enough for me to put one wig in order in one evening. When I tried to immediately take on the second one, I realized that I couldn’t, even if I cut it!)
In this photo on the right are combed strands, on the left is tow)))
5. Now we need to assess the condition of the wig after combing and decide what we will do with it. If we want to return the doll's curls, then we take one strand (it should be wet) and twist it around our finger in the direction away from the face. If the curl of the doll's synthetic hair was initially good, then when we carefully remove this strand from our finger, we will get a great curl! And no forceps! If it works, then we make curls by simply twisting wet strands onto our fingers. The very ends of the strand will most likely need to be cut before winding it so that the strand and curl are neat.
On the right are curls, on the left are just combed strands.
The wig is ready.
7. If point 6 could not be completed, that is, the curl was initially of poor quality or was badly damaged for some reason, then we take curlers or any of their substitutes, curl the strands, then pour boiling water over the wig from a kettle, but not for long - just one kettle quite enough, even with a break... Then, after drying, we can leave the resulting curls as curls or transform them into curls in the way already described (or we can immediately twist them with curlers so that we get curls).
8. If we want to straighten the doll's hair, we iron the strands with an iron through a cloth.
It was like this:
And this is what happened. Well, then you can do whatever your heart desires.
Of course, the new wig will be more shiny than any restored from such tow that I had to deal with... However, I assess the results of the restoration as good. In addition, it is not always possible to purchase a wig of the right size. In the case of large dolls, it is more difficult...
Well, actually, my report comes to an end. I will be glad if it is useful to someone. I know that you can make a very individual doll from mass-produced porcelain parts. Good luck to everyone in their creativity!
When is it time to wash your wig?
Before we touch on the topic of cleaning your hair, let’s find out in a nutshell: when is it time to wash? Artificial wigs, unlike natural ones, do not become greasy as quickly. This makes them much more practical and costs several times less.
The first sign that it’s time to wash the wig is the lack of fluffiness and density. The hair began to show through the inside, namely:
- Fastenings;
- Elastic bands;
- Hairpins;
- Native hair.
The color of the artificial hair has changed a little - it has darkened, but this can only be seen on light wigs.
How to care for a synthetic wig
To avoid problems and questions about how to restore the hair of a wig and give it its former smoothness and beauty, you need to learn a few rules from the very beginning:
- Washing your wig should be done regularly, using special products or shampoos with a low alkali content.
- Do not wring or curl wet hair after washing - this will cause irreparable damage to its structure.
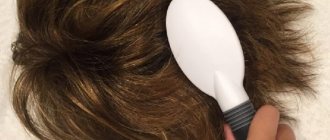
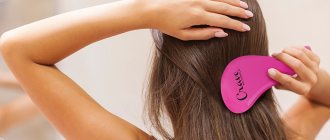
- You can only comb dry strands, and do this with a wide-tooth comb or a massage brush.
- It is forbidden to dry the wig near heating devices or hang it on ropes.
- It is recommended to store on a stand, in a paper box or cotton bag.
Follow the care instructions and recommendations given by Parikof store specialists, and then your wig will delight you with its appearance for a long time.
Method number 1: how to straighten a synthetic wig using steam
Let's start with the simplest and most reliable way to straighten artificial strands. For this procedure, you only need a kettle and water.
1. Fill the kettle with water and bring to a boil;
2. Hold the wig over a boiling kettle until the hair straightens;
3. As you straighten, comb the strands with a massage brush with thin, wide teeth.
There are tips on the Internet that it is easier to straighten artificial hair in a steamy bathroom. To do this, turn on the hot water, wait until the room becomes parco, and then begin to comb your curls. But we do not recommend this method for two reasons:
- Firstly, with a kettle everything goes much faster and more efficiently.
- Secondly, you don’t have to steam in the bathroom and waste cubic meters of hot water.
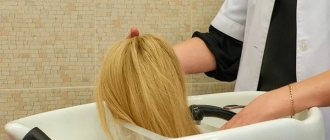
How to wash a wig?
The procedure for washing natural and synthetic hair is the same:
- Dissolve shampoo in a container with water;
- Wig for 5-7 minutes. should get wet, the detergent penetrates the structure;
- The base of the wig (monture) can be washed with a sponge;
- After shampoo for 10 minutes. leave the products in a solution with conditioner;
- Finish with a gentle top-down rinse with cool water;
- The remaining water is removed with a towel, wrapping the wig in it for 15 minutes;
- Dry on a stand at room temperature for about 10 hours.
Wig perm
What to do if you finally bought a wig with straight hair, but you really want to curl it, but you’re afraid that the hairs will melt and turn into a washcloth. Well, we definitely won’t curl it with a curling iron or flat iron with a corrugated attachment, but we’ll use hot rollers; if you do it very carefully, then it’s possible. To do this, you need to boil the hot rollers, but wait until they cool down a little.
We wrap our hair in warm curlers and leave it for the maximum amount of time. Then we comb it, and, if desired, fix it with varnish if the hair of the wig is soft. If they are hard, fixing them with varnish is useless.
Secrets of caring for curly wigs
- It is better to comb wavy curls and curls with your fingers - this way you will not harm them and will not tear out fibers from the base.
- For gentle care, choose brushes with wide teeth to thoroughly comb through your hair and get rid of knots.
- It is better to dry an artificial wig on a special blank or on a jar, away from sunlight and heat sources.
- To avoid damaging the shape of your curls, do not braid them into tight braids or plaits before storing them in a box for a long time.
How to restore a wig from human hair
You can restore different characteristics of a product; let’s go through the most popular ones.
Restoring shine
- Saturate wet wig hair with conditioner (you will need about 57 grams of product).
- Place it in a plastic bag and microwave for 30 seconds. Wet hair will heat up a little and steam will form, which will provide high-quality moisture.
- Take an old ziplock bag, place your wig in it, and leave it in there for a while. As a result, the hair of the product will be able to absorb steam and conditioner.
- Comb the wig, holding it in your hand or securing it on a special stand.
Restoring hair softness
Apply natural oil (coconut, argan, grape seed or extra virgin olive) to your wig hair. Add a moisturizing conditioner and leave for half an hour under a shower cap. After this, wash your hair following the washing and drying rules.
How to Restore Wavy Wig Hair
Wavy hair is sensitive to dryness, which leads not only to breakage, but also to frizz. To restore moisture, apply deep conditioner evenly, then place the wig in a suitable container in the microwave for 48 seconds. After removing from the microwave, you should wrap your hair briefly in something to increase the benefits of the conditioner.
How to wash?
Hair should not be washed in ordinary water, but by adding a little baking soda. It is advisable to use a special shampoo, but if this is not available, then any homemade one that does not contain conditioners and various oils will do. All you need is a soap base that will degrease and wash away dirt. The balm and oils in the shampoo will still not be able to soften the artificial hair, but because of them, the wig will become dirty literally after the first two or three wears.
Before washing, the wig must be put on a mannequin head or a 3-liter jar; comb, untangle tangled areas with your hands.
After washing, put it on a mannequin or a jar, straighten it, let it dry a little and comb it with a very soft comb, separating it into strands.
Carefully remove any hair that has come out, using scissors to slightly trim the ends that have strayed from the general line. After this, leave the wig until completely dry.
Drying it with a hairdryer is useless and harmful, because synthetic pile melts from hot air and any other heat treatments.
After the hair is dry, comb the wig again and put a special net on it.
You can wash it not only on the can, as if it were someone’s head, but also wash it as if it were some kind of thing.
To do this, we do the following:
1)
Fill a basin with water and dilute the shampoo in it;
2)
Immerse the hair cap in the soap solution for 5 minutes;
3)
We put it on the jar, rinse it with lukewarm water;
4)
Wrap in a towel for 15–20 minutes;
5)
We put the slightly dried wig back on the jar and leave it to dry for several hours.
Comb the wig after it dries.
Can you cut extensions?
Only natural wigs can be cut. Artificial ones are usually not cut, especially at home, because the cut may turn out to be too hard and unnatural. In general, synthetic hair wigs are designed in such a way that they are not subject to radical changes.
Interesting materials:
Which metal will react with dilute sulfuric acid? Which method of cognition is empirical? What bridge costs 2000 rubles? What kind of gift can you make with your own hands on February 23? What minimum wage should I use when calculating benefits? What is the minimum wage in the Sverdlovsk region 2022? What set of cooking utensils is needed in the kitchen? What initial capital is required to participate in exchange trading? What is the longest braking distance allowed for passenger cars? What people dance Lezginka?
How to curl a wig
The curling process differs for products made from natural and artificial strands. There are several ways.
Natural
It is recommended to use a hair dryer, straightener, curling iron or hot roller no more than once or twice a month. It is worth purchasing professional styling products, because their conventional counterparts pollute the strands, weigh them down, and make them brittle over time.
Curling with classic curlers is not prohibited. This method can be done regularly.
Artificial
Before curling artificial hair, you should once again make sure that the material is heat resistant. If it can withstand high temperatures, the following steps must be followed:
- Attach the product to the mannequin and comb thoroughly with a special comb.
- Separate the curls, secure the strands with clips.
- Moisten with water from a spray bottle.
- Curl each strand one by one.
Curling a synthetic hair wig with a curling iron carries the risk of accidentally burning the material if handled carelessly. However, there is a safer method:
- Moisten the strands with cream. Rub it in your palms and run through your hair.
- Comb thoroughly and divide into strands. Hook in curlers.
- Pour half a pan of water and boil. Let cool for 5 minutes, then dip the wig and curlers into the pan for 40 seconds.
- Allow to dry completely.