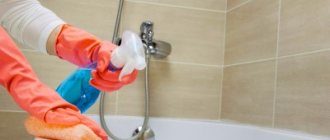
If an acute problem arises, how to clean the shower head from limescale, you can use strong chemicals or improvised means. When used correctly, both methods can quickly remove water stone from the external surface of the device, as well as nozzles and internal elements.
You can clean the shower head with special preparations or improvised means.
How often should you clean your shower head?
It is advisable to remove dirt at least once a month. This will help maintain stable water pressure and reduce the number of harmful microorganisms. Scientists from the Cooperative Institute for Research in Environmental Sciences (CIRES) found out that mycobacteria easily multiply inside the shower head, which can cause lung diseases.
Prevention
The purpose of the event is to prevent the formation of lime-salt deposits and blockages in the nozzles:
- Installing inlet filters will allow you to capture solid mechanical impurities and rust.
- In country houses, it makes sense to install a water softener or chemical filter. Another option is a magnetic fluid transducer.
- A monthly visual inspection will help identify limescale deposits in the early stages.
(Visited 420 times, 420 visits today)
Share
How and how to clean a shower head
Limescale deposits can be removed using simple means. Most likely, you will find them at your home.
Vinegar
Method 1
Unscrew the watering can from the hose or pipe. If necessary, use a wrench. It is easy to damage or simply scratch the device with pliers.
Run a stream of tap water through the shower head to thoroughly rinse the inside. Wear gloves and clean the watering can with a soft, old toothbrush and vinegar. Remove deposits from the holes with a toothpick or pin.
To remove remaining residue, place the watering can in a container with vinegar overnight. Then rinse the device and secure it to the hose or pipe.
Method 2
If you cannot remove the shower head for some reason, try another method. Pour the vinegar into a plastic bag and then secure it over a watering can with fishing line, a rubber band, or wire. The nozzle should be completely immersed in the solution. Here's how to achieve this:
After an hour, carefully remove the structure and turn on the water to rinse the device. Then wipe it with a soft cloth.
Cola
This drink contains three acids. Can You Clean a Showerhead With Coca‑Cola? / Hunker: lemon, wine and phosphorus. The acidity of the latter is higher than that found in natural cleaning products. For this reason, cola copes with removing plaque and rust on plumbing fixtures.
To make your shower head sparkle, simply pour soda into a plastic bag and follow the same steps as the second method with vinegar.
Detergent
Try store-bought household chemicals. For example, Cillit BANG, Mr. Proper, Toilet Duckling and Domestos. In a plastic bag, combine 2 cups hot water with ⅛ cup detergent. You will have a soap mixture. Attach it to the nozzle according to the instructions from the second method with vinegar.
If the purchased solution is intended specifically for removing limescale from plumbing fixtures, proceed as indicated on the label.
Soda
In a bowl, combine ½ cup baking soda with a little warm water and stir. You should end up with a mass that resembles toothpaste in consistency. Put on gloves and coat the hole side of the watering can with the product. Leave for 25 minutes and then rinse the outside of the device. To remove any remaining mixture from inside the nozzle, turn on the shower for two to three minutes.
Lemon and salt
Cut a slice from the lemon and sprinkle salt on it. Rub the hole side of the shower head and then turn on the hot water for a few minutes.
This method will help if a thin layer of limescale has formed on the nozzle. The sour juice will destroy deposits, and the salt will work as a scrub.
Cause of blockage
Most of the housing stock is connected to the central water supply system. Cold and hot water is supplied to the consumer through iron pipelines. The quality of the liquid in most cases leaves much to be desired:
- the presence of small solid mineral particles in the form of grains of sand;
- presence of rust flakes;
- increased water hardness, – content of dissolved mineral salts.
Negative factors are the main cause of the formation of limescale blockages. When water enters the closed container of a shower head, it experiences a number of physical and technical effects:
- temperature change when mixing cold and hot flows;
- pressure drops and vortex formations occur;
- conversion of static pressure energy into kinematic energy in the area of the outlet from the watering can - the spray holes.
Pieces of dirt and rust larger than the diameter of the holes clog the passage. Changes in dynamic and temperature conditions cause crystallization and precipitation of lime salts. This ultimately leads to disruption of the normal operation of the shower head.
What mistakes should you avoid when cleaning your shower head?
To avoid making things worse, follow these How to Clean a Showerhead Using Basic Pantry Ingredients precautions:
- Work in a ventilated area. It doesn’t matter what you decide to use to clean the nozzle: vinegar or household chemicals. The fumes from these products may be harmful if inhaled. To protect yourself, open a window or turn on a fan while cleaning.
- Do not use chlorine products if you want to get rid of bacteria. CIRES researchers suggest Your Showerhead Slime is Alive—and Mostly Harmless / Cooperative Institute for Research in Environmental Sciences at the University of Colorado Boulder that some microorganisms are resistant to this substance. In addition, such chemicals can easily ruin clothes during cleaning.
- Do not scrub the nozzle with a stiff wire brush. If the device has a chrome finish, there will be scratches on it. Choose soft cloths.
What you will need
You will need 9% strength white vinegar and a spray bottle. Also prepare cling film. It is better to use stretch film, which has a slightly sticky surface.
If you use vinegar essence, it must be diluted. For 1 part of product you will need 6-8 parts of water.
Store-bought descalers
There are many different chemicals available to remove plaque from plumbing fixtures. Antiscaling, an inexpensive chemical, will help remove plaque from your shower head. It is used for those materials that are resistant to high temperatures, since this cleaning method requires boiling the parts in water.
There are more modern formulas and cleaners that can help clear your shower head of limescale and residue buildup. Perfect for:
- Sillit Bang;
- Sif;
- Sanox;
- Electrolux.
Domestos is also suitable for cleaning watering cans made of different materials; it is a universal cleaner and helps to perfectly remove plaque.
We suggest you familiarize yourself with Methods for cleaning aluminum from oxidation at home. For more advanced situations, the strong chemical formula WD-40 is suitable.
There are many other means with which you can very carefully and accurately remove plaque. They also form a protective film that prevents scale formation.
Before purchasing and using any product, carefully read the instructions for use.
Use standard precautions: look at the expiration date and contraindications. The most susceptible surfaces are:
- acrylic;
- chrome plated;
- made of brass;
They must be used very carefully and protected from exposure to highly concentrated products, which should only be used when the degree of contamination is very high.
Preparing to clean the faucet
To carry out comprehensive cleaning, you will need to disassemble the mixer. This is not difficult to do, even with little plumbing knowledge. All taps are divided into three main types:
- two-valve;
- single lever;
- ball
The disassembly principle is not much different. Standard tools will also be needed.
Necessary tools and equipment
To disassemble the mixer you will need:
- Phillips and slotted screwdriver;
- key.
You must use either a special water key or a simple adjustable key.
Removing the shower head and hose
Before removing the hose, you must remove the shower head. The algorithm is as follows:
- Take the watering can in one hand.
- Unscrew the nut that secures the hose to the watering can.
- The nut should be rotated counterclockwise.
In some cases, your hands may slip and the nut will not unscrew. Then you should wipe it dry and put on household gloves. Sometimes it is more convenient to do this with pliers.
After dismantling the watering can, disconnect the hose from the mixer. This must be done with an open-end or adjustable wrench.
Removing the gander and aerator
Before dismantling the gander, it is necessary to turn off the water in the riser so as not to accidentally turn on the water. Then follow the instructions:
- At the base of the spout, wrap a cloth around the union nut to protect it from damage.
- Use an adjustable wrench to unscrew the nut.
- Turn the gander along its axis and remove it from the body.
An aerator is a special device screwed into the gander, which helps fill the water with air bubbles and also serves as a filter to remove foreign particles.
To unscrew the aerator, there are 2 gripping edges on its body and they are located diametrically. It is necessary to grab these edges with a key and rotate them counterclockwise.
Disassembling the shower head
Disassembling a standard watering can, without switching modes, has the following algorithm:
- Using a screwdriver, unscrew the fixing bolt and remove the decorative plug.
- Unscrew the bolt and remove the diffuser.
How to Clean an Old Shower Hose to Make It Shine Like New
A tidy bathroom and shining taps are the pride of every housewife. To clean the shower hose and polish the plumbing fixtures, I had to buy expensive and harsh chemicals. But, as it turned out, time-tested folk remedies cope with this task quite well.
Anti-plaque household chemicals
The most acceptable way is to use detergents for cleaning bathtubs and toilets that contain chlorine and other active elements that can rid the watering can of plaque without a trace. Among them are “Toilet duckling”, “Domestos”, “Cillit BANG”, etc.
- First you should try to disassemble the watering can. But if there are no instructions, you should not do this, otherwise you may damage it.
- Pour water into a container and stir a little of the selected detergent into it.
- Dip the disassembled or assembled watering can into the cleaning solution and forget about it for 30-60 minutes.
- After soaking, just run a brush over the watering can to remove plaque fragments from hard-to-reach areas. The active elements will “dissolve” the durable limescale deposit, and it will be easily removed.
- Then rinse the watering can and wipe dry.
Clearing a clogged aerator
Regardless of the design, aerators require periodic cleaning. The filter traps small foreign particles and over time becomes overgrown with limescale.
How to disassemble a removed aerator?
In order to disassemble the removed aerator, it is necessary to separate the filter mesh from the ring on which it is located.
Mechanical cleaning of a clogged filter
At the first stage, it is necessary to carefully clean the plastic filter from scale, rust and foreign particles. This must be done with an old toothbrush or toothpicks.
Chemical cleaning of limescale
If limescale takes up a significant amount of filter space, then it must be soaked for at least an hour in a solution of acetic acid. After this, carefully rinse the mesh and reassemble the aerator.
If nothing helps?
In this case, you will have to buy a new aerator. Otherwise, the water pressure will decrease or problems with the stability of the stream will begin.
Cleansing with citric acid (editorially verified)
Citric acid is the second most popular and effective household remedy for scale and lime deposits. You will need one large sachet of 25 g. The contents are poured into any container that is not afraid of high temperature, and approximately 1 liter of hot water is poured.
It is better to unhook the watering can from the hose or put it in a jar and place it in the bathtub or shower stall. When the plaque gets wet, clean it with a brush, then rinse the nozzle completely.
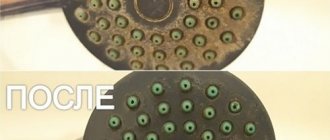
Verified by the editors: a third of a 25 g bag of citric acid was dissolved in 500 ml of water at a temperature of 70-80 degrees. We placed a shower head into the solution, and a reaction immediately began in the form of bubbles. There was little dirt, so it only lasted 30 minutes. The result of cleansing is in the photo. The method is 100% working.
