We have a cat and a dog at home, so I bought a universal turbo brush to clean the carpets with a vacuum cleaner. At first, it coped well not only with dust, but also with wool, but now it’s clogged. I'm afraid a little more and it will stop working completely. How to properly disassemble and clean the turbo brush of a vacuum cleaner, can you do it yourself?
1
Hello, Polina! First, let's look at how the device works. There are mechanical and electrically driven brushes. The former work due to the force of the sucked air: the higher the power of the vacuum cleaner, the better the device can clean the surface. Electrically driven brushes are much more expensive, but they do not depend on power, since the roller rotates autonomously. True, such a miracle of technology can “overdo it” and pull fibers out of the carpet along with the dust. The choice is yours.
Most often, simple mechanical brushes are used, which are included with the vacuum cleaner.
If you don't already have such a device, be sure to buy one at your local hardware store.
Such a nozzle is inexpensive, but the benefits are simply enormous. And for it to work properly, all parts must sometimes be cleaned of debris.
Samsung robot vacuum cleaner
This vacuum cleaner cleans laminate, tile, and carpet. In this case, the debris ends up in the center of the self-cleaning brush, then immediately goes into the dust collector. The automatic system detects the type of surface and regulates the dust suction power. The filter does not become clogged with debris. The vacuum cleaner can be controlled remotely using an application on a smartphone (set the time, cleaning route). It is recommended to clean the side brushes of the robot vacuum cleaner once a week, otherwise their motors may burn out. If you need to disassemble the brushes, it should be done in this order:
- Unscrew the 4 screws on the bottom cover;
- find the side brushes, pull and remove them from the shaft.
Comparison with competitive models
The Bosch GS-10 has a lot of competitors with similar characteristics and cost. To make it easier to compare and choose the model that best suits you personally, we have made a selection of the most similar devices from other brands.
Competitor #1 – LG VK76A02NTL
This device from LG has a similar price but has a little more power. At 2000 W of consumption, its suction power increases to 380 W, versus 300 W for the Bosch GS-10.
Technical specifications:
- Power consumption/suction – 2000/380 W.
- The presence of a turbo brush in the kit - no.
- The dust collector is container-type, without a bag, with a cyclone filter.
- Container capacity – 1.5 l.
- Noise level – 78 dB.
- Cord length – 5 meters.
If you need a more powerful model, then this is a better choice than the analogue from Bosch.
Are you interested in this vacuum cleaner model? Then we recommend that you familiarize yourself with the rating of the best 2000 W models from LG. Read more below.
Competitor #2 – Samsung VC18M3160
This model is good because it comes with a turbo brush. At the same time, with a power consumption of 1800 W, this device absorbs 380 W.
Technical specifications:
- Power consumption/suction – 1800/380 W.
- The presence of a turbo brush in the kit - yes.
- The dust collector is container-type, without a bag, with a cyclone filter.
- Container capacity – 2 l.
- Noise level – 87 dB.
- Cord length – 6 meters.
It is of course noisier than the presented BOSCH models, but its container is more spacious.
Competitor #3 – Philips FC9350
This model is a little lighter and cheaper than the Bosch GS-10, but in terms of characteristics and functionality it completely replicates it.
Technical specifications:
- Power consumption/suction – 1800/350 W.
- The presence of a turbo brush in the kit - no.
- The dust collector is container-type, without a bag, with a cyclone filter.
- Container capacity – 1.5 l.
- Noise level – 82 dB.
- Cord length – 6 meters.
At the same time, in terms of suction, the device from Philips is even slightly superior to the analogue from BOSCH discussed above.
Washing vacuum cleaner Bork
A special feature of the Bork washing vacuum cleaner is the presence of a high-speed separator that cleans not only surrounding objects, but also the air. Small dust particles are absorbed and fall into the water. When the separator rotates quickly, they become heavier and settle to the bottom. At the same time, the surrounding air becomes clean and humidified. A washing vacuum cleaner can do:
- dry cleaning of floors, carpets, furniture, clothes, indoor plants;
- cleaning up liquids;
- eliminating blockages in pipes;
- ionization, humidification and aromatization of air;
- vacuuming or aromatizing things when preparing them for storage.
The brush of the washing vacuum cleaner may break due to improper use of the device. To prevent this from happening, the following rules must be followed:
- pour water into the tank up to the mark;
- after cleaning, be sure to rinse the tank, wipe it and store it separately from the vacuum cleaner;
- Do not use water to wash parquet.
If the brush of a Bork vacuum cleaner breaks, it must be disassembled. This operation is performed in the following order:
- Turn the brush upside down.
- Unscrew the 2 outer bolts, 2 central bolts, 2 located near the wheels.
- Using a thin screwdriver, pry and pull out the axle on rollers that holds the fasteners of the top cover.
- Unscrew 2 more bolts located near the large wheels.
- Turn over.
- Press the middle button and remove the top cover.
- Unscrew the 2 bolts located near the air intakes and pull out the upper part.
- Take a good look, determine the cause of the breakdown and clean all the parts.
- Carry out repairs.
- Reassemble in reverse order.
Repair it yourself or call a professional?
You can repair a Samsung vacuum cleaner yourself, or entrust this work to a professional. Both options have their advantages and disadvantages that you need to consider before making your final decision.
Equipment under warranty
For most models of Samsung vacuum cleaners, the warranty is 1 year, although for devices in the SC20F70, SC07F80 and SC12H70 series it is 5 years.
In addition, some models with an inverter motor come with a 10-year warranty from the date of purchase.
If the vacuum cleaner breaks down, but is under warranty, you do not need to repair it yourself. You should contact a service center, where all parts will be replaced free of charge. If the equipment cannot be repaired, it must be replaced or the money returned. The main thing is not to attempt to open the case yourself.
Pros and cons of home renovation
Advantages of home renovation:
- financial savings;
- arrival of the master anywhere in the city, at a time convenient for the client;
- repairs are carried out in front of the owner of the equipment.
The main disadvantage of home repairs is the difficulty in finding a qualified specialist and the risk of meeting scammers.
Therefore, it is better to contact craftsmen who have already proven themselves by performing similar work for relatives or friends. It’s good if he has a narrow specialization, that is, he only repairs vacuum cleaners.
Advantages and disadvantages of repairing at a service center
Repairing equipment at a service center has the following advantages:
- Original parts are always available.
- The likelihood of encountering scammers is minimal.
- Large organizations employ qualified specialists.
- All work is carried out under a contract. Replaced parts are guaranteed.
The disadvantages include the need to deliver equipment to a service center and the high cost of work (compared to private craftsmen).
You can find a specialist by looking for an advertisement in a newspaper or on the Internet. The average cost of repair work is 1,500 rubles, depending on the complexity.
Cleaning the brush
The Samsung robot vacuum cleaner has a turbo brush and side brushes. To clean the turbo brush you need:
- Turn the vacuum cleaner upside down.
- Pull out the bearings.
- Clean the turbo brush from wound debris, using scissors and tweezers if necessary.
The side brushes should be cleaned in this order:
- Turn the vacuum cleaner over in the same way.
- Unscrew the screw using a Phillips screwdriver.
- Remove the brushes from the shaft and clean with a dry cloth.
- Wipe the axle.
- Assemble the vacuum cleaner.
Expert opinion
Nikolai Petrovich
Subpage for an expert
You can clean the side brushes with another soft-bristled brush (for example, a toothbrush). To restore their shape, you need to immerse them in hot water for a while.
Dutch Uncle
Simplicimus Incognitus: Bedgerdyshch!
Cordless vacuum cleaners have one huge advantage (portability) and two disadvantages: relatively low suction power and limited operating time. Moreover, both the advantages and disadvantages are directly related to the batteries used - which, by the way, will need to be replaced in a year or two...
So, after a year and a half, I began to notice that the vacuum cleaner I talked about in the first part began to work rather poorly. Let me remind you that until recently there were five people living in the apartment: two people, two large dogs and a “medium fluffy domestic cat.”
2.1 Preparation
Almost the only worthwhile information that was found on the Internet was a photo report by a certain New Yorker about replacing Ergorapido battery replacement batteries.
After looking at the photos, I ordered Sanyo Eneloop AA 1900 mAh NiMh batteries from extragadget.ru. If your vacuum cleaner uses lithium ones, order lithium ones, don’t get confused!
I ordered from extragadget.ru because I had already placed orders with them, and I was quite satisfied with both the timing and the quality of service. Why Sanyo Eneloop batteries? Firstly, at one time they were highly praised by Sergei Golubitsky in an article about the Maha smart charger - these are not disposable Chinese batteries, but high-quality Japanese products that use the technology of the same name, which reduces self-discharge and allows batteries to be recharged up to 1800 times! And secondly, in extragadget.ru they already had soldered contacts (see photo below), which greatly simplified and speeded up the work.
In February 2015, the batteries arrived, I went to the post office to get them and prepared a place on the table where I placed a vacuum cleaner and the necessary tools: Phillips and flathead screwdrivers, a knife, electrical tape, a soldering iron, solder, flux. In order not to be distracted during disassembly and reassembly, you can connect the batteries in pairs in advance (see details below).
Begin! Disconnect the handheld vacuum cleaner. Then we disconnect the garbage container from it. If necessary, the surfaces can be wiped clean of dust (and there is dust there). After this, you can unscrew the screws and detach the sides.
1. Side view. To the right of the motor you can see blue Electrolux 1300 mAh batteries. The vacuum cleaner uses 10 batteries - which means the total charge will be 13 Ah - which, according to the manufacturer, should be enough for about 15 minutes of operation.
2. Bottom view. The nameplate shows the parameters of the vacuum cleaner.
3. Disconnect the upper part of the handle. In the top view you can see two more batteries and next to the motor and a green board with control electronics and a power button. During disassembly, try not to press the power button of the vacuum cleaner.
Repair
Let's look at the main breakdowns and how to fix them.
| Breaking | Remedy |
| The turning mechanism does not hold due to abrasion of the rotating surface | Connect the turning mechanism to the brush. Using a drill, make 2 holes on both sides, thread the wire, secure and bend. The mechanism will hold tight. |
| The connection between the brush and the nozzle is loose and sucks in air due to a broken O-ring | Open the connection, remove the broken ring. Cut strips from the batting and wrap them around the broken ring. Air will not be sucked in. Strengthen the connection with plastic: cut thin strips, bend them in the shape of a V, insert into the holes and strengthen the connection. |
| The rollers are worn out | Remove the cotter pin that connects the brush to the extension. Restore the rollers: cut a strip from a plastic bottle, wrap it around the damaged roller, fill it with epoxy resin, and sand it. Make a new cotter pin from a metal rod, place rollers on it, and secure the sides of the rod with epoxy resin. |
The brush of a vacuum cleaner is one of its most worn components. Sometimes the reason for poor operation of the vacuum cleaner lies in a malfunction of the nozzle, which you can fix with your own hands. To do this, you need to be able to properly disassemble the brush and determine the cause of the breakdown. If repairs are carried out correctly, the brush can last for a long time.
You will find more interesting information on this topic in the “ Repair ” section of our portal.
Trouble-shooting
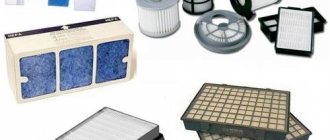
Sometimes it happens that a vacuum cleaner suddenly stops performing its main function. Everything seems to work, but dust is not sucked in. In this case, first of all, you need to remove and inspect the filters. If the filters are clogged with dust, they need to be cleaned. If cleaning does not work, the filters need to be replaced. Before replacing, you need to turn on the vacuum cleaner without filters and make sure that the suction power is at the proper level. If it is still small, you will have to inspect the impeller. It may happen that it is completely clogged with small debris.
At the same time, check the condition of the brushes and commutator of the engine. Worn brushes need to be replaced and the commutator cleaned. The tightness of the hoses may also be compromised, especially in the places where they are attached to the nozzles.
You need to pay attention to this too
The next common problem is that the vacuum cleaner does not turn on. There are three main reasons for this:
- fuse blown;
- break in the network cable;
- There is a fault in the switch.
The fuse has already been mentioned, but to check other faults you will need an ordinary tester. With its help, you can easily ring the wires and locate the break point. Then a soldering iron is connected to the case and the problem is eliminated.
This happens when the vacuum cleaner is used for a long time. No repairs are required here. After cooling, the operation of the vacuum cleaner will be restored automatically.
If during operation the vacuum cleaner vibrates or you hear squealing or grinding noises, this means that there is a problem with the bearings. They need to be lubricated, and it is best to replace them immediately. The presence of sharp sounds in the bearing assembly indicates that its service life has expired.
And the last trouble is that the power wire is not tightened. Repair in this case is also not very difficult. Here the problem may most likely be in the spring. You need to get to the winding drum and inspect it. The spring may be weakened or, conversely, tightened. If everything is fine here, then you will have to remove the drum and unwind the wire from it (or vice versa, rewind it). This will adjust the tension force of the drum.
During inspection, it is necessary to check the functionality of the pressure roller. Vacuum cleaners of any brand are not immune to such a malfunction when the engine speed is no longer regulated. In this case, the problem must be looked for in the electronic control unit. It is simply not recommended to repair it yourself.
The process of disassembling and repairing a Samsung vacuum cleaner is not very difficult. It can be done independently with minimal knowledge of electrical engineering and the ability to handle plumbing tools.
A little about electronics
Thermal fuses are installed on branded, expensive electric motors to prevent the vacuum cleaner from starting a fire. Under heavy load, for example, when a bearing is jammed, the motor begins to heat up greatly. This may cause a fire, but the thermal fuse opens the circuit, stopping rotation and overheating.
Finally, we’ll tell you what exactly you shouldn’t get into. The electronics in the vacuum cleaner come down mainly to powering the motor, which can be connected to the network using regular terminals via the power button. Some models have a power control (switch or dimmer on the housing), which includes an additional variable resistance adjustment resistor - this limits the current consumed by the motor. It is also possible to have an electronic filling sensor, rotation control sensors (encoders), backlit power button and other options.
Parts care
Cleaning nozzles, pipe and hose
To clean the suction hose and working brush attachments, follow these steps:
- fill the bathtub with warm water;
- disconnect the hose from the vacuum cleaner and place it in the liquid for 10 minutes;
- after the specified time, clean the inner surface of the pipe with a long rod or steel wire, wipe the outer surface with a hard sponge;
- remove the hose from the water and place it on a spread oilcloth to dry.
To remove build-up of dust, fur, and hair from the brush heads, adjust the brush switch so that the bristles extend and remove debris using tweezers, scissors, or an old toothbrush.
After this, fill the container with water and add detergent or soap, place the nozzle in the resulting solution for 15 minutes, then wipe it with a hard sponge, rinse with clean water and leave to dry.
Blowing the motor
- remove all filters from the vacuum cleaner, close the housing and take the device to an open space (for example, a balcony); turn on the device and set the power switch to maximum;
- After 15-20 minutes of operation, unplug the device, let it cool and wipe it with a damp cloth.
REFERENCE! The process of cleaning dust inside will be more effective if you tilt the vacuum cleaner slightly in different directions while blowing and cover (not completely) the hole to which the hose is connected.
Removing the smell
If not maintained regularly or due to moisture or food debris getting into the dust collector, the vacuum cleaner begins to smell unpleasant. Also, an odor may appear if dirty water stagnates in the aquafilter.
To get rid of this problem, remove the dust collection device and the engine protection filter and wash it with soapy water.
To eliminate the smell, use fragrance balls, which you place in the dust container and leave there until it is empty.
- mix wine vinegar and warm water in equal parts; disassemble the vacuum cleaner and treat the entire inside of the device with the solution;
- wait until the unit dries, then apply 5-6 drops of any essential oil to a cotton pad and place it in the dust collector.
Cleaning the turbo brush
This device differs from conventional brushes by the presence of a rotating shaft with stiff bristles located at the point where dust is collected.
Clean this nozzle at least once every six months, if there are animals in the house - at least once every 3 months:
- remove the protective cover, turn the brush over and unscrew the screws located on the inside of the device;
- separate the nozzle into two parts, wipe the inner surface of each with a damp cloth;
- Using tweezers, scissors, remove accumulated hair and fur and collect the brush.
Did our advice help you?
The easiest way to clean
Initially, it is important to understand that without disassembling the brush, performing high-quality cleaning becomes impossible. In any case, if you have a suitable screwdriver, the cleaning procedure will take no more than a few minutes.
To make it easier to understand the turbo brush cleaning method, it will be divided into separate stages:
- removing the brush from the vacuum cleaner tube;
- partial disassembly to remove the rotating part;
- cutting through accumulated debris (often hair and fur);
- removal of pollutant.
It is necessary to cut the debris, because otherwise it will not be possible to clean the brush perfectly.
Many people try to clean the vacuum cleaner brush with another brush or an old comb. This method is less effective, as it requires more time to obtain exactly the same positive result.
Peculiarities
The vacuum cleaner is distinguished by its power, quality of cleaning, and its size. Customer reviews indicate that this unit can last for quite a long time.
Despite the large number of positive reviews about Thomas vacuum cleaners, the device has classic breakdowns associated with the pump, the power button, splashing water and wear of the porous gasket.
Every home handyman should definitely know what causes these problems and how to correct them correctly.
How to properly clean a turbo brush for a vacuum cleaner from hair and fur?
We have a cat and a dog at home, so I bought a universal turbo brush to clean the carpets with a vacuum cleaner. At first, it coped well not only with dust, but also with wool, but now it’s clogged. I'm afraid a little more and it will stop working completely. How to properly disassemble and clean the turbo brush of a vacuum cleaner, can you do it yourself?
Article on the topic: How a robotic wet vacuum cleaner works
Hello, Polina! First, let's look at how the device works. There are mechanical and electrically driven brushes. The former work due to the force of the sucked air: the higher the power of the vacuum cleaner, the better the device can clean the surface. Electrically driven brushes are much more expensive, but they do not depend on power, since the roller rotates autonomously. True, such a miracle of technology can “overdo it” and pull fibers out of the carpet along with the dust. The choice is yours.
Most often, simple mechanical brushes are used, which are included with the vacuum cleaner.
If you don't already have such a device, be sure to buy one at your local hardware store.
Such a nozzle is inexpensive, but the benefits are simply enormous. And for it to work properly, all parts must sometimes be cleaned of debris.
What to do if the turbo brush does not spin
Sometimes the turbo brush roller may not rotate and the nozzle may not work. This can happen for various reasons. It is necessary to diagnose and eliminate the cause of the breakdown.
In order to carry out diagnostics, it is necessary:
- Inspect all belts: drive, timing. If the belt is stretched, damaged or has come off, it needs to be replaced.
- Check the turbo brush roller. It may be very dirty. If after cleaning the roller the brush does not work, you need to replace it.
- Make sure that current is supplied to the motor. If the motor rotates but the brush does not work, the motor is faulty and needs to be replaced.
A turbo brush is a useful thing in the household, allowing you to save energy and time when cleaning. Before purchasing it, you need to pay attention to the pros and cons of using it.
Most Popular Brands
Electrolux
Distinctive features of the products of this brand: high quality cleaning and high power. Also suitable for Rowenta and Phillips vacuum cleaners. The kit comes with a conductor, so perhaps the model will fit other models as well.
Electrolux turbo brushes are known for their quality and power.
Dyson
If you need a device for cleaning carpet from animal hair, then units of this brand are definitely your option. In addition, the Dyson turbo brush is easy to clean and is very easy to disassemble and assemble. Suitable for almost any vacuum cleaner.
Dyson turbo brushes are ideal for cleaning pet hair from carpets.
The devices are perfect for removing problematic debris from various surfaces. The brush is made of durable plastic and has a contamination indicator, making it easier to use.
LG turbo brushes are good at removing debris from almost any surface.
A turbo brush is a very useful thing in the household. It can significantly increase the efficiency of your vacuum cleaner and get rid of annoying hair, dust and dirt.