Nails consist of many stratum corneum, and careless hand care or performing household work without using gloves can lead to gradual damage to the nail plate, causing detachments or breakages.
It is quite difficult to restore a nail yourself, so girls either cut it off completely or turn to a specialist. However, there is one common home method - repairing your nails with a tea bag. Such repairs are absolutely safe for the girl, so you can do it without fear.
What you will need
Before you begin nail repair, pay attention to preparing consumables and compositions to restore a healthy manicure.
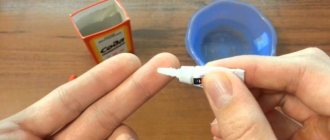
As a standard, ordinary decorative transparent varnish is used to fix the bag, but often, to increase the efficiency of the repair, girls use gel polish and an ultraviolet lamp to adhere it. However, keep in mind that this option will be safe only if there is an injury on the regrown free edge. If a crack occurs on the bed itself, exposure to the lamp and polymers can be dangerous to the health of the matrix (root).
In addition to the base and top coat of the varnish itself, for work you will need:
- Tea bag;
- File;
- Bafik (for polishing);
- Scissors (it is recommended to use nail scissors);
- Acetone or other means to remove the previous decorative coating;
- Antiseptic.
Additionally, you can prepare a colored pigment to completely disguise the area of nail damage.
Temporary fixation
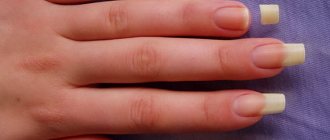
If your nail breaks at work, where you don’t have the necessary tools and supplies, you can patch it up a little. Remember that the gluing procedure will need to be continued at home as soon as possible. This method involves using regular tape. Cut a piece of adhesive tape slightly larger than the crack and cover your nail with it. Smooth the surface in the direction of the nail break. Remove excess tape with scissors and iron everything again. This procedure will prevent further damage for several hours.
How to seal a nail with a tea bag
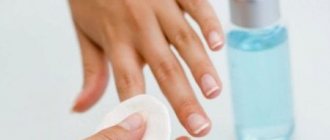
Repairs must begin by removing the previous decorative composition from the surface. To do this, use nail polish remover, acetone or special compounds to neutralize gel polish.
After this, the fingertips are cleaned and degreased with an antiseptic (hydrogen peroxide can be used instead).
The work begins with shaping the plate:
- First you need to remove all sharp and uneven edges that could cause scratches. To do this, use a file, as scissors can damage the location of the stratum corneum, which will lead to the formation of detachments. After this, give the nail its original shape.
- Polish the stock with a buff so that the coating lays evenly and neatly.
- Apply a thin layer of base coat to your nail.
- Cut out a small piece of tea material (you need to take the thinnest layer), apply it to the damaged area. Secure the top with an additional layer of base.
- After the previous layer has cured, you can apply another layer of base coat to create a dense finish similar to a natural manicure.
- After completely fixing the bag, use a file to give the free edge the desired shape.
- Apply colored pigment and secure the manicure with a top coat.
Typically, repairing one nail takes up to fifteen minutes if the work is done with gel polish. A regular solution takes longer to dry, so a girl can spend up to one hour on the procedure.
Using tips
You can also use tips to fix a broken nail at home. It is better to purchase transparent or translucent square-shaped products. In addition to them, you will need special glue, a nail file, scissors and nail polish remover.
First of all, remove all roughness in the damaged area and degrease the nail with nail polish remover. Apply glue to the entire plate and the inner surface of the tip. Place the product on the nail so that the stop matches the edge. Let the glue dry for a couple of minutes, and then cut the tips with scissors to the shape of the rest of your nails, it is better to leave a little length for adjustment. Treat the resulting nail with a nail file, and for greater reliability, coat the joints with glue.
Which tea bag to choose - they are different
To increase the efficiency of repairs, pay attention to the choice of patch quality. It should have a fibrous structure. The more natural the composition of the material, the better it will hold up after repair.
It is generally recommended to choose a cellulose base because it remains on the surface for a long time. However, you cannot choose artificial mesh materials, as they are quite bulky and look bad after manipulation. The base is replaced with a disposable filter for a coffee machine. The criteria for choosing a filter are the same.
Initial examination
First, the victim must be carefully examined in order to understand the scale of the tragedy. Depending on the location of the injury and the extent of the damage, the treatment method is selected. We need to come to an agreement right away. A case with a complication. For example, if the nail is half broken. If the crack is such that the nail bed is damaged, blood is oozing, the plate has moved away from the “meat,” then under no circumstances should anything be glued. Repairs can only be carried out if the nail itself is damaged, without consequences for the “skin and meat”. There are no photos of such cases here, because the spectacle is not for the faint of heart.
If such a problem occurs, then rinse your finger with hydrogen peroxide and cover it with a band-aid. Next - nails in the hand and cheerfully, cheerfully, to the nearest hospital. Russian maybe, whatever you say, it’s an effective amulet, but it doesn’t happen once in a while. For the girl Tanya, everything healed, but for the girl Dasha, dirt got in and inflammation began. No one is immune from complications. Although the manicure process will be simplified. You will need to paint one less finger. And forever. Doctors are like that, don’t feed me bread, let me cut something off. Okay, a joke of humor, but black. But, unfortunately, it is vital.
Will anything bad happen if you use superglue?
The work needs to be done only with varnish, since it is designed to work with the sensitive surface of the fingers and the plate itself. In addition, you can find a solution with a safe composition intended for the restoration and treatment of manicure.
Glue cannot be used for several reasons:
- Increased toxicity;
- One of the restrictions on its use is that if it gets on the skin, rinse with plenty of water, since it is not intended for contact with the girl’s body;
- There is a risk of an allergic reaction;
- When penetrating into a crack, it damages sensitive tissue and affects the matrix.
It is allowed to use only special medical glue BF-6, but it is not always recommended, so you should consult with a specialist.
Building up
If the nail is broken, but there is still a free edge, then the extension is done in the usual way. If the nail is broken at the root, and the fingertip protrudes strongly above the plate, then the extension technology here will change slightly. Since acrylic tips are now practically not used to increase the length of a manicure, you can also extend a broken nail with gel. To do this, you first need to prepare your nails.
If your skin is injured when your nail plate breaks, you must first heal the wound. To do this, cut off the nail along the crack line and treat the dermis with an antiseptic. Next you need to stop the bleeding. Press the wound with a cotton pad and hold for a few minutes. Place your finger in cold water first and keep it there for 15 minutes. This will help reduce pain. Then move your finger into a warm solution of table or sea salt (add a teaspoon of salt to 1 liter of water). This procedure will speed up the drying of the wound.
Dry your hands with a dry towel, apply antibiotic ointment, and cover the wound with a bandage. Leave the nail for at least three days so that the wound heals, after which you can proceed to extensions. We do a manicure: remove the pterygium, cut the cuticle, polish the skin around the nail. Using a buff, remove the glossy shine from the nail plate. Degrease and apply primer, let the surface dry for 20 seconds.
Set up a paper form. Now you can design the required length and shape of the future nail. To do this, you can use any sculpting gel, be it transparent or colored material. Dry it again in the lamp. Apply the design to the extended nail and secure it with finishing gel. Now you again have beautiful extended nails of the required length.
To learn how to repair a broken nail, watch the video below.
What to do if the patch is very noticeable
If the repair is carried out carelessly, there is a risk that the area where the tea bag is fixed will be noticeable. This happens when choosing a thick base for manipulation or improperly securing it with glue (especially when working with the entire nail).
To prevent the damage site from being noticeable, you need to use a file to polish the side cuts or top surface, as well as a buff - it polishes the nail, carefully smoothing out the transition.
To mask the problem, it is recommended to use visual tricks:
- Creating a color gradient (smooth transition from one shade to another).
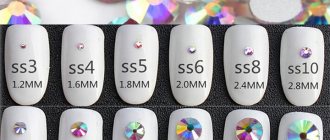
- Fixing three-dimensional decor: rhinestones, sparkles, beads.
- Using shiny, colorful products.
- Applying drawings to the plate.
Little nothings of life
The simplest situation is if the nail is broken on the side. It was cracked, slightly broken, there were no more casualties, the skin was intact and unharmed. It’s unpleasant, it clings to hair and clothes and tends to fall off completely.
There is an exit. “We’ll glue it, gentlemen,” the doctors said. High-quality repairs will extend the life of an injured patient by one to two weeks. Then look at the circumstances. Either trim the overgrown nail or repeat the repair. Providing first aid to the victim: watch, learn, remember!
Method #2: Gel
Many beauty centers believe that gel is an excellent option for strengthening nails. With its help, you will add strength to the nail and fill the crack, you can even reattach a peeling fragment.
- Remove nail polish.
- Apply the gel evenly over the entire surface of the nail.
- Cover evenly with activating spray.
- Apply a second layer of gel and spray. If a third coat is required, repeat the procedure.
- Remove any rough edges with a file and shape the nail.
- Apply varnish as usual!
Method #2: Cellophane
Using cellophane is similar to the tea bag method in that it secures the nail along the crack so you can do a manicure.
- Remove nail polish.
- Clean the affected nail with rubbing alcohol.
- Place the cellophane over the nail, starting at the nail bed.
- Gently spread nail glue over the top of the cellophane, completely covering the nail.
- Dip your nail into a special powder.
- Carefully remove excess powder.
- Repeat steps 4 to 6.
- Trim off any excess cellophane that hangs over the end of the nail.
- Create the nail of the desired shape.
- Carefully file away any uneven surface areas.
- Apply makeup as usual!
