How you dry your curls is how they will be. For almost 2 years, I have tried different options for drying my hair. I thought about this post a long time ago, almost a year ago, but, as they say, the longer the aging, the nobler the drink. For almost a year and a half I dried my curls naturally. At the same time, I tried to do some magic with different drying devices and an old hair dryer brush. This June I got a real hair dryer with a diffuser. And yes, the way you dry your curls greatly affects your curl pattern. In order not to get confused in drying methods, I will divide the post into several parts, based on the method. At the end of the post there will be statistical information with an interpretation of my survey of Instagram subscribers.
For ease of understanding the information and my conclusions, I’ll tell you about my hair.
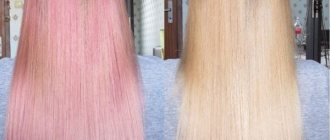
Highly porous, dry Curly, curl type 2b-3a The hair itself is of medium thickness
I practiced all the methods of drying curls for a long time, but for the post I used them all sequentially with the same set of care products for the purity of the experiment:
- DevaCurl No-Poo Original bucket
- VIESO Mask for hair and scalp relaxing Perilla
- Alter Ego Miracle Repair Conditioning Cream
- DevaCurl Styling Cream
- Ecoslay Orange Marmalade
- Cantu Moisturizing Twist & lock gel
The application technique and styling portion sizes were identical.
Natural drying
This method is the most familiar to most curly haired people. What exactly is required for such drying? Never mind.
Technology After styling, simply leave your hair as it is and wait until it air-dries completely.
Even the most ardent supporters of everything natural for curls will approve of it, because it cannot harm the hair at all. There is no heating, no blowing either.
But I refused it. Why? Even when I have free time, I arm myself with a hairdryer. The fact is that my curl is quite flaccid, delicate and at the slightest opportunity, when drying, it stretches or disappears altogether.
And I'm not even talking about the appearance of the tips, they just hang like sticks, without curling into rings.
And one more important point that finally turned me away from natural drying was time. When I didn’t apply gel to my hair, but used cream, drying was much faster. When drying curls with gel, a crust forms, through which the moisture evaporates with great difficulty. And this significantly increases the drying time. By the way, with the gel my hair can dry for up to 5 hours. Imagine drying that much every other day? And in winter?
And my results with this drying method.
- The curls are stretched, the curl has turned into a light wave
- The tips are not curled
- Root volume and length volume have almost disappeared
conclusions
Pros Completely free The most “ecologically friendly” and natural method, accepted even by the most ardent adherents of orthodox kgm (no thermal effects, curls do not dry out, etc.) Most often, with such drying there is less fluff
Cons Requires too much time If the hair is long, the drying time is simply enormous Curls stretch under its own weight It is difficult to curl the ends additionally The root volume is lost Styling can get on the scalp in large quantities if applied to the root zone
Drying through a sieve
As soon as I had the idea of blow drying my hair, I armed myself with a sieve.
And what? This is the most affordable and easiest way to replace a diffuser. I already had a sieve and didn’t spend any extra money. By the way, which sieve is right for us? I have several of them. And definitely not plastic, because... The holes in it, as a rule, are very small and located at the bottom. This means that the air flow will penetrate weakly and only from one side. And there is no point in such drying.
There are metal sieves made of thin wire. They have holes on all sides. In truth, they consist entirely of holes. This option suits us just fine (not without reservations, of course).
Technology After applying the styling, you need to place the curls in a sieve in strands and dry them with a hairdryer. You need to imitate all-round airflow on your own - just rotate the hairdryer around the sieve from different sides. The sieve should not move so as not to disturb the hair. You need to act carefully.
It would seem that this is the most affordable way to dry curls, what else is needed for happiness? But in fact, in addition to the advantages, this method has disadvantages.
So it’s completely unclear how to dry the roots. To get the hair fixed in the sieve, we press it as close as possible to the head. If the sieve is moved further from the head to dry the roots, then the air flow instantly fluffs up the hair and all our efforts are in vain. I tried many times and there was always a lot of fluff.
I also ran into one problem. The longer and thicker the hair, the more difficult it is to dry it inside. Imagine you put a strand in a sieve. The air entering through the sieve blows onto the outer layers of the strand. And the strand doesn’t dry out inside! Of course, you can divide the strands into smaller ones, but how long will such drying take?
And let's not forget that it is better to dry in a sieve, tilting your head down and to the sides. How long will you have to stand in this position?
Here are my drying results.
The curls are very uneven, because... some of the strands were well dried, some were not. There is more fluff. In general, the curls are curled along the length and at the ends
conclusions
Pros Does not require investment, every kitchen has a sieve
Cons The hair in the center of the sieve does not dry well It is difficult to dry the roots A metal sieve can overheat and damage the hair, even if you use warm air (that’s why diffusers are always made of plastic) If the hair dryer is powerful, then even on the minimum setting speed, the hair in the sieve may become disheveled (especially if it is not very thick)
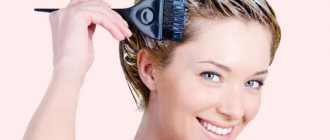
How to use the device
In order for the device to give the desired effect, you need to know how to use a diffuser on a hair dryer.
Basic algorithm of actions when using:
- Apply mousse or styling gel evenly onto palms.
- Use your palms to distribute the product evenly throughout the strands, remembering to pay special attention to the ends.
- Set the hair dryer to the required drying mode.
- Separate your hair with a horizontal parting.
- Secure the upper part of the hair with a crab clip, and begin, first of all, drying it on the back of the head.
- Dry each strand by placing it in a diffuser. The disc itself must be brought as close to the head as possible. Use your free hand to lift your hair up to create volume at the roots.
- Now you need to move to the top part. Strands must be taken gradually, since wet hair can disturb the already styled lower part.
- Allow time for the finished curls to cool. You can even spray them with a cold stream of air.
- Lay the finished curls neatly and, if necessary, fix with varnish.
Note! If the hair dryer attachment is used without requirements for the shape of the future styling, then during the drying process you should lower your head down. This will add volume to your hair.
Drying with Freddy Krueger's hand diffuser
A year ago I purchased a replica of the DevaCurl hand diffuser. After watching the videos of Lorraine Massey's followers, I decided that I couldn't live without this diffuser.
I tried to dry my hair with it, but I almost immediately felt uncomfortable doing it.
Why? The fact is that such a “paw” does not have sides that limit the hair when drying. Compared to a regular diffuser, when drying with this, hair falls out easily and you have to press it firmly against the scalp or hold it with your hands.
I think it also has to do with my hair type. If the hair is hard and has a curl of 3b, then no matter how you apply a diffuser, the hair will curl into a curl. Mine requires careful handling until it dries. Otherwise it will disappear
The only thing I really found this diffuser useful for was drying the root zone. Here he has no equal. The fingers and palm of the “paw” have a concave shape, making it convenient to apply to the head
Technology Carefully place a strand of curls on the diffuser paw. Press the diffuser to your head. You need to hold the hair with your other hand so that it does not fall out of the “paw”.
This is what my hair looks like after drying it with a paw diffuser.
The root volume is wonderful There is a little fluff Uneven curl formation The curl at the tips is not the same everywhere
Conclusion
Pros The most convenient use - in the root zone Easily forms root volume Suitable for tight curls from 3b and above
Cons It is difficult to carefully fit the entire strand onto the “paw” Due to the constant movement of the “paw” through the hair, a lot of fluff is formed Strands fall out of the “paw” and drying is delayed Since the shape of the diffuser is flat and air turbulences are not created inside, as in classic bowls, warm air instantly overheats the hair
Kinds
The nozzle is distinguished by its round shape and the presence of fingers (spikes), with the help of which styling is carried out. Manufacturers have launched the production of universal diffusers, and hair dryers often include several types of attachments. This is very convenient to use, because women in the same family can have different hair lengths. Yes, and throughout life, hairstyle changes.
The round shape of the diffuser is available with a flat or concave surface. Concave models make styling easier on long hair. And with the help of a convex haircut it will be easier to style a short haircut.
The nozzles are made of silicone and plastic. For long curls, plastic devices are suitable because they do not cause hair tangling. And it’s easier to wind strands on them. It is easier to style short hair with a silicone adapter. The hairs seem to stick to the base, which makes it possible to give them shape.
The diameter of the circle, the number of spikes and their length determine the functionality of the attachment. Devices designed to create volume are marked with the inscription “Volume Effect”.
Blow dry and palm dry
My hairdresser suggested this method to me several years ago.
It’s not surprising that the vast majority of hairdressers simply don’t have diffusers. And the hairdresser decided to style my hair in curls, without brushing it out, as usual. Her palm became the diffuser. Since then I have been practicing this technique periodically. The master placed a strand in it and dried it with a hairdryer, coming from different sides. To my surprise, my hair curled into tight curls!
Technology Carefully place the strand with styling in the palm of your hand. Dry your hair with a stream of air, constantly and quickly changing the position of the hair dryer so as not to overheat your hair. After drying one strand, gently lower your palm and let the hair take its natural position. Drying roots this way is also very easy. You just need to slightly lift the roots and, holding them, blow air from a hairdryer.
And my results
There is a little fluff. The root volume is pronounced. The curls are defined, but still, when dried in the palm, they stretch a little. The ends are not curled everywhere.
Conclusion
Pros If you don’t have a diffuser attachment, then this is the most convenient way of drying, not only the length, but also the root zone is dried well
Cons You need a lot of care and patience to dry each strand efficiently and accurately It is very difficult to dry long and thick hair
The best option for wavy hair is Anself - Hair Diffuser.
Hair dryer Anself Hair Diffuser Diffuser for natural styling of curly or wavy hair ...
- 1. Designed for most full-size professional hair dryers.
- 2. Attachments and nozzles are a great addition to your hair dryer.
- 3. Simply attach them to the end of the attachment and you can turn the dryer into various styling tools.
View Price
This hair dryer diffuser attachment provides professional results for those with wavy hair. It maintains the unrivaled look of wavy and lightly curled hair while enhancing shine and reducing both frizz and damage.
Specifications:
- Weighs 3.7 ounces
Pros:
- Easy to attach
- Even air distribution
- Affordable price
Minuses:
- Limited compatibility
Diffuser drying
I’ll complete my comparison in the most optimal way - drying with a special diffuser attachment.
This nozzle is similar to a claw diffuser, but it is much more convenient and easier to use. There are many diffuser options to suit every taste and any hair dryer. In my opinion, it is very important that the fingers of the diffuser are made of plastic and protrude as much as possible from the bowl. So that there is no side of the diffuser, which irreparably creases the curls when drying.
The air flow in the diffuser is divided into dozens of separate jets, which allows you to dry your hair and roots faster and does not overheat your hair.
Technology Tilt your head in the direction from which you will take the strand to dry. Carefully place the styling-treated hair into the diffuser bowl. Press the diffuser as close to the scalp as possible. Dry for a few minutes. Dry the hair roots separately.
results
Most of all, I like hair with this method of drying.
The strands are outlined, voluminous The root volume is expressed The tips are curled There is almost no fluff
For today, this is the ideal drying option for me.
Which to choose?
The functional attachment is selected for a specific hair type and length. The remaining requirements are imposed on the material from which the device is made and design features.
In order for the diffuser to fit, you need to familiarize yourself with its characteristics:
- Those with long curly hair will find it convenient to use a device with a combing effect.
- To add volume to straight long curls, an adapter labeled “superlum” is suitable.
- The diffuser's hollow fingers effectively lift hair at the roots.
- The wide head of the nozzle will be convenient to use for those with short haircuts.
- Short diffuser fingers are more suitable for medium-length hair, as well as for straightening curly hair.
- For thick, long hair, a nozzle with smooth fingers is recommended.
- The long straight fingers of the nozzle are convenient for straightening long curly strands. In addition, they do a good job of styling ends.
Best manufacturers:
- Bosch (Germany);
- Parlux (Italy);
- Tico Professional (Italy);
- Comair (Germany);
- BaByliss PRO (France);
- Remington (China);
Diffusers can be purchased complete with a hairdryer or separately. Many manufacturers produce universal models of attachments that fit any hair dryer from their product range.
https://www.youtube.com/watch?v=jMXnHddj7hA
Results of a survey of curly girls
By the way, and not only for me.
I conducted a survey among my followers on Instagram and I want to tell you about the results. In total, I asked three questions to understand whether other girls see the dependence of the drying method and the severity of curls.
First, I found out which method they prefer to use:
There was no diffuser-claw option
As you can see, most curly girls dry their hair naturally. There are several reasons, but the most basic one is simply the lack of a hair dryer with a diffuser.
Very few people dry in their palms, and even fewer use a sieve for this. Still, many prefer traditional and simple methods in this matter.
The second question was whether they see a relationship between the drying method and the volume/curling of curls along the length and at the ends, and whether drying with a diffuser differs from natural drying.
Girls' answers:
87.5% of girls answered that blow-drying with a diffuser allows:
- Dry your hair faster
- Strengthen the curl
- Get root volume
- For some, the amount of fluff is reduced
But there are girls who, on the contrary, do not like this method, because:
- Hair length decreases (due to curls bouncing)
- Down appears (some even suggest that it is due to drying too quickly)
- Hair dries out more
There is an assumption that the feeling of “dry” hair is more common for girls with high-porosity hair, if the temperature is too high, the direction of the air flow does not change often (you dry one strand for a very long time), the characteristics of the hair dryer are inappropriate (low power, heating even in the “cold air” mode) ).
As for the formation of fluff when drying with a diffuser, I will share my experience. When I first started drying my hair with a diffuser, I didn’t realize that the amount of gel needed to be applied a little more than when drying naturally. At least that's how it works for my hair. The gel sets quickly and prevents individual hairs from getting out of the strand.
I made another important conclusion for myself: if you can’t dry it with a hairdryer with a diffuser yet, because... If your hair flies around, then before moving the diffuser to another strand, you need to turn off the hair dryer. You can imagine how moving the bowl away from your head, you inadvertently inflate your hair.
And I never start blow-drying immediately after styling. I walk for about 20 minutes, and only then do I start actively drying. This way the styling will set on the hair and there won’t be as much fluff. Yes, and you don’t have to wash the bowl of gel)
The third question I asked the girls was the type of curls and whether the hair curls from the roots . I wanted to see the relationship between drying method and hair type.
But it turned out that even girls whose curls start right from the roots do not neglect drying with a diffuser. And they also focus on the root zone. Girls whose curl starts from the line of the ears and chin also dry the root zone with a diffuser for volume.
Also, the use of a diffuser does not depend on the degree of curl of the respondents (in the girls’ answers from 2a to 3b). That is, diffuser drying is chosen not only by those who want/need to strengthen their curls (2a, 2b), but also by girls with pronounced curls (3a, 3b), which seem to be able to dry out anyway.
Now a short excursion into the theory of drying curls
I’ll quote a part of my post about styling:
How does styling work? The wet hair, which we diligently squished to condition using the squish to condition technique at the previous stage of washing, has already formed a curl.
This means that water penetrated properly into the hair and helped it “remember” its natural curl texture and strengthen the chemical bonds between water molecules. But water alone is not enough. We all know that if you don’t apply styling to curly hair, wet curls will quickly crumble into separate shapeless strands. The bonds between water molecules are the weakest and are quickly destroyed by the touch of a hand or turning of the head. Question: how to fix a beautiful curl for a long time? Any styling product contains polymers (for example, pvp, copolymer acrylate, crosspolymer, etc.). They swell, evenly envelop and help create a film on the hair without penetrating inside. It is this film that helps preserve the chemical bonds between water molecules - and after drying we get a beautiful curl.
In fact, there are only two ways to dry curls - naturally and with a diffuser.
Whether it is a sieve, your own palm, a “paw” diffuser or a full-fledged diffuser, the essence does not change. When drying naturally, we subject our curls to the law of gravity and the curls stretch under their own weight.
When drying with a diffuser, we become a little magicians and force other natural laws to work for us: we speed up time and change the upward movement of hair)
As a result, I’ll tell you a couple more points about drying my curls
- After microplopping (blotting the hair with a towel), I dry my hair naturally for about 20 minutes.
- Then I start blow drying. I start it with warm air and minimum speed for a few seconds. As soon as I feel that my hair has warmed up, I immediately press the cold air button with my finger and dry it in the same position of the diffuser for another minute.
- I always dry my hair in several passes. I dried it for 5 minutes and went about my business for 15-20 minutes. Then I dried it again. And so on until the hair is completely dry.
- I dry the inner layer of hair separately, tilting my head forward. The same goes for the crown area - I place the diffuser directly on top.
- I don’t use thermal protection because... The drying air is always barely warm. No overheating.
In this post, I tried to talk about my experience of drying my hair in different ways for two years.
For a very long time I was afraid to use a hairdryer or diffuser, I didn’t know which way to approach them, I ended up with a lot of fluff, unsuccessful styling and a completely ruined mood. But only by trying, experimenting, looking for options that suit me, I found what is ideal for me today.
And if the words “hairdryer” or “diffuser” evoke negative associations, then you are at the beginning of a very interesting path, the crown of which will only be successful curls!
Share your drying secrets
I wish you all gorgeous curly hair!