Sew-on buttons are most often used as an additional fastener; they are suitable for those places where the fabric tension is not too great.
They can be sewn on the edge of clothing and always on double folded material and reinforced with a gasket.
The buttons come in different sizes and consist of two parts. The upper part of the button (with the rod) is sewn on the wrong side of the upper edge of the fastener, the lower part of the button (with the cup) is sewn on the front side of the lower edge of the fastener.
Popular master classes by Valery.
DIY pendant made of wire and stone. Master Class.
How to make a cone for a Christmas tree out of paper with your own hands.
Paracord bracelet for beginners.
Varieties
Clothes buttons differ in the material they are made of:
- metal;
- plastic.
According to the method of fastening they can be:
- installation - secured using special tools;
- sewn - to attach them you need a thread and a needle.
Depending on their form, purpose and application, they are divided into:
- simple;
- s-shaped;
- shirts;
- magnetic;
- clasp;
- holsters;
- straps;
- tablet
O-shaped
The most common type of buttons is o-shaped. They are called simple, ring or flight, because the fastener first appeared on jackets and overalls of pilots. The design is not complicated and consists of two metal parts that fit tightly into one another. The upper component has a spring fastening.
At first, the upper part was produced in an all-metal form; today the cast version is more often used.
Simple buttons are used both on different types of everyday clothing and on specialized textiles.
S-shaped
This type is of the spring type. One of the parts resembles the letter “S”, which is why they are called s-shaped. Depending on the size they are divided into several types:
- uniform - the size of the top ranges from 27 to 40 mm;
- article - half the size of the uniform;
- anorak - compact size;
- mini anorak - the upper part is less than 8 mm.
The shape of the top is varied - from flat and round to diamond-shaped, square, drop-shaped. They are fixed by sewing or fastening. The large spring allows it to withstand heavy loads.
Shirt
Shirt-type buttons differ from regular ones in the way they are fastened - not with a single pin, but thanks to 6-8 spikes. The design allows fastening fasteners on fabrics of light density. They are suitable for children's clothes, knitwear and knitted clothes, light summer jackets.
See also
Step-by-step instructions on how to install a bathtub and attach it to the wall
The devices are convenient to use, but quite expensive to manufacture. During installation, the material is pierced with spikes located on the ring. Their diameter varies from 9.5 mm to 40 mm. The largest ones are used on jackets.
Magnetic
Self-fastening magnetic fasteners are most often used in household products - bags, outerwear, wallets. They are convenient to use, but they are expensive to produce. The connection strength thanks to the magnet is high, and it is very easy to unfasten even with one hand. The magnetic button device includes four parts - two bases and the same number of mounting flanges. The magnet allows you to automatically select the position and close. The larger the fastener size, the greater the connection force.
Koburnaya
This type has another name - tablet. They have been produced since the times of the USSR, when they were necessary for fastening military haberdashery. The lower part of the structure is very similar to the part of the s-shaped device. The top of the lock is hollow inside, petal-shaped. Its size is 12 mm. When the button is fastened, it expands and contracts. Most often, the fasteners are nickel-plated, but they can have two more color variations - black and brown.
Clamp or block
On the cover of the clamp or block button there is a ring fastening. This is the main distinguishing feature of the clasp. Through the hole in its upper part you can see the fasteners. It is similar to a similar s-shaped part, but is significantly larger in size. The most common clasp sizes are 8-21 mm.
Rivet installation process
It is necessary to work with tools carefully, slowly and without making sudden movements. Otherwise, the fabric, accessories or tools may be damaged. The most common type of installation of accessories is the installation of a block on clothing. In workshops and ateliers, forceps are used for this procedure. However, such a tool must be purchased of good quality so that the handles do not bend and the “cheeks” do not move.
Don’t despair if you don’t have special forceps at hand; you can do without them at home. Use the following step-by-step instructions:
- Use a punch to make a hole of the required diameter in textile material or leather.
- Thread the block leg and put a ring on it.
- Place the piece of clothing with the block on the anvil.
- Use a punch to split the stem of the block into petals. If all the steps are done correctly, the petals should bend on their own on the block ring.
- Lightly go over the block with a hammer to finally secure it to the fabric.
When working, place the ring with the convex side away from you so that it repeats the convex shape of the edge of the block.
How to restore damaged
If the metal button has stopped performing its function and is constantly coming undone, a regular hammer can help. To do this, the convex part of the fastener is placed on a hard surface and blows are carefully applied, slightly flattening the “bump”. After each blow, you must try to fasten it. Once the fixation is secure, the goal is achieved.
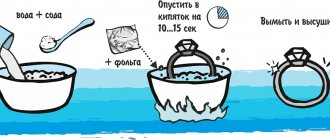
The plastic fastener can be repaired using an iron, tracing paper or foil. To do this, cover the convex part with foil or tracing paper and melt it a little. After the plastic hardens, try to fasten it. You can correct the melted edges of the button using a nail file.
How to install the sew-on variety
In addition to punched fasteners, fasteners called sew-on fasteners are used on clothes. They differ in the method of fastening, which involves the use of a needle and thread. The button consists of two parts. The first is sewn on the wrong side of the floor, the second - on the front.
In order to attach the parts, you must:
- Mark the sewing areas with chalk.
- Sew through the special holes in the fastener using regular stitches (as with overcasting), gradually moving from one hole to another.
- Mark the location of the top of the fastener by rubbing chalk on the shank of the button and stamping it onto the clothing.
- Sew the second part in the same way as the first.
To achieve a neat look for sewn buttons, you should practice on a piece of fabric in advance. Equally important is the selection of threads that match the color of the fabric as closely as possible.
Replacing buttons on a jacket with your own hands
To correctly and quickly install a new rivet or remove an old one, you need skill and dexterity. In order to improve the quality of work and make it as thorough as possible, you need to purchase a set of special tools. Any technological manipulation requires maximum accuracy and attentiveness, otherwise everything will go down the drain. If the old fittings are no longer useful in the future, then you can simply “cut off” the head of the rivet with a hammer or knife, placing the fittings in the same way as described earlier.