Hello, dear readers. In this article we will look at how to clean diesel injectors with your own hands without outside help. If you wish and have a little free time, you can clean diesel injectors yourself. Kill two birds with one stone, learn how to do your own repairs and save money.
At the end of the article there is a video demonstrating how to clean diesel injectors yourself. It will complement the text material and help you visually understand the cleaning mechanism.
The number of diesel cars on city streets is not decreasing. They are popular and in demand by drivers. Diesel is valued for its low fuel consumption when traveling long distances.
In a diesel engine, the fuel supply system uses injectors. They occupy a central position in the system ensuring uninterrupted engine operation. Problems that arise in the operation of the injectors cannot be ignored.
Options for flushing vehicle engine injectors
- It is necessary to pour the injector cleaning solution into the car tank. This method cannot be considered highly effective; it is rather preventive and is used to prevent the appearance of harmful deposits. But there is no guarantee that harmful deposits will not appear at all. In addition, you need to understand that if the injectors are particularly heavily contaminated, pouring the flushing composition into the tank can end in disaster. Solvent has a broad effect on all types of deposits in the fuel complex and dissolved dirt with significant particles enters the combustion chambers, and it is impossible to predict how this could end for the piston engine.
- It will be necessary to completely dismantle the injectors and wash them on a specialized ultrasonic stand. This option is much more effective than the first, but here only the injectors themselves are washed; the rest of the fuel system will not be cleaned. This method is not suitable for vehicles running on diesel fuel. As a rule, diesel engines require a thorough examination of the entire fuel complex, and it would be best to replace failed injectors and subject the remaining spare parts to high-quality processing. The advantage of this option is that the cleaned and dissolved plaque and dirt do not enter the combustion chamber and will not affect the perfect functioning of the car engine. Timely testing of injectors and ultrasonic diagnostics can reveal the need to clean injectors and the need to replace already failed parts.
- Connecting a diesel engine to a specialized unit. Here the engine is connected to professional equipment capable of washing diesel injectors, bypassing the fuel complex, without first dismantling the parts. Thus, all deposits and dirt deposits are efficiently removed from the surface of the injectors and valves themselves. This option cannot guarantee that the injector washing procedure will be carried out flawlessly, but they will work accurately and without interruption. This option does not make it possible to determine which particular nozzle has failed, whether the spray torch is working normally, and whether it is necessary to carry out the washing procedure at all, or rather, completely replace the parts.
- Self-cleaning of diesel engine injectors. If the car engine injector has a dismountable design, you can wash it with a standard solvent. Of course, the result will not be almost perfect as after ultrasonic washing. When choosing this washing method, you need to disassemble the diesel injector only in a cleaned and washed room, and the disassembly table must be practically sterile. So, if during the assembly process the part is not visible even to the tiniest particle, then this can lead to irreversible consequences and such painstaking work will be done in vain and the nozzle will still have to be changed. Upon completion of the procedure for self-washing the injectors, you will need to immediately lubricate the working surfaces with diesel fuel or oil, which will prevent the formation of rust on the injector parts.
Repair
Diesel injectors are repaired when flushing is unsuccessful. The entire repair essentially comes down to replacing the coked nozzle. If the problem persists, the return filter of the part is also replaced. To work we will need the following tools:
- repair kit for Common Rail (it consists of a new atomizer and return filter);
- set of open-end wrenches;
- special puller for these parts.
Repair sequence
- The puller is installed on the nozzle being removed.
To remove Common Rail injectors, it is best to use a proprietary puller - A rod is inserted into the puller, and a nut with a left-hand thread is screwed onto the rod (these rods and nuts are supplied complete with branded pullers).
A rod and nut with a left-hand thread are installed on the Common Rail injector - Use a 36mm open-end wrench to loosen the nut. Along with it, the element being repaired itself is weakened.
- Now the part is manually unscrewed from the socket.
The pre-loosened common rail injector is removed manually - An open-end wrench size 17 is put on it from the filter side, a wrench size 13 is put on the nozzle cap. After that, the wrench size 17 is held, and the sprayer cap is loosened with another wrench.
- Now the nozzle cap, loosened with keys, is unscrewed manually.
The Common Rail injector nozzle cover, previously loosened with keys, is unscrewed manually - The old sprayer is carefully removed from the lid and replaced with a new one.
The old dirty atomizer is removed from the Common Rail injector - The check valve is removed from the second part.
The common rail injector check valve can be removed after removing the injector - The return spring is removed from the check valve.
The common rail injector return spring is removed from the check valve. - The check valve is replaced with a new one.
The removed check valve of the Common Rail injector is replaced with a new one from the repair kit. - After this, reassembly is performed.
This is interesting: Body frame repair
Video: repairing a Bosch common rail diesel injector
Symptoms indicating clogged car diesel injectors
- The engine is unstable at idle;
- the car engine starts unevenly, the second or third time;
- loss of dynamics and long response when pressing the gas pedal;
- the appearance of dips when pressing on the gas pedal;
- increased fuel consumption;
- sudden explosions in the intake complex of a car engine;
- exhaust toxicity becomes too noticeable;
- engine tripping;
- the appearance of dark smoke from the exhaust pipe.
Signs of trouble
Common causes of malfunctions will be three factors:
- increased flow through the injector (overflow);
- reduction in the quality of fuel atomization;
- reduction in the productivity of individual sprayers.
Outwardly, this will appear approximately the same, although a more careful study of each specific case will be able to indicate the approximate nature of the problem.
- The output of the engine changes, and its power can either fall or increase.
- The engine will start unstably and idle unsteadily.
- While driving, clearly visible jerks and pick-ups may appear when the position of the accelerator pedal remains unchanged.
- The sound of the engine will change, harshness, vibrations and even knocking in the cylinders will appear.
- The engine will begin to smoke, the exhaust will turn black, which indicates the release of soot - unburned residues of hydrocarbon fuel.
- The oil level in the crankcase will begin to rise due to excess diesel fuel getting there.
- A modern internal combustion engine will notice a malfunction using internal diagnostics and light up a warning lamp on the instrument panel.
In any case, clarifying the reasons will require individual diagnostics of the injectors.
Other available methods for flushing the injector and engine power system
As you can see, the solvent is an effective cleaner. However, there are other ways to flush injectors.
- One such solution is flushing, which is poured directly into the fuel tank. The solution is controversial and is more suitable for new cars as a preventative measure.
If you pour such a flush into an old car, the risk that all deposits from the fuel system will clog the channels, dirt will get into the combustion chamber in the cylinders, etc., increases significantly. As a result, the injectors, pump and the engine itself will suffer.
- In practice, it is much preferable to clean the injectors by removing them. However, there is a minus here, since the remaining elements of the system are not washed.
- Comprehensive cleaning of the fuel system involves disassembling and removing all elements (pump, injectors, fuel tank, etc.). Then the injectors and injection pumps are checked on stands, cleaned, defective, repaired or replaced.
The remaining parts of the fuel system are thoroughly cleaned before installation. This method is the most effective and also guarantees that loose dirt will not get into the cylinders. At the same time, diagnostics allows you to accurately identify faulty injectors, and not just dirty ones.
- For a collapsible nozzle, you can go by disassembling the element and washing it with cleaner. This method is common and often used when servicing a car yourself.
However, the result may still be worse compared to washing on a bench. You also need to be able to disassemble a diesel injector, and during reassembly, prevent even the slightest particles of dust or dirt from getting in. If this happens, there is a risk of rapid failure of the entire element.
VMPAUTO AC.060112
Patriots will not ignore the additive VMPAUTO AC.060112, used to improve the individual qualities of diesel fuel. Just 150 ml of this product is suitable for 60-80 liters of fuel mixture. The main advantages of this cleaner include its low cost and reduction in pump wear by 20%. But there is also a drawback: it does not clean the injection system and catalyst, which does not make it less desirable on the Russian market.
Now you know which injector cleaners are best to use. Have you tried additives?
Do-it-yourself injector cleaning using the example of VAZ 2114 and VAZ 2110
Having prepared everything you need, you should begin the process of washing the injectors. The whole process can be divided into two stages: removing the injectors and, in fact, washing.
Removing injectors
The photo shows the process of washing the injectors; it is conventionally divided into two stages - removal and washing
First you need to remove the terminal from the battery. The fuel pump will turn off and the fuel pressure in the system will drop. Then you need to carefully disconnect the fuel line from the injector rail; residual fuel may leak out. Then apply the cleaner to the injector seats to prevent dirt from getting into the fuel system. Afterwards you can remove the ramp and pull the injectors out of it.
You may need a set of spare rubber seals. Some products can corrode them. It is better not to place injectors removed from a diesel engine on dirty surfaces.
Cleaning the injectors
It is better to cover a ramp without nozzles from possible contamination. It is better to do the same with open fuel pipe channels.
To flush the injectors you will need to do the following:
- Insert the cleaning agent cap extension into the nozzle hole;
- Connect the power source to the injector contacts;
- Simultaneously pressing the cap of the canister with the cleaning agent and the switch button, flush the nozzle;
- Repeat until the stream from the nozzle becomes uniform and powerful enough.
Specifics of operation of diesel engine injectors
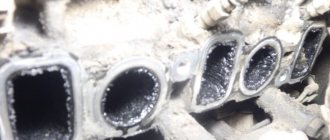
Carbon deposits and dirt deposited on the injectors and on all parts of the car’s fuel system stick most of all after the engine is running. Injectors of cars with a diesel engine, as a rule, operate in more difficult road conditions, experience increased pressure, heavy loads and complex temperature changes. The above factors together can lead to rapid mechanical wear of working parts and the formation of a large layer of various deposits. The fact is that when the engine stops running, it remains hot for quite a long period and the remaining splashes of fuel hit the working surfaces of the nozzle, forming a fairly dense carbon deposit similar to a thick varnish coating. It is this kind of deposit that has a negative effect on the cross-section of the calibrated channel and causes a deterioration in its throughput by almost a quarter if the adhered layer becomes more than 4 microns thick. Therefore, the thicker the layer of dirt, the lower the performance of the car’s engine, as a result of which its power characteristics decrease and fuel consumption increases. Thus, washing the injectors completely pays for the costs and you can feel the difference in engine performance immediately after the procedure.
Injector flushing should be done as often as possible to ensure stable engine operation and avoid financial costs for unforeseen breakdowns. To protect the injectors, it is also worth installing special filter elements that do not allow microparticles larger than 15 microns to pass through. These filters are installed directly in the injector itself, as well as in the fuel system of the vehicle engine.
How to clean injector nozzles at home
- Actually, the solvent itself or a special injector cleaner for gasoline engines. Finding it is not a problem at any auto parts sales point. Except for particularly severe cases, one jar is enough for us. You can take two, just in case;
- 2 rubber hoses. They should be about a meter in length. An important point is that they will be put on the fuel pump, so they must be of a diameter suitable for the pump;
- A container that will play the role of our “gas tank”. A plastic bottle that needs to be rinsed well first is ideal;
- It is very desirable to have a fuel filter (to filter the solvent from possible dirt from the container).
It is especially important to carry out preventive maintenance for cars with a distributor injection system.
Folk remedies Recipes for masks At home Hair loss in women How to stimulate growth Causes of hair loss Hair loss in men Review of vitamins Helpful tips
Preparing for washing
Before flushing, it is necessary to prepare a special device that will supply voltage to the nozzle. This device consists of a 12-volt power source (power supply or “crown”), a switch and wires.
Video tutorial on how to easily clean injectors yourself
The wires from the power supply must be connected to the switch, and two free leads must be made from it, which will be attached to the injector contacts. The entire system must supply current to the injector when the switch button is pressed.
Along with this device, you only need carburetor cleaning fluid. An important point when choosing such a liquid is the diameter of the extension on the cap. It should fit tightly into the nozzle hole, forming a tight connection. The cost of all equipment will not exceed 100 rubles.
Method one - using carburetor cleaner
If instead of a special means for cleaning injectors you have carb cleaner lying around, then in a garage you can clean the gasoline injector yourself, even with a carburetor cleaner from a can, rather than buying liquid for the injector. Next we describe one of these methods. To work you will need:
- two pieces of clean rags;
- small-section copper insulated wire about a meter long;
- knife;
- plastic clamps (ties);
- awl;
- electric battery with a voltage of 9 V (the popular “Krona”);
- a piece of oxygen hose 4.5 cm long;
- insulating tape;
- carburetor cleaner (when choosing, pay attention to the working cap of the cylinder with a diameter that matches the inner diameter of the oxygen hose so that it can be inserted inside);
- safety glasses and gloves.
You need to work with carb cleaner carefully, using personal protective equipment, so you must first put on goggles and gloves . Work algorithm:
- remove the injector from the fuel manifold and clean it from the outside using a rag (it is better to first remove the rubber seals from it);
- cut a piece of wire into equal parts and clean the insulation on one side of the resulting wires using a knife;
- using electrical tape, connect the stripped ends of the wires to the battery;
- at the opposite ends of the wires, use an awl to slightly expand the insulation for further connection to the nozzle;
- make a hole in the carb cleaner cap using an awl in its upper part;
- insert the cap into the rubber hose (in this case, the “original” hole of the cap will be plugged with the hose) and clamp them with a plastic clamp;
- Install the resulting adapter onto the carb cleaner cylinder;
- Connect the nozzle, cleaned from the outside, to an adapter made of a rubber hose and tighten it with a clamp;
- connect the nozzle to the battery, you will hear a click indicating that the nozzle has opened;
- place the adapter with the nozzle onto the carburetor cleaner bottle;
- gently apply pressure (press);
- in this case, the carburetor cleaner will come out in a vertical stream through the nozzle (that's what glasses are for!).
