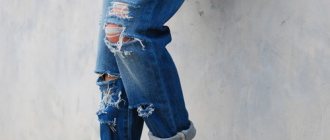
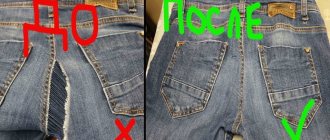
Cuffs on classic men's trousers are not in fashion these days, but the same cannot be said about cuffs on jeans. Jeans casually folded at the bottom look quite fashionable, and besides, such “cuffs” save money on hemming the bottom of the jeans in the studio. But, despite the fashion, hemming the bottom of trousers with a double cuff is used quite often. And most often, such a hem is needed for the trousers of rapidly growing boys, when the school uniform trousers bought in the summer become short by the New Year holidays. In this case, it is easy to rip the cuff and the trousers will increase in length from 5 to 10 cm.
In this article you will learn how to make cuffs on men's trousers with your own hands. In the photo we will clearly show you the technology of processing a double cuff with adjusting the trouser tape. All photographs were taken conventionally using contrasting threads and materials and are intended to visually depict the double cuff processing technology.
Marking the length of trousers and the width of the cuff
It is for this reason that trousers for school uniforms are often sold without finishing the bottom, and sometimes they even come with a trouser tape. In any case, if you have just such trousers, do not rush to take them to the studio and shorten them, try making a hem in the form of a double cuff with your own hands.
The most important thing is to make the markings correctly and not get confused on which side to sew the trouser tape on. But first, let's figure out how much fabric should be left to make a cuff. In the photo you see that on the conventional section of the trousers for the cuff you need to put two hems of 3.5 cm each and about 1 cm under the trouser tape, a total of 8 cm. But the fold can be made narrower, for example two 2.5 cm + 0.5 cm, that is, 5.5 cm.
Pay attention again to where the hem line for the bottom of the trousers is located, 8 cm or slightly less from the edge of the trouser leg.
Processing the bottom of the trousers with a cuff.
Good day, dear readers of the milla-sidelnikova.com blog!
Another way to finish the hem of the trousers is to make cuffs along the bottom of the trouser legs.
A cuff is a decorative detail used to decorate the edge of sleeves, trouser legs, as well as the bottom of shoulder items (tunics, blouses, dresses, etc.)
Processing the cuffs of the bottom of trousers sewn in a classic style is significantly inferior in popularity to other types of processing. It is extremely rare to see such treatment on such trousers. But on trousers sewn in a sports style and others close to sports: joggers, cargo, breeches, shorts, etc. (for men, women and children) the cuff “realizes its potential” to its fullest. On these types of trousers, trimming the bottom with cuffs is very popular.
Cuffs on trousers can be:
- one-piece
- and stitched.
Processing of the bottom of the trousers with a one-piece cuff.
On the finished product, this treatment of the bottom of the trousers looks very similar to trousers with cuffs. But still, it is called finishing the bottom of the trousers with a cuff and is performed together with the trouser braid.
This method of processing the bottom is suitable for those trousers that need both braid and cuffs. (If the trousers will be heavily used, then to protect the bottom edge of the trousers with cuffs, it would be good to also sew on a braid. But sewing it on will be difficult. There are already many layers of material, and with braid, the bottom edge of the trousers will become too thick).
And I would like to note one more circumstance. Those trousers that are planned to be processed in this way should be either straight, flared or tapered, but only slightly, just a little. A clumsy and dense braid simply will not be able to “adjust” to the too “curly” bottom edge of the trousers.
Double cuff.
As usual, the first thing you need to do is deal with the allowances. To make a double cuff we will need:
1) allowance for the cuff of the required width;
2) allowance for the cuff (as the width of the cuff);
3) allowance for the bottom of the trousers (not less than 0.5 cm, but not more than the width of the tape minus 0.5 cm).
The allowances for making a double cuff at the bottom of straight trousers will look like this:
The principle of constructing allowances on a trouser pattern in the hem area, for flared and tapering models, can be seen in the article “Lapel on trousers”.
Let me remind you that the type of processing of the bottom must be determined at the stage of making the pattern in order to “have time” to allocate the allowances necessary for the selected processing.
One-piece double cuffs are made on trousers after all the seams “flowing” into the bottom of the trousers have been completed, and the seam allowances of these seams have been processed to prevent fraying.
Along the line of the upper edge of the cuff (on the finished product), we turn the bottom of the trouser leg to the wrong side
and sweep it up.
It is better to do the basting in two lines so that the lines of the bottom edge of the cuff (on the finished product) and the bottom line of the trousers match perfectly.
Iron the resulting fold.
We already have a clear, even upper edge of the cuff. You can no longer return to him.
Now let's start sewing the trouser tape. Laying the edge of the tape:
- The crotch seam has a 1.5 cm overhang;
- Thickened edge of the tape down;
- Covering the cut at the seam allowance of the bottom of the trousers with tape.
The bottom line of the trousers should coincide with the bottom line of the tape (you can check the pattern). The tape sewing line runs under the bulge in the tape. Or if there is none at a distance of 2 - 3 mm from the thickened edge of the tape.
We adjust the tape to the trousers.
Details of the process of processing the bottom of trousers with trouser braid can be found in the article “Processing the bottom of trousers with braid”.
Fold the cuff along the hem line (on finished trousers) to the front side
and sweep up
with the formation of an edging from the trouser tape.
After this, iron the fold along the bottom of the trousers. To avoid possible traces from the hot iron, it is better to iron the edge from the wrong side.
We secure the cuff in this position with stitches in the seam or hand stitches (along the step and side seams).
Well, the one-piece cuffs along the bottom of the trousers can be considered completed. As you can see, with this treatment along the bottom and trouser braid, there are also cuffs.
Next, after completing the one-piece cuffs along the bottom, you can do the final processing of the trousers...
One and a half cuff.
One-piece cuffs can also be one-and-a-half. Their implementation also begins long before cutting. By adding the required amount of allowance to the cuffs.
For straight trousers:
- Cuff (width according to model);
- Subcuff (1/2 cuff width);
- Hem hem (1/2 cuff width);
- Bottom hem allowance of at least 0.5 cm.
And here, too, only after completing the side and crotch seams on the trousers can you begin to make one-and-a-half cuffs.
Making this type of cuff begins with sewing on the trouser tape.
The tape is adjusted in exactly the same way as in the previous case, but this time we lay the tape with the thick side up. The stitch line, which in this case is used to stitch the top of the tape! should coincide with the bottom line of the trousers (on the finished product this is the bottom of the trousers). And the thickened edge of the tape should protrude beyond this line by 2-3 mm.
We process the cut at the bottom allowance to prevent fraying.
Folding the seam allowance for the bottom of the trousers along the line (lower on finished trousers) for sewing the tape
we sweep it to the wrong side.
And then iron it from the side of the trouser tape.
After this, the line of the bottom edge of the cuff (on finished trousers) must be aligned with the line on the seam allowance of the bottom of the trousers.
And this needs to be done from the wrong side of the trousers.
We connect the sides of the future cuff with a hand stitch, laying it along the alignment line.
View from the inside.
View from the face.
And then we machine stitch it.
Now we bend the fabric along the line of the upper edge of the cuff (on the finished product).
We secure the bend of the material with hand stitching.
And iron: first, fold along the upper edge of the cuff (we iron from the side of the cuff),
then fold along the lower edge of the cuff (iron from the side of the trouser tape).
We secure the formed cuff to the trousers with stitches. Either by machine - in the seam (side and step), or by hand stitches with hidden stitches.
The one-and-a-half cuff is ready!
Well, dear sewing lovers, have you read the processing of the bottom of the trousers with a one-piece one-and-a-half cuff? Now you can forget! It’s complicated, confusing and the result, as you can see, is not so hot! The seam under the cuff is sealed no matter how hard you try.
Once upon a time, a long time ago, I tried to make cuffs on trousers in a similar way. It seemed to me that this was something new, complex, and therefore interesting. I did it! Did not like! After some time, let me think, I’ll try again. This time I will be more attentive and careful. No! No matter how hard you try, the seam still appears.
But such processing with cuffs exists, and it had to be shown. Who knows, maybe someone will like it...
In the next article we will talk about stitched cuffs. See you! Sincerely, Milla Sidelnikova!
Processing technology for hemming trousers with cuffs
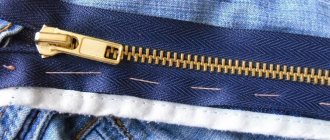
Place the bottom edge of the trouser tape (it has a thickening) to the chalk line and sew the tape on the sewing machine with two lines, as shown in this photo. Do not make too frequent stitches, the load in this place is small, and it will be much more difficult to rip out small stitches later. In addition, they can leave marks that are difficult to remove.
The tape is attached to the wrong side of the trousers, and the resulting double section of the cuff must be turned onto the front side of the trousers. Moreover, you can’t do without an iron here.
Ways to lengthen classic men's and women's trousers
Classic products require the use of more restrained lengthening techniques.
It is necessary to make maximum use of the depth of the bottom hem without using other material, the height of the lapel:
- The bottom seam is ripped out, carefully ironed and a new fold is made to a shallower depth. In this way you can lengthen the product by 1-2 cm.
- If the depth of the bottom hem is insignificant, a trouser tape that is sewn to the bottom edge of the trouser leg will help to add 1-2 cm. It will act as a hem.
- Trousers with a lapel can be lengthened by reducing the height of the lapel, or removed by moving the fold line to the desired size.
- If you have leftover fabric from sewing the same product, you can lengthen the trousers by adding a simple or double lapel, which will hide the seaming line of the parts.
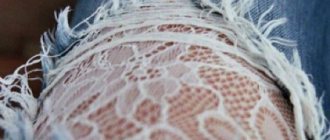
These methods are used for both male and female models. You can also lengthen women's trousers at home using decorative elements: lace, braid, thin fabrics to match the product.
How to attach a double cuff to trousers
If you were able to stitch the bottom edge of the tape on a sewing machine exactly 0.1-0.2 cm, then all you have to do is “pull” the cuff along its bottom edge and fix this position with a hot steam iron. The braid will “peek out” exactly 0.1-0.2 cm without attracting attention to itself and at the same time protect the fabric of the trousers from rubbing. If you were unable to carefully and evenly sew the bottom line on the tape, then you will have to lay out the cuff “by hand,” periodically checking how much the tape comes out from under the cuff and ironing this position.
To prevent the cuff on the trouser leg from turning back, it must be secured. This can be done in different ways, the main thing you need to know is that you don’t need to fasten it all over the circle, but only in two places. Namely, in both side seams of the trouser leg. The easiest way to secure the cuff is with a hand stitch, just make sure that the threads are not visible on the front side. You can stitch it on a sewing machine. And only exactly along the seam connecting the ladles of the trousers. Then the seam will be invisible and the cuff will be attached to the trousers more firmly. But this operation is quite complicated and requires skill, so it’s better to secure it with a regular hand stitch, and if the cuff comes off, it’s easy to sew it back on.
Lengthening sports pants
For the production of sportswear, elastic, knitted fabrics are usually used, so the best material for lengthening them is knitted elastic.
A cuff is cut out of it, which is sewn to the lower edge of the trouser leg. The cuff will be double, so its height is multiplied by 2 and a seaming allowance of 1.6 cm is added.
Sequencing:
- The cuffs are sewn down along the side seams, turned seam inside out and folded in half.
- Combine the inner seams of the trouser leg and cuff, baste the seam, stretching the elastic evenly.
- Once everything has gone well, the part is sewn on with an overlock or zig-zag stitch, loosening the top thread.
Various finishing inserts made of contrasting, transparent or color-matching materials will help you lengthen your sweatpants.
The best option is if the fabrics match in stretchability, so that the stitching area looks neat. The inserts are placed under the knee, at knee level or at the bottom of the trouser leg.
Lengthening trousers at home
In order to lengthen your pants at home, it is not necessary to have the same material . Other fabrics that include colored patches, lace or tape for trousers, and knit cuffs for sweatpants.
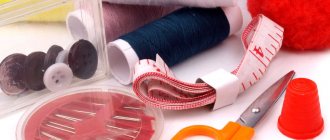
Other materials you may need:
Reference! In order to increase the length of your trousers, it is best to iron them before starting work. This reduces the possibility of wrinkles and, accordingly, facilitates correct measurements.
Another important point in preparing for work is measuring the width of the trouser leg and calculating the material for hemming with allowance for seams and overlock. You need to leave at least 1.5 centimeters on the sides, and at least 3 centimeters on the bottom.
How to lengthen pants
In order to lengthen them, you should acquire patience and the necessary materials. Also, it is quite important to have at least basic skills and understanding of the work so that the final product looks beautiful and neat.
The standard lengthening measurement is from the waist down the leg to the hem of the trousers. It is also important to consider that the correct length must be selected for the shoes with which the trousers will be worn in the future.
Important! You should consider standard trouser length standards before starting work.
Pants length standards:
- European men's trouser models should be 1–2 centimeters shorter than classic ones.
- The optimal length of women's trousers is to the middle of the heel of the shoe.
- Classic ones should be worn so that when standing straight, there is one fold on the toe. Then the toe of the shoe will not be visible when moving.
- Children's products should be comfortable for the child. However, the optimal length is ankle length.
In general, lengthening the length now will not be particularly difficult, since many manufacturers leave a sufficient amount of material during the processing of seams.