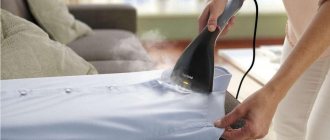
Since then, when people took off animal skins and began to wear woven clothes, the question arose of removing folds and wrinkles from things after washing. Things were pressed down with flat stones, ironed with frying pans filled with hot coals, and everything else housewives could come up with until the American inventor Henry Seely patented an electric iron on June 6, 1882.
And only in 1903, the American entrepreneur Earl Richardson put the invention into practice by producing the first electrically heated iron, which seamstresses really liked.
Operating principle and electrical circuit of the iron
Electrical circuit diagram
If you look at the electrical diagram of a Braun iron, you might think that this is a circuit for an electric heater or an electric kettle. And this is not surprising; the electrical circuits of all the listed devices are not much different. The differences lie in the design of these household appliances due to their different purposes.
The 220 V supply voltage is supplied through a flexible heat-resistant cord with a molded plug to the XP connector installed in the iron body. The PE terminal is a grounding terminal, does not take part in the operation and serves to protect a person from electric shock in the event of a breakdown of the insulation on the housing. The PE wire in the cord is usually yellow-green
colors.
If the iron is connected to a network without a ground loop, then the PE wire is not used. Terminals L (phase) and N (zero) in the iron are equivalent; which terminal receives zero or phase does not matter.
From terminal L, current is supplied to the Temperature Regulator, and if its contacts are closed, then further to one of the terminals of the heating element. From terminal N, current flows through a thermal fuse to the second terminal of the heating element. A neon light bulb is connected parallel to the heating element terminals through resistor R, which lights up when voltage is applied to the heating element and the iron heats up.
Thermostat
In order for the iron to start heating, it is necessary to apply supply voltage to a tubular electric heater (TEH) pressed into the sole of the iron. To quickly heat the sole, high-power heating elements are used, from 1000 to 2200 W. If such power is constantly supplied, then within a few minutes the sole of the iron will heat up red-hot and it will be impossible to iron things without ruining them. To iron items made of nylon and anide, an iron temperature of 95-110°C is required, and items made of linen require an iron temperature of 210-230°C. Therefore, to set the required temperature when ironing items made from different fabrics, there is a temperature control unit.
The temperature control unit is controlled using a round knob located in the central part under the handle of the iron. When turning the knob clockwise, the heating temperature will increase; when rotating counterclockwise, the heating temperature of the soleplate will be lower.
Rotation from the handle to the thermostat assembly is transmitted through an adapter in the form of a sleeve or a metal angle placed on the threaded rod of the thermostat. The handle on the iron body is held in place by several latches. To remove the handle, just pry it by the edge with a little force using the blade of a screwdriver.
The operation of the thermostat of the Philips iron and any other manufacturer is ensured by installing a bimetallic plate, which is a strip of two metals sintered over the entire surface with different coefficients of linear expansion. When the temperature changes, each metal expands to a different extent and as a result the plate bends.
In the thermostat, the plate is connected through a ceramic rod to a bistable switch. The principle of its operation is based on the fact that, thanks to a flat curved spring, when passing through the equilibrium point, the contacts instantly open or close. Speed of action is necessary to reduce the burning of contacts as a result of the formation of a spark when they open. The switching point of the switch can be changed by rotating the knob on the body of the iron and thus control the heating temperature of the soleplate. When you turn the thermostat switch on and off, a characteristic soft click is heard.
Thermal fuse
To increase the safety of operating the iron in the event that the thermostat breaks down, for example, the contacts are welded together, modern models (there was no thermal fuse in Soviet irons) install a thermal fuse FUt, designed for an operating temperature of 240°C. When this temperature is exceeded, the thermal fuse breaks the circuit and voltage is no longer supplied to the heating element. In this case, what position the temperature control knob is in does not matter.
There are three types of thermal fuse designs, as in the photo, and they all work on the principle of opening contacts due to bending of the bimetallic plate as a result of heating. In the photo on the left is a thermal fuse for a Philips iron, and at the bottom right is a Braun one. Usually, after the temperature of the sole drops below 240°C, the thermal fuse is restored. It turns out that the thermal fuse works like a thermostat, but maintains a temperature suitable for ironing only linen items.
To indicate the supply voltage to the heating element, a neon light bulb HL is connected parallel to its terminals through a current-limiting resistor R. The indicator does not affect the operation of the iron, but allows you to judge its performance. If the light is on, but the iron does not heat up, it means that the heating element winding is broken or there is poor contact at the point where its leads are connected to the circuit.
Wiring diagram
The entire electrical circuit of the iron is mounted on the opposite side of the soleplate, made of high-strength aluminum alloy. This photo shows the wiring diagram of a Philips electric iron. Wiring diagrams of irons from other manufacturers and models of irons differ slightly from those shown in the photo.
The supply voltage of 220 V is supplied from the power cord using plug-in terminals placed on pins 3 and 4. Pin 4 is connected to pin 5 and one of the heating element pins. From pin 3, the supply voltage is supplied to the thermal fuse and then to the iron’s thermostat, and from it via the bus to the second terminal of the heating element. Between pins 1 and 5, a neon light bulb is connected through a current-limiting resistor. Pin 2 is grounding and is riveted directly to the sole of the iron. All current-carrying busbars of the circuit are made of iron, and in this case this is justified, since the heat generated in the busbars is used to heat the iron.
Main characteristics
How to choose an iron for home use? To do this, you need to study the important qualities of this device. Devices of this type can have a number of important qualities, due to which smoothing of things is carried out comfortably and easily.
You can find out why the steam generator does not supply steam by clicking on the link.
Power indicator
Power affects the speed of the heating element’s working process, the volume of steam released depends on it, and it also determines the rate of electrical energy consumption.
For home use, a device with a power of 1800-2000 W would be suitable. It is suitable for smoothing things made of thick or thin fabric. Devices with low power may simply not be able to cope with clothes made of thick fabric.
Boiler volume
The duration of the operating process of the device depends on the volume of the boiler. Accordingly, the larger the capacity, the longer the operating process of the device will be. Simple irons with a steam function have a small capacity - 200-250 ml. If the device operates with steam supply, it may last for about 15-20 minutes.
Larger steam generators have a larger tank. Usually they have a container installed that can hold liquids up to 1-2.5 liters. These devices can operate in continuous mode with steam output for 1.5-2 hours.
Workflow mode
Almost all models of steam irons have a useful feature - the ability to regulate the strength of the steam supply. It may vary according to the type and structure of the material. But it is worth considering that its presence has a great influence on the cost of the device.
Some models may have a steam boost. This function has the following characteristics:
- the effect of a steam boost is that in a short time steam comes out under high pressure;
- with simple devices, on average, about 10-80 grams of steam comes out in one minute, and when operating a thermal shock, up to 140-300 grams can be released during this time;
- This function allows you to smooth out large creases that form on things and dense fabrics.
Other useful features
On sale you can find models whose functionality includes additional functions that simplify the ironing process:
- the presence of an anti-drip system that blocks the formation of condensation. It usually leaves stains on clothes and makes them wet;
- there may be an automatic shutdown provided that the user does not operate the device for more than 15 minutes;
- indicator that monitors the liquid level in the container;
- filter systems that allow you to add tap water to the container;
- descaling system;
- Sometimes a special program is provided that allows you to add water while the device is operating.
DIY electric iron repair
Attention! Care should be taken when repairing an electric iron. Touching exposed parts of a circuit connected to an electrical outlet may result in electric shock. Don't forget to remove the plug from the socket!
Any home handyman, even one who has no experience in repairing household appliances, can carry out repairs on his own iron. After all, there are few electrical parts in the iron, and you can check them with any indicator or multimeter. It is often more difficult to disassemble an iron than to repair it. Let's look at the disassembly and repair technology using the example of two models from Philips and Braun.
Irons stop working for one of the following reasons, listed by frequency of occurrence: a broken power cord, poor contact of the terminals where the cord is connected to the electrical circuit, oxidation of the contacts in the thermostat, a malfunction of the thermal fuse.
Checking the service cord
Since during ironing the power cord is constantly bent and the greatest bending occurs at the point where the cord enters the body of the iron, the wires in the cord usually fray at this point. This malfunction begins to appear when the iron is still heating up normally, but when ironing, the heating on indicator blinks, without being accompanied by a click of the thermostat switch.
If the insulation of the conductors in the cord frays, a short circuit may occur with an external manifestation in the form of a flash of fire with a loud bang and tripping of the circuit breaker in the panel. In this case, you need to unplug the iron from the socket and begin repairing it yourself. A short circuit in the iron cord is not dangerous for humans, but it is very impressive for housewives.
If the iron stops heating, then first of all you need to check the presence of voltage in the outlet by connecting any other electrical appliance to it, such as a table lamp, or connect the iron to another outlet. Before doing this, do not forget to turn the temperature regulator on the iron clockwise at least to the first circle on the scale. In the extreme left position of the thermostat knob, the iron can be turned off.
If the socket is working properly and the iron does not heat up, then with the cord plug inserted into the network, move it at the entrance to the iron body, simultaneously pressing, while observing the power-on indicator. The same operation must be done in the area where the cord enters the power plug. If the indicator lights up even for a moment, it means that there is definitely a wire break in the power cord and you will have to take the iron to a service workshop or repair it yourself.
Using a multimeter or pointer tester
If you have a multimeter or pointer tester, you can check the power cord without connecting it to the network, which is safer by connecting the probes of the device, turned on in resistance measurement mode, to the pins of the power plug. A working iron should have a resistance of about 30 ohms. Even a slight change in the reading of the device when moving the cord will indicate the presence of a broken wire. The insulation resistance of the iron, measured between any pin of the plug and its body, should be equal to infinity.
If the power cord is frayed at the point where it enters the electrical plug, then there is no need to disassemble the iron, but it will be enough to replace the plug with a new one, cutting it off at the point where the wire is damaged.
If the power cord is frayed at the entrance to the iron or the proposed method does not allow you to determine the faulty cord, you will have to disassemble the iron. Disassembling the iron begins with removing the back cover. Difficulties may arise here due to the lack of a suitable bit for the head of the screws. For example, I don’t have bits for an asterisk slot with a pin in the center, and I unscrew such screws with a flat-head screwdriver with a suitable blade width. After removing the cover from the iron, all the contacts necessary to find the faulty part in the iron will become available. It will be possible, without further disassembling the iron, to check the integrity of the power cord, the serviceability of the heating element and the thermostat.
As you can see in the photo of the Philips iron, three wires come out of the power cord, connected using slip-on terminals to the terminals of the iron in insulation of different colors. The color of the insulation is the marking of the wires.
Although there is no international standard yet, most European and Asian manufacturers of electrical appliances have adopted yellow-green
The insulation color is used to mark the grounding wire (which is usually denoted in Latin letters
PE
),
brown
for the phase wire (
L
), and
light blue
for the neutral wire (
N
). The letter designation is usually printed on the iron body next to the corresponding terminal.
Conductor in yellow-green
color is grounding, serves to ensure safety, and does not affect the operation of the iron.
The current-carrying wires are brown
and
light blue
insulated, so they need to be checked.
Using a table lamp
There are many ways to check the power cord of an iron and it all depends on what tools the home technician has at hand. If you don’t have any equipment at hand, then you can use the simplest method.
To do this, you first need to remove the cord plug terminals from the iron terminals. The slip-on terminals on the iron contacts are usually held in place by latches, and in order for them to be easily removed, you need to press the latch with a sharp object, as shown in the photo. At the same time, you need to inspect the contacts for oxidation or burning, and if any are present, clean the contacts from the bottom and top to a shine using fine sandpaper. If the terminals are put on without effort, then you need to tighten them with pliers. Step-by-step instructions for repairing terminal connections in photographs are given in the article “Restoring terminal contact.” After this, you need to put the terminals in place and check the operation of the iron by connecting it to the network. It is quite possible that this was the fault and the iron will work.
If the terminal connections are in order, then you need to remove the terminals attached to the brown and blue wires and connect them to the plug pins of any electrical appliance using insulating tape, a table lamp with an incandescent or LED bulb is best suited for this. The switch in the table lamp must be in the on position. After this, plug in the iron's plug and crumple the iron's wire at the point where it enters the body and at the plug. If the table lamp shines steadily, it means that the iron wire is working properly and you will have to further look for the fault.
Using a phase indicator
If you have an indicator for determining the phase, then you can use it to check not only the serviceability of the power cord, but also the functionality of all other elements of the iron.
To check the cord with an indicator, with the cover removed, when there is access to the terminals, turn on the iron and carefully, in any order, first touch the blue wire with the indicator probe, and then the brown one. Here, depending on the type of malfunction of the iron and the position of the plug in the socket, there are several options for the behavior of the indicator.
If, when you touch one of the wires, the indicator lights up, but does not light up on the other, it means that the wire that the indicator lights up when you touch it is working properly. If it lights up in both cases, it means the wire that is connected to the phase in the socket is working and the entire circuit of the iron, including the thermostat, fuse and heating element, too.
All that remains is to determine which of the wires is broken. To do this, you need to remove the plug from the socket, disconnect from the iron any of the plug-in terminals coming from the blue or brown wires and insulate it. Next, insert the plug into the socket in the same way and again check for phase presence. If there is a phase on both terminals of the iron, then the wire with the removed terminal is broken, and all parts of the iron are in working order. And if there is no phase anywhere, then the wire connected to the iron terminal is broken.
Using an additional power cord
If you have a power cord from any unnecessary household electrical appliance, for example a faulty electric kettle, then you can temporarily use this cord to check the power cord of an electric iron. To do this, just remove the terminals from the brown and blue wires from the iron's terminals, connect the bare ends of the donor power cord and plug the plug into the network for a few seconds. If the indicator lights up and the iron starts to heat up, it means there is a problem with the power cord.
You can even use a cord to connect to household electrical wiring from a desktop computer. To do this, you need to connect the outermost contacts of the connector for connecting to the system unit, in the photo on the left, using wire jumpers to the above-mentioned iron terminals.
Iron power cord repair
If the problem with the iron is a frayed power cord, then it is best to replace it with a new one. When choosing a replacement cord, you should keep in mind that irons use a special cord of increased flexibility and to prevent its plastic insulation from melting in case of accidental contact with a heated sole, it is covered with a fabric sheath. Therefore, it is not permissible to use a power cord from any other household electrical appliance for replacement, except as a temporary measure.
If it is not possible or you do not want to purchase a new power cord, then it can be successfully repaired. The repair consists of replacing the electrical plug if the wires are frayed at the exit from it or cutting off the wire at the entrance to the iron and reinstalling the plug-in terminals.
I will not dwell in detail on the technology of replacing an electrical plug and reinstalling the slip-on terminals, since these issues are discussed in detail in the articles “How to change an electrical plug on a wire” and “Restoring terminal contact.”
Checking a tubular electric heater (TEH)
Heating elements in irons rarely fail, and if the heating element is faulty, then the iron has to be thrown away. To check the heating element, it is enough to remove only the back cover from it. Typically, the terminals of the heating element are connected to the outer terminals and, as a rule, the terminals of the heating on indicator are connected to the same terminals. Therefore, if the indicator lights up but there is no heating, then the reason for this may be a break in the heating element’s spiral or poor contact at the points where the iron leads are welded to the contact rods coming out of the heating element.
There are models of irons, such as the Braun model shown in the photograph, in which the thermostat is connected to the break of one terminal of the heating element, and the thermal fuse is connected to the break of the other. In this case, if the thermal fuse is faulty, then an erroneous conclusion can be made that the heating element is faulty. The final conclusion about the condition of the heating element can only be made after complete disassembly of the iron.
The photo demonstrates a method for checking a heating element using a multimeter. You can learn more about this and other methods of checking the heating element from the website article “How to check and ring the heating element.”
Checking the serviceability of the iron thermostat
In order to get to the thermostat to check, you need to completely disassemble the iron. The handle of the iron and the plastic part of the body are attached to its metal part using screws and latches. There are a huge number of iron models, even from one manufacturer, and each of them has its own mounting methods, but there are general rules.
One attachment point is usually located near the nose of the iron and the plastic body is fixed with a self-tapping screw, as in this photo of a Philips iron. In this model, the self-tapping screw is located under the steam quantity adjustment knob. To get to the head of the screw, you need to turn the handle counterclockwise until it stops and pull it up. After removing the steam supply adjustment unit, the screw can be unscrewed.
In the Braun iron model that I had to repair, the self-tapping screw was hidden under the decorative cap of the water nozzle. To unscrew the screw, I had to remove the nozzle. It just fit tightly. By the way, it can be removed for cleaning if it becomes clogged.
The second attachment point is usually located in the area where the power cord enters. The plastic body of the iron can be attached either with self-tapping screws or with latches. The Philips iron model shown in the photo uses a threaded mounting method. From the point of view of the repairability of the iron, fastening with self-tapping screws is preferable, since during disassembly the risk of damage to the fastening elements of the plastic case is reduced.
And in the Braun iron model, the plastic part of the body with the handle is secured using two latches hooked onto the eyes. To disassemble, you need to disengage the latches by moving them apart.
This work must be done carefully so as not to break the latches and eyes. The latches are disengaged, and now the body part with the handle can be separated from the iron. It, in turn, is attached to the adapter cover with screws or using flags.
In this photo of a Philips iron, the cover is secured to the soleplate using three screws. Before unscrewing the screws, you need to remove the power indicator, which is held in place using slip-on terminals on the iron's terminals.
And on the Braun iron model, the lid is secured to the sole using four metal flags threaded through slots and turned. To release the cover, use pliers to turn the flags so that they align with the slots. In this iron, two flags at the spout were completely rusted, and I had to bend a special adapter from a steel strip and cut two threads in it for screw fastening.
After removing the cover, the thermostat assembly will become accessible for testing and repair. First of all, you need to inspect the condition of the contacts. The Philips iron also has a thermal fuse in the thermostat assembly. When cold, the contacts must be closed.
If the appearance of the contacts does not cause suspicion, then you need to ring them using a dial tester or multimeter turned on in the minimum resistance measurement mode. The photo on the left shows the continuity diagram of the thermal fuse contacts, and on the right - the thermostat. The multimeter should show zero reading. If the multimeter shows 1, and the dial tester shows infinity, it means that the fault lies in the contacts; they are oxidized and require cleaning.
Checking the contacts of the thermostat assembly can also be checked using an indicator to find the phase according to the method of checking the power cord described above, touching one and the other contacts in succession. If the indicator lights up when you touch one contact and not the other, it means the contacts are oxidized.
You can do without checking by immediately cleaning the contacts of the thermostat and thermal fuse with sandpaper. Then turn on the iron, it should work.
If you don’t have any instruments at hand to check the contacts, you can plug in the iron and use a screwdriver blade with a well-insulated plastic handle to short-circuit the contacts. If the indicator lights up and the iron starts to heat up, it means the contacts are burnt. Extreme caution should not be forgotten.
To clean the contacts, you need to insert a narrow strip of fine sandpaper between the contacts and pull it a dozen times. Next, turn the strip 180° and clean the second contact of the contact pair. It is useful to clean the contacts of the thermostat to extend the life of the iron if, for example, when repairing the steam supply system, the iron had to be disassembled.
A heating element
The design of the iron is not complete without direct incandescence parts. This mechanism is located between the sole and the plate. He is tightly squeezed between them. The heating element consists of a chrome wire wound around a mica sheet. The two ends of the conductor are connected to contact strips.
They, in turn, are connected to the iron terminals. There are two reasons why mica is chosen as a heating material. It is a very good insulating material. Apart from this, mica can also withstand very high temperatures. The entire assembly of heating element, chrome wire and contact strips provides a mechanically strong and reliable structure covered with asbestos sheet. It separates and insulates the top plate from upward heat. The main plastic and silicon modules are located there.
Examples of self-repair of irons
Recently I had to repair two faulty irons from the Braun and Philips brands. I will describe the problems that had to be fixed.
Braun electric iron repair
The iron did not heat up, the indicator did not shine in any position of the thermostat adjustment knob. When bending the power cord, there were no signs of the iron working.
After removing the back cover, it was discovered that the supply voltage was supplied through the terminal block. Access to the plug-in terminals was difficult. The wire markings corresponded to the generally accepted color markings. The iron had already been repaired previously, as evidenced by the broken left latch on the terminal block.
The appearance of the removed terminal block is shown in the photograph. It also has a neon light indicating the supply of supply voltage to the heating element.
The input contact busbars for supplying supply voltage were in some places covered with an oxide film of rust. This could not cause the iron to break down, which was confirmed by connecting it after removing traces of rust from the contacts using sandpaper.
After completely disassembling the iron, the thermal fuse and thermostat contacts were tested using a multimeter. The thermal fuse shows a resistance of zero ohms, and the thermostat contacts show infinity.
Inspection showed that the contacts were tightly adjacent to each other, and it became obvious that the reason for the failure lay in the oxidation of their surfaces. After cleaning the contacts with sandpaper, contact was restored. The iron began to heat up normally.
Philips electric iron repair
I received a Philips iron for repair after the owner cleaned the steam generation system. The thermostat did not work, and the iron heated up to the temperature at which the thermal fuse opened.
After completely disassembling the iron, it was discovered that the ceramic pusher, which should be located between the bimetallic plate and the thermostat switch, was missing. As a result, the bimetallic plate bent, but its movement was not transmitted to the switch, so the contacts were constantly closed.
There was no old iron from which the pusher could be removed, there was no opportunity to buy a new one, and I had to think about what to make it from. But before making the pusher with your own hands, you needed to determine its length. The bimetallic plate and the switch had coaxial holes with a diameter of 2 mm, in which the standard pusher was previously fixed. To determine the length of the pusher, take an M2 screw and two nuts. To secure the screw instead of the pusher, I had to lift the thermostat by unscrewing one screw.
Attention! The bimetallic plate is in contact with the soleplate of the iron and has good electrical contact with it. The switch plate is connected to the electrical network. The screw is metal and is a good conductor of electric current. Therefore, touching the soleplate of the iron when making the described adjustment must be done only with the iron plug removed from the socket!
The screw was inserted into the hole of the bimetallic plate from below, as in the photo, and secured with a nut. Thanks to the ability to rotate the second nut clockwise or counterclockwise, it became possible to adjust the height of the pusher simulator in order to configure the thermostat to maintain the temperature set by the temperature control knob.
The length of the pusher at which the heating temperature of the iron corresponds to the one set by the position of the adjustment knob can be selected by doing test ironing. But for this you will have to assemble and disassemble the iron every time. It is much easier to use an electronic thermometer. Many multimeters have the function of measuring temperature using a remote thermocouple.
To measure the temperature of the soleplate, you need to put the handle on the thermostat and set it to the position with the mark one, two or three circles opposite the pointer on the iron body. Next, attach the thermocouple to the soleplate of the iron, fix the soleplate in a vertical position and turn on the iron. When the temperature of the sole stops changing, take readings.
As a result of the experiment, it was determined that a pusher with a length of about 8 mm was required. Since the iron inside the body can heat up to a temperature of 240°C, the pusher had to be made of heat-resistant material. A resistor caught my eye and I remembered that in it a resistive layer is applied to a ceramic tube. The 0.25 W resistor is just the right size, and its shortened copper leads, threaded through the holes, will serve well as clamps.
The resistor will fit any value. Before installing it in the iron, the resistor was heated to red on a gas water heater burner and the burnt layer of paint and resistor coating were removed using sandpaper. Everything was removed down to the ceramics. If you use a resistor with a value of more than 1 MOhm, which you need to be 100% sure of, then you don’t have to remove the paint and the resistive layer.
After preparation, the resistor was installed instead of the spacer ceramic element and the ends of the taps were slightly bent to the sides. The iron was assembled and the operation of the thermostat was rechecked, which confirmed that the temperature was maintained by the thermostat within the limits of the data given in the table.
Pressure plate
The next element in the iron structure is the plate. It is attached to the base part. This element is usually called a top plate because it follows the shape of the sole. In most cases, it completely follows the contour of the main element on which all modules are mounted. The pressure plate has several holes through which the studs pass to form the backing plate.
The nuts on them are tightened in such a way that both of these elements are pressed against each other. In some models of household appliances, the plate is heavy and made of cast iron. However, you can find modern versions in which a steel sheet no more than 1 cm thick is installed. Almost all models have rectangular recesses directly in the sheet where the thermostat is installed.
Recommended heating temperature for fabric iron soleplate
The recommended temperature for heating the soleplate of the iron, depending on the position of the temperature control knob associated with the recommended temperature for ironing fabrics, is shown in the table.
| Table of iron heating temperature depending on the position of the adjustment knob relative to the ironing symbols and type of fabric | ||
| Conventional symbol | Type of fabric | Recommended ironing temperature, ºС |
| ✺ | acrylic, nylon, nylon, polyamide, polyester, silk, chiffon | 95-115 |
| ✺✺ | wool, wool mixture | 130-155 |
| ✺✺✺ | linen, cotton | 175-205 |
How did they iron in the old days?
Soles of metal irons before the beginning of the 20th century. heated by thermal energy.
So, a cast iron iron of the 19th century. did not have a heater, so before work it was placed on an alcohol burner or on a stove and during the ironing process it was pressed firmly against the fabric.
Between the rollers
One of the old ways to iron laundry is to run it through rollers. In combination with heated rollers, it is still used today in self-service laundries. The wrung out laundry, passing through a rotating hot press, is simultaneously smoothed and dried.
Types of devices
Three main types of vertical steam irons have been developed:
- For horizontal ironing with vertical steam function. The housing contains a water container. The liquid is supplied to the heating element, which converts it into steam, then it comes out of the holes very quickly.
- With a steam generator . The design of a steam station consists of three main elements: a reservoir with a large capacity for moisture, an iron that resembles a regular one, and a hose that serves to transmit steam.
- Steamers . These devices come complete with a floor-mounted steam generator, a steam hose and a flat iron attachment. Can be sold with various brushes. The device is used for ironing clothes and cleaning textiles. These models do not have a horizontal ironing function.
A regular vertical steam iron is compact in size and has a relatively low price. A device with a steam generator quickly smoothes a large amount of clothing and can also be used for quite a long time. Due to its convenience, the steamer is often used for delicate fabrics, curtains, and textiles.
It is worth noting that there are also smaller hand-held examples of vertical steam irons.
Lid
Another important element in the design of the iron is the protective base, which is attached to the base part of the sole. The cover plate is made from a thin sheet of iron. It is located on the top of the base plate and covers all the internal parts where the heating element is located.
The handle and connector are attached only to the cover. This assembly scheme can be found in most models. The iron's steel coating ensures good thermal conductivity. This will reduce the overall temperature and protect fragile parts from melting.
Exploitation
Using any model is quite simple. All that is required is to set the ironing modes correctly. In most modern devices, the switch sensor is located on the top side. There are models where the regulator is located directly on the handle.
You just have to plug in the iron and wait a few minutes. As soon as the sole reaches the set temperature, a signal will sound or the lamp on the body will go out. After this you can start ironing.
Do not leave water in the steam generator or tank after all operations have been completed. It often contains trace elements, minerals and salts that can damage the device or its components. It is better to pre-filter water for ironing. This will help avoid blockages and breakdowns.
Thermostat
This module is the most important element. It uses a bimetallic strip to control a switch that is connected in series with a resistive heating block. This allows you to regulate expansion during high heat. This detail can be found in every iron. The thermostat allows you to retain heat and prevents the main elements inside from overheating.
A bimetallic strip is a simple element that converts a change in temperature into mechanical displacement. It consists of two different metals bonded together. They must have different expansion coefficients. This is necessary to regulate the resulting pressure. If such a strip is heated, it begins to bend towards the alloy having a lower coefficient of expansion. When cooled, it straightens and returns to its normal position.
The bimetallic strip is attached to the contact spring through small pins. The point of contact between the strip and the wires remains closed. When the temperature rises significantly, the incoming expansion causes the strip to bend. As a result, the contact point automatically opens.
Thus, power supply to the heating element is temporarily stopped until the temperature returns to normal. A special device called a cam is placed next to the contact spring, which automatically determines the amount of bending of the bimetallic strip required to separate the contact. Thanks to the thermostat, the iron can be set to ironing modes manually. It also protects the device from fire.
Ironing woolen items
To avoid shrinkage of woolen items, iron them only on the wrong side and through a damp cloth. If you need to iron woolen items from the inside out, place the item on the ironing surface, place wet gauze on top of it, and a smoothing agent on top of it.
Wait a couple of minutes, then remove the gauze and smooth the product on the right side for a few minutes. Repeat the procedure if necessary.
Woolen trousers and skirts should only be ironed through a damp gauze cloth. Trousers and skirts can be ironed using steam, but only if they do not wrinkle too much.
Proper use of the iron ensures that the products will not be damaged or lose their shape. Please read the instructions carefully before starting to use.
Do not use the iron for ironing on surfaces not intended for this purpose. For best results, use a special iron stand.
Capacitor
The thermostat helps maintain the temperature within certain limits. But frequent short circuits and open circuits damage the contact points. To avoid this, a specific range capacitor is connected across two main points of contact.
The condenser makes it possible to automatically set the temperature and regulate the energy supply without user intervention. With this mechanism, the incoming current and temperature are kept within the same set limit.
Photo gallery: rating models
The Bosch TDA 3024010 iron is available in different colors
Braun IS 5055 WH docking station is small but quite powerful
Iron Marta MT-1102 - a high-quality and affordable unit
Steam generator Mie Stiro 11005.0 can be classified as professional equipment
The Polaris PIR 2267AK steam iron has a pleasant appearance and good ergonomics
Rowenta DW 5135D1 looks pretty brutal
Supra IS-2602C is a good option not only for housewives
The presence of removable nozzles in Tefal Ultimate Anti-calc FV97395.0 and the material used to make them significantly affect the cost of the product
Unit USI-281 - affordable price and minimal set of options
Philips GC4595/40 Azur FreeMotion cordless iron - an uncompromising model
Varieties of forms
In addition to the material of the ironing surface, the configuration and area of the sole are equally important. At first glance they seem the same, but in fact they differ in outline. The variety of models is due to the fact that manufacturers are experimenting, trying to find which shape of the iron sole will be better for ironing.
Types of working surfaces:
- with a pointed nose. Tapered top irons are great for ironing small parts, hard-to-reach areas and areas near hardware;
- with a rounded (blunt) nose. Irons are best used for large items: bed linen, towels, tulle;
- with a rounded back. Such models do not wrinkle laundry during the return motion;
- with corners at the edges of the bottom. When working with irons of this shape, care and smooth movements are required. Otherwise, when ironing, persistent bruises will form;
- with a groove around the perimeter. A notch at the base allows you to smooth out the material under sewn fittings or overlays; wide sole.
Advice! To save energy consumption and reduce ironing time, you should choose irons with a wide working surface. The larger its area, the faster you can iron your laundry.