Publication in the group: Processing and preparation of products
Walnuts are considered a healthy product that should be included in your diet every day. Its main disadvantage is the shell with skin, which makes it difficult to extract the kernels. Below you can find out about various methods for peeling fruit from the hard shell.
Preparing walnuts for chopping
By purchasing walnuts in shell, you can save money and be confident that the beneficial properties of the product will be preserved. After purchasing, the fruits must first be disinfected, and then begin cleaning. This is due to the fact that it is unknown in what conditions the product was stored and how much dust settled on it.
Before you begin cleaning, you must do one of the following:
- for 2 min. cover with a soda solution based on 1 liter of liquid and 28 g of soda, then rinse with water;
- dip into the seething liquid for about 3 minutes, then rinse or pour over very hot liquid;
- wash the fruits with a sponge and laundry soap applied to it.
Afterwards, the product must be dried in the oven at 100 °C or in the microwave for 60 minutes. Then lay it out on the table for 2 days to air.
Storage rules
Walnuts can be stored at room temperature for no more than a month. Then they dry out, begin to taste bitter, and spoil. In the refrigerator, the inside of the fruit does not lose its taste for about a year. Pre-cleaned cores or their halves are packaged in a food-grade plastic container or in a ziplock bag. The product is stored in the freezer even longer.
In general, the optimal storage conditions for products of plant origin are as follows: air temperature from - 5 to + 15 ᵒC, humidity not more than 40%.
In sealed packaging and in the refrigerator, peeled nut cores retain all their beneficial properties and taste.
Required Tools
When choosing fresh fruits, the hard and green shell must be removed so that you can get to the edible part.
The following tools can be used to remove the skin and shell of a walnut:
- hammer;
- with a knife;
- pliers;
- nut tongs;
- nut cracker
The traditional method of cracking nutshells involves using a hammer. To simplify the process and obtain a more effective result, it is advisable to use a coupling with a diameter of about 20 mm. It will act as a platform. It is also possible to use the neck of a champagne bottle, but it is not very comfortable to work with.
Possibility of combining with another type of business
Since the trees are planted sparsely, other crops can be grown between them for a more rational use of the land (this direction is especially important in the first five years, when the seedlings grow). You can grow pumpkin or legumes.
Walnuts are heat-loving and common in the southern regions. Attempts to grow them in the north ended in failure. But residents of the northwestern regions can replace it with Manchurian walnut, which is very similar to walnuts, but is frost-resistant (can withstand cold winters from -30ºС and even short drops down to -45 ºС).
Also, as a combination of directions, you can grow chekalkin nut - this is a shrub up to 4 meters high. It has a curved crown that is covered in white flowers in spring. Experts consider this plant one of the most beautiful shrubs. Then the flower turns into a small box, in each of which by autumn 5-17 hazelnut-like nuts are formed.
Quick ways to clean walnuts
At the end of the summer period, the walnut fruit ripens, and its green shell becomes deformed and darkens. When it hits the ground, the shell separates from the nut. Although the green shell is difficult to peel off, it must be removed initially. It contains a lot of natural dye, so you should use gloves to peel the fruit. It is permissible to break the hard shell and damage the core or leave it intact.
It is permissible to peel walnuts from shell and skin using thermal and mechanical methods. Each method is effective and leads to the same result. When exposed to physical force, even the hardest shell cannot withstand the fetus.
It is quite problematic to split with your hands, so you need to use one of the tools:
- door;
- hammer;
- nutcracker;
- pliers or pliers.
There is no need to grind the fruit into flour once the shell cracks. It is enough to open it with a knife, which will help keep the fruit intact and undeformed. During heat treatment, the shell becomes pliable and loses its hardness.
To do this, it is permissible to use the following methods:
- soak the fruit in boiling water;
- ignite in a saucepan or oven.
Heat treatment methods are very effective, but they cannot be done without the use of physical force. If the fruit that has undergone thermal treatment does not split, it is recommended to use mechanical methods.
Homemade lever nut crackers
Thick-skinned nut varieties do not crack easily even when using specially designed nut crackers. In such cases, you can purchase or make a lever-type device at home.
It can be made from a small board, two metal corners and a lever. The latter is attached to the base of the board using metal corners.
A metal plate corresponding to the diameter of the nut must also be secured to the board. A part from a hydraulic automobile shock absorber is used as such a plate. The second such part is fixed on the lower surface of the lever.
Using this device requires much less effort and time. And even a small child can use it.
There are different designs of lever nut crackers, which can be easily made from scrap materials.
How to crack a nut with a hammer
A hammer is considered a traditional device for cracking nut shells.
However, it has more disadvantages than advantages:
- upon impact, pieces of the shell will scatter, as a result they will have to be collected throughout the room;
- After chopping, the nut kernels will not be whole.
If there are no other tools, it is recommended to use a stand, for example, a wooden block, as well as a small hammer, the weight of which varies within 200 g.
To split the fruit with a hammer, you need to do the following:
- Place the nut on the stand and hit it a little with the tool.
- The impact area should be on the side of the shell to create a small crack at the joint.
- Turn the nut with its nose up and make another blow.
- Separate the kernel from the cracked shell and remove the partitions.
"Butterfly" hammer
So that after breaking with a hammer you can get a butterfly-shaped kernel, it is recommended to use a fixing stand for a walnut in the shape of a circle. If the fruit is large, you can use the neck of a bottle that previously contained champagne. To obtain “butterflies”, the sharp end of the tool must be sharpened well, since it is this area that needs to be split into the shell.
The blow must be carried out not along the seam, bottom or top, but along the meridian, which runs through the center of the halves of the shell. Gently tapping the fruit on each side helps crack the shell so that “butterflies” form. Also, in its entirety, partitions remain between the kernels, which are easy to remove and use to create tinctures. Once the shell is cracked, the kernel must be slightly hooked with a knife and removed.
Special forceps
Special nut crackers are considered a useful tool that makes it possible to crack the fruit without much effort. Despite the fact that the device is capable of crushing the hard shell, the kernel will not remain intact.
To split with tongs, it is recommended to perform the following steps:
- Open the chopping device and place the nut in the recess. The recess is located in the upper area of the forceps.
- Grab the 2 lower handles with your palm and press firmly, trying to unite them together.
How to peel a walnut using special tongs.
However, not all varieties of nuts can be cracked with tongs. To get rid of a very thick shell, there is not enough strength to fully compress the tool.
Advice
In order to be able to choose correctly, store wisely, and not overuse walnuts, you should follow several tips:
- Suitable for athletes to restore energy balance. It can be added to protein shakes.
- When living in a polluted environmental environment, it is recommended to consume walnuts daily.
- Women during pregnancy should consult their doctor about the daily intake of this product.
- To make it more convenient to chop fruits, you can use an improvised stand, for example, a clutch.
- When splitting them with a door, you should not pull it too zealously.
- The nut cracker should be chosen to fully encircle the nut. This will help you use less force when chopping.
Walnuts are known for their ability to treat various diseases, strengthen the immune system and improve brain activity. In order for the body to receive all the necessary properties, vitamins, and microelements from these fruits, one should adhere to the daily norm of their consumption.
How do you like the article?
With a knife
After prying off the green skin with a knife, the fruit is freed from the outer shell. When the greenish skin is removed, it is recommended to put the nuts in a dry, dark room so that the kernels dry well. Next, you can begin to clean the kernels from the hard shell.
To remove it, it is recommended to use a medium-sized knife:
- Place the fruit so that its elongated end faces upward.
- Insert the tip of the instrument into the recess of the fruit, located between the 2 flaps of the shell.
- In this area, turn the tool, firmly fixing the nut in your hand.
When performing such manipulations, the shell should crack. Afterwards you can carefully remove the core. When cracking a nut with a sharp knife, you must be careful as the blade of the tool can come off and cause serious injury.
Knife
If you don't have the right tools on hand, use a small paring knife. Its tip must be inserted into the hole located in the center of the blunt end of the nut, and then the knife must be turned with force. As a result, the nut will split into two parts, after which carefully remove the contents of the shells.
The disadvantage of this method is the inability to remove intact kernels. In addition, careless movement can lead to injury. Therefore, it is recommended to use a knife only in cases where you need to peel no more than 1-2 nuts.
Gas wrench
Peeling nuts with a gas wrench is quite easy and effective. This method allows you to peel the shell without deforming the kernel and without applying much effort. It is very convenient to crack the shell with a small tool, but if you don’t have one, a large wrench will do.
To do this, the tool must be adjusted to the parameters of the nut, moving the metal jaws to the required distance. Afterwards, the fruit should be placed between them and lightly squeezed on both sides until a cracking sound appears. By adapting to this tool, you can clean a large volume of product in a short period of time.
Manufacturing process
Now let's proceed directly to the manufacture of our tongs. So, first we cut out all the parts according to the drawing with a jigsaw.
Then we drill holes in the side walls, first with a diameter of six mm, and then four mm. After this, we countersink the holes with a milling cutter for the screw heads.
Then we drill a second hole with a diameter of 6 mm. In this case, for greater accuracy, it is better to place the side wall blanks one on top of the other and align the previous holes.
Then we process all the finished parts with sandpaper and assemble our tongs.
We screw a screw with a press washer into the lower arm-base. It will serve us as a limiter, so that the arms of the tongs do not close too tightly and crush the cracked nuts, and also so that we do not accidentally pinch our fingers. The position of this limiter can be adjusted by screwing or unscrewing a screw, thanks to which we can change the gap between the levers.
And now our tongs are ready.
How to soften walnut shells
To soften the shells of walnuts, you can use thermal methods to free the kernels from the hard shell. Very hot water is suitable for this, as well as calcination in a frying pan or in the oven.
Boiling water
Very hot liquid helps to soften the hard shell well, which in the end is easily pryed with a fork.
To soften the shell with boiling water, you must follow these steps:
- Place the fruits in boiling liquid for 30 minutes.
- Remove nuts from water and cool.
- Find a small hole in the hard shell, pry it open and twist it with a knife or fork.
Thanks to this method, the partitions can be easily removed to extract the kernels as a whole.
Oven
To easily release the kernels from the hard shell, it is recommended to warm the nuts well in the oven.
For these purposes, it is recommended to do the following:
- Preheat the oven to 200 ℃. Place nuts on a baking sheet.
- Place the container in the oven, heating the fruit for 20 minutes.
- Remove the nuts from the oven and cool completely.
After heat treatment, the hard shell becomes very fragile, and as a result it can be removed with any device.
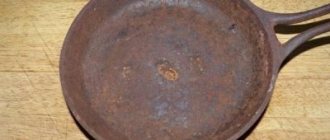
Pan
To soften the shell using a frying pan, you need to do the following:
- Place the saucepan on the fire without adding oil.
- After heating the container, transfer the dry fruits into it.
- Fry the nuts for 10 minutes, stirring constantly.
- When the fruits have cooled completely, break the shell with a knife.
Large screw nutcracker
This is a nutcracker that is simple and enjoyable to use. It breaks sturdy nuts with a smooth turning action and offers elegant control. The design is a combination of wood and metal construction. You can hold it with one hand with the nut in place and turn the screw with the other hand. It is very convenient and pleasant to use. This Instructable section describes the basic design details involved in making this Nutcracker style.
Step 1: Materials
You will need a large screw and a small piece of strong wood. The nut crackers shown here have large 3/8-16 stainless steel cap screws that are 3″ long. The pressure pad for the end of the screw was made on a lathe from 3/4″ diameter stainless steel rod and 3/4″ diameter brass rod for the threaded sleeve.
Step 2: Shaping the Body
The rectangular body of the nutcracker measures approximately 3-1/2" by 3" by 1-1/2". The nut pocket was gouged out with a 2-1/8" diameter Forstner bit to a depth of 1-1/4"; this left a 1/4” thick wall behind the cavity, adding much needed strength to the cracker. The round shaped cracker started with a slightly wider piece of wood to leave a slightly thicker wall around the nut pocket; After boring the cavity, the workpiece was cut and ground to a round outline. This shape fits the palm very well. The hole for the brass bushing is centered so that the axis of the screw is in the center (that is, front to back and side to side) of the nut pocket. Threaded bushings are shown in the photo.
Step 3: Processing the Large Screw
The end of the screw was turned to the smaller thread diameter for a short length as seen in the photo. These particular screws have very finely machined smooth and almost polished threads to ensure the nutcracker operates smoothly. The pressure pad is made of 303 stainless steel. The concave tapered end helps lock and hold the nut in place when turning the screw.
Step 4: Processing
The handle for turning the screw is a 2" x 1" diameter birch dowel designed to hold the head of the screw. The ends are rounded and ground smooth for a comfortable grip. The handle is secured to the screw with a generous application of clear epoxy.
Step 5: Applying Beeswax
Treatment with a mixture of beeswax and pure mineral oil. When used, this compound is warmed slightly until it becomes very soft and almost liquid, then rubbed in. After some time, the piece is polished with a soft cloth. If the wood is sanded nice and smooth, this beeswax finish gives the piece a nice velvety finish.
Step 6: Final Assembly
The threaded bushing is held in place by a lightweight epoxy coating
Note that the bushing flange is inside the cavity, so it takes a significant amount of thrust when nutcrackering. Once the screw is turned halfway, the pressure pad is permanently secured using a strong retaining compound such as Loctite 609
After this, there is no need to disassemble the nutcracker!
Peeling nuts from green skins
You can peel a walnut without staining your hands a difficult-to-remove brownish tint by wearing gloves. Hydrogen peroxide, soda solution or laundry soap will help to wash the skin.
It is possible to get rid of the greenish layer using the following methods:
- Cleaner. It is sold in places where you can buy nuts, and has the appearance of a device for cracking. The fruit is placed in the grooves of the device and squeezed until complete separation.
- It is permissible to peel the fruit with a knife, cutting off the shell and removing the insides.
- If you don't have any tools at hand, you can lightly step on the walnut. When the shell cracks, it is removed and the inside is used for its intended purpose.
When the skin is cut, the inside is dried for 30 days in a well-ventilated area without direct sunlight.
General guidelines for peeling green peels:
- Cut off the husk with a knife or get rid of it by rolling the nut with your foot on a hard surface. Wear gloves to protect your hands. Otherwise, brown spots will remain.
- Use a wire brush and water to remove mucus and remaining husks from the peeled nuts.
- To prevent mold, dry the fruits for 6 weeks, laying them out in one layer in a dry, dark place.
Soaking and drying will help remove tannins from the nuts, as well as enzyme inhibitors and phytic acid, which makes the product crunchy.
Cleaning brown husks
The thin skin contains many tannins, which cause a bitter taste and an allergic reaction.
Therefore, it must be removed in one of the following ways:
- The nuts must be placed in a container, poured with boiling water and left in this form for 15 minutes. During boiling, most of the film will come off on its own, and the rest can be removed with your hands or a knife.
- The nut kernels should be placed on a baking sheet, which is placed in the oven preheated to 200 °C. After 15 min. nuts should be rubbed with your hands over a towel or sifted on a strainer to exfoliate the skins.
Unusual cleaning methods
You can peel and shell walnuts using the methods listed in the table:
| Method | Description |
| Champagne bottle | The walnut must be placed on a flat surface by hitting it with the bottom of a Soviet champagne bottle. This allows you to split the nut into 2 halves without much effort. |
| Garlic press | The method is suitable for small nuts. The whole nut should be placed in the garlic press and the handle should be squeezed until a cracking sound appears. Afterwards, the compression force must be reduced, which will allow you to obtain a whole and undamaged core. |
How to peel walnuts so they stay whole
To crack a walnut while maintaining the integrity of the kernel, it is recommended to use a knife.
The procedure for separating the hard shell is as follows:
- Place the tip of the tool into the joint located between the two shells. Turn the knife until the shell splits.
- Holding the fruit in your hands, turn the device and carefully push the shell apart until it separates or completely cracks.
- Without touching the inside, prick the shell with a tool and, without deforming the kernel, remove it in its entirety.
If you know how to properly peel and shell a walnut, this greatly simplifies the process and saves time. Using the above methods, you can easily prepare the fruits for consumption.
Do I need to wash it?
After shelling, specks, husks and, of course, bacteria may remain on the kernels. You can get rid of all this with boiled water. Pour boiling water over the inside and place in a colander to drain the water. Then dry it in any way.
Another way is to soak the contents in salted water at room temperature. To do this, pour water into the pan and add 1 tsp. per liter of water and place the nucleoli for half an hour. Then pour it into a colander to drain and dry.